一. JDBC實作方案
用一個for 循環,把資料一一插入;產生一個插入sql,類似這種insert into user(name,pwd) values('aa','123 '),('cc','123')...
第一種方案,是用for語句循環插入:
該方案的優點在於,JDBC 中的PreparedStatement 有預編譯功能,預編譯之後會快取起來。之後SQL執行會比較快,而且 JDBC可以開啟批次,這個批次執行非常給力。
劣勢在於,很多時候我們的 SQL 伺服器和應用伺服器可能並不是同一台,所以必須考慮網路 IO。如果網路 IO 比較花時間的話,那麼可能會拖慢 SQL 執行的速度。
第二種方案,是產生一條 SQL進行插入:
此方案的優點在於,只有一次網路 IO。即使分片處理也只是幾次網路 IO,所以這個方案不會在網路 IO 上花費太多時間。
當然這種方案也有劣勢。一是SQL 太長了,甚至可能需要分片後批次處理;二是無法充分發揮PreparedStatement 預編譯的優勢,SQL 要重新解析且無法重複使用;三是最終產生的SQL 太長了,資料庫管理器解析這麼長的SQL 也需要時間。
我們接下來會採用第二種方案來實作。
二. 具體實現思路
如果我們想要拉高插入效率,肯定不能夠一條一條地插入了,必須得使用foreach批量插入;
採用多執行緒進行非同步插入,提升效能;
我們不可能單次提交多個insert,大量的插入操作會很耗時,短時間內完不成,可以採用定時任務來實現。
接下來我們就來談談具體該怎麼利用程式碼來實作。
三.程式碼實作
本案例主要是基於SpringBoot整合mybatis進行實作。
1.導入依賴
    <parent>
        <groupId>org.springframework.boot</groupId>
        <artifactId>spring-boot-starter-parent</artifactId>
        <version>2.3.4.RELEASE</version>
    </parent>
    <dependencies>
        <dependency>
            <groupId>org.springframework.boot</groupId>
            <artifactId>spring-boot-starter-web</artifactId>
        </dependency>
        <dependency>
            <groupId>mysql</groupId>
            <artifactId>mysql-connector-java</artifactId>
            <version>5.1.48</version>
        </dependency>
        <dependency>
            <groupId>org.mybatis.spring.boot</groupId>
            <artifactId>mybatis-spring-boot-starter</artifactId>
            <version>2.1.0</version>
        </dependency>
        <dependency>
            <groupId>org.projectlombok</groupId>
            <artifactId>lombok</artifactId>
        </dependency>
        <dependency>
            <groupId>org.springframework.boot</groupId>
            <artifactId>spring-boot-starter-test</artifactId>
        </dependency>
    </dependencies>
2.建立啟動類別
@SpringBootApplication  //引导类核心注解
@EnableScheduling //开启定时任务
public class BatchApplication {
    public static void main(String[] args) {
        SpringApplication.run(BatchApplication.class,args);
    }
}
3.設定檔application.yml
server:
  port: 9999  # 指定端口号
spring:
  datasource:
    driver-class-name: com.mysql.cj.jdbc.Driver
    url: jdbc:mysql://localhost:3306/springboot?useUnicode=true&characterEncoding=utf-8&useSSL=false&serverTimezone=UTC
    username: root
    password: 123
mybatis:
  mapper-locations: classpath:mybatis/*.xml   #指定mapper映射文件路径
  type-aliases-package: com.qfedu.model  # 别名
4.建立表格與實體類User
建立表格:
CREATE TABLE `user` (
  `id` INT(11) NOT NULL AUTO_INCREMENT,
  `username` VARCHAR(30) DEFAULT NULL,
  `pwd` VARCHAR(20) DEFAULT NULL,
  `sex` INT(11) DEFAULT NULL,
  `birthday` DATETIME DEFAULT NULL,
  PRIMARY KEY (`id`)
) ENGINE=MyISAM  DEFAULT CHARSET=utf8
注意:MyISAM效率會比INNODB快。
User.java
@Data
public class User {
    private int id;
    private String username;
    private String pwd;
    private int sex;
    private LocalDate birthday;
}
5.持久層mapper與映射檔
UserMapper.java
@Mapper
public interface UserMapper {
    void insertBatch(@Param("userList") List<User> userList);
}
UserMapper.xml
<?xml version="1.0" encoding="UTF-8" ?>
<!DOCTYPE mapper
        PUBLIC "-//mybatis.org//DTD Mapper 3.0//EN"
        "http://mybatis.org/dtd/mybatis-3-mapper.dtd">
<mapper namespace="com.qfedu.mapper.UserMapper">
    <insert id="addList" parameterType="User"  >
        insert  into user (username,pwd,sex,birthday) values
        <foreach collection="list" item="item" separator=",">
            (#{item.username}, #{item.pwd}, #{item.sex}, #{item.birthday})
        </foreach>
    </insert>
</mapper>
6.開啟定時任務
SpringBoot預設整合了scheduled,使用步驟如下:
#在引導類別加入@EnableScheduling註解,開啟定時任務;
在業務層方法上加入@Scheduled註解,定義cron表達式週期執行。
業務層方法中開啟的執行緒可以根據目前機器的設定來修改。我們這裡開了7個線程,每個線程去執行20次循環,一次增加5000條資料。這裡要注意mybatis批量插入時,不建議超過10000個錯誤。因為資料量過大,容易出現棧記憶體溢位的問題。
@Component
public class UserServiceImpl {
    @Autowired
    private UserMapper userMapper;
    @Autowired
    //线程池
    private ThreadPoolExecutor executor;
    @Scheduled(cron = "0/20 * * * * ?") //每隔20秒执行一次
    public void  addList(){
        System.out.println("定时器被触发");
        long start = System.currentTimeMillis();
        for (int i = 0; i < 7; i++) {

            Thread thread = new Thread(() -> {
                try {
                    for (int j = 0; j < 20; j++) {
                        userMapper.addList(UserUtil.getUsers(5000));
                    }
                } catch (Exception e) {
                    e.printStackTrace();
                }
            });
            try {
                executor.execute(thread);
            } catch (Exception e) {
                System.out.println(e.getMessage());
            }
        }
    }
}
7.產生物件的util
我們用來模擬產生要插入的數據,實際業務開發的時候可以是從excel匯入的數據。
public class UserUtil {
    private static Random random = new Random();
    public static List<User> getUsers(int num){
        List<User> users = new ArrayList<>();
        for (int i = 0;i<num;i++){
            User user = new User();
            user.setBirthday(LocalDate.now());
            user.setSex(random.nextInt(2));
            user.setPwd("123"+random.nextInt(100000));
            user.setUsername("batch"+random.nextInt(num));
            users.add(user);
        }
        return users;
    }
}
8.執行緒池配置
執行緒池參數:
corePoolSize 核心執行緒數,在執行緒池中要保證的最小執行緒數;
mainumPoolSize 最大執行緒數,執行緒池中能執行的最大執行緒數;
keepAliveTime 保證存活時間,當執行緒空閒時間,多久會回收執行緒;
unit 和keepAliveTime配合使用,時間單位;
workQueue 工作佇列,用於儲存任務在任務被執行之前。
@Configuration
public class ThreadPoolExecutorConfig {
    @Bean
    public ThreadPoolExecutor threadPoolExecutor() {
        //线程池中6个线程,最大8个线程,用于缓存任务的阻塞队列数5个
        ThreadPoolExecutor executor = new ThreadPoolExecutor(6, 8, 5, TimeUnit.SECONDS, new ArrayBlockingQueue<>(100));
        executor.allowCoreThreadTimeOut(true);//允许超时
        return executor;
    }
}
9.完整專案結構

#10.測試


以上是怎麼使用springboot+mybatis快速插入大量數據的詳細內容。更多資訊請關注PHP中文網其他相關文章!
 怎么使用SpringBoot+Canal实现数据库实时监控May 10, 2023 pm 06:25 PM
Canal工作原理Canal模拟MySQLslave的交互协议,伪装自己为MySQLslave,向MySQLmaster发送dump协议MySQLmaster收到dump请求,开始推送binarylog给slave(也就是Canal)Canal解析binarylog对象(原始为byte流)MySQL打开binlog模式在MySQL配置文件my.cnf设置如下信息:[mysqld]#打开binloglog-bin=mysql-bin#选择ROW(行)模式binlog-format=ROW#配置My
 Spring Boot怎么使用SSE方式向前端推送数据May 10, 2023 pm 05:31 PM
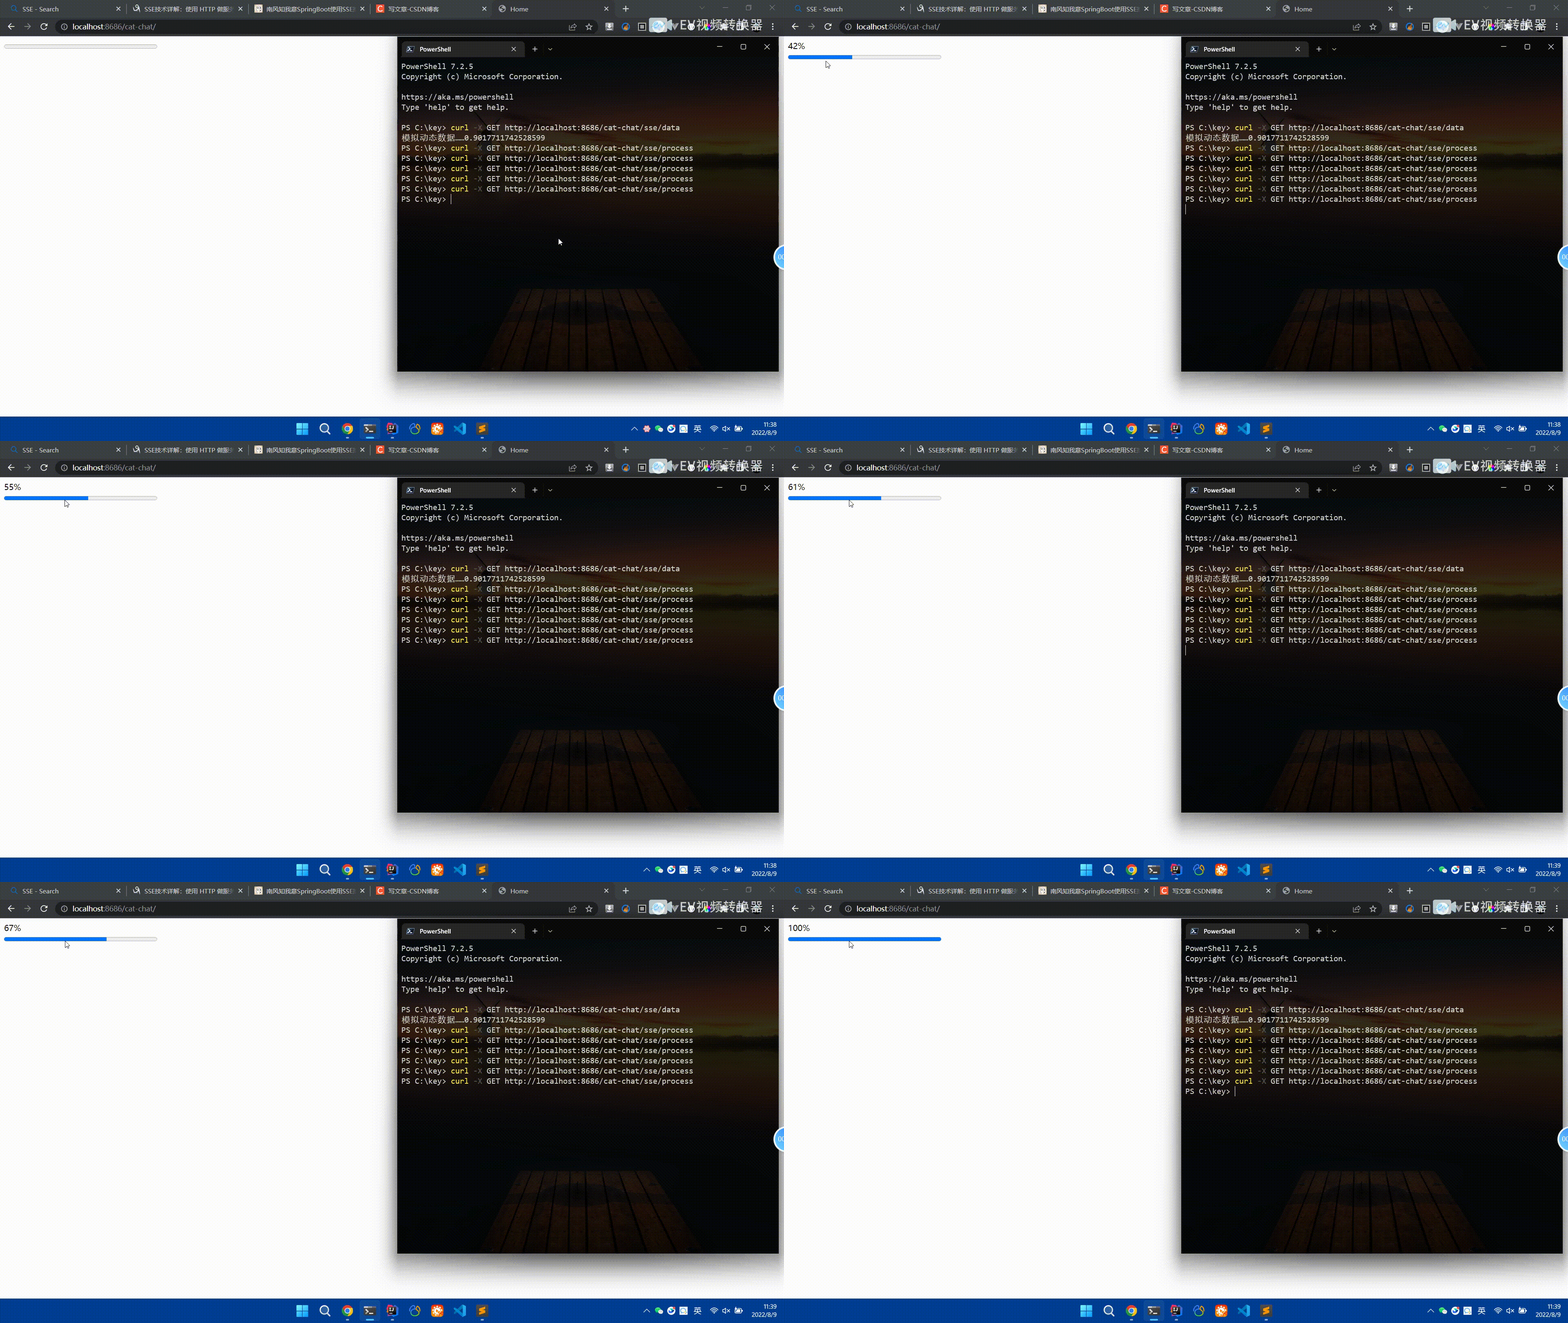
前言SSE简单的来说就是服务器主动向前端推送数据的一种技术,它是单向的,也就是说前端是不能向服务器发送数据的。SSE适用于消息推送,监控等只需要服务器推送数据的场景中,下面是使用SpringBoot来实现一个简单的模拟向前端推动进度数据,前端页面接受后展示进度条。服务端在SpringBoot中使用时需要注意,最好使用SpringWeb提供的SseEmitter这个类来进行操作,我在刚开始时使用网上说的将Content-Type设置为text-stream这种方式发现每次前端每次都会重新创建接。最
 SpringBoot怎么实现二维码扫码登录May 10, 2023 pm 08:25 PM
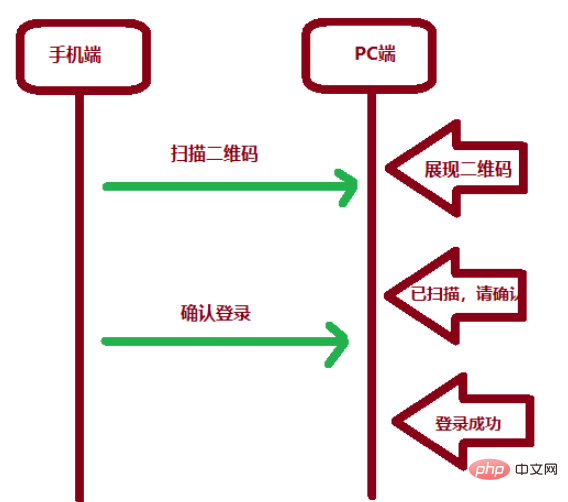
一、手机扫二维码登录的原理二维码扫码登录是一种基于OAuth3.0协议的授权登录方式。在这种方式下,应用程序不需要获取用户的用户名和密码,只需要获取用户的授权即可。二维码扫码登录主要有以下几个步骤:应用程序生成一个二维码,并将该二维码展示给用户。用户使用扫码工具扫描该二维码,并在授权页面中授权。用户授权后,应用程序会获取一个授权码。应用程序使用该授权码向授权服务器请求访问令牌。授权服务器返回一个访问令牌给应用程序。应用程序使用该访问令牌访问资源服务器。通过以上步骤,二维码扫码登录可以实现用户的快
 SpringBoot/Spring AOP默认动态代理方式是什么May 10, 2023 pm 03:52 PM
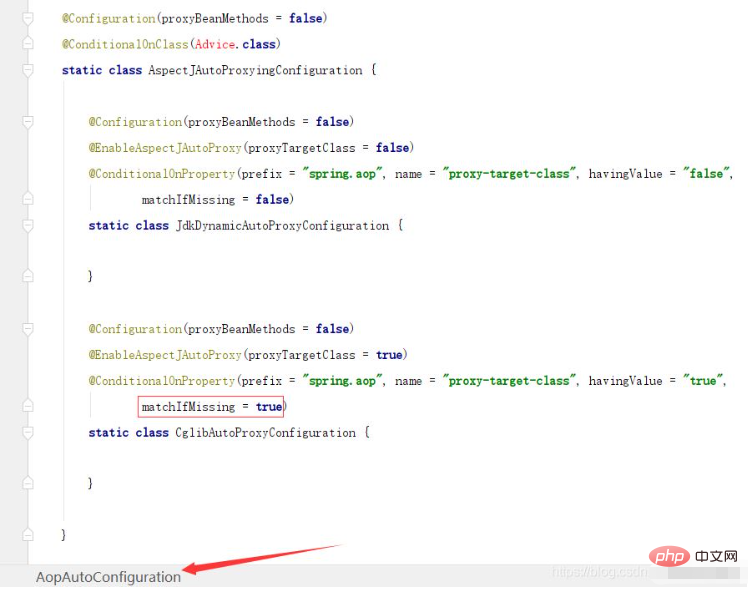
1.springboot2.x及以上版本在SpringBoot2.xAOP中会默认使用Cglib来实现,但是Spring5中默认还是使用jdk动态代理。SpringAOP默认使用JDK动态代理,如果对象没有实现接口,则使用CGLIB代理。当然,也可以强制使用CGLIB代理。在SpringBoot中,通过AopAutoConfiguration来自动装配AOP.2.Springboot1.xSpringboot1.xAOP默认还是使用JDK动态代理的3.SpringBoot2.x为何默认使用Cgl
 spring boot怎么对敏感信息进行加解密May 10, 2023 pm 02:46 PM
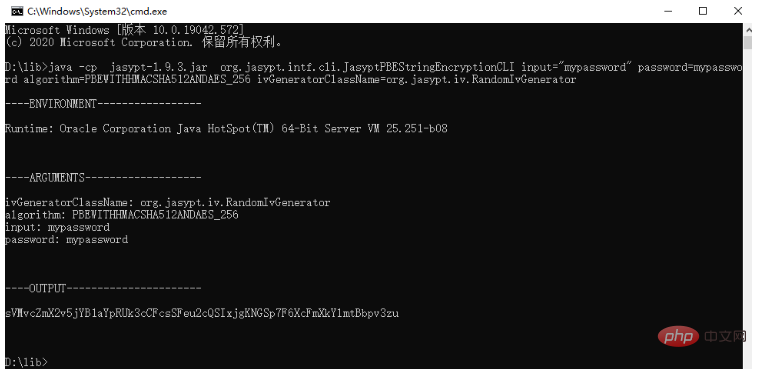
我们使用jasypt最新版本对敏感信息进行加解密。1.在项目pom文件中加入如下依赖:com.github.ulisesbocchiojasypt-spring-boot-starter3.0.32.创建加解密公用类:packagecom.myproject.common.utils;importorg.jasypt.encryption.pbe.PooledPBEStringEncryptor;importorg.jasypt.encryption.pbe.config.SimpleStrin
 使用Java SpringBoot集成POI实现Word文档导出Apr 21, 2023 pm 12:19 PM
知识准备需要理解ApachePOI遵循的标准(OfficeOpenXML(OOXML)标准和微软的OLE2复合文档格式(OLE2)),这将对应着API的依赖包。什么是POIApachePOI是用Java编写的免费开源的跨平台的JavaAPI,ApachePOI提供API给Java程序对MicrosoftOffice格式档案读和写的功能。POI为“PoorObfuscationImplementation”的首字母缩写,意为“简洁版的模糊实现”。ApachePOI是创建和维护操作各种符合Offic
 springboot怎么整合shiro实现多验证登录功能May 10, 2023 pm 04:19 PM
1.首先新建一个shiroConfigshiro的配置类,代码如下:@ConfigurationpublicclassSpringShiroConfig{/***@paramrealms这儿使用接口集合是为了实现多验证登录时使用的*@return*/@BeanpublicSecurityManagersecurityManager(Collectionrealms){DefaultWebSecurityManagersManager=newDefaultWebSecurityManager();
 Springboot如何实现视频上传及压缩功能May 10, 2023 pm 05:16 PM
一、定义视频上传请求接口publicAjaxResultvideoUploadFile(MultipartFilefile){try{if(null==file||file.isEmpty()){returnAjaxResult.error("文件为空");}StringossFilePrefix=StringUtils.genUUID();StringfileName=ossFilePrefix+"-"+file.getOriginalFilename(


熱AI工具

Undresser.AI Undress
人工智慧驅動的應用程序,用於創建逼真的裸體照片

AI Clothes Remover
用於從照片中去除衣服的線上人工智慧工具。

Undress AI Tool
免費脫衣圖片

Clothoff.io
AI脫衣器

AI Hentai Generator
免費產生 AI 無盡。

熱門文章

熱工具

Safe Exam Browser
Safe Exam Browser是一個安全的瀏覽器環境,安全地進行線上考試。該軟體將任何電腦變成一個安全的工作站。它控制對任何實用工具的訪問,並防止學生使用未經授權的資源。

ZendStudio 13.5.1 Mac
強大的PHP整合開發環境

SublimeText3 英文版
推薦:為Win版本,支援程式碼提示!

禪工作室 13.0.1
強大的PHP整合開發環境

Dreamweaver CS6
視覺化網頁開發工具


