一文聊聊Vue中非單一文件組件的使用
- 青灯夜游轉載
- 2023-01-17 20:05:191267瀏覽
Vue怎麼使用非單一檔案元件?以下這篇文章跟大家介紹Vue中非單一檔案元件的使用,希望對大家有幫助!

一,什麼是元件
#實作應用中局部功能代和資源的集合(簡單來說就是將html,js,css,資源整合起來的一個小盒子)
理解:用來實現局部(特定)功能效果的程式碼集合
為什麼:一個介面的功能很複雜
作用:複用編碼,簡化專案編碼,提高運作效率
元件又分為非單一檔案元件和單一檔案元件,一般常用的就是單一檔案元件。 【相關推薦:vuejs影片教學、web前端開發】
#二,非單一檔案元件
2.1使用元件的三大步驟
#1.建立元件
(1)如何定義一個元件?
#使用Vue.extend(options )創建,其中options和new Vue(options)時傳入的那個options兒乎一樣。但也略有不同,元件內不需要寫el該屬性,因為元件是直接服務Vue實例的,所以並不需要在元件內寫,並且元件寫完之後不只是服務於一個地方,這裡就體現了元件的復用性,所以元件不能寫el。

#2.註冊元件
(2)如何註冊元件?
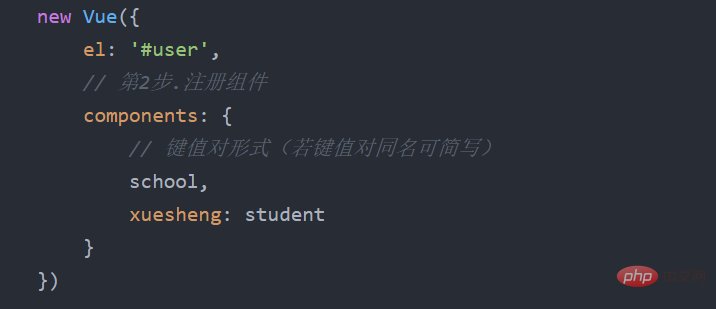
1.局部註冊:靠new Vue的時候傳入components選項
2.全域註冊:靠Vue.component( '元件名稱,元件)

3.使用元件
(3)如何使用元件
#編寫元件標籤(使用元件)
下面是建立非單一檔案元件的全過程

(4)為什麼data必須寫成函數?
避免元件被重複使用時,資料存在引用關係。
附註:使用template 可以配置元件結構。
<body>
<div id="user">
<!-- 第3步使用组件编写组件标签 -->
<school></school>
<br>
<xuesheng></xuesheng>
</div>
<div class="user2">
<hello></hello>
</div>
</body>
<script>
// 第一步:创建组件
// 创建school组件
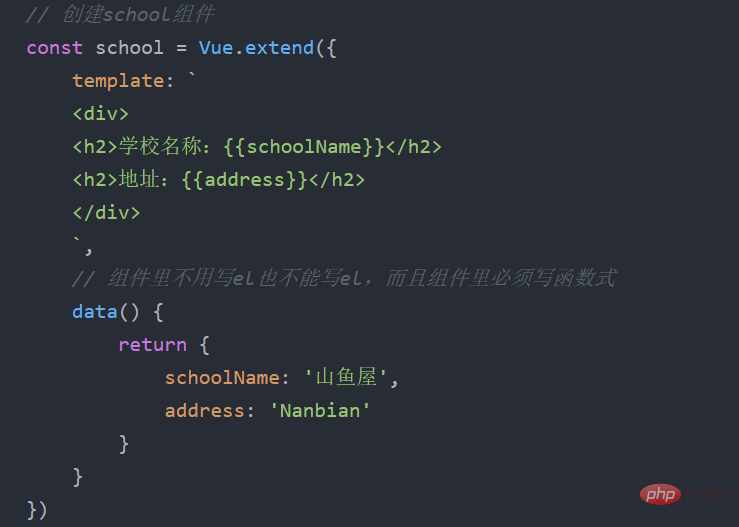
const school = Vue.extend({
template: `
<div>
<h2>学校名称:{{schoolName}}</h2>
<h2>地址:{{address}}</h2>
</div>
`,
// 组件里不用写el也不能写el,而且组件里必须写函数式
data() {
return {
schoolName: '山鱼屋',
address: 'Nanbian'
}
}
})
// 创建student组件
const student = Vue.extend({
template: `
<div>
<h2>学生名称:{{studentName}}</h2>
<h2>年龄:{{age}}</h2>
<button @click = 'showName'>点我出名</button>
</div>
`,
// 组件里不用写el也不能写el,而且组件里必须写函数式
data() {
return {
studentName: '山鱼屋',
age: 20
}
},
methods: {
showName() {
alert(this.studentName)
}
},
})
// 创建全局组件
const hello = Vue.extend({
template: `
<div>
<h2>你好呀!{{name}}</h2>
</div>
`,
data() {
return {
name: 'shanyu',
}
}
})
// 注册全局的组件
Vue.component('hello', hello);
// 创建vm
new Vue({
el: '#user',
// 第2步.注册组件
components: {
// 键值对形式(若键值对同名可简写)
school,
xuesheng: student
}
})
new Vue({
el: '.user2',
})
</script>4.關於寫法的注意點
#1)關於元件名稱
一個單字組成: 第一種寫法( 首字母小寫): school,第二種寫法(首字母大寫) School
多個單字組成: 第一種寫法(kebab-case命名):my-school,第二種寫法(Came1Case命名): MySchool (需要Vue鷹架支援)
註:
(1),元件名盡可能迴避HTML中已有的元素名稱,例如: h2、 H2都不行。
(2).可以使用name配置項目指定元件在開發者工具中呈現的名字。

#2)關於元件標籤
第1種寫法: 36294b0081e4be8b0f9233f2d04ce30245b904bf2d760e20eca78bbc1279a7b6
第2種寫法: b8ca3119a7915a4a685cd5b3046ccc27 備註:不用使用腳手架時,9152e3d1f6d11fd4fd27cec0ff1d51f1 會導致後續組件無法渲染。
3)簡寫方式
const school = Vue.extend(options)可簡寫為: const school = {options}
2.2元件的巢狀
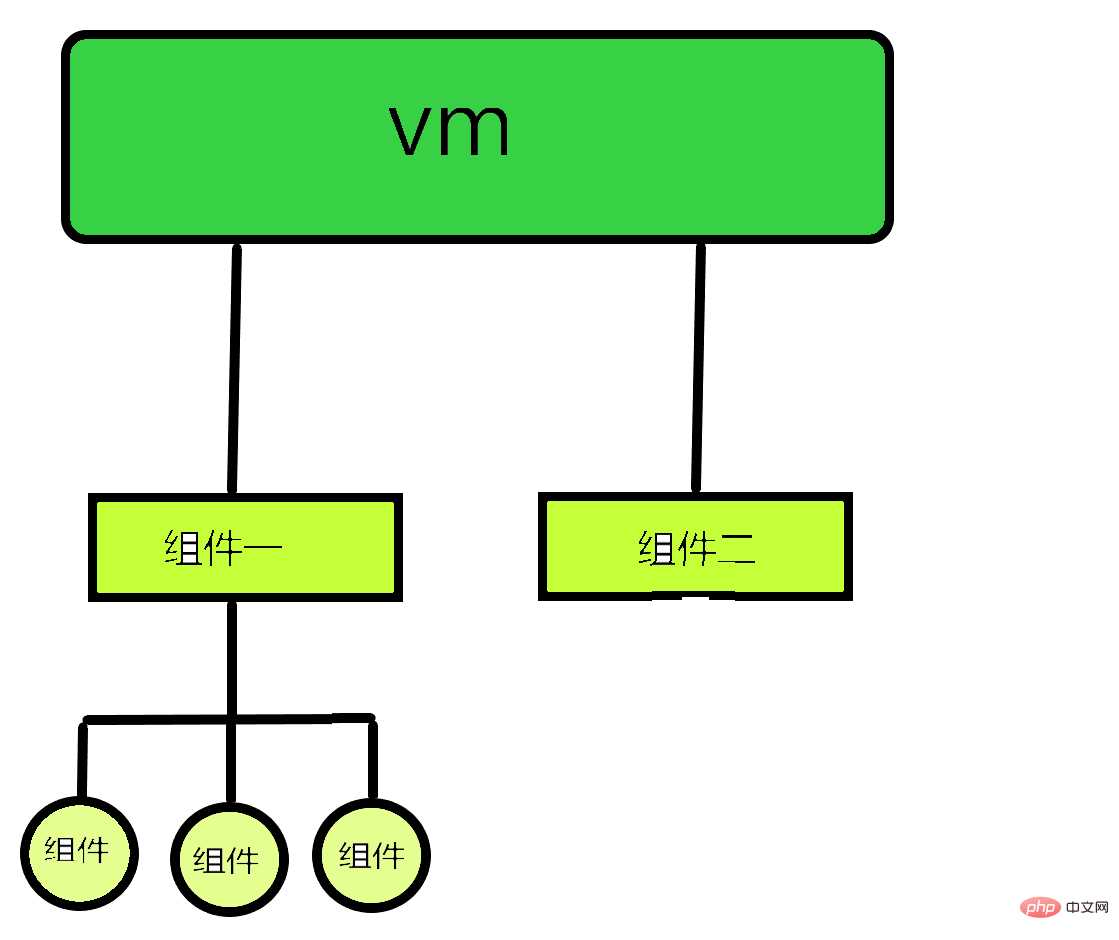
#跟俄羅斯娃娃差不多,大件套小件(其實vm下面還有一個名為app的元件,他管理所有的元件)
<body>
<div id="user">
</div>
<script>
// 创建room组件
const room = {
template:
`<div>
<h2>
房间号{{num}}
</h2>
<h2>
puwei:{{pnum}}
</h2>
</div>`,
data() {
return {
num: '222',
pnum: '8'
}
}
}
// 创建students组件
const students = {
template:
`<div>
<h2>
姓名:{{name}}
</h2>
<h2>
学号:{{studentnum}}
</h2>
<room></room>
</div>`,
data() {
return {
name: '山鱼',
studentnum: '9657'
}
},
components: {
room
}
}
// 创建school组件
const school = {
template:
`<div>
<h2>
校名:{{sname}}
</h2>
<h2>
地址:{{address}}
</h2>
<students></students>
</div>`,
data() {
return {
sname: '山鱼学院',
address: '华山道9088号'
}
},
components: {
students
}
}
const app = {
template:
`
<school></school>
</div>`,
components: {
school
}
}
// 创建app组件
new Vue({
template:`<app></app>`,
el: '#user',
components: {
app,
}
})
</script>
</body>
關於VueComponent
school元件本質是一個名為VueComponent的建構函數,且不是程式設計師定義的,是Vue.extend產生的。
只需要寫b8ca3119a7915a4a685cd5b3046ccc27(自閉合標籤)或36294b0081e4be8b0f9233f2d04ce30245b904bf2d760e20eca78bbc1279a7b6, Vue解析時會幫我們建立school元件的實例對象,也就是Vue幫我們執行的: new VueComponent(options)。
每次呼叫Vue.extend,返回的都是一一個全新的VueComponent(雖然雙胞胎特別像但是無論怎麼來說也不是相同的一個人)
this指向
(1).元件配置中data函數、methods中的函數、watch中的函數、computed中的兩數它們的this均是[VueComponent實例物件]。
(2) new Vue(options )配置中data函數、methods中的函數、watch中的函數、 computed中的函數它們的this皆是[Vue實例物件]。
以上是一文聊聊Vue中非單一文件組件的使用的詳細內容。更多資訊請關注PHP中文網其他相關文章!

