要過年了,使用CSS實現一個喜慶的燈籠動畫效果!
- 青灯夜游轉載
- 2022-01-10 19:33:492930瀏覽
要過年了,以下這篇文章帶大家用CSS畫了個燈籠,並加入動畫效果,實現燈籠左右搖擺的效果,希望對大家有所幫助!
過年了~ 過年了~ 過年了~
辭舊迎新過年啦張燈結彩春節啦~
金雞起舞送福啦新的一年福來啦~
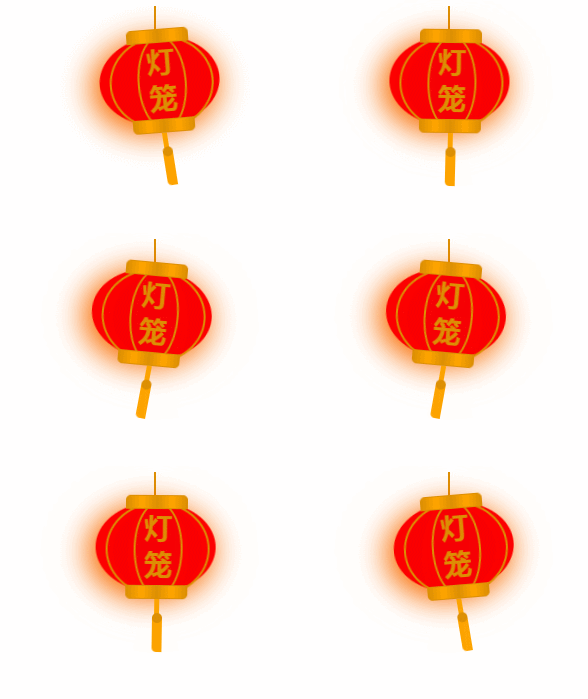
文章開頭幾句歌詞,頓時顯得喜慶了不,我們的燈籠是下面這個樣子的。
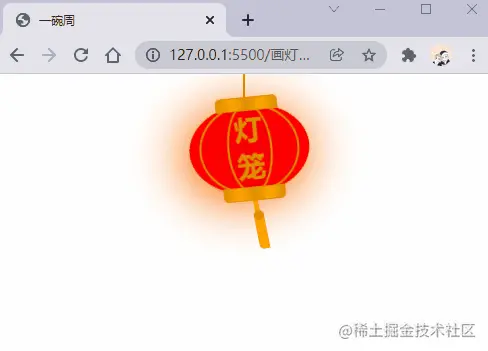
animation屬性
畫燈籠我們絕對不能畫一個靜態的燈籠,我們先來複習CSS中的animation。 ,該是是一個簡寫屬性,由animation-name,animation-duration, animation-timing-function,animation-delay ,animation-iteration-count,animation-direction,animation-fill-mode 和 animation-play-state 屬性組成。這裡我們就不展開講解了,具體可以到MDN中學習。
我們先來看看下面這個範例:
animation: swing 3s infinite ease-in-out;
在上面的範例中使用了一個名為swing的動畫序列,動畫序列透過@ keyframes創建,執行時間3s,動畫循環執行,最後ease-in-out表示動畫執行的節奏。
實作想法
為一個矩形加上
border-radius使其,形成一個燈籠的外形。為矩形加上
::before和::after來形成燈籠的頂部和頭畫一個燈籠線。
在 矩形內部加入兩個比較細的矩形,透過添加 border-radius 來形成燈籠的線條。
設定燈籠的動畫效果
新增燈穗的樣式
接下來我們就分步驟實現。
繪製燈籠外形
首先我們定義HTML結構,程式碼如下:
<!-- 灯笼容器 -->
<div class="lantern-con">
  <!-- 提着灯笼的线 -->
  <div class="lantern-line"></div>
  <!-- 灯笼主要区域 -->
  <div class="lantern-light">
  </div>
</div>
然後我們畫一個橢圓,然後透過::before和::after,繪製上下的兩個燈籠蓋,CSS如下:
/* 灯笼容器 */
.lantern-con {
  position: fixed;
  left: 160px;
}

/* 灯笼中间红色区域 */
.lantern-light {
  position: relative;
  width: 120px;
  height: 90px;
  background-color: red;
  margin: 30px;
  border-radius: 50%;
  box-shadow: -5px 5px 50px 4px #fa6c00;
  /* 设置旋转点 */
  transform-origin: top center;
  animation: swing 3s infinite ease-in-out;
}

/* 灯笼顶部和底部的样式 */
.lantern-light::before,
.lantern-light::after {
  content: '';
  position: absolute;
  border: 1px solid #dc8f03;
  width: 60px;
  height: 12px;
  /* 背景渐变 */
  background: linear-gradient(
    to right,
    #dc8f03,
    #ffa500,
    #dc8f03,
    #ffa500,
    #dc8f03
  );
  left: 30px;
}

/* 顶部位置 */
.lantern-light::before {
  top: -7px;
  border-top-left-radius: 5px;
  border-top-right-radius: 5px;
}

/* 底部位置 */
.lantern-light::after {
  bottom: -7px;
  border-bottom-left-radius: 5px;
  border-bottom-right-radius: 5px;
}

/* 提着灯笼的线的样式 */
.lantern-line {
  width: 2px;
  height: 50px;
  background-color: #dc8f03;
  position: absolute;
  left: 88px;
}
/* 灯笼的动画效果 */
@keyframes swing {
  0% {
    transform: rotate(-6deg);
  }

  50% {
    transform: rotate(6deg);
  }

  100% {
    transform: rotate(-6deg);
  }
}
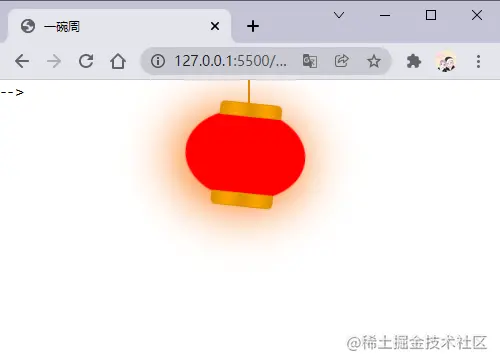
現在就實現了一個比較基礎燈籠外形,效果如下:
border-radius屬性將其設定為橢圓,然後繪製邊,呈現燈籠線條。
<div class="lantern-light">
  <!-- 灯笼中间的线条 -->
  <div class="lantern-circle">
    <div class="lantern-rect">
      <!-- 灯笼中间的文字内容 -->
      <div class="lantern-text">灯笼</div>
    </div>
  </div>
</div>對應的CSS如下:/* 灯笼中间的线条 */
.lantern-circle,
.lantern-rect {
height: 90px;
border-radius: 50%;
border: 2px solid #dc8f03;
background-color: rgba(216, 0, 15, 0.1);
}
/* 外层 */
.lantern-circle {
width: 100px;
margin: 12px 8px 8px 10px;
}
/* 内层 */
.lantern-rect {
margin: -2px 8px 8px 26px;
width: 45px;
}
/* 文字样式 */
.lantern-text {
font-size: 28px;
font-weight: bold;
text-align: center;
color: #dc8f03;
margin-top: 4px;
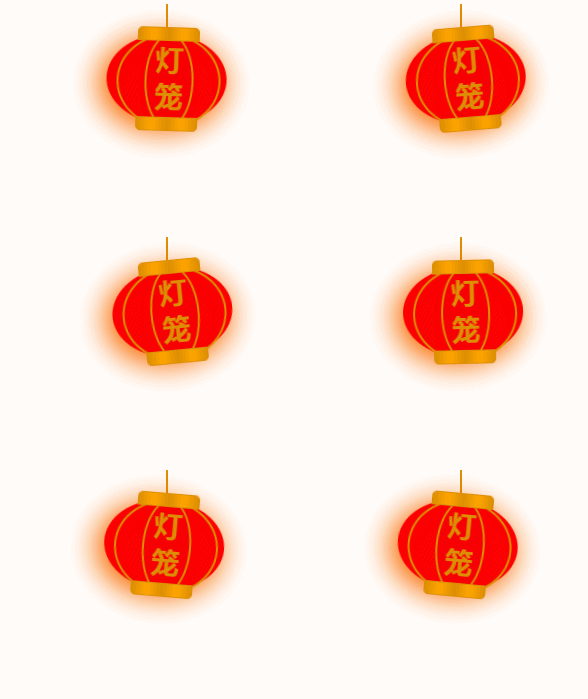
} #效果如下:
<!-- 灯笼主要区域 -->
<div class="lantern-light">
  <!-- more code -->
  <!-- 灯笼穗 -->
  <div class="lantern-tassel-top">
    <div class="lantern-tassel-middle"></div>
    <div class="lantern-tassel-bottom"></div>
  </div>
</div>CSS如下:/* 灯穗 */
.lantern-tassel-top {
width: 5px;
height: 20px;
background-color: #ffa500;
border-radius: 0 0 5px 5px;
position: relative;
margin: -5px 0 0 59px;
/* 让灯穗也有一个动画效果 */
animation: swing 3s infinite ease-in-out;
}
.lantern-tassel-middle,
.lantern-tassel-bottom {
position: absolute;
width: 10px;
left: -2px;
}
.lantern-tassel-middle {
border-radius: 50%;
top: 14px;
height: 10px;
background-color: #dc8f03;
z-index: 2;
}
.lantern-tassel-bottom {
background-color: #ffa500;
border-bottom-left-radius: 5px;
height: 35px;
top: 18px;
z-index: 1;
}到這我們就把這個燈籠畫完了。
css影片教學)
以上是要過年了,使用CSS實現一個喜慶的燈籠動畫效果!的詳細內容。更多資訊請關注PHP中文網其他相關文章!

