如何利用Javascript簡單實現星空連線的效果
- WBOYWBOYWBOYWBOYWBOYWBOYWBOYWBOYWBOYWBOYWBOYWBOYWB轉載
- 2022-01-07 17:11:412693瀏覽
這篇文章為大家帶來了JavaScript中星空連線效果應該如何呈現的相關知識,希望對大家有幫助。

Javascript 星空連線效果的簡單實作
之前有見過非常酷的粒子連線的效果,這篇文章主要是實現一個簡單的星空連線的效果。
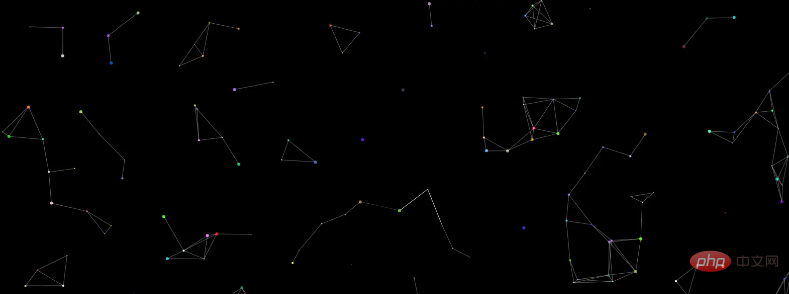
先貼一下大概的效果圖。

這個主要是用到了Html5中的canvas繪圖,關於canvas的基本使用這裡就不展開介紹了,大家可以自行去了解。
接著採用的是requestAnimationFrame來進行動畫的繪製,而沒有採用定時器。
一、實現的效果
#星星自動生成,且星星的顏色,初始位置,移動方向都是隨機的。
當星星之間的距離小於給定值之後,會在星星之間產生連線。
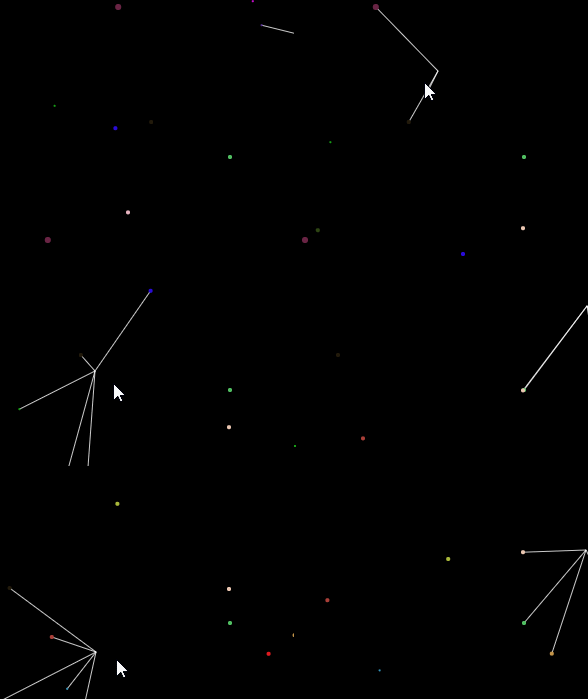
滑鼠指標和星星之間的距離小於給定值之後,也會在星星和滑鼠指標之間產生連線。
二、實作的方法
#透過canvas繪圖實作
定義星星類別Star,包括位置,半徑,顏色,移速等屬性與繪製和移動等方法。
繪製星星,實現隨機移動的效果。
在繪製星星之後計算每個星星之間的距離,在符合要求的星星之間繪製連線。
計算滑鼠指標和星星之間的距離,在符合要求的星星之間繪製連線。
繪製採用requestAnimationFrame
在主函數中執行4,5的函數繼續進行繪製
三、具體的實作
Html Css
基本的文件結構非常簡單,建立一個canvas容器就可以了。
<!DOCTYPE html>
<html>
<head>
    <meta charset="UTF-8">
    <meta name="viewport" content="width=device-width, initial-scale=1.0">
    <meta http-equiv="X-UA-Compatible" content="ie=edge">
    <title>星空连线</title>
    <style type="text/css">
        * {
            margin: 0;
            padding: 0;
        }
        body,
        html {
            width: 100%;
            height: 100%;
            overflow: hidden;
        }
        #starry {
            position: absolute;
            background-color: #000000;
        }
    </style>
</head>
<body>
    <canvas id="starry"></canvas>
</html>
定義星星類別Star, 包含位置,半徑,顏色,移速等屬性與繪製和移動等方法。
      class Star {
            constructor() {
                this.x = randNum(3, canvas.width - 3);
                this.y = randNum(3, canvas.height - 3);
                this.r = randNum(1, 3);
                this.color = randColor();
                this.speedX = randNum(-2, 2) * 0.2;
                this.speedY = randNum(-3, 3) * 0.2;
            }
            // 绘制每个星点
            draw() {
                //新建一条路径
                ctx.beginPath();
                //调整透明度
                ctx.globalAlpha = 1;
                // 填充颜色
                ctx.fillStyle = this.color;
                // 绘制圆弧
                ctx.arc(this.x, this.y, this.r, 0, Math.PI * 2);
                // 填充
                ctx.fill();
            }
            // 星星移动
            move() {
                this.x += this.speedX;
                this.y += this.speedY;
                //设置极限值
                if (this.x <= 3 || this.x >= canvas.width - 3) this.speedX *= -1;
                if (this.y <= 3 || this.y >= canvas.height - 3) this.speedY *= -1;
            }
        }
        // 存储小球
        let stars = [];
        for (let i = 0; i < 150; i++) {
            let star = new Star();
            // 存入数组
            stars.push(star);
        }
繪製星星,實現隨機移動的效果。
我們可以先實現星星的繪製,先暫時不管連線的效果。
        function drawLine() {
            for (var i = 0; i < stars.length; i++) {
                stars[i].draw();
                stars[i].move();
            }
        }
在繪製星星之後計算每個星星之間的距離,在符合要求的星星之間繪製連線。
其實只要在上一步的函數中加入距離判斷和繪製連線的程式碼就可以了。
        function drawLine() {
            for (var i = 0; i < stars.length; i++) {
                stars[i].draw();
                stars[i].move();
                for (var j = 0; j < stars.length; j++) {
                    if (i != j) {
                        if (Math.sqrt(Math.pow((stars[i].x - stars[j].x), 2) + Math.pow((stars[i].y - stars[j].y), 2)) < 80) {
                            ctx.beginPath();
                            ctx.moveTo(stars[i].x, stars[i].y);
                            ctx.lineTo(stars[j].x, stars[j].y);
                            ctx.strokeStyle = "white";
                            ctx.globalAlpha = 0.2;
                            ctx.stroke();
                        }
                    }
                }
            }
        }
計算滑鼠指標和星星之間的距離,在符合要求的星星之間繪製連線。
和繪製星星的方法差不多。
      function mouseLine() {
            for (var i = 0; i < stars.length; i++) {
                if (Math.sqrt(Math.pow((stars[i].x - mouseX), 2) + Math.pow((stars[i].y - mouseY), 2)) < 120) {
                    ctx.beginPath();
                    ctx.moveTo(stars[i].x, stars[i].y);
                    ctx.lineTo(mouseX, mouseY);
                    ctx.strokeStyle = "white";
                    ctx.globalAlpha = 0.8;
                    ctx.stroke();
                }
            }
        }
主函數進行繪製
      function main() {
            // 清除矩形区域
            ctx.clearRect(0, 0, canvas.width, canvas.height);
            //鼠标移动绘制连线
            mouseLine();
            // 小球之间自动连线
            drawLine();
            // 不断重新执行main(绘制和清除)
            window.requestAnimationFrame(main);
        }
一些輔助隨機函數
      // 随机函数
        function randNum(m, n) {
            return Math.floor(Math.random() * (n - m + 1) + m);
        }
        // 随机颜色
        function randColor() {
            return 'rgb(' + randNum(0, 255) + ',' + randNum(0, 255) + ',' + randNum(0, 255) + ')';
        }
完整的程式碼
星空连线
結果如下:

#【相關推薦:javascript學習教學】
#以上是如何利用Javascript簡單實現星空連線的效果的詳細內容。更多資訊請關注PHP中文網其他相關文章!

