
Homestead 怎麼配置 xdebug 進行調試(PhpStorm)

- 青灯夜游轉載
- 2021-12-24 11:10:412122瀏覽
Homestead環境下怎麼配置PhpStorm Xdebug進行調試,以下這篇文章跟大家介紹一下PhpStorm Homestead 配置 Homestead 怎麼配置 xdebug 進行調試(PhpStorm)的方法,希望對大家有幫助!

環境
- windows10
- PhpStorm v2019.1.3
- homestead v7.2 (ubuntu18.04 )
- laravel 5.8.* (vhost: laravel.test)
- #請按照你的實際環境來配置, 並不是非得按照我文章中這樣的, 但是配置過程大體類似.. .
Tips
- ##記得PhpStorm 需要
- PhpStorm v2019.1.3
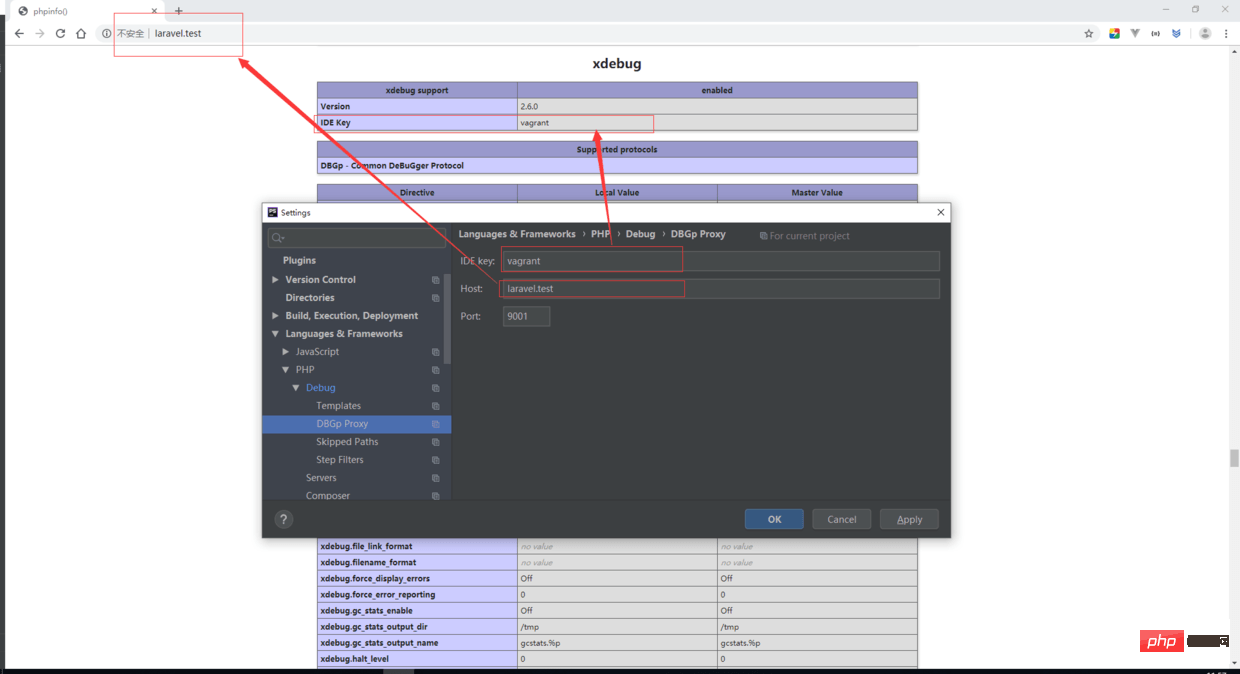
以上#在訪問的時候需要加 - ? Homestead 怎麼配置 xdebug 進行調試(PhpStorm)_session_start=vagrant
, 這個vagrant不是固定的, 最好用phpinfo看下
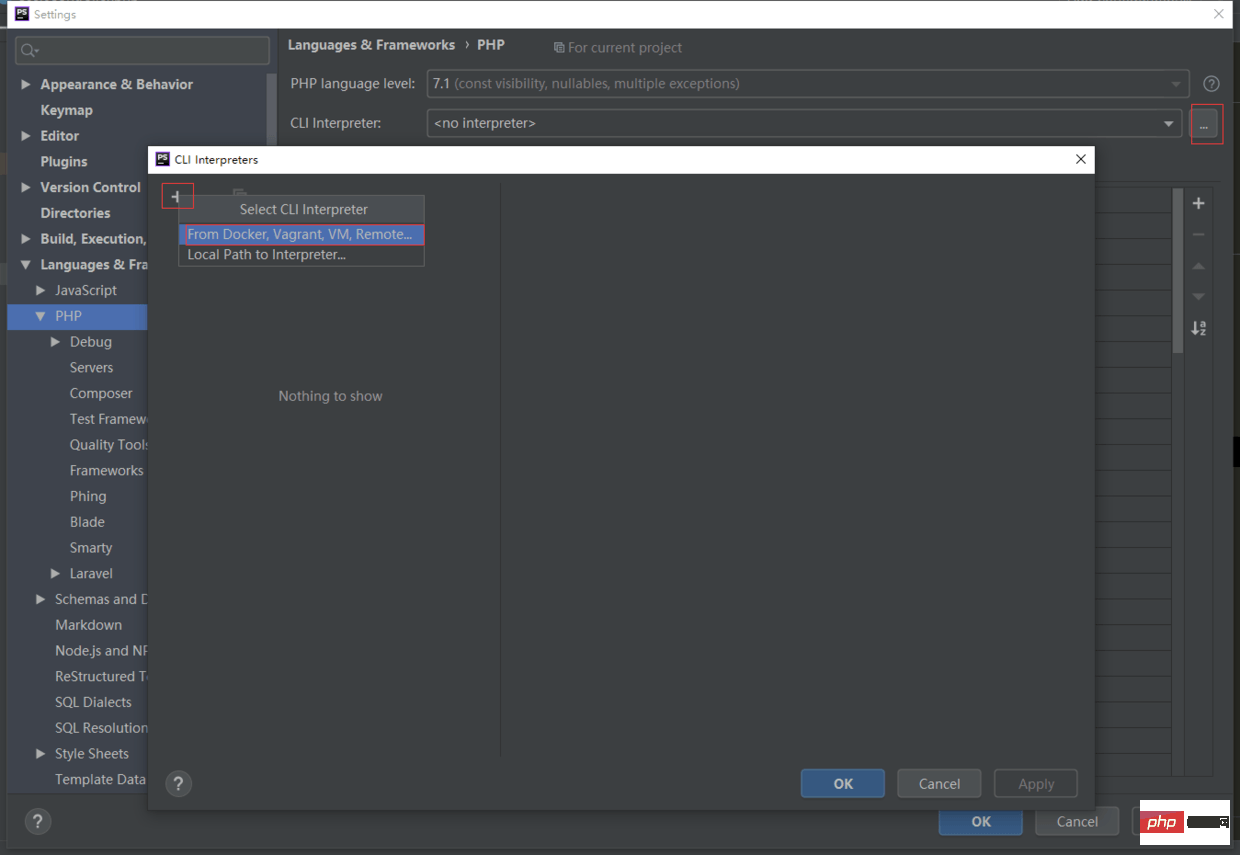
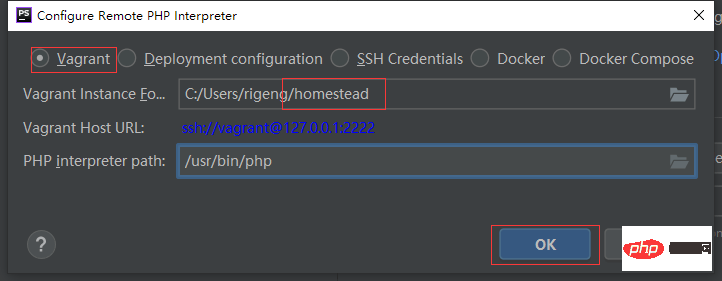
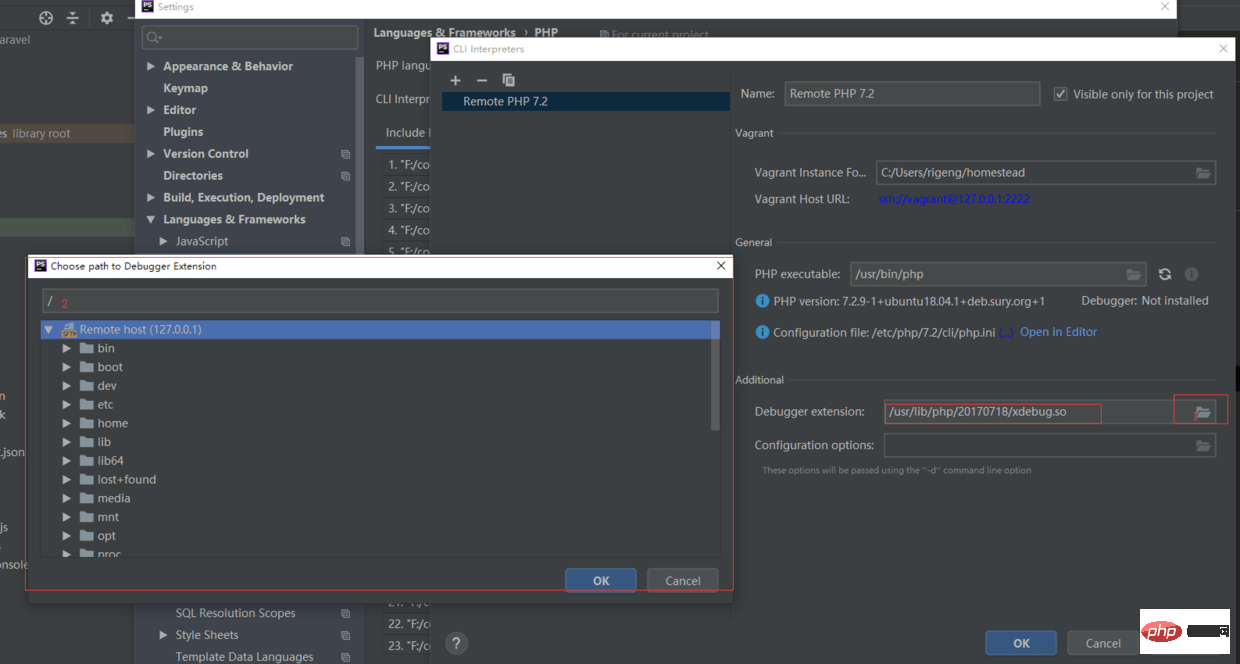
File => settings => languages & Frameworks => PHP
此時如果你的PHP 版本無法選擇, 請看這篇文章最後的小技巧

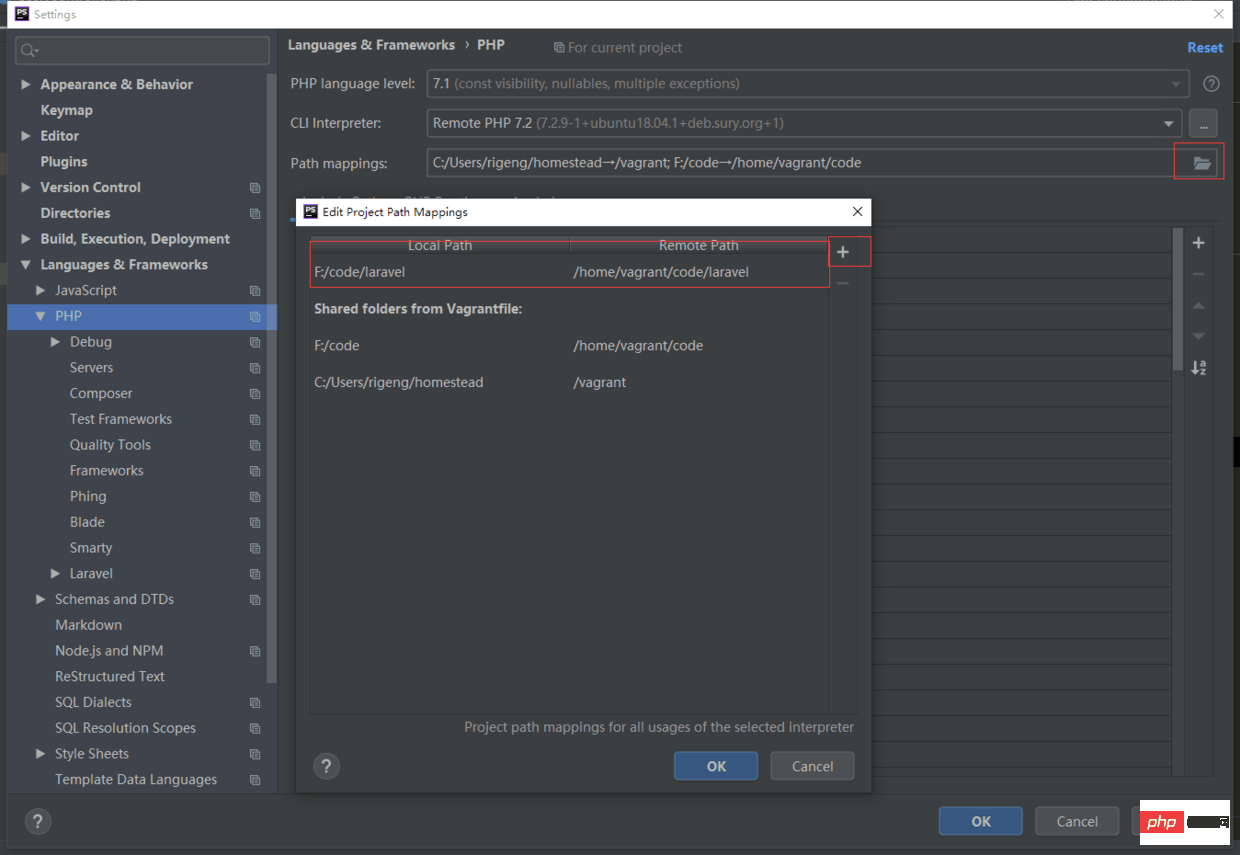
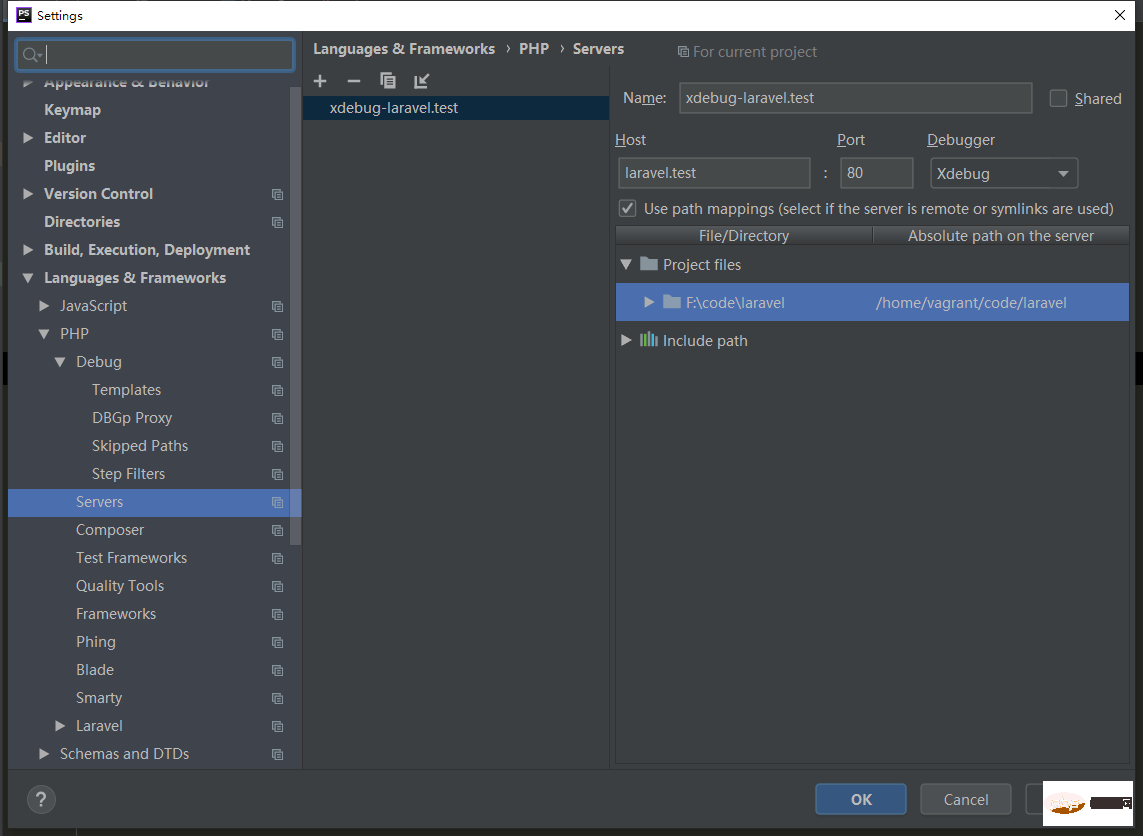
- Local Path: 是windows 主機上的目錄
- Remote Path: 是homestead 中的目錄
-
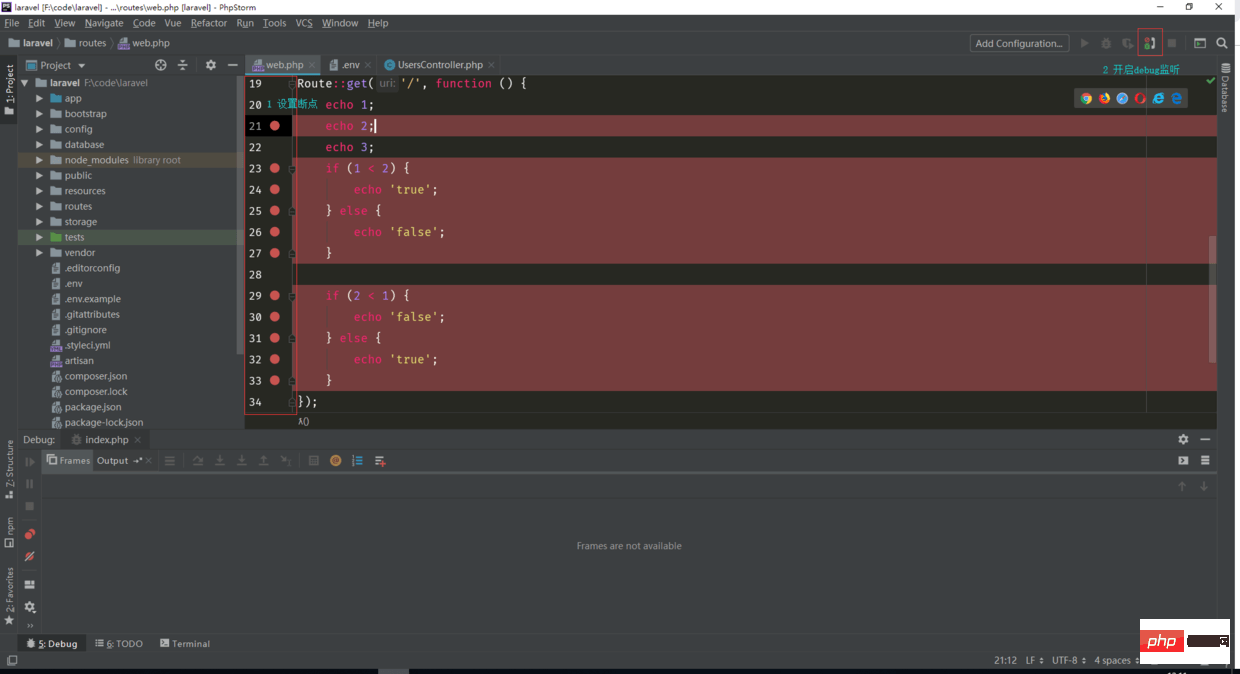
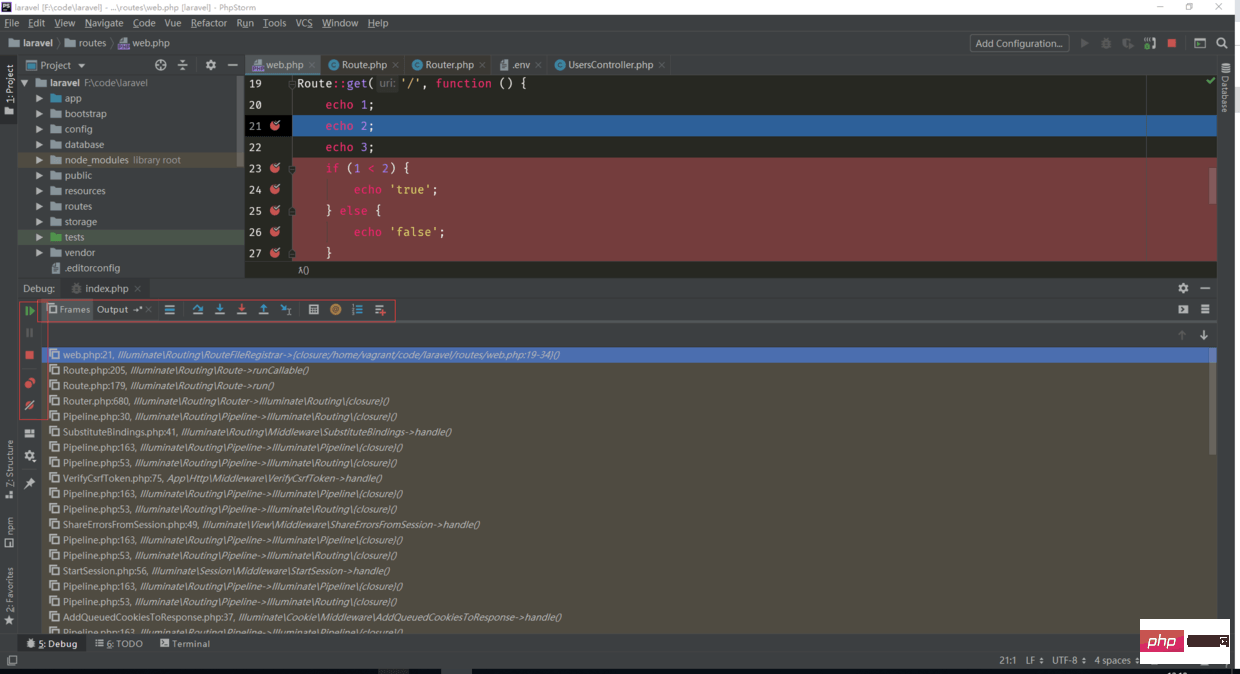
- 一定要開啟debug監聽
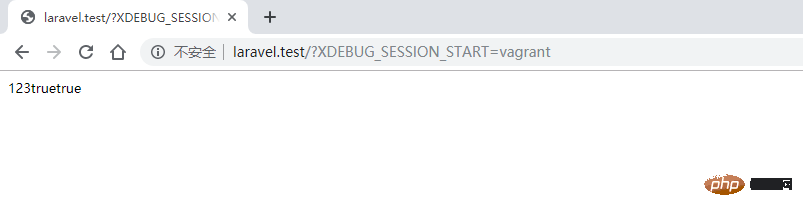
- 一定要在瀏覽器後面加上
- ?XDEBUG_SESSION_START=vagrant
這個參數, 如果不想每次加這個東西, 也可以安裝chrome 插件 - ?XDEBUG_SESSION_START=vagrant
這個vagrant不是固定的, 是php.ini 中設定的那個IdeKey的值
小技巧
- #如果你的
- PHP language level
無法選擇, 你可以對嘗試以下設定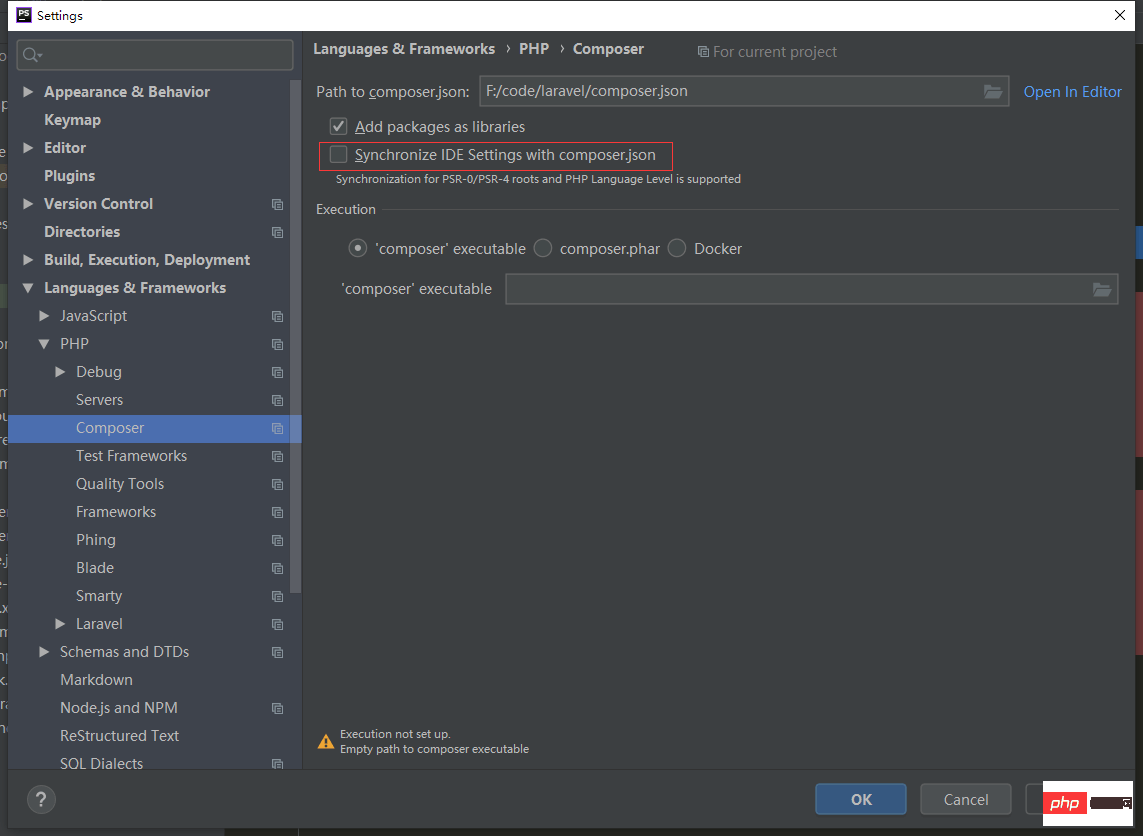
相關推薦:#
以上是Homestead 怎麼配置 xdebug 進行調試(PhpStorm)的詳細內容。更多資訊請關注PHP中文網其他相關文章!
陳述:
本文轉載於:learnku.com。如有侵權,請聯絡admin@php.cn刪除
上一篇:laravel中has方法怎麼用下一篇:laravel中has方法怎麼用