首頁 >web前端 >Bootstrap教程 >聊聊Bootstrap中的網格佈局,看看怎麼垂直對齊和水平對齊
聊聊Bootstrap中的網格佈局,看看怎麼垂直對齊和水平對齊
- 青灯夜游轉載
- 2021-11-01 11:11:502648瀏覽
這篇文章帶大家一起了解Bootstrap中的網格佈局,看看垂直對齊和水平對齊方式,希望對大家有幫助!

1、Bootstrap網格佈局
#上一節我們介紹了Bootstrap中的網格,網格在網頁佈局中是一個重點和困難,佈局是網頁設計的起點和基礎,一定要花功夫弄懂,最起碼把我寫的教程介紹的內容弄懂,因為我寫的都是最常用的和最基礎的。當然對於一個有一定基礎的網頁設計師,這些內容相信一看就懂,今天我們進一步學習網格佈局。 【相關推薦:《bootstrap教學》】
本節內容涉及到通用類別的彈性盒子(Flex)中的部分功能。
2、垂直對齊
2.1 row標籤中設定垂直對齊
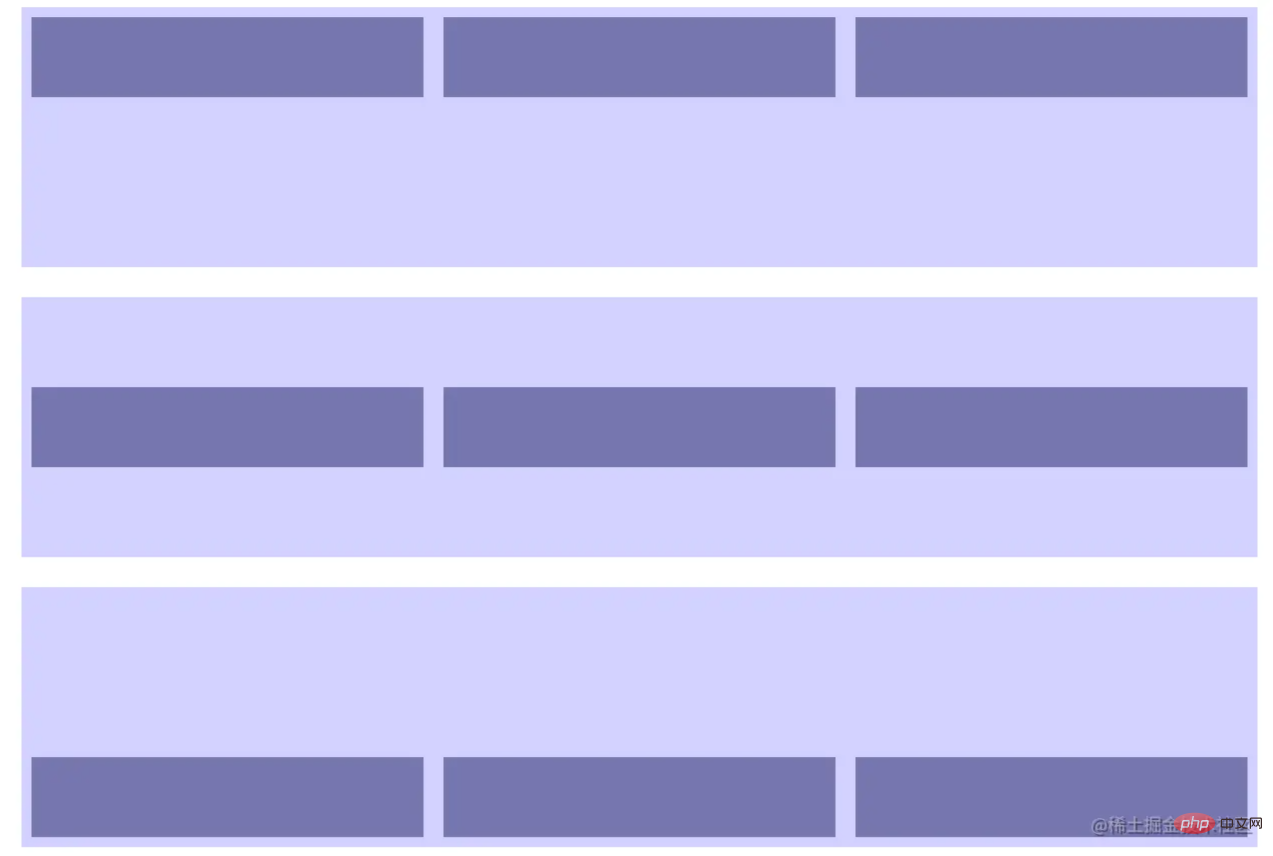
透過在row標籤中新增align-items-start、align-items-center、align-items-end可以更改行在容器中的垂直對齊方式,以上三個標籤分別為頂部對齊、居中對齊、底部對齊。以下是一段示範程式碼和效果圖,程式碼中css程式碼設定背景色和間距,方便查看效果。
<!doctype html>
<html>
  <head>
    <meta charset="utf-8">
    <meta name="viewport" content="width=device-width, initial-scale=1">
    <meta name="keywords" content="">
    <meta name="description" content="">
    <link href="bootstrap5/bootstrap.min.css" rel="stylesheet">
    <style>
      .row{background-color: rgba(0, 0, 255, 0.178);height: 260px;margin:30px;}
      .col{background-color: rgba(101, 101, 161, 0.842);height: 80px;padding: 30px;margin: 10px;}
    </style>
    <title>垂直对齐演示</title>
  </head>
  <body>
        <div>

          <div class="row align-items-start">
            <div> </div>
            <div></div>
            <div></div>
          </div>

          <div class="row align-items-center">
            <div> </div>
            <div></div>
            <div></div>
          </div>

          <div class="row align-items-end">
            <div> </div>
            <div></div>
            <div></div>
          </div>

        </div>

     <script src="bootstrap5/bootstrap.bundle.min.js" ></script>
  </body>
</html>
2.2 col標籤中設定垂直對齊
透過在col標籤中新增 align-self-start、align-self-center、align-self-end可以更改列在行中的垂直對齊方式,以上三個標籤分別為頂部對齊、居中對齊、底部對齊。以下是一段示範程式碼和效果圖,程式碼中css程式碼設定背景色和間距,方便查看效果。
<!doctype html>
<html>
  <head>
    <meta charset="utf-8">
    <meta name="viewport" content="width=device-width, initial-scale=1">
    <meta name="keywords" content="">
    <meta name="description" content="">
    <link href="bootstrap5/bootstrap.min.css" rel="stylesheet">
    <style>
      .row{background-color: rgba(0, 0, 255, 0.178);height: 260px;margin:30px;}
      .col{background-color: rgba(101, 101, 161, 0.842);height: 80px;padding: 30px;margin: 10px;}
    </style>
    <title>垂直对齐演示</title>
  </head>
  <body>
        <div>

          <div class="row align-items-start">
            <div class="col  align-self-start"> </div>
            <div class="col align-self-center"></div>
            <div class="col align-self-end"></div>
          </div>

        </div>

     <script src="bootstrap5/bootstrap.bundle.min.js" ></script>
  </body>
</html>
3、水平對齊
#3.1 row標籤中設定垂直對齊
透過在row標籤中加入justify-content-start、justify-content-center、justify-content-end、justify-content-around、justify-content-between、justify-content-evenly可以更改列在行中的水平對齊方式。以下是一段示範程式碼和效果圖,程式碼中css程式碼設定背景色和間距,方便查看效果。
<!doctype html>
<html>
  <head>
    <meta charset="utf-8">
    <meta name="viewport" content="width=device-width, initial-scale=1">
    <meta name="keywords" content="">
    <meta name="description" content="">
    <link href="bootstrap5/bootstrap.min.css" rel="stylesheet">
    <style>
     .row{background-color: rgba(0, 0, 255, 0.178);height: 120px;margin:10px;}
      .col-4{background-color: rgba(101, 101, 161, 0.842);height: 30px;padding: 10px;margin: 10px;}
    </style>
    <title>垂直对齐演示</title>
  </head>
  <body>
        <div>

          <div class="row justify-content-start">
            <div> </div>
            <div></div>
            <div></div>
          </div>

          <div class="row justify-content-center">
            <div> </div>
            <div></div>
            <div></div>
          </div>

          <div class="row justify-content-end">
            <div> </div>
## <div></div>
            <div></div>
          </div>

          <div class="row justify-content-around">
            <div> </div>
            <div></div>
            <div></div>
          </div>

          <div class="row justify-content-between">
            <div> </div>
            <div></div>
            <div></div>
          </div>

          <div class="row justify-content-evenly">
            <div> </div>
            <div></div>
            <div></div>
          </div>

        </div>
    </body>
</html>
更多程式相關知識,請造訪:程式設計影片! !
以上是聊聊Bootstrap中的網格佈局,看看怎麼垂直對齊和水平對齊的詳細內容。更多資訊請關注PHP中文網其他相關文章!

