thinkphp 6.0 swoole擴充websocket的使用
- 藏色散人轉載
- 2020-12-15 09:35:533030瀏覽
下面由thinkphp框架教學專欄跟大家介紹thinkphp 6.0 swoole擴充websocket使用教學(think-swoole),希望對需要的朋友有幫助!
thinkphp 6.0 swoole擴充websocket使用教學(think-swoole)
前言
最新版本的TP-SWOOLE變化很大,該文所提供的方法已經無法使用,可參考https://github.com/xavieryang007/think-swoole-demo/blob/master/doc/文件/4.1-websocket.md
介紹
即將推出的tp6.0,已經適配swoole.並推出think-swoole 3.0,並且預設適配了socketio。和2.0版本在使用方法上面有些許不同。
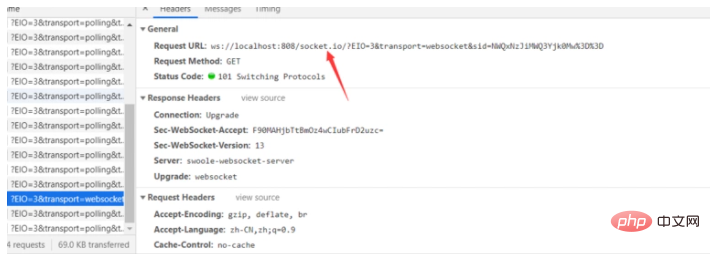
Websocket 繼承與Http,進行websocket連線之前需要一次HTTP請求,如果當期位址支援websocket則回傳101,然後進行連線。也就是說不是我的服務支援websocket後,請求每個連接位址都可以進行websocket連接,而是需要預先適配才可以連接。
參數配置
如果要使用websocket需要在設定中啟用,將websocket下的enable設定為true
 'server'           => [
        'host'      => '0.0.0.0', // 监听地址
        'port'      => 808, // 监听端口
        'mode'      => SWOOLE_PROCESS, // 运行模式 默认为SWOOLE_PROCESS
        'sock_type' => SWOOLE_SOCK_TCP, // sock type 默认为SWOOLE_SOCK_TCP
        'options'   => [
            'pid_file'              => runtime_path() . 'swoole.pid',
            'log_file'              => runtime_path() . 'swoole.log',
            'daemonize'             => false,
            // Normally this value should be 1~4 times larger according to your cpu cores.
            'reactor_num'           => swoole_cpu_num(),
            'worker_num'            => swoole_cpu_num(),
            'task_worker_num'       => 4,//swoole_cpu_num(),
            'enable_static_handler' => true,
            'document_root'         => root_path('public'),
            'package_max_length'    => 20 * 1024 * 1024,
            'buffer_output_size'    => 10 * 1024 * 1024,
            'socket_buffer_size'    => 128 * 1024 * 1024,
            'max_request'           => 3000,
            'send_yield'            => true,
        ],
    ],
    'websocket'        => [
        'enabled'       => true,// 开启websocket
        'handler'       => Handler::class,  //自定义wbesocket绑定类
        'parser'        => Parser::class, //自定义解析类
        'route_file'    => base_path() . 'websocket.php',
        'ping_interval' => 25000,
        'ping_timeout'  => 60000,
        'room'          => [
            'type'        => TableRoom::class,
            'room_rows'   => 4096,
            'room_size'   => 2048,
            'client_rows' => 8192,
            'client_size' => 2048,
        ],
    ],
    'auto_reload'      => true,
    'enable_coroutine' => true,
    'resetters'        => [],
    'tables'           => [],
handler和parser大大方便了自訂websocket服務,預設系統整合socketio。
本文主要介紹如何使用socketio,這裡假設大家有socketio有一定了解和使用基礎。
socketIo預設會在請求位址後加上對應的參數

同時,socketio預設會在請求位址後加上對應的參數

同時,socketio預設會在請求位址後加上對應的參數
同時,socketio預設情況下,會認為 http://url/socket.io / 是支援websocket服務的地址。而在tp-swoole3.0內部已經對該位址請求進行了處理
<?php namespace think\swoole\websocket\socketio;
use think\Config;
use think\Cookie;
use think\Request;
class Controller
{
protected $transports = ['polling', 'websocket'];
public function upgrade(Request $request, Config $config, Cookie $cookie)
{
if (!in_array($request->param('transport'), $this->transports)) {
return json(
[
'code' => 0,
'message' => 'Transport unknown',
],
400
);
}
if ($request->has('sid')) {
$response = response('1:6');
} else {
$sid = base64_encode(uniqid());
$payload = json_encode(
[
'sid' => $sid,
'upgrades' => ['websocket'],
'pingInterval' => $config->get('swoole.websocket.ping_interval'),
'pingTimeout' => $config->get('swoole.websocket.ping_timeout'),
]
);
$cookie->set('io', $sid);
$response = response('97:0' . $payload . '2:40');
}
return $response->contentType('text/plain');
}
public function reject(Request $request)
{
return json(
[
'code' => 3,
'message' => 'Bad request',
],
400
);
}
}TP6.0,插件註冊採用了service方式進行了註冊,可在tp-swoole 服務註冊文件中查看路由註冊資訊,如果想自訂連結規則,則可以覆蓋該路由。
<?php // +----------------------------------------------------------------------
// | ThinkPHP [ WE CAN DO IT JUST THINK IT ]
// +----------------------------------------------------------------------
// | Copyright (c) 2006-2018 http://thinkphp.cn All rights reserved.
// +----------------------------------------------------------------------
// | Licensed ( http://www.apache.org/licenses/LICENSE-2.0 )
// +----------------------------------------------------------------------
// | Author: yunwuxin <448901948@qq.com>
// +----------------------------------------------------------------------

namespace think\swoole;

use Swoole\Http\Server as HttpServer;
use Swoole\Websocket\Server as WebsocketServer;
use think\App;
use think\Route;
use think\swoole\command\Server as ServerCommand;
use think\swoole\facade\Server;
use think\swoole\websocket\socketio\Controller;
use think\swoole\websocket\socketio\Middleware;

class Service extends \think\Service
{
    protected $isWebsocket = false;

    /**
     * @var HttpServer | WebsocketServer
     */
    protected static $server;

    public function register()
    {
        $this->isWebsocket = $this->app->config->get('swoole.websocket.enabled', false);

        $this->app->bind(Server::class, function () {
            if (is_null(static::$server)) {
                $this->createSwooleServer();
            }

            return static::$server;
        });

        $this->app->bind('swoole.server', Server::class);

        $this->app->bind(Swoole::class, function (App $app) {
            return new Swoole($app);
        });

        $this->app->bind('swoole', Swoole::class);
    }

    public function boot(Route $route)
    {
        $this->commands(ServerCommand::class);
        if ($this->isWebsocket) {
            $route->group(function () use ($route) {
                $route->get('socket.io/', '@upgrade');
                $route->post('socket.io/', '@reject');
            })->prefix(Controller::class)->middleware(Middleware::class);
        }
    }

    /**
     * Create swoole server.
     */
    protected function createSwooleServer()
    {
        $server     = $this->isWebsocket ? WebsocketServer::class : HttpServer::class;
        $config     = $this->app->config;
        $host       = $config->get('swoole.server.host');
        $port       = $config->get('swoole.server.port');
        $socketType = $config->get('swoole.server.socket_type', SWOOLE_SOCK_TCP);
        $mode       = $config->get('swoole.server.mode', SWOOLE_PROCESS);

        static::$server = new $server($host, $port, $mode, $socketType);

        $options = $config->get('swoole.server.options');

        static::$server->set($options);
    }
}
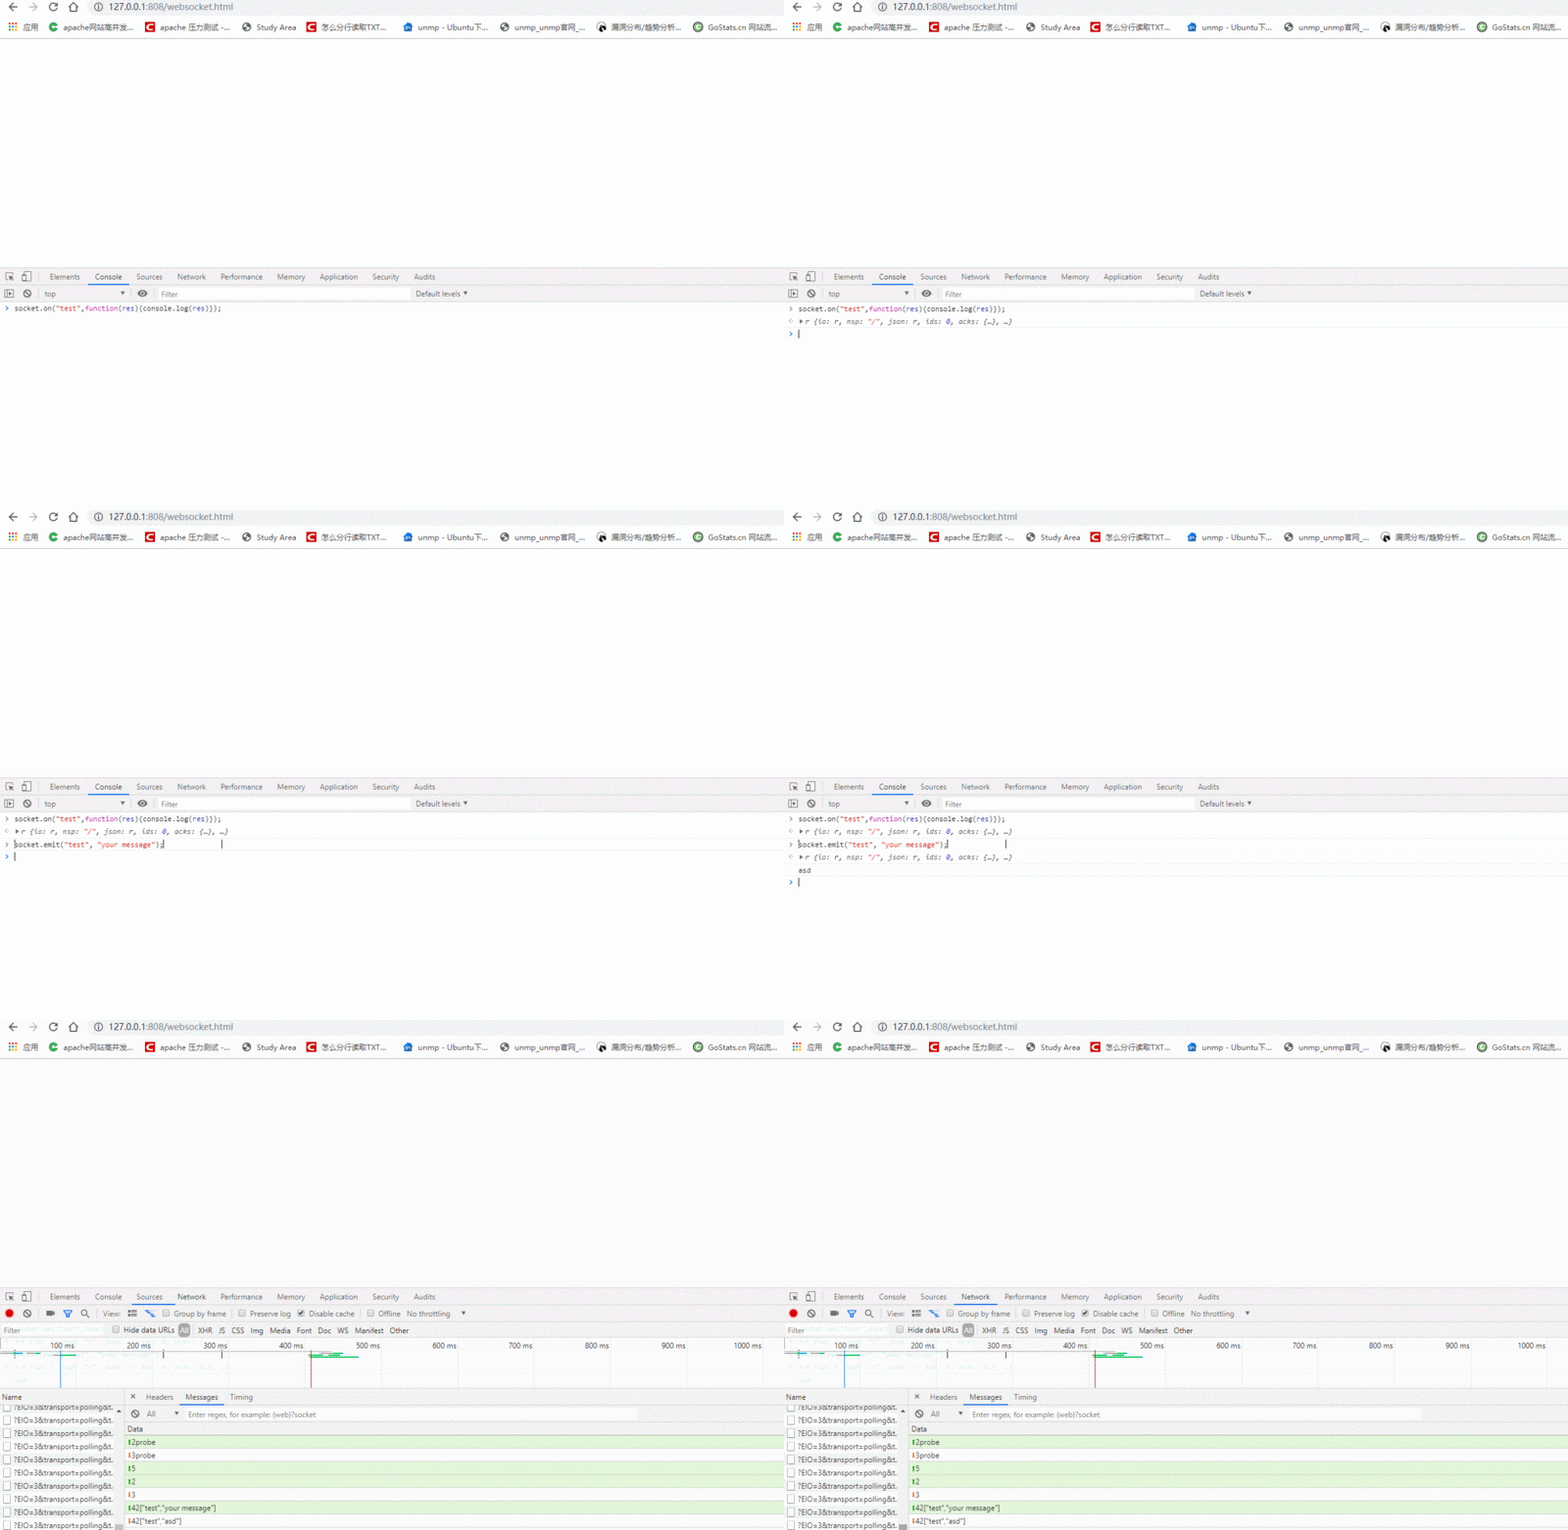
Socketio預設使用demo
nbsp;html>
<meta>
<title>Title</title>
<script></script>
<script>
const socket = io('http://localhost:808');
socket.emit("test", "your message");
socket.on("test",function(res){console.log(res)});
</script>
###Websocket路由設定方法######在app目錄下新建websocket.php檔案,其中需要注意,由於使用了反射,閉包參數名稱不能隨意定義,不然無法注入。第一個參數是websocket,是目前websocket的Server對象,第二個參數data是客戶端發送的資料。其中socketio emit的第一個參數和Websocket::on的第一個參數一致,作為事件名稱。 ###<?php /**
* Author:Xavier Yang
* Date:2019/6/5
* Email:499873958@qq.com
*/
use \think\swoole\facade\Websocket;
Websocket::on("test", function (\think\swoole\Websocket $websocket, $data) {
//var_dump($class);
$websocket->emit("test", "asd");
});
Websocket::on("test1", function ($websocket, $data) {
$websocket->emit("test", "asd");
});
Websocket::on("join", function (\think\swoole\Websocket $websocket, $data) {
$websocket->join("1");
});############參考如上方法即可使用全新的websocket服務。當然tp-swoole3.0同樣還有許多其他的新功能,這些功能需要大家去摸索嘗試。 ###我也會在接下來的文章中,一起與大家分享我的使用流程。 ###以上是thinkphp 6.0 swoole擴充websocket的使用的詳細內容。更多資訊請關注PHP中文網其他相關文章!

