Mac+Apache+PHP安裝Xdebug方法步驟
- 藏色散人轉載
- 2020-01-30 20:01:282758瀏覽

MAC homebrew自2018/3/31之後棄用homebrew/php
By 31st March 2018 we will deprecate and archive the Homebrew/php tap. Unfortunately we have been unable to maintain an acceptable, consistent user or contributor experience and CI workload through non-core formula taps in the Homebrew organisation so we are continuing to migulad and woor leow malmerr 它't 課'! supported outside the Homebrew organisation.
詳細:https://brew.sh/2018/01/19/homebrew-1.5.0/
所以不能再用下面的方法安裝xdebug了,下面的方法不行!下面的方法不行!下面的方法不行!
brew install php<version number>-xdebug
所以,安裝xdebug我們可以手動編譯一下,具體步驟如下:
1.首先進入Xdebug 官方下載頁面:https://xdebug.org/download.php ,下載安裝php版本支援的xdebug的版本
eg.我本地的PHP版本是5.6.38,所以下載了2.5.4的source,一個tgz壓縮包
#2.在下載xdebug的資料夾裡開啟終端機
tar -xzf xdebug-2.5.4.tgz
cd xdebug-2.5.4
也可以在本地直接解壓,再進入解壓縮的xdebug的資料夾裡,開啟終端機
phpize
#如果不可以,寫phpize的完整路徑
./configure
上面指令執行之後,開始編譯
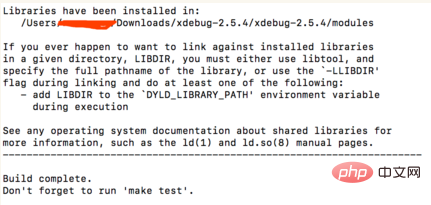
make -j2
編譯完成之後,會提示,在modules可找到xdebug.so檔案

3.將編譯之後得到的xdebug.so檔案可以拷貝到extension_dir規定的資料夾中
註:php.ini 中搜尋extension_dir
4.在php.ini設定參數
[Xdebug]
zend_extension="/usr/local/lib/php/pecl/20131226/xdebug.so"
;自动跟踪,可关闭(关闭后提升性能)
xdebug.auto_trace=On
;性能分析,可关闭(关闭后提升性能)
xdebug.profiler_enable=On
xdebug.var_display_max_children=512
xdebug.var_display_max_data=2048
xdebug.var_display_max_depth=8
修改完後,重新啟動apache,phpinfo()偵測一下安裝上了沒,應該是沒問題了
更多php相關知識,請造訪php教學!
以上是Mac+Apache+PHP安裝Xdebug方法步驟的詳細內容。更多資訊請關注PHP中文網其他相關文章!

