在vue中如何實作驗證碼輸入框元件
- 亚连原創
- 2018-06-20 16:32:023857瀏覽
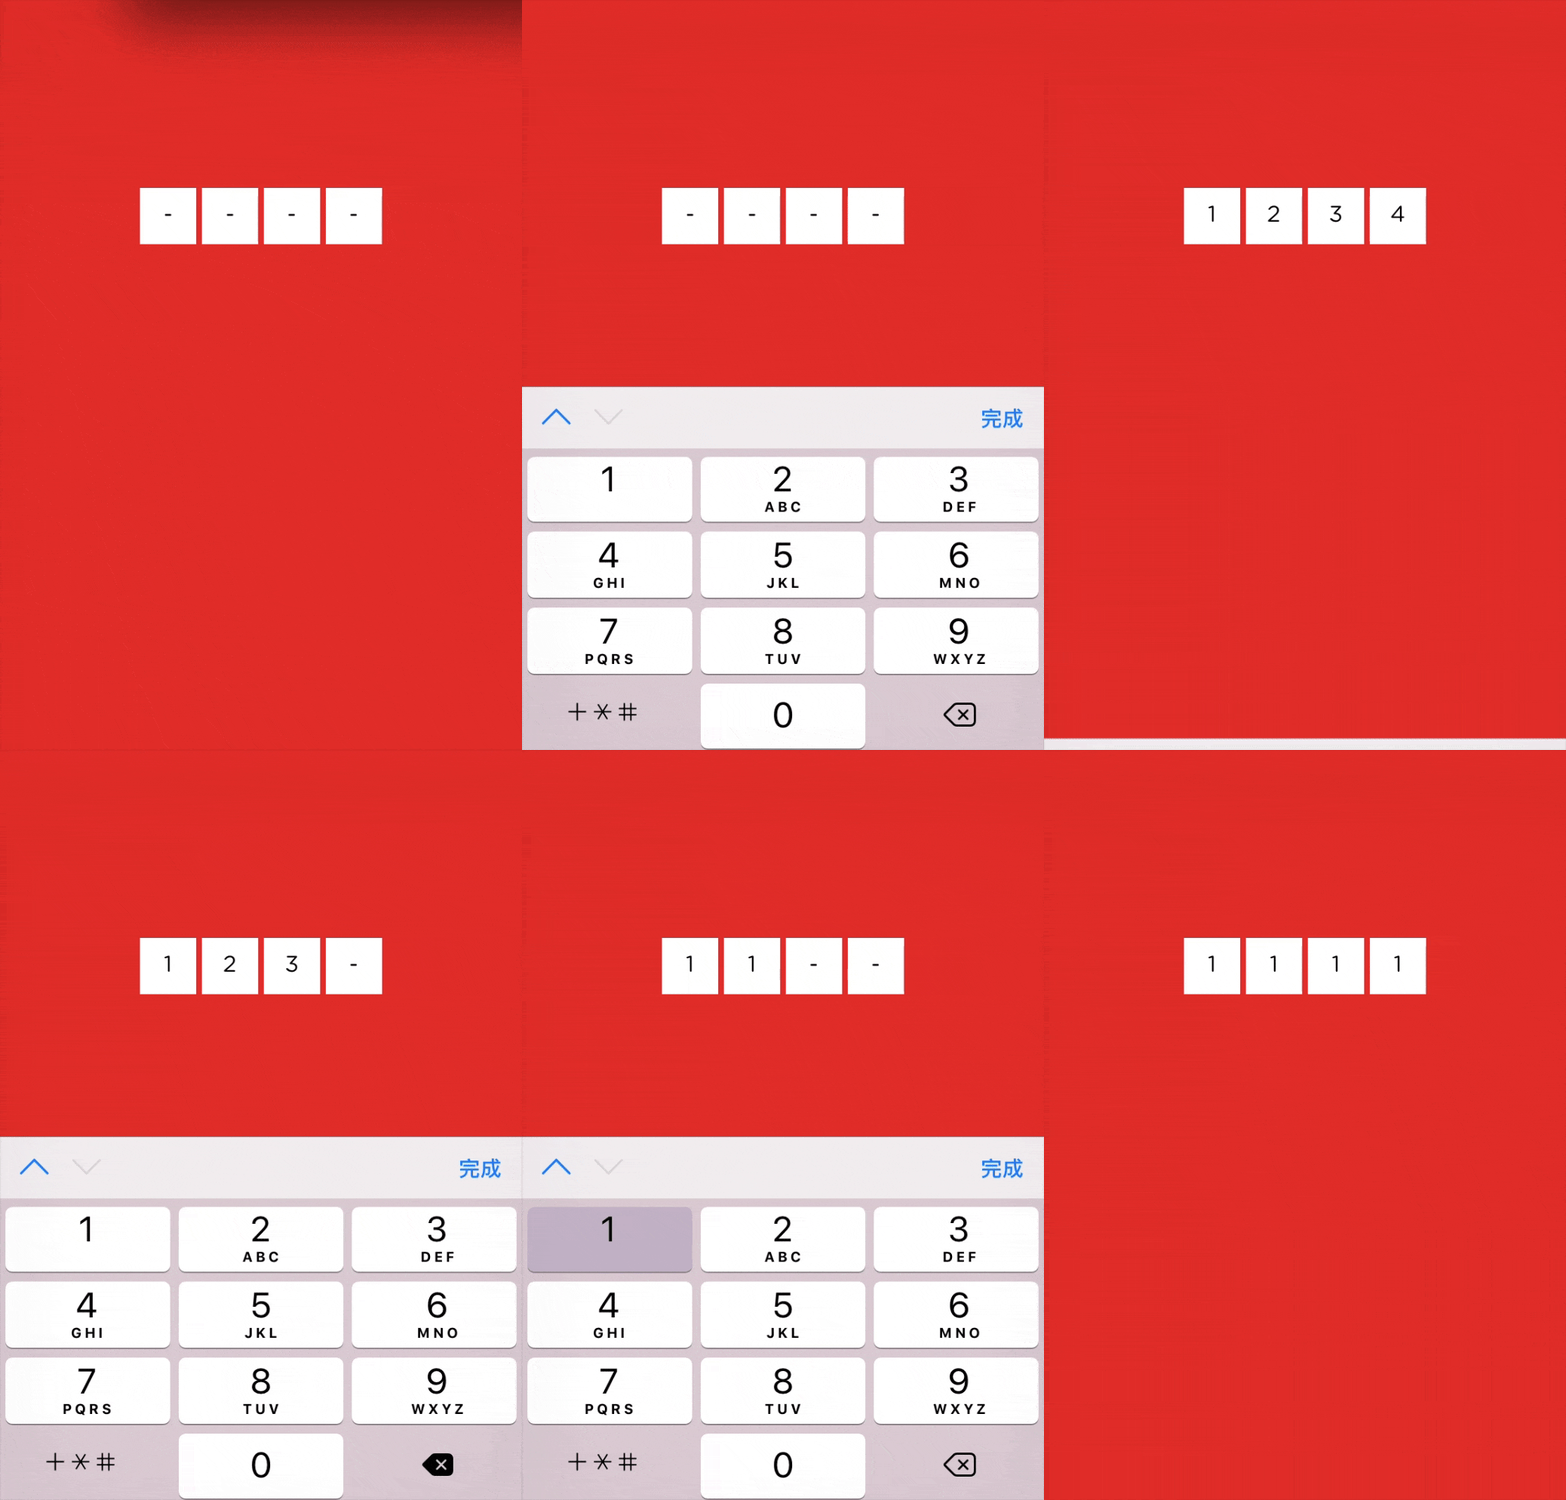
最近做專案遇到這樣的需求要求輸入4位或6位簡訊驗證碼,輸入完成後收起鍵盤。實作步驟大家參考下本文
先來看波完成效果圖

.
#輸入4位元或6位元簡訊驗證碼,輸入完成後收起鍵盤實作步驟
第一步
佈局排版
<p class="security-code-wrap">
 <label for="code">
  <ul class="security-code-container">
  <li class="field-wrap" v-for="(item, index) in number" :key="index">
   <i class="char-field">{{value[index] || placeholder}}</i>
  </li>
  </ul>
 </label>
 <input ref="input" class="input-code" @keyup="handleInput($event)" v-model="value"
   id="code" name="code" type="tel" :maxlength="number"
   autocorrect="off" autocomplete="off" autocapitalize="off">
</p>
使用li元素來模擬輸入框的顯示,沒有別的目的,就只是為了語義化,當然你也可以使用其他任意一個元素來模擬,例如p。
使用label標籤的好處是它可以跟input的click事件關聯上,一方面實現了語義化解決方案,另一方面也省去了我們透過js來喚起虛擬鍵盤。
隱藏輸入框
.input-code {
 position: absolute;
 left: -9999px;
 top: -99999px;
 width: 0;
 height: 0;
 opacity: 0;
 overflow: visible;
 z-index: -1;
}
將真實的輸入框定位到螢幕視覺區域以外的地方,虛擬鍵盤被喚起時,就不會將頁面往上頂了。所以你的驗證碼輸入元件一定要放在虛擬鍵盤遮擋不了的地方。
第二步
處理驗證碼輸入
handleSubmit() {
 this.$emit('input', this.value)
},
handleInput(e) {
 this.$refs.input.value = this.value
 if (this.value.length >= this.number) {
  this.hideKeyboard()
 }
 this.handleSubmit()
}
輸入時,給輸入框賦一次值,是為了解決android端上輸入框失焦後重新對焦,輸入遊標會定在第一位的前面,經過賦值再聚焦,遊標的位置就會顯示在最後一位後面。
第三步驟
完成輸入後關閉虛擬鍵盤hideKeyboard() {
// 输入完成隐藏键盘
document.activeElement.blur() // ios隐藏键盘
this.$refs.input.blur() // android隐藏键盘
}#元件完整程式碼
##
<!--四位验证码输入框组件-->
<template>
<p class="security-code-wrap">
<label for="code">
<ul class="security-code-container">
<li class="field-wrap" v-for="(item, index) in number" :key="index">
<i class="char-field">{{value[index] || placeholder}}</i>
</li>
</ul>
</label>
<input ref="input" class="input-code" @keyup="handleInput($event)" v-model="value"
id="code" name="code" type="tel" :maxlength="number"
autocorrect="off" autocomplete="off" autocapitalize="off">
</p>
</template>
<script>
export default {
name: 'SecurityCode',
// component properties
props: {
number: {
type: Number,
default: 4
},
placeholder: {
type: String,
default: '-'
}
},
// variables
data() {
return {
value: ''
}
},
methods: {
hideKeyboard() {
 // 输入完成隐藏键盘
 document.activeElement.blur() // ios隐藏键盘
 this.$refs.input.blur() // android隐藏键盘
},
handleSubmit() {
this.$emit('input', this.value)
},
handleInput(e) {
this.$refs.input.value = this.value
if (this.value.length >= this.number) {
this.hideKeyboard()
}
this.handleSubmit()
}
}
}
</script>
<style scoped lang="less">
.security-code-wrap {
overflow: hidden;
}
.security-code-container {
margin: 0;
padding: 0;
display: flex;
justify-content: center;
.field-wrap {
list-style: none;
display: block;
width: 40px;
height: 40px;
line-height: 40px;
font-size: 16px;
background-color: #fff;
margin: 2px;
color: #000;
.char-field {
font-style: normal;
}
}
}
.input-code {
position: absolute;
left: -9999px;
top: -99999px;
width: 0;
height: 0;
opacity: 0;
overflow: visible;
z-index: -1;
}
</style>元件使用程式碼<security-code v-model="authCode"></security-code>上面是我整理給大家的,希望今後會對大家有幫助。 相關文章: ####
以上是在vue中如何實作驗證碼輸入框元件的詳細內容。更多資訊請關注PHP中文網其他相關文章!
陳述:
本文內容由網友自願投稿,版權歸原作者所有。本站不承擔相應的法律責任。如發現涉嫌抄襲或侵權的內容,請聯絡admin@php.cn
上一篇:使用NodeJS編寫爬蟲範例下一篇:使用NodeJS編寫爬蟲範例

