vue父元件往父組件內傳遞值步驟詳解
- php中世界最好的语言原創
- 2018-04-27 15:49:061889瀏覽
這次帶給大家vue父元件往父元件內傳遞值步驟詳解,vue父元件往父元件內傳遞值的注意事項有哪些,下面就是實戰案例,一起來看一下。
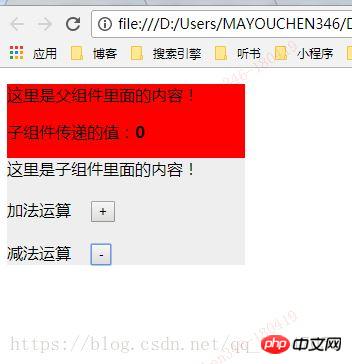
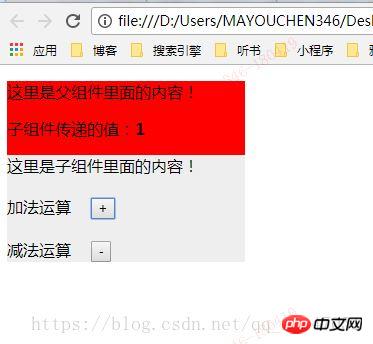
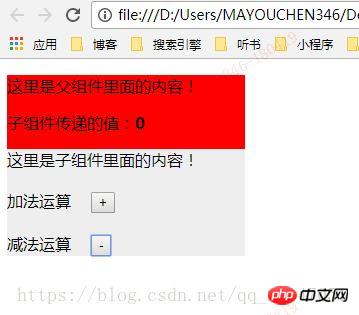
如下圖所示:
當沒有任何動作的時候父元件的值是0

#當點選加號以後父元件的值是1

當點選減號以後父元件的值是減一變成0

具體代碼我直接貼出來,剛出爐的代碼。
nbsp;html>
<meta>
<meta>
<meta>
<title>子组件将数据传递给父组件</title>
<script></script>
<script>
//定义一个组件
Vue.component('counter', {
template: '\
<p style="background:#eee;width: 238px;">\
<p>这里是子组件里面的内容!\
<p style="margin-top:20px">\
<p>\
<span style="margin-right:20px;display:inline-block;">加法运算<button @click="incrementCounter">+\
\
<p>\
<span style="margin-right:20px;margin-top:20px;display:inline-block;">减法运算<button @click="deleteCounter">-\
\
\
',
data: function () {
return {
counter: 0
}
},
methods: {
incrementCounter: function () {
this.counter += 1;
this.$emit('increment',1);
},
deleteCounter: function () {
this.counter -= 1;
this.$emit('increment',2);
}
}
})
//执行一个组件
window.onload = function(){
var app = new Vue({
el: '#app',
data: {
total: 0
},
methods:{
incrementTotal: function (val) {
if(val==1){
this.total += 1;
}else{
if(this.total<=0){
this.total = 0;
}else{
this.total -= 1;
}
}
}
}
})
}
</script>
<p>
</p><p>这里是父组件里面的内容!</p>
<p>子组件传递的值:<b>{{ total }}</b></p>
<counter></counter>
我相信看了本文案例你已經掌握了方法,更多精彩請關注php中文網其它相關文章!
推薦閱讀:
以上是vue父元件往父組件內傳遞值步驟詳解的詳細內容。更多資訊請關注PHP中文網其他相關文章!
陳述:
本文內容由網友自願投稿,版權歸原作者所有。本站不承擔相應的法律責任。如發現涉嫌抄襲或侵權的內容,請聯絡admin@php.cn
上一篇:React怎麼實作diff演算法下一篇:React怎麼實作diff演算法

