wampserver+phpstorm+xdebug環境配置調試php程式碼
- 不言原創
- 2018-04-27 13:35:413623瀏覽
這篇文章主要介紹了關於wampserver phpstorm xdebug環境配置調試php程式碼,有著一定的參考價值,現在分享給大家,有需要的朋友可以參考一下
wampserver phpstorm xdebug環境配置調試php程式碼
wampserver安裝
phpstorm安裝
phpstorm下偵錯
phpstorm安裝wampserver安裝
wampserver安裝比較簡單,只要下載wampserver.exe,一路next下去即可
phpstorm下載位址:https ://www.jetbrains.com/phpstorm/phpstorm破解方法:http://www.oyksoft.com/soft/40722.html?pc=1
安裝完成之後,如果phpstorm還是沒有正確破解,看看是不是你的host檔案是否有將0.0.0.0 account.jetbrains.com 加進去,具體host檔案儲存位置為:C:\Windows\System32\drivers\ etc
xdebug安裝
預設情況下,如果你安裝的是wampserver,xdebug外掛程式是預設裝好的,具體xdebug安裝路徑可以透過查看php.ini找到,尋找方法是左鍵點擊wampserver程式圖標,找到PHP選項,找到php.ini,點擊進去,搜尋[xdebug],其中zend_extension的值就是你的xdebug儲存位置,為了能夠在phpstorm中調試php程式碼,我們需要在php.ini的[xdebug]標籤最後面加上下面程式碼:
zend_extension ="E:/StudySoftware/wampserver/wamp/bin/php/php5.6.25/zend_ext/php_xdebug-2.4.1-5.6-vc11.dll"xdebug.remote_enable = 1xdebug.profiler_enable = off
xdebug.profiler_enable_trigger = Off
xdebug.profiler_output_name = cachegrind.out.%t.%p
xdebug.profiler_output_dir ="E:/StudySoftware/wampserver/wamp/tmp"xdebug.show_local_vars=0xdebug.idekey=PhpStorm
xdebug.remote_enable = On
xdebug.remote_host=localhost
xdebug.remote_port=9000  xdebug.remote_handler=dbgp
設定完成後重啟wampserver即可,接著在瀏覽器中輸入localhost,找到phpinfo,點擊進去,搜尋xdebug,找到下面內容:
Google瀏覽器下安裝 Xdebug外掛
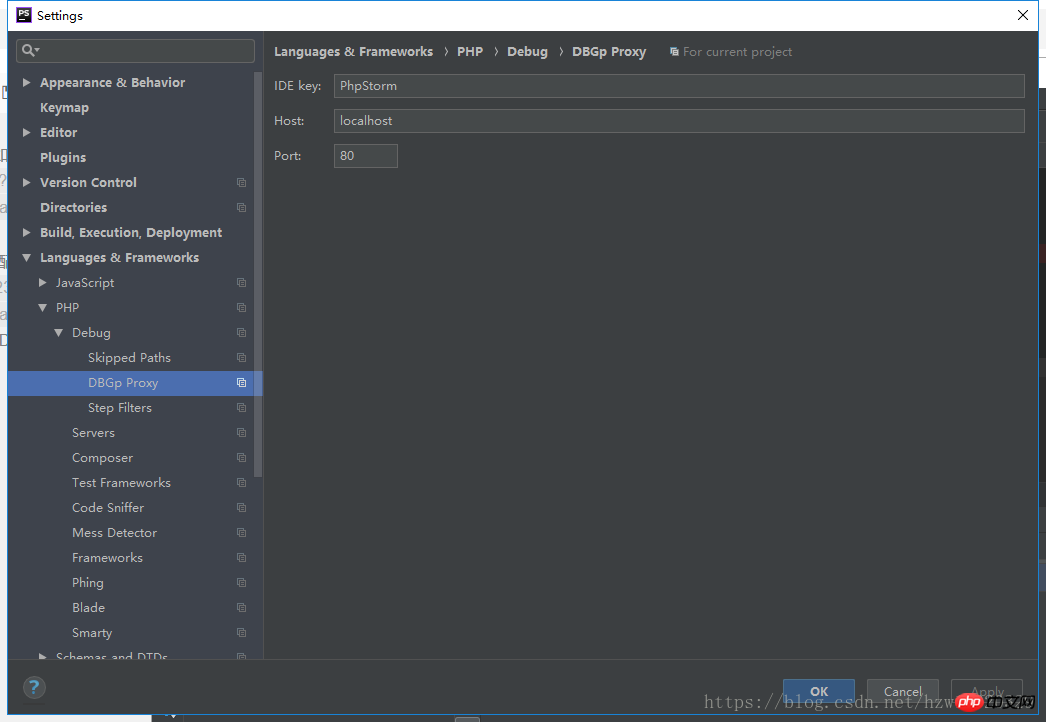
(2):File->Settings->Languages&Frame Works->Php->Debug->DBGp Proxy 配置相關設置,配置內容如下圖所示:下載地址:http://www.downza. cn/soft/211550.html
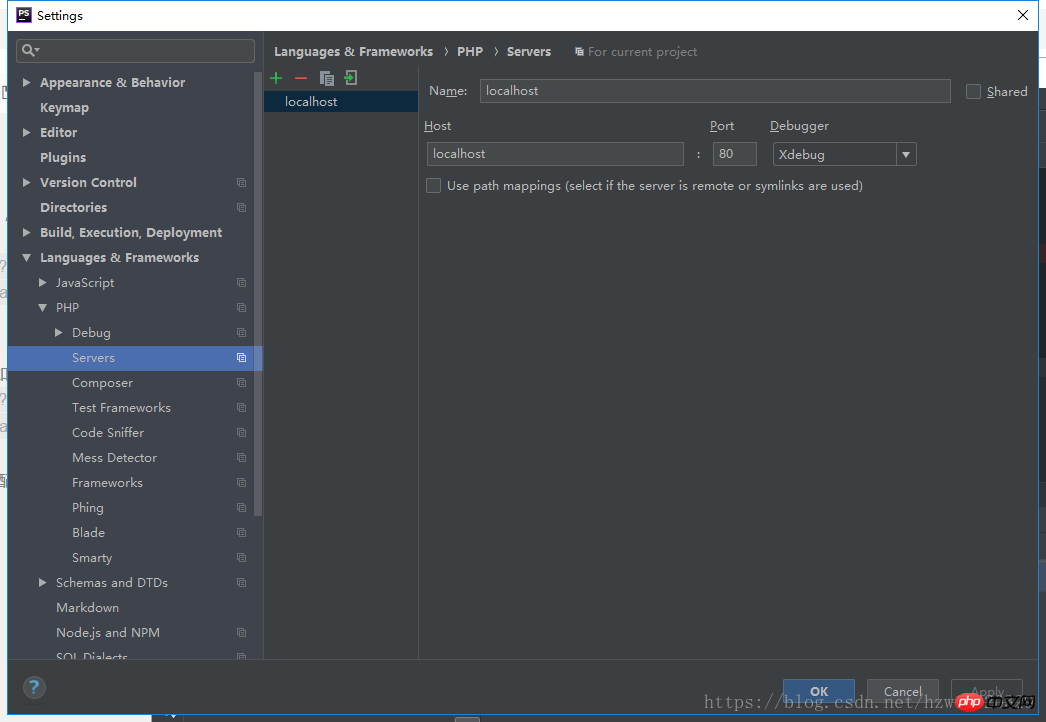
# (1):File->Settings->Languages&Frame Works->Php->Servers 設定伺服器相關設置,配置內容如下圖所示
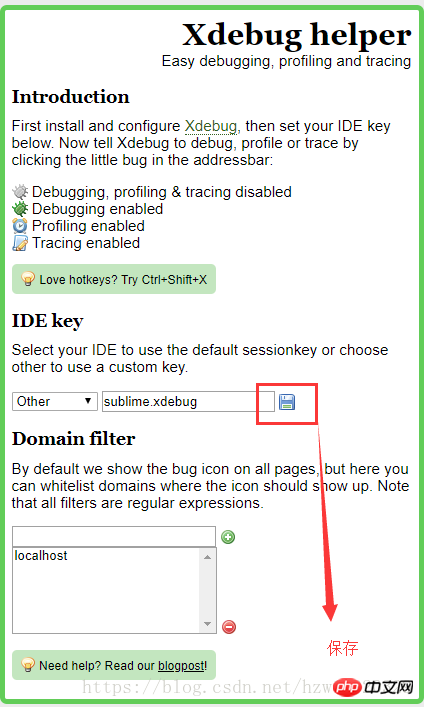
下載完成之後,點擊右上角的蜘蛛圖標,選擇選項,在裡面輸入如下圖所示的內容
#phpstorm調試配置
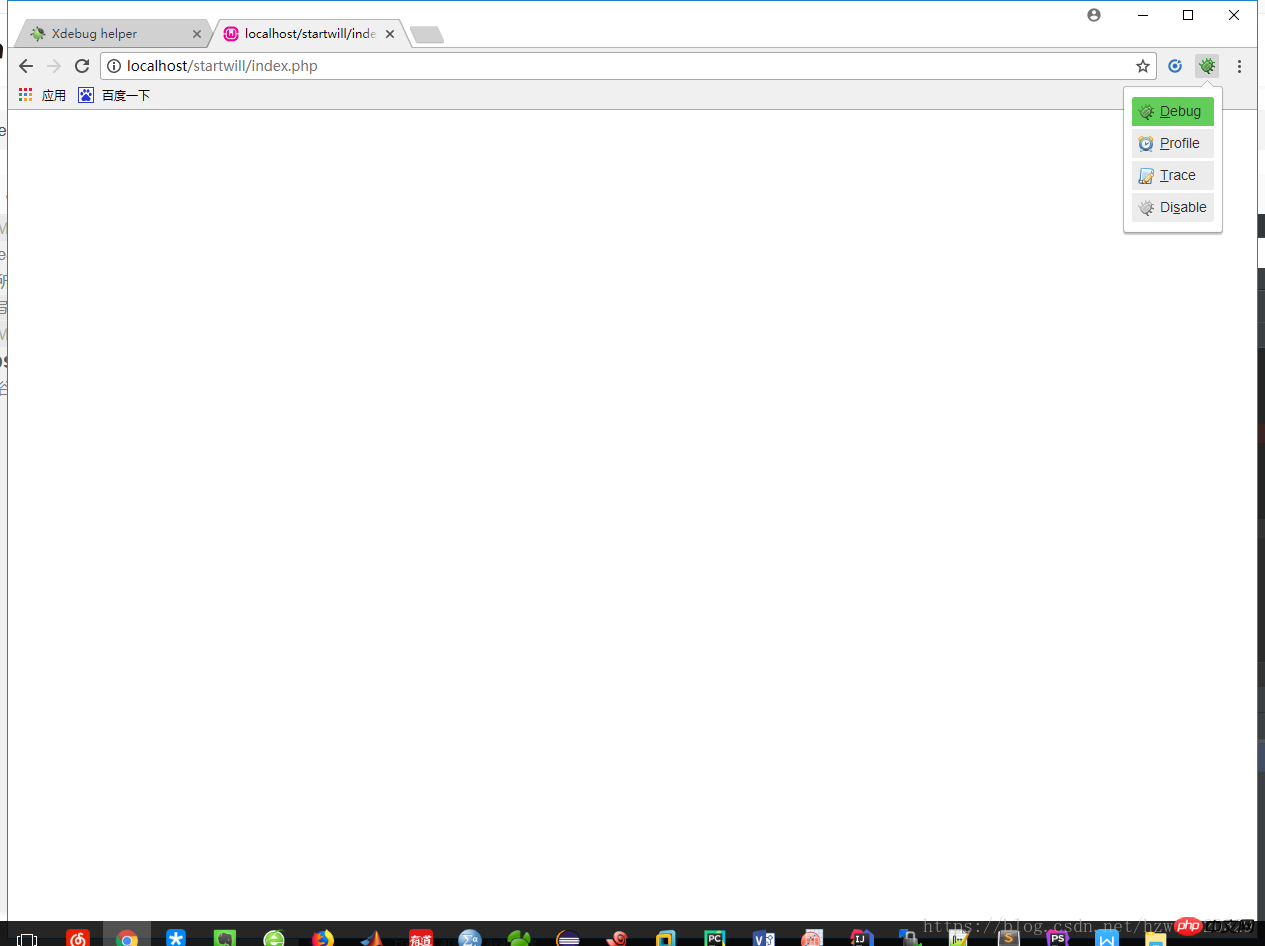
(1):在Google瀏覽器中輸入:http://localhost/startwill/index.php,當然這個位址你自己隨便變
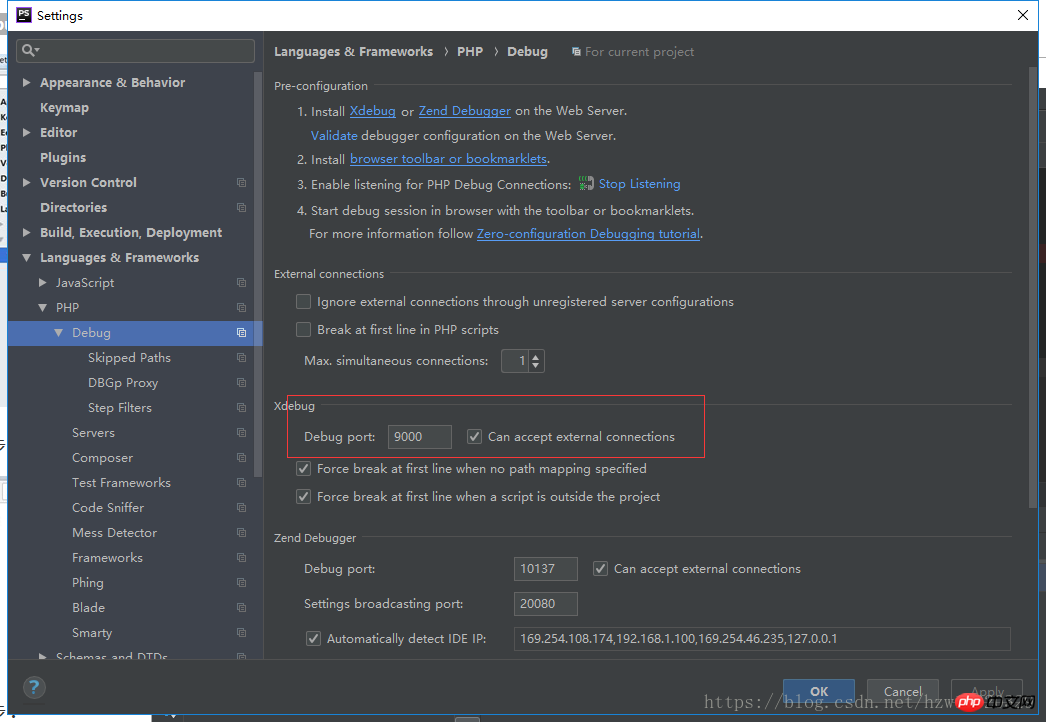
# (3):File->Settings->Languages&Frame Works->Php-Debug 找到右邊視窗對應的debug設置,把連接埠改成9000,設定內容如下圖:#phpstorm進行調試
(2):點選Google瀏覽器中的xdebug插件,選擇Debug選項
- #
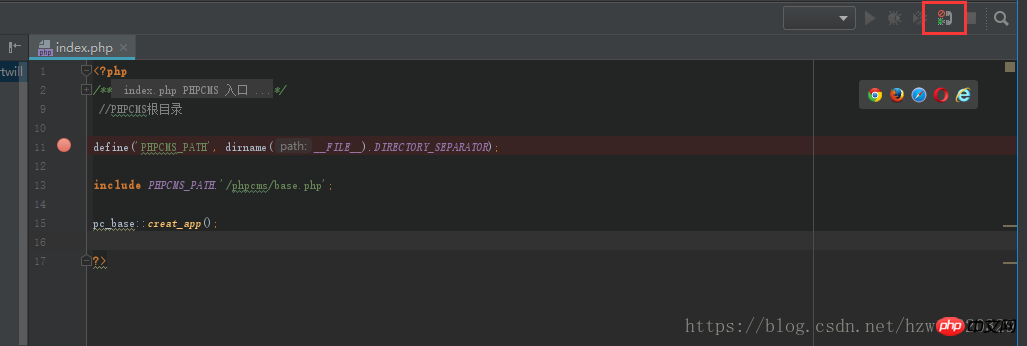
(3):在phpstorm中開啟一個我們自己的php文件,在這裡我的是index.php文件,設定一個斷點,點選右上角的偵錯按鈕:
# (4):在瀏覽器中按下回車鍵之後,就會執行到我們設定的斷點處啦
以上是wampserver+phpstorm+xdebug環境配置調試php程式碼的詳細內容。更多資訊請關注PHP中文網其他相關文章!
陳述:
本文內容由網友自願投稿,版權歸原作者所有。本站不承擔相應的法律責任。如發現涉嫌抄襲或侵權的內容,請聯絡admin@php.cn


 xdebug安裝
 #phpstorm進行調試