js如何取得本機圖片顯示到瀏覽器並上傳至伺服器
- 零到壹度原創
- 2018-04-21 14:53:1711176瀏覽
這篇文章介紹的內容是關於瀏覽器顯示本地圖片的預覽圖,調用後端介面將圖片上傳至伺服器,有著一定的參考價值,現在分享給大家,有需要的朋友可以參考一下
一、jsp頁面
<%@ page language="java" contentType="text/html; charset=UTF-8"
pageEncoding="UTF-8"%><%@ taglib prefix="c" uri="http://java.sun.com/jsp/jstl/core"%><!DOCTYPE html PUBLIC "-//W3C//DTD HTML 4.01 Transitional//EN" "http://www.w3.org/TR/html4/loose.dtd"><html>
<head>
<title></title>
<meta http-equiv="Content-Type" content="text/html; charset=utf-8" />
<META HTTP-EQUIV="pragma" CONTENT="no-cache">
<META HTTP-EQUIV="Cache-Control" CONTENT="no-cache, must-revalidate">
<META HTTP-EQUIV="expires" CONTENT="0">
<!-- 引入js -->
<script type="text/javascript" src="<%=request.getContextPath()%>/js/jquery.js"></script>
<script type="text/javascript" src="<%=request.getContextPath()%>/js/jquery.min.js"></script>
<body>
<p id="enteringInfor">
<form id="uploadForm" >
<p class="formItem" style="float:left">
<p class="itemBlock">
<p style="display:inline-block;float:left" class="selectContainer">
<span class="txtBox">姓名</span>
<input type="text" class="select" name="realName" id="realName" placeholder="请输入姓名" style="width:200px;">
</p>
</p>
<p class="itemBlock">
<p style="display:inline-block;float:left" class="selectContainer">
<span class="txtBox">性别</span>
<select class="select" name="gender" id="gender" >
<option value="1">男</option>
<option value="2">女</option>
</select>
</p>
</p>
</p>
<p class="formItem" style="float:right;margin-top:50px;">
<p class="picture">
<p class="layui-upload">
<p class="layui-upload-list" id="localImag">
<img class="layui-upload-img lazy" src="/static/imghwm/default1.png" data-src="https://img.php.cn/upload/article/000/099/200/2713c4c20388c1d561df6c4e69371e9b-0.png" id="userPic" style="max-width:90%" alt="js如何取得本機圖片顯示到瀏覽器並上傳至伺服器" >
<p id="demoText"></p>
</p>
<p style="width:332px;position:absolute;bottom:0px">
<span >上传图片</span>
<input id="entrustPicUpload" type="file" name="entImg" onchange="getPhoto(this)" />
</p>
</p>
</p>
</p>
</form>
<p style="padding-left:24px;text-align:center;height:70px;line-height:70px;border:none;width:100%;overflow:hidden;zoom:1">
<button onclick="saveUser()">保存</button>
</p>
<input type="hidden" name="userId" id="userId"/>
</p><script>
var imgurl = "";
function getPhoto(node) {
var imgURL = "";
try{
var file = null;
if(node.files && node.files[0] ){
file = node.files[0];
}else if(node.files && node.files.item(0)) {
file = node.files.item(0);
}
//Firefox 因安全性问题已无法直接通过input[file].value 获取完整的文件路径
try{
imgURL = file.getAsDataURL();
}catch(e){
imgRUL = window.URL.createObjectURL(file);
}
}catch(e){
if (node.files && node.files[0]) {
var reader = new FileReader();
reader.onload = function (e) {
imgURL = e.target.result;
};
reader.readAsDataURL(node.files[0]);
}
}
creatImg(imgRUL);//显示图片
return imgURL;
}
function creatImg(imgRUL){
document.getElementById("userPic").src = imgRUL;
$('#userPic').viewer({
url: 'src',
});
}
//保存
function saveUser(){
//数据判断
var realName=$("#realName").val(); if(realName==null||realName==''){
layer.msg('用户名不能为空!',{icon : 7,time:1000}); return ;
} var imgSrc = $("#userPic").attr("src"); if(imgSrc == "" || imgSrc==null){
layer.msg('请上传图片!',{icon : 7,time:1000}); return ;
} var formData = new FormData($("#uploadForm")[0]);
$.ajax({
url : "../addUser",
type: 'POST',
data: formData,
async: false,
cache: false,
contentType: false,
processData: false,
success : function(data) {
var obj = JSON.parse(data);
layer.msg('保存成功!', {icon : 6,time : 2000});
},
error : function(data) {
layer.msg('保存失败!', {icon : 5,time : 2000});
}
});
} </script>
</body></html>二、controller介面
/**
     * 添加用户
     * @param session
     * @param request
     * @param response
     * @throws IOException
     */
    @RequestMapping(value = "/addUser", method = RequestMethod.POST)
    public void addUser(MultipartFile entImg,HttpSession session, HttpServletRequest request, HttpServletResponse response)
                throws IOException {
        String realName = request.getParameter("realName");//姓名
        String gender = request.getParameter("gender");// 性别

        //调用工具类上传图片
        String userPic = FileUtils.uploadUser(entImg, request);

        TestUser testUser = new TestUser();
        testUser.setRealName(realName);
        testUser.setGender(Integer.parseInt(gender));
        testUser.setUserPic(userPic);        // 添加人员信息及图片url到数据库
        int res= userService.insertUser(testUser);        if (res > 0) {
            writeJSON(response, res);
        } else {
            writeJSON(response,null);
        }

    }
三、工具類別
public class FileUtils {

    FILES_PATH("files_path"); // 此路径存放于jdbc.properties配置文件中,例如:files_path=D:/uploadImgs
    private static final String path = PropertiesUtil.get(FILES_PATH)+"/user";    /**
     * 上传图片URL
     * @param fileName
     * @param request
     * @return
     */
    public static String getPath(String fileName,HttpServletRequest request) {
        String ip=IpUtil.getIP();        int port=request.getLocalPort();
        StringBuilder sb=new StringBuilder();
        sb.append("http://");
        sb.append(ip);
        sb.append(":");
        sb.append(port);
        sb.append("/uploadImgs/user/");
        sb.append(fileName);        return sb.toString();
    }    /**
     * 以时间戳对上传文件进行重新命名
     * @param file
     * @return
     */
    public static String renameFile(MultipartFile file) {        if(file!=null) {
            Long date=new Date().getTime();
            String fileRealName=file.getOriginalFilename();
            String prefix=fileRealName.substring(fileRealName.lastIndexOf(".")+1);
            String fileName = date.toString()+"."+prefix;
            return fileName;
        }        return null;
    }    /**
     * 图片上传
     * @param file
     * @param fileName
     */
    public static String uploadUser(MultipartFile file, HttpServletRequest request) {        // 重命名
        String renameFile = FileUtils.renameFile(file);        // 图片名
        String picPath = FileUtils.getPath(renameFile, request);        // 上传
        File targetFile = new File(borpath, renameFile);        if (!targetFile.exists() && !targetFile.isDirectory()) {
            targetFile.mkdirs();
        }        try {
            file.transferTo(targetFile);
        } catch (Exception e) {
            e.printStackTrace();
        }        return picPath;

    }


}
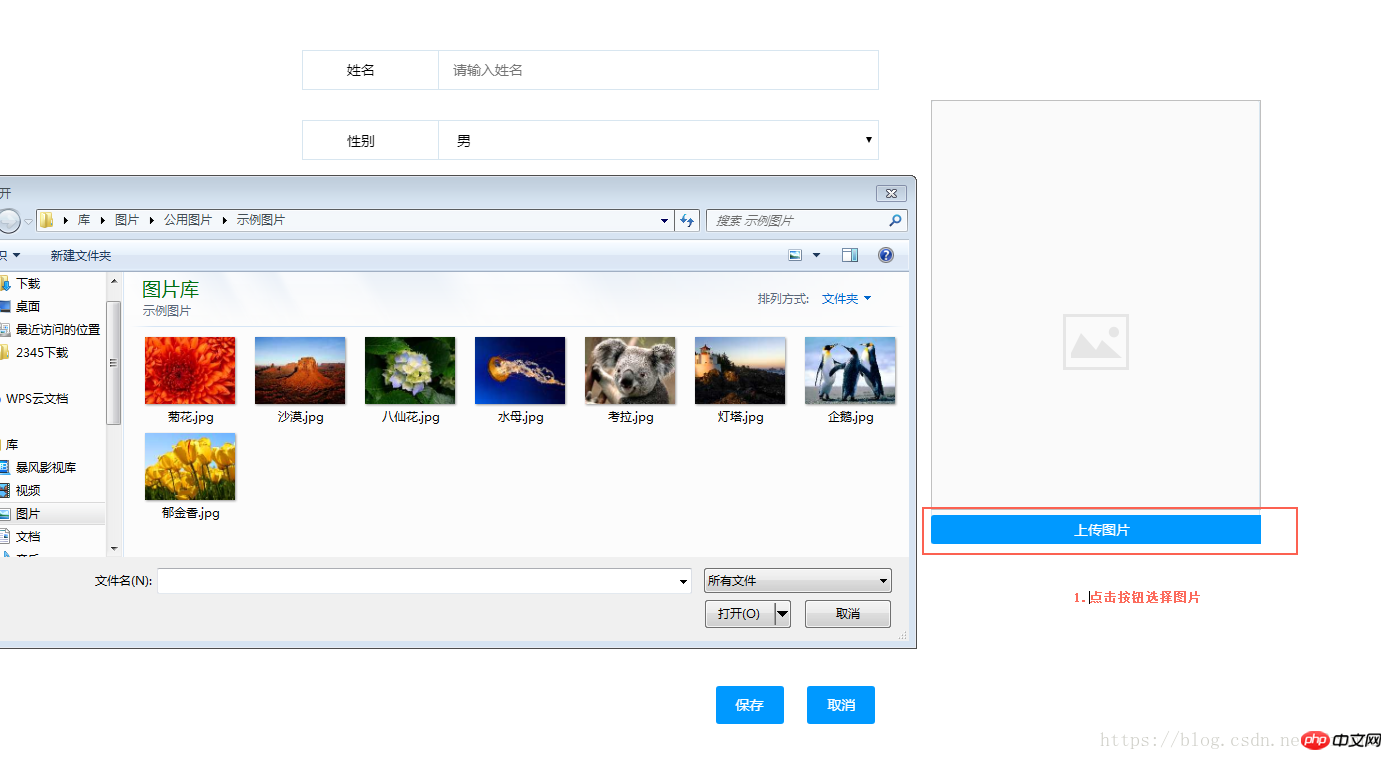
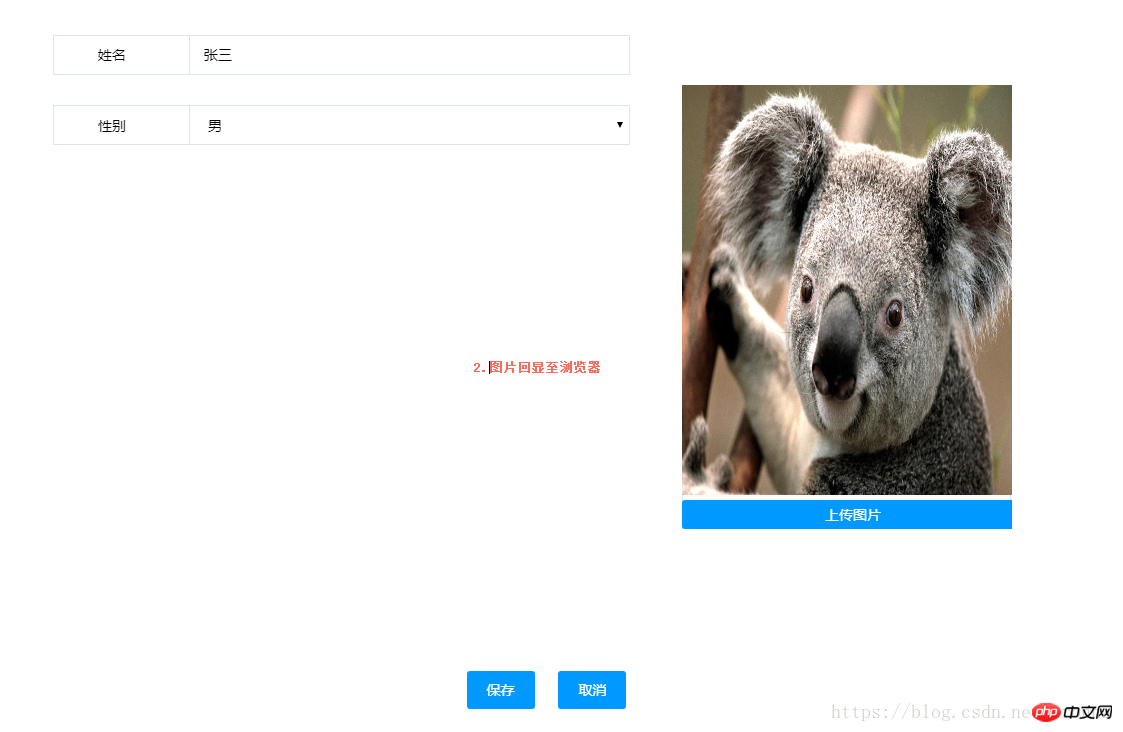
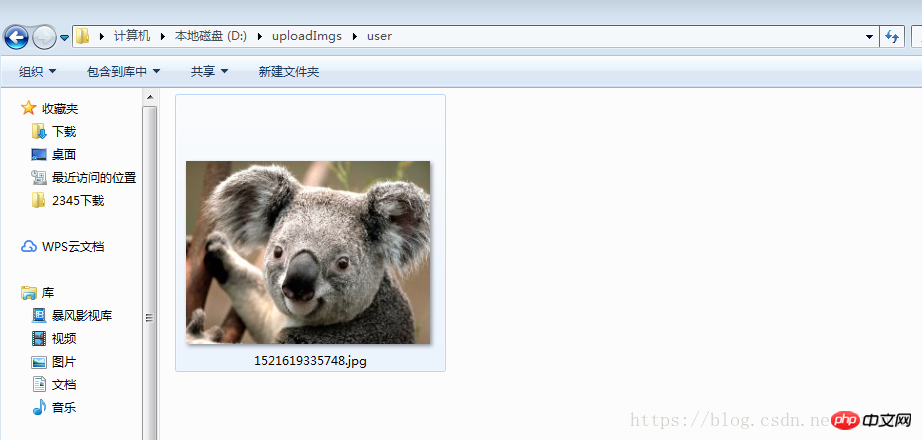
四、效果 

#3.圖片上傳成功後儲存至指定資料夾下
4.資料庫資料
相關推薦:
#以上是js如何取得本機圖片顯示到瀏覽器並上傳至伺服器的詳細內容。更多資訊請關注PHP中文網其他相關文章!
陳述:
本文內容由網友自願投稿,版權歸原作者所有。本站不承擔相應的法律責任。如發現涉嫌抄襲或侵權的內容,請聯絡admin@php.cn
上一篇:DWR如何實作Ajax下一篇:DWR如何實作Ajax

