Windows下Nginx的安裝及設定實例講解
- 小云云原創
- 2018-03-01 15:02:2110125瀏覽
本文主要跟大家分享Windows下Nginx的安裝及設定實例講解,希望能幫助大家。
一、Nginx簡介
1.Nginx是什麼
Nginx是一款輕量級Web伺服器、也是一款反向代理伺服器
2.Nginx能幹什麼
①可直接支援Rails和PHP的程式
②可作為HTTP反向代理伺服器
③作為負載平衡伺服器
④作為郵件代理伺服器
⑤幫助實作前端動靜分離
3.Nginx特點
#高穩定度
- ##高效能
資源佔用少
功能豐富
#模組化結構
支援熱部署
2.啟動指令
#安裝路徑下的nginx.exe
##3.停止指令
安裝路徑下的nginx.exe -s stop,
或是:nginx.exe -s quit4.重啟指令
安裝路徑下的nginx.exe - s reload
 ps -ef |grep nginx
6.平滑重啟
①sudo vim /etc/sysconfig/iptables
-m tcp –dport 80 -j ACCEPT
③保存退出④重啟防火牆sudo service iptables restart四、Nginx虛擬網域設定及測試驗證
設定步驟:
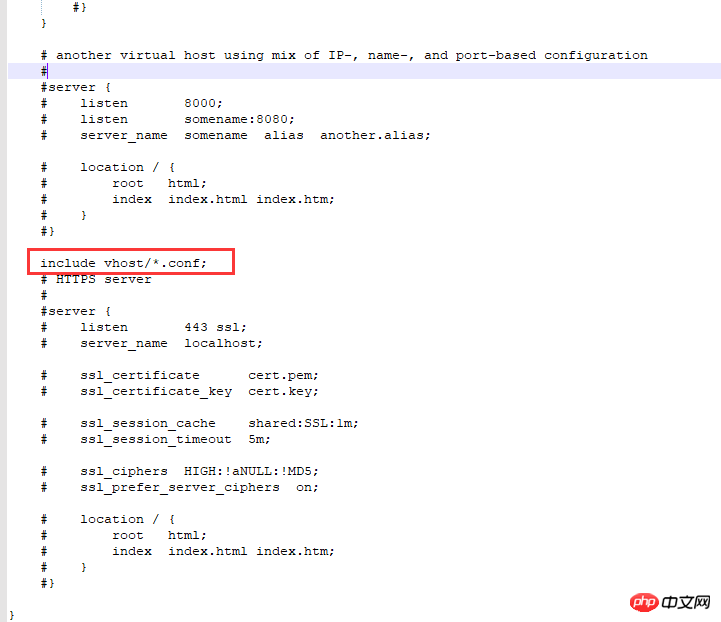
1.編輯sudo vim /usr/local/nginx/conf/nginx.conf
①增加include vhost/*.conf;②儲存退出
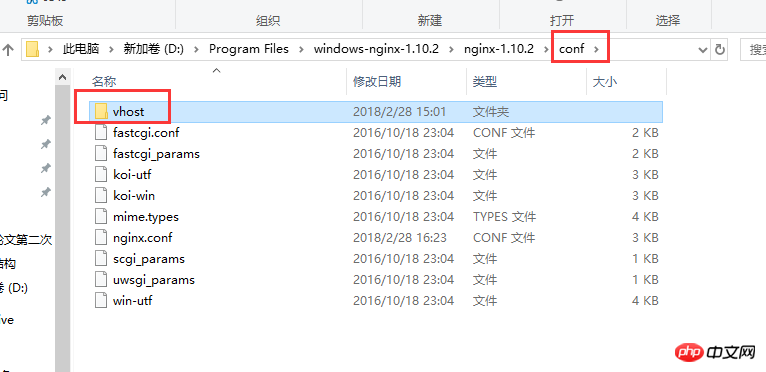
#2.在/usr/local/nginx/conf/目錄新建vhost資料夾:
即:/user/local/nginx/conf/vhost
3.建立網域轉送配置檔案
image.hcxjingdong.com.conf:转向目录的反向代理:
server {
    listen 80;
    autoindex off;
    server_name image.hcxjingdong.com;
    access_log c: /access.log combined; index index.html index.htm index.jsp index.php; #error_page 404 /
    404. html;
    if ($query_string~ * ".*[\;'\].*") {
        return 404;
    }
    location~/(mmall_fe|mmall_admin_fe)/dist / view /* {
        deny all;
    }
    location / {
        root C:\ftpfile\img;
        add_header Access-Control-Allow-Origin *;
        }
    }


tomcat.hcxjingdong.com.conf:转向端口的反向代理:
server {
    listen 80;
    autoindex on;
    server_name tomcat.hcxjingdong.com;
    access_log c: /access.log combined; index index.html index.htm index.jsp index.php; #error_page 404 /
    404. html;
    if ($query_string~ * ".*[\;'\].*") {
        return 404;
    }
    location / {
            proxy_pass http: //127.0.0.1:8080;
            add_header Access-Control-Allow-Origin *;
            }
    }
4.啟動(重新啟動)驗證
①啟動:
{nginx}/sbin/nginx -s reload
註:${ nginx}代表安裝在系統中的路徑,例如:/usr/local/nginx
 #5.存取驗證
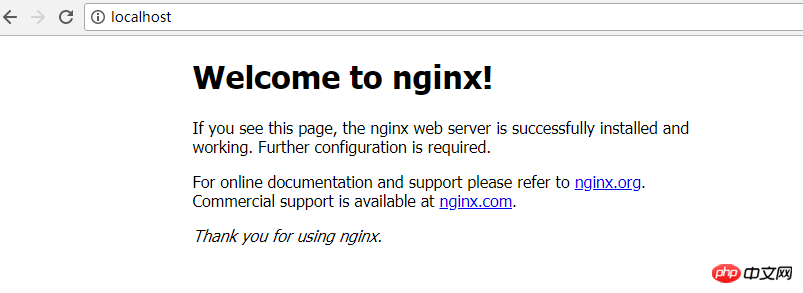
使用預設80連接埠存取驗證:http://localhost: 80或 http://127.0.0.1:80
6. 指向連接埠
http轉送
server{
    listen 80;
    autoindex off;
    server_name learning.hcxjingdong.com;
    access_log c:/access.log combined;
    index index.html index.htm index.jsp index.php;
    #error_page 404 /404.html;
    if ( $query_string ~* ".*[\;'\].*" ){
        return 404;
    }
    location / {
        proxy_pass http://127.0.0.1:81/learning;
        add_header Access-Control-Allow-Origin *;
    }
}
listen 80:監聽80 埠;
autoindex off:是否建立首頁的索引目錄;
當nginx接到image.hcxjingdong.com(二級網域)請求,就轉寄到:http://127.0.0.1:81/learning目錄下
7.指向目錄
線上圖片伺服器,為前端提供的前端部署伺服器都是透過指向目錄的反向代理
server{
    listen 80;
    autoindex off;
    server_name img.hcxjingdong.com;
    access_log c:/access.log combined;
    index index.html index.htm index.jsp index.php;
    #root /product/front/;
    #error_page 404 /404.html;
    if ( $query_string ~* ".*[\;'\].*" ){
        return 404;
    }
    location ~ /(hcxjingdong_fe|hcxmall_admin_fe)/dist/view/* {
        deny all;
    }
    location / {
        root \product\ftpfile\img;
        add_header Access-Control-Allow-Origin *;
    }
}
root /product/ftpfile/img: 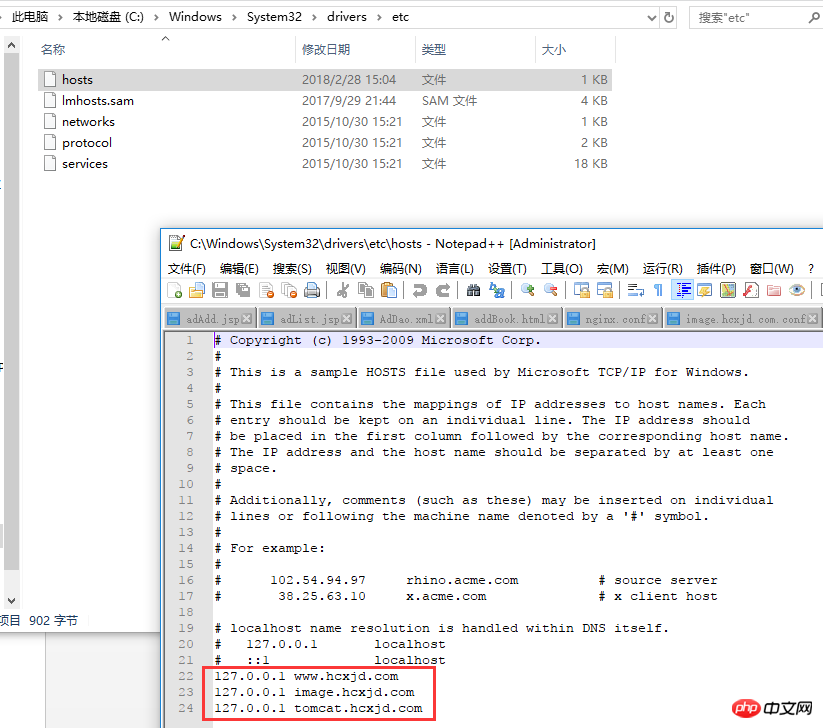 root直接指向硬碟系統目錄product資料夾下的ftpfile下的img資料夾;
 五、Nginx注意事項
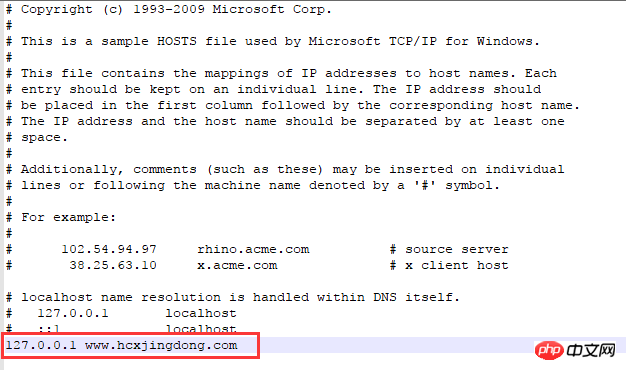
可以設定網域轉發,但請一定要設定host,並且使host生效之後才可以,設定完成之後要重新啟動瀏覽器
Windows下設定: ①進入c:\Windows\System32\drivers\etc
③新增好對應的網域名稱及ip
④儲存退出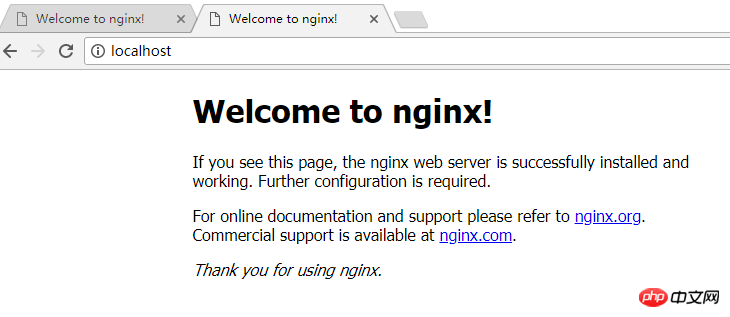 例如:
例如:
10.211.55.6 s.hcx.com
六、設定Windows下的Nginx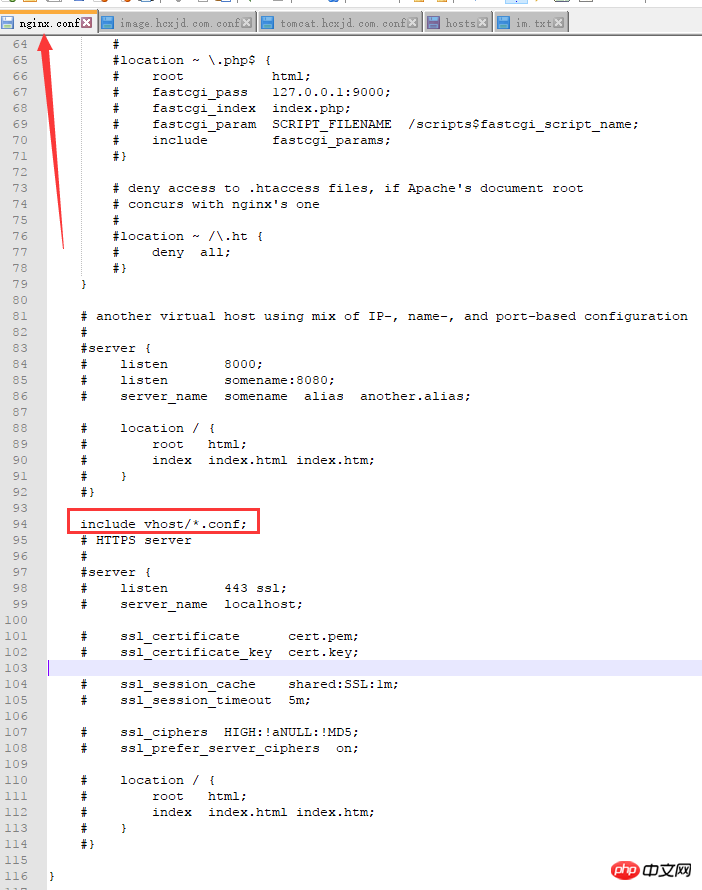
c:\Windows\System32\drivers\etc

server{
    listen 80;
    autoindex off;
    server_name image.hcxjingdong.com;
    access_log c:/access.log combined;
    index index.html index.htm index.jsp index.php;
    #error_page 404 /404.html;
    if ( $query_string ~* ".*[\;'\].*" ){
        return 404;
    }

    location ~ /(hcxmall_fe|hcxmall_admin_fe)/dist/view/* {
        deny all;
    }

    location / {
        root C:\ftpfile\img;
        add_header Access-Control-Allow-Origin *;
    }
}
到C:\ftpfile\img目录下存放图片以便访问
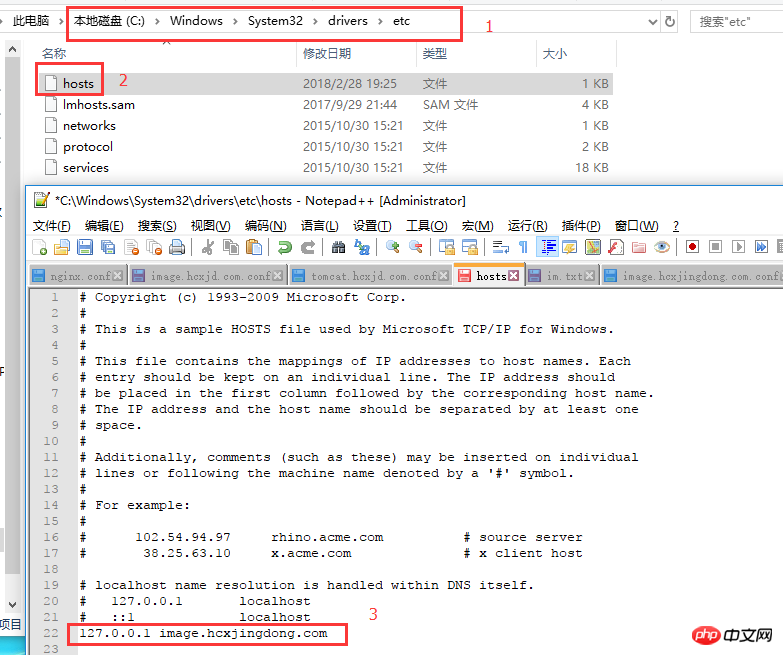
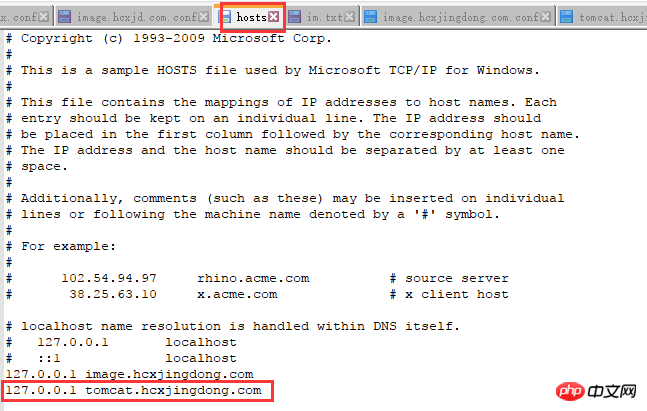
4.修改本机的host,让本机的nginx配合到image.hcxjingdong.com域名
去到C:\Windows\System32\drivers\etc目录下修改hosts文件:
5.重启nginx:
进入到nginx目录执行命令:
①nginx.exe -t:验证配置文件是否正确
②nginx.exe -s reload:重启nginx

6.访问域名(image.hcxjingdong.com)验证图片是否生效:
测试host是否生效:image.hcxjingdong.com
测试图片是否生效:http://image.hcxjingdong.com/hcx.jpg

配置ip端口的转发
1.在conf下的vhost下创建:tomcat.hcxjingdong.com.conf

使用tomcat域名进行ip端口转发,转发到tomcat服务上
tomcat.hcxjingdong.com.conf:
server{
    listen 80;
    autoindex off;
    server_name tomcat.hcxjingdong.com;
    access_log c:/access.log combined;
    index index.html index.htm index.jsp index.php;
    #error_page 404 /404.html;
    if ( $query_string ~* ".*[\;'\].*" ){
        return 404;
    }
    location / {
        proxy_pass http://127.0.0.1:8080;
        add_header Access-Control-Allow-Origin *;
    }
}
2.配置hosts:
3.启动tomcat
4.重启nginx:nginx.exe -s reload
5.访问http://tomcat.hcxjingdong.com
成功显示tomcat启动页,说明http的转发也成功了。
相关推荐:
以上是Windows下Nginx的安裝及設定實例講解的詳細內容。更多資訊請關注PHP中文網其他相關文章!

