


本文主要和大家分享了Angular結合zTree非同步載入節點資料的困難點以及方法,有這方面需求的朋友參考下吧,希望能幫助到大家。
1 前提準備
1.1 新建一個angular4專案

1.2 去zTree官網下載zTree
zTree官網:點選前往
三少使用的版本:點選前往

#2 程式設計步驟

##從列印出zTree物件可以看出,zTree物件利用init方法來實作zTree結構;init方法接收三個參數
參數1:一個ul標籤的DOM節點物件
參數2:基本配置物件
參數3:標題資訊陣列
2.1 在index.html中引入相關js、css

##
nbsp;html>


 <meta>
 <title>TestZtree</title>
 <base>

 <meta>
 <link>

 <link>
 <link>
 <script></script>
 <script></script>


 <app-root></app-root>
View Code2.2 在TS檔案中宣告jquery物件
declare var $ : any;2.3 在TS檔案中編寫程式碼

import { Component, OnInit } from '@angular/core';
declare var $ : any;
@Component({
 selector: 'app-root',
 templateUrl: './app.component.html',
 styleUrls: ['./app.component.scss']
})
export class AppComponent implements OnInit {

 // setting = {
 // view: {
 // showLine: true,
 // showIcon: true,
 // fontCss: this.getFont
 // },
 // data: {
 // simpleData: {
 // enable: true,
 // idKey: 'id',
 // pIdKey: 'pId'
 // }
 // },
 // callback: {
 // onClick: this.onCzTreeOnClick
 // }
 // };
 // zNodes = [
 // {id: 1, pId: 0, name: '1 一级标题', open: true, iconOpen:"assets/zTree/css/zTreeStyle/img/diy/1_open.png", iconClose:"assets/zTree/css/zTreeStyle/img/diy/1_close.png"},
 // {id: 11, pId: 1, name: '1.1 二级标题', open: true, font:{'background-color':'skyblue', 'color':'white'}},
 // {id: 111, pId: 11, name: '1.1.1 三级标题 -> 博客园', url: 'http://www.cnblogs.com/NeverCtrl-C/'},
 // {id: 112, pId: 11, name: '1.1.2 三级标题 -> 单击', click: "alert('你单击了')"},
 // {id: 12, pId: 1, name: '1.2 二级标题'},
 // {id: 2, pId: 0, name: '2 一级标题'}
 // ]
 // getFont(treeId, node) {
 // return node.font ? node.font : {};
 // }
 // onCzTreeOnClick(event, treeId, treeNode, clickFlag) {
 // alert(treeNode.name);
 // }
 setting = {
 data: {
 simpleData: {
 enable: true
 }
 }
 };
 zNodes = [
 {id: 1, pId: 0, name: '1 一级标题'},
 {id: 11, pId: 1, name: '1.1 二级标题'},
 {id: 111, pId: 11, name: '1.1.1 三级标题'},
 {id: 112, pId: 11, name: '1.1.2 三级标题'},
 {id: 12, pId: 1, name: '1.2 二级标题'},
 {id: 2, pId: 0, name: '2 一级标题'}
 ];
 constructor() { }
 ngOnInit() {
 console.log($);
 console.log($.fn.zTree);
 $.fn.zTree.init($("#ztree"),this.setting,this.zNodes);
 }
}
View Code2.4 在元件HTML中編寫程式碼

 ##3.1.2 程式設計步驟
在基本設定物件中指定showLine屬性的值為false即可
 setting = {
 data: {
 simpleData: {
 enable: true
 }
 },
 view: {
 showLine: false
 }
 };
3.2 不顯示節點圖示
3.2.1 官方文件
去掉節點前面的圖示
 3.2.2 程式設計步驟
將基本設定物件的showIcon屬性設為false即可

setting = {
 data: {
 simpleData: {
 enable: true
 }
 },
 view: {
 showLine: false,
 showIcon: false
 }
 };
View Code
3.3 自訂節點圖示
3.3.1 官方文件
更改節點的圖示
 #3.3.2 程式設計步驟
為treeNode節點資料設定icon/iconOpen /iconClose屬性即可
 3.4 自訂字體
3.4.1 官方文件
更改節點字體的樣式
 #3.4.2 程式設計步驟
為treeNode節點資料設定font屬性即可,font屬性的值是一個對象,該物件的內容和style的資料一樣
 3.4.3 效果展示
 #3.5 超連結
3.5.1 官方文件
點擊節點標題就會自動跳到對應的url
注意01:click屬性只能進行最簡單的click 事件操作。相當於 的內容。 如果操作較複雜,請使用 onClick 事件回呼函數。
 3.5.2 程式設計步驟
為treeNode節點資料設定url、click屬性即可
技巧01:設定click屬性時,屬性值必須是一些簡單的onClick事件
技巧02:設定target屬性時,屬性值有_blank 和_self
_blank -> 用一個新視窗開啟
_self -> 在原來的視窗開啟

 zNodes = [
 {id: 1, pId: 0, name: '1 一级标题', open: true, iconOpen:"assets/zTree/css/zTreeStyle/img/diy/1_open.png", iconClose:"assets/zTree/css/zTreeStyle/img/diy/1_close.png"},
 {id: 11, pId: 1, name: '1.1 二级标题', open: true, font:{'background-color':'skyblue', 'color':'white'}},
 {id: 111, pId: 11, name: '1.1.1 三级标题 -> 博客园1', url: 'http://www.cnblogs.com/NeverCtrl-C/', target: '_blank'},
 {id: 113, pId: 11, name: '1.1.1 三级标题 -> 博客园2', url: 'http://www.cnblogs.com/NeverCtrl-C/', target: '_self'},
 {id: 112, pId: 11, name: '1.1.2 三级标题 -> 单击', click: "alert('你单击了')"},
 {id: 12, pId: 1, name: '1.2 二级标题'},
 {id: 2, pId: 0, name: '2 一级标题'}
 ]
View Code
3.6 點選控制
3.6.1 官方文件
點擊節點標題時觸發對應的方法
技巧01:在angular中可以利用這個用法來實現路由跳轉

3.6.2 编程步骤
设置基本配置对象的onClick属性
技巧01:onClick属性值是一个方法的引用,我们需要自己编写这个方法

 setting = {
 view: {
 showLine: true,
 showIcon: true,
 fontCss: this.getFont
 },
 data: {
 simpleData: {
 enable: true,
 idKey: 'id',
 pIdKey: 'pId'
 }
 },
 callback: {
 onClick: this.onCzTreeOnClick
 }
 };
View Code
编写onClick触发方法

 onCzTreeOnClick(event, treeId, treeNode, clickFlag) {
 alert(treeNode.name);
 }
View Code
3.6.3 代码汇总
import { Component, OnInit } from '@angular/core';
declare var $ : any;
@Component({
selector: 'app-root',
templateUrl: './app.component.html',
styleUrls: ['./app.component.scss']
})
export class AppComponent implements OnInit {
setting = {
view: {
showLine: true,
showIcon: true,
fontCss: this.getFont
},
data: {
simpleData: {
enable: true,
idKey: 'id',
pIdKey: 'pId'
}
},
callback: {
onClick: this.onCzTreeOnClick
},
// async: {
// enable: true,
// url:"http://localhost:3000/data",
// type: "get",
// // autoParam:["id", "name=n", "level=lv"],
// // otherParam:{"otherParam":"zTreeAsyncTest"},
// dataFilter: this.filter
// }
};
zNodes = [
{id: 1, pId: 0, name: '1 一级标题', open: true, iconOpen:"assets/zTree/css/zTreeStyle/img/diy/1_open.png", iconClose:"assets/zTree/css/zTreeStyle/img/diy/1_close.png"},
{id: 11, pId: 1, name: '1.1 二级标题', open: true, font:{'background-color':'skyblue', 'color':'white'}},
{id: 111, pId: 11, name: '1.1.1 三级标题 -> 博客园1', url: 'http://www.cnblogs.com/NeverCtrl-C/', target: '_blank'},
{id: 113, pId: 11, name: '1.1.1 三级标题 -> 博客园2', url: 'http://www.cnblogs.com/NeverCtrl-C/', target: '_self'},
{id: 112, pId: 11, name: '1.1.2 三级标题 -> 单击', click: "alert('你单击了')"},
{id: 12, pId: 1, name: '1.2 二级标题'},
{id: 2, pId: 0, name: '2 一级标题'}
]
getFont(treeId, node) {
return node.font ? node.font : {};
}
// filter(treeId, parentNode,responseData) {
// console.log(responseData);
// if (responseData) {
// for(var i =0; i View Code
3.7 异步加载节点数据
3.7.1 官方文档
节点的数据是从后台进行获取的

3.7.2 编程步骤
技巧01:异步加载节点数据时init方法不用传递第三个参数
> 准备一个后台用于返回JSON格式的数据
技巧01:返回的JSON数据是一个列表,格式为
[
{
"id": 1,
"pId": 0,
"name": "1 one"
},
{
"id": 2,
"pId": 0,
"name": "2 two"
}
]技巧02:三少偷懒,是利用json-server模拟的后台数据,哈哈;json-server
> 设置基本配置对象的async属性
setting = {
view: {
showLine: true,
showIcon: true,
fontCss: this.getFont
},
data: {
simpleData: {
enable: true,
idKey: 'id',
pIdKey: 'pId'
}
},
callback: {
onClick: this.onCzTreeOnClick
},
async: {
enable: true,
url:"http://localhost:3000/data",
type: "get",
// autoParam:["id", "name=n", "level=lv"],
// otherParam:{"otherParam":"zTreeAsyncTest"},
dataFilter: this.filter
}
};View Code
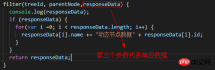
> 编写响应数据处理方法
filter(treeId, parentNode,responseData) {
console.log(responseData);
if (responseData) {
for(var i =0; i <p>View Code</p><p>3.7.3 代码总汇</p><p class="cnblogs_code"><br></p><p class="cnblogs_code_hide"><br></p><pre class="brush:php;toolbar:false">{
"data":
[
{
"id": 1,
"pId": 0,
"name": "1 one"
},
{
"id": 11,
"pId": 1,
"name": "1.1 oneToOne"
},
{
"id": 12,
"pId": 1,
"name": "1.2 oneToTwo"
},
{
"id": 2,
"pId": 0,
"name": "2 two"
}
]
}模拟后台响应数据


HTML
import { Component, OnInit } from '@angular/core';
declare var $ : any;
@Component({
selector: 'app-root',
templateUrl: './app.component.html',
styleUrls: ['./app.component.scss']
})
export class AppComponent implements OnInit {
setting = {
view: {
showLine: true,
showIcon: true,
fontCss: this.getFont
},
data: {
simpleData: {
enable: true,
idKey: 'id',
pIdKey: 'pId'
}
},
callback: {
onClick: this.onCzTreeOnClick
},
async: {
enable: true,
url:"http://localhost:3000/data",
type: "get",
// autoParam:["id", "name=n", "level=lv"],
// otherParam:{"otherParam":"zTreeAsyncTest"},
dataFilter: this.filter
}
};
// zNodes = [
// {id: 1, pId: 0, name: '1 一级标题', open: true, iconOpen:"assets/zTree/css/zTreeStyle/img/diy/1_open.png", iconClose:"assets/zTree/css/zTreeStyle/img/diy/1_close.png"},
// {id: 11, pId: 1, name: '1.1 二级标题', open: true, font:{'background-color':'skyblue', 'color':'white'}},
// {id: 111, pId: 11, name: '1.1.1 三级标题 -> 博客园1', url: 'http://www.cnblogs.com/NeverCtrl-C/', target: '_blank'},
// {id: 113, pId: 11, name: '1.1.1 三级标题 -> 博客园2', url: 'http://www.cnblogs.com/NeverCtrl-C/', target: '_self'},
// {id: 112, pId: 11, name: '1.1.2 三级标题 -> 单击', click: "alert('你单击了')"},
// {id: 12, pId: 1, name: '1.2 二级标题'},
// {id: 2, pId: 0, name: '2 一级标题'}
// ]
getFont(treeId, node) {
return node.font ? node.font : {};
}
filter(treeId, parentNode,responseData) {
console.log(responseData);
if (responseData) {
for(var i =0; i TS
3.7.4 效果展示
相关推荐:

以上是Angular結合zTree非同步載入節點資料實例分享的詳細內容。更多資訊請關注PHP中文網其他相關文章!

 聊聊Angular中的元数据(Metadata)和装饰器(Decorator)Feb 28, 2022 am 11:10 AM
本篇文章继续Angular的学习,带大家了解一下Angular中的元数据和装饰器,简单了解一下他们的用法,希望对大家有所帮助!
 angular学习之详解状态管理器NgRxMay 25, 2022 am 11:01 AM
本篇文章带大家深入了解一下angular的状态管理器NgRx,介绍一下NgRx的使用方法,希望对大家有所帮助!
 浅析angular中怎么使用monaco-editorOct 17, 2022 pm 08:04 PM
angular中怎么使用monaco-editor?下面本篇文章记录下最近的一次业务中用到的 monaco-editor 在 angular 中的使用,希望对大家有所帮助!
 项目过大怎么办?如何合理拆分Angular项目?Jul 26, 2022 pm 07:18 PM
Angular项目过大,怎么合理拆分它?下面本篇文章给大家介绍一下合理拆分Angular项目的方法,希望对大家有所帮助!
 Angular + NG-ZORRO快速开发一个后台系统Apr 21, 2022 am 10:45 AM
本篇文章给大家分享一个Angular实战,了解一下angualr 结合 ng-zorro 如何快速开发一个后台系统,希望对大家有所帮助!
 聊聊自定义angular-datetime-picker格式的方法Sep 08, 2022 pm 08:29 PM
怎么自定义angular-datetime-picker格式?下面本篇文章聊聊自定义格式的方法,希望对大家有所帮助!
 聊聊Angular Route中怎么提前获取数据Jul 13, 2022 pm 08:00 PM
Angular Route中怎么提前获取数据?下面本篇文章给大家介绍一下从 Angular Route 中提前获取数据的方法,希望对大家有所帮助!
 浅析Angular中的独立组件,看看怎么使用Jun 23, 2022 pm 03:49 PM
本篇文章带大家了解一下Angular中的独立组件,看看怎么在Angular中创建一个独立组件,怎么在独立组件中导入已有的模块,希望对大家有所帮助!


熱AI工具

Undresser.AI Undress
人工智慧驅動的應用程序,用於創建逼真的裸體照片

AI Clothes Remover
用於從照片中去除衣服的線上人工智慧工具。

Undress AI Tool
免費脫衣圖片

Clothoff.io
AI脫衣器

AI Hentai Generator
免費產生 AI 無盡。

熱門文章
熱工具

禪工作室 13.0.1
強大的PHP整合開發環境

SublimeText3漢化版
中文版,非常好用

SublimeText3 Linux新版
SublimeText3 Linux最新版

記事本++7.3.1
好用且免費的程式碼編輯器

Dreamweaver CS6
視覺化網頁開發工具

