
如何寫vue插件實例分享

- 小云云原創
- 2018-01-05 13:20:512374瀏覽
在學習之前,先問問自己,為什麼要寫vue的外掛。本文透過一個簡單的實例來教大家如何寫一個vue插件,以及需要注意的地方,如果有需要的讀者跟著學習一下吧。
在一個專案中,尤其是大型項目,有很多部分需要重複使用,例如載入的loading動畫,彈出方塊。如果一個一個的引用也稍顯麻煩,而且在一個vue檔案中引用的元件多了,會顯得程式碼臃腫,所以才有了封裝vue外掛程式的需求。
說完需求,就來看看具體實現。目前我嘗試了兩種不一樣的插件編寫的方法,逐一介紹。
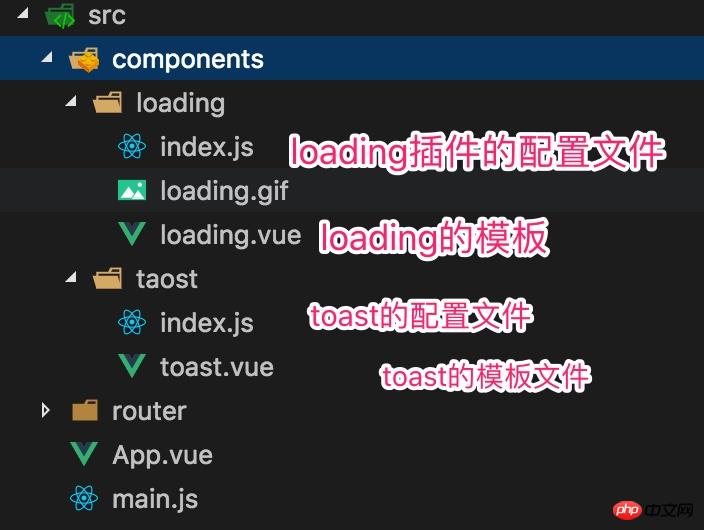
這是我的專案目錄,大致的結構解釋這樣,盡量簡單,容易理解。
一個是loading插件,一個是toast插件,不同的地方在於:loading插件是作為元件引入使用,而toast插件是直接添加在掛載點裡,透過方法改變狀態呼叫的。
目前使用起來是醬紫的:
toast外掛
toast檔案下有兩個文件,後綴為vue的檔案就是這個插件的骨架,js檔案一個是將這個骨架放入Vue全域中,並寫明操作邏輯。
可以看一下toast.vue的內容:
<template>
 <transition name="fade">
  <p v-show="show">
   {{message}}
  </p>

 </transition>
</template>

<script>
export default {
 data() {
 return {
  show: false,
  message: ""
 };
 }
};
</script>

<style lang="scss" scoped>
.toast {
 position: fixed;
 top: 40%;
 left: 50%;
 margin-left: -15vw;
 padding: 2vw;
 width: 30vw;
 font-size: 4vw;
 color: #fff;
 text-align: center;
 background-color: rgba(0, 0, 0, 0.8);
 border-radius: 5vw;
 z-index: 999;
}

.fade-enter-active,
.fade-leave-active {
 transition: 0.3s ease-out;
}
.fade-enter {
 opacity: 0;
 transform: scale(1.2);
}
.fade-leave-to {
 opacity: 0;
 transform: scale(0.8);
}
</style>
這裡面主要的內容只有兩個,決定是否顯示的show和顯示什麼內容的message。
粗看這裡,有沒有發現什麼問題?
這個檔案中並沒有props屬性,也就是無論是show也好,message也好,就沒有辦法透過父子元件通訊的方式進行修改,那他們是怎麼正確處理的呢。別急,來看他的設定檔。
index.js:
import ToastComponent from './toast.vue'

const Toast = {};

// 注册Toast
Toast.install = function (Vue) {
 // 生成一个Vue的子类
 // 同时这个子类也就是组件
 const ToastConstructor = Vue.extend(ToastComponent)
 // 生成一个该子类的实例
 const instance = new ToastConstructor();

 // 将这个实例挂载在我创建的p上
 // 并将此p加入全局挂载点内部
 instance.$mount(document.createElement('p'))
 document.body.appendChild(instance.$el)

 // 通过Vue的原型注册一个方法
 // 让所有实例共享这个方法
 Vue.prototype.$toast = (msg, duration = 2000) => {
  instance.message = msg;
  instance.show = true;

  setTimeout(() => {

   instance.show = false;
  }, duration);
 }
}

export default Toast
這裡的邏輯大致可以分成這麼幾步:
創建一個空對象,這個對象就是日後要使用到的插件的名字。此外,這個物件中要有一個install的函數。使用vue的extend方法建立一個插件的建構子(可以看做創建了一個vue的子類別),實例化該子類,之後的所有操作都可以透過這個子類別完成。之後再Vue的原型上新增一個共用的方法。
這裡需要著重提的是Vue.extend()。舉個例子,我們日常使用vue編寫元件是這個樣子的:
Vue.component('MyComponent',{
template:'<p>这是组件</p>'
})
這是全域元件的註冊方法,但其實這是一個語法糖,真正的運行過程是這樣的:
let component = Vue.extend({
template:'<p>这是组件</p>'
})
Vue.component('MyComponent',component)
Vue.extend會傳回一個對象,按照大多數資料上提及的,也可以說是回傳一個Vue的子類,既然是子類,就沒有辦法直接透過他使用Vue原型上的方法,所以需要new一個實例出來使用。
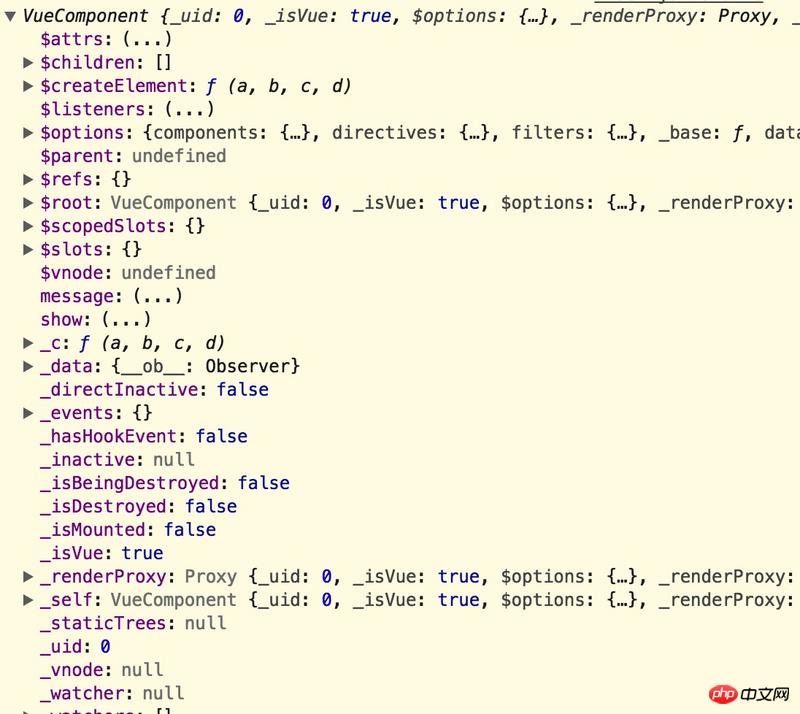
在程式碼裡console.log(instance)
得出的是這樣的結果:
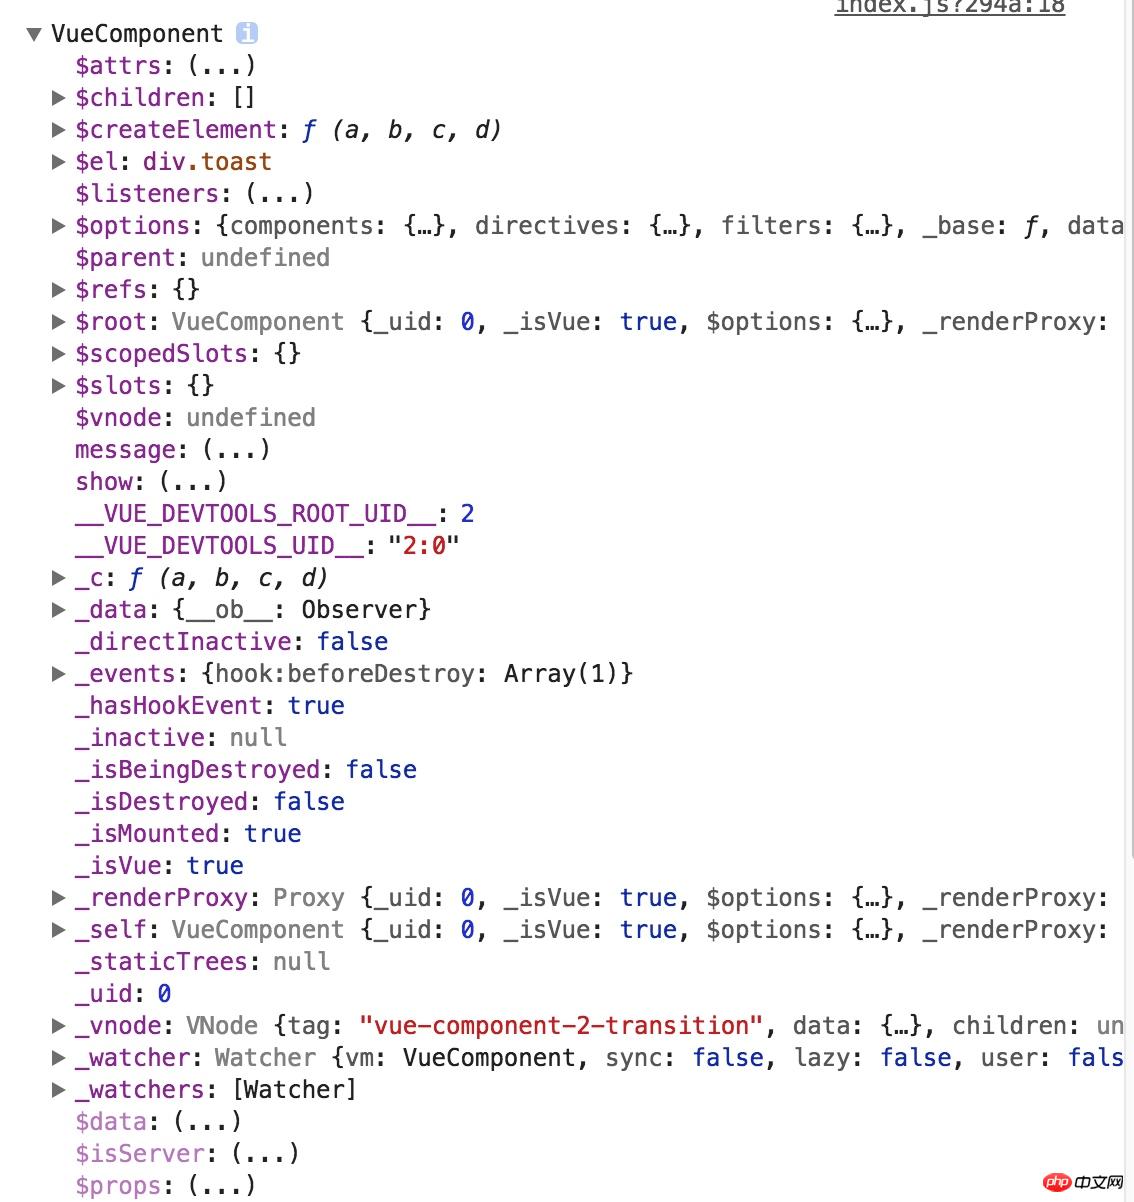
可以看到$el:p.toast
也就是toast元件模板的根節點。
懷疑的是,我不知道為什麼要建立一個空的p節點,並且把這個實例掛載在上面。我嘗試註釋這段程式碼,但是運行會報錯。
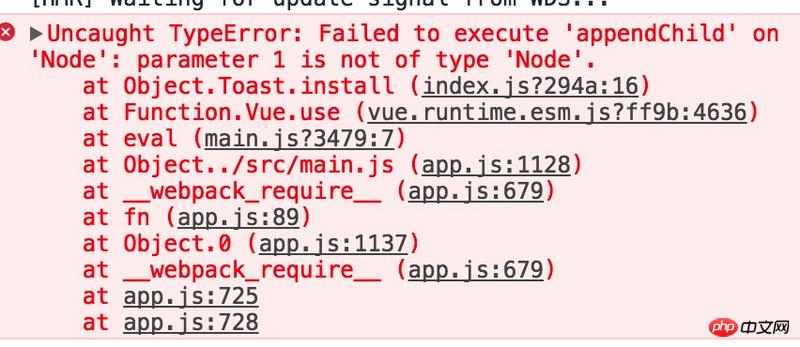
找出這個錯誤的原因,看起來像是因為
document.body.appendChild(instance.$el)
這裡面的instance.$el的問題,那好,我們console下這個看看。 WTF! ! ! !結果居然是undefined。
那接著
console.log(instance)
#和上一張圖片比對一下,發現了什麼?對,$el消失了,換句話說在我註釋了
instance.$mount(document.createElement('p'))
這句話之後,掛載點也不存在了。接著我試著改了一下這句話:
instance.$mount(instance.$el)
$el又神奇的回來了………………
暫時沒有發現這個改動有什麼問題,可以跟上面一樣運作。但無論如何,這也就是說instance實例必須掛載在一個節點上才能進行後續操作。
之後的程式碼就簡單了,無非是在Vue的原型上加入一個改變插件狀態的方法。之後導出這個物件。
接下來就是怎麼使用的問題了。來看看main.js是怎麼寫的:
import Vue from 'vue'
import App from './App'
// import router from './router'
import Toast from './components/taost'
Vue.use(Toast)

Vue.config.productionTip = false

/* eslint-disable no-new */
new Vue({

 // router,
 render: h => h(App)
}).$mount('#app')
這樣就可以在其他vue檔案中直接使用了,像這樣:
// app.vue
<template>
<p id="app">
<loading duration='2s' :isshow='show'></loading>
<!-- <button @click="show = !show">显示/隐藏loading</button> -->
<button @click="toast">显示taost弹出框</button>
</p>
</template>
<script>
export default {
name: "app",
data() {
return {
show: false
};
},
methods: {
toast() {
this.$toast("你好");
}
}
};
</script>
<style>
#app {
font-family: "Avenir", Helvetica, Arial, sans-serif;
-webkit-font-smoothing: antialiased;
-moz-osx-font-smoothing: grayscale;
text-align: center;
color: #2c3e50;
margin-top: 60px;
}
</style>透過在methods中增加一個方法控制寫在Vue原型上的$toast對toast元件進行操作。
这样toast组件的编写过程就结束了,可以看到一开始gif图里的效果。
loading插件
经过上一个插件的讲解,这一部分就不会那么细致了,毕竟大多数都没有什么不同,我只指出不一样的地方。
<template>
<p class='wrapper' v-if="isshow">
<p class='loading'>
<img src="./loading.gif">
</p>
</p>
</template>
<script>
export default {
props: {
duration: {
type: String,
default: "1s" //默认1s
},
isshow: {
type: Boolean,
default: false
}
},
data: function() {
return {};
}
};
</script>
<style lang="scss" scoped>
</style>这个就只是一个模板,传入两个父组件的数据控制显示效果。
那再来看一下该插件的配置文件:
import LoadingComponent from './loading.vue'

let Loading = {};

Loading.install = (Vue) => {
 Vue.component('loading', LoadingComponent)
}

export default Loading;
这个和taoat的插件相比,简单了很多,依然是一个空对象,里面有一个install方法,然后在全局注册了一个组件。
比较
那介绍了这两种不同的插件编写方法,貌似没有什么不一样啊,真的是这样么?
来看一下完整的main.js和app.vue这两个文件:
// main.js
import Vue from 'vue'
import App from './App'
// import router from './router'
import Toast from './components/taost'
import Loading from './components/loading'
Vue.use(Toast)
Vue.use(Loading)
Vue.config.productionTip = false
/* eslint-disable no-new */
new Vue({
// router,
render: h => h(App)
}).$mount('#app')
// app.vue
<template>
<p id="app">
<loading duration='2s' :isshow='show'></loading>
<!-- <button @click="show = !show">显示/隐藏loading</button> -->
<button @click="toast">显示taost弹出框</button>
</p>
</template>
<script>
export default {
name: "app",
data() {
return {
show: false
};
},
methods: {
toast() {
this.$toast("你好");
}
}
};
</script>
<style>
#app {
font-family: "Avenir", Helvetica, Arial, sans-serif;
-webkit-font-smoothing: antialiased;
-moz-osx-font-smoothing: grayscale;
text-align: center;
color: #2c3e50;
margin-top: 60px;
}
</style>可以看出来,loading是显示的写在app.vue模板里的,而toast并没有作为一个组件写入,仅仅是通过一个方法控制显示。
来看一下html结构和vue工具给出的结构:
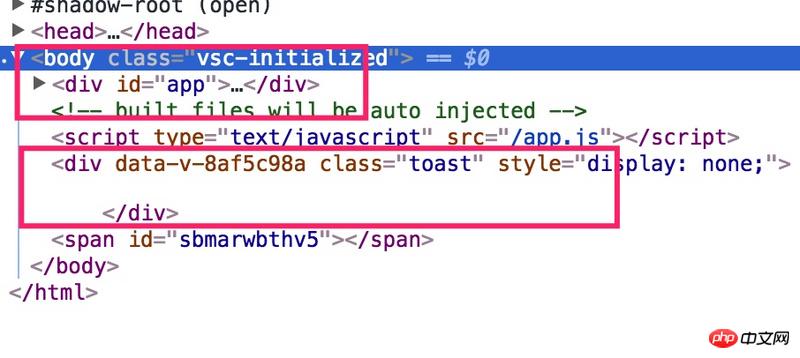
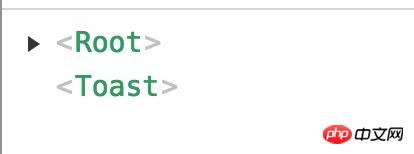
看出来了么,toast插件没有在挂载点里面,而是独立存在的,也就是说当执行
vue.use(toast)
之后,该插件就是生成好的了,之后的所有操作无非就是显示或者隐藏的问题了。
相关推荐:
以上是如何寫vue插件實例分享的詳細內容。更多資訊請關注PHP中文網其他相關文章!