
Easyui使用Dialog行內按鈕佈局

- 小云云原創
- 2017-12-31 15:58:461878瀏覽
本文主要為大家帶來一篇Easyui使用Dialog行內按鈕佈局的實例。小編覺得蠻不錯的,現在就分享給大家,也給大家做個參考。一起跟著小編過來看看吧,希望能幫助大家。
JSP頁面
<p class="easyui-layout" data-options="fit:true">
<p data-options="region:'north',split:false"
>
<p title="角色分配" >
<table cellpadding="12" cellspacing="0" >
<tr>
<td >角色名称:</td>
<td><input id="roleName" class="easyui-textbox"
></td>
<td >角色功能:</td>
<td>
<select id="roleFun" class="easyui-combobox" data-options="editable:false,multiple:true,panelHeight:'400px'" ></select>
<p id="roleFunPanel">
<ul id="roleFunTree" class="easyui-tree" data-options="animate: true,checkbox:true">
<li>线路列表1</li>
<li>线路列表2</li>
<li>线路列表3</li>
</ul>
</p>
</td>
<td >
<a href="javascript:void(0)" rel="external nofollow" rel="external nofollow" rel="external nofollow" class="easyui-linkbutton" data-options="iconCls:'icon-add',plain:true" onclick="newAppendRole()">添加</a>
</td>
</tr>
</table>
<table id="tblRoleDetail" ></table>
</p>
</p>
</p>
<p id="editRoleDialogFrame"></p>
JS部分程式碼
var grid = $("#tblRoleDetail").datagrid({
border : false,
striped : true,
rownumbers : true,
fitColumns : true,
singleSelect : true,
height: '90%',
width: '100%',
idField :'roleName',
plain : true,
fit : false, <span > </span>
selectOnCheck:false,
nowrap: true,
onClickRow : tblRoleDetailOnClickRow ,
columns:[[
{field:'roleName',title:'角色名',width: '19%',align:'center'},
{field:'funId',title:'权限名称',width: '70%',align:'left',
formatter: function(value,row,index){
return '<span title='+value+'>'+value+'</span>'
}
},
{field:'opt',title:'操作',width:'10%',align:'center',
formatter:function(value,rec)
{
var btn1 = '<a class="editcls" onclick="newRoleEdit(\''+rec.roleName+'\')" href="javascript:void(0)" rel="external nofollow" rel="external nofollow" rel="external nofollow" >编辑</a>';
var btn2 = '<a class="delecls" onclick="removeRole(\''+rec.roleName+'\')" href="javascript:void(0)" rel="external nofollow" rel="external nofollow" rel="external nofollow" >删除</a>';
return btn1+btn2;
}
}
]],
onLoadSuccess:function(data){
$('.editcls').linkbutton({text:'编辑',plain:true,iconCls:'icon-edit'});
$('.delecls').linkbutton({text:'删除',plain:true,iconCls:'icon-remove'});
$('#tblRoleDetail').datagrid('fixRowHeight'); //固定所有高度,避免行号和行数据错位
}
});
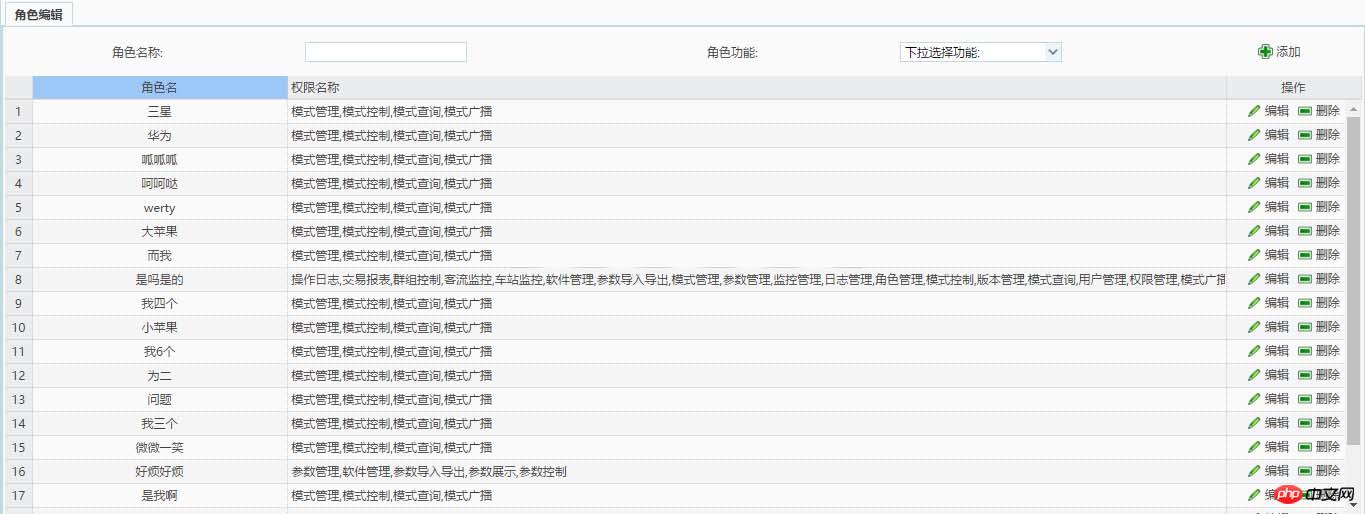
效果圖
相關推薦:
#詳情bootstrap3-dialog-master模態框用法
以上是Easyui使用Dialog行內按鈕佈局的詳細內容。更多資訊請關注PHP中文網其他相關文章!
陳述:
本文內容由網友自願投稿,版權歸原作者所有。本站不承擔相應的法律責任。如發現涉嫌抄襲或侵權的內容,請聯絡admin@php.cn