有關ionic2懶加載配置介紹
- 巴扎黑原創
- 2017-09-02 13:23:231466瀏覽
這篇文章主要介紹了ionic2懶加載配置詳解,小編覺得挺不錯的,現在分享給大家,也給大家做個參考。一起跟著小編過來看看吧
文章標題為part 1,並解釋目前可以如此配置,但後續使用上可能還有變動。
以ion-cli預設home元件為例。新增home.module.ts檔
import { NgModule } from '@angular/core';
import { IonicPageModule } from 'ionic-angular';
import { HomePage } from './home';
@NgModule({
 declarations: [HomePage],
 imports: [IonicPageModule.forChild(HomePage)],
 exports: [HomePage]
})
export class HomePageModule { }
修改home.ts,主要是加入IonicPage,其組態項目可參考官方文件。
import { Component } from '@angular/core';
import { IonicPage } from 'ionic-angular';
@IonicPage()
@Component(... )
export class HomePage { ... }
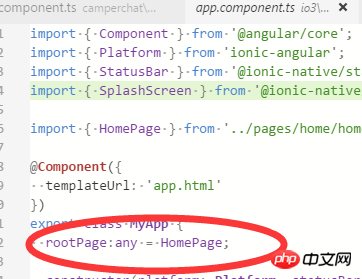
修改app.component.ts, HomePage 改為'HomePage' , 刪除app.module.ts及其他頁面用到的import { HomePage } from '.. /pages/home/home'; 因為不需要這個了,在需要的位置直接字串引用即可。

rootPage:any = 'HomePage';
ionic serve 看到以下類似檔案代表成功。

以上是有關ionic2懶加載配置介紹的詳細內容。更多資訊請關注PHP中文網其他相關文章!
陳述:
本文內容由網友自願投稿,版權歸原作者所有。本站不承擔相應的法律責任。如發現涉嫌抄襲或侵權的內容,請聯絡admin@php.cn

