js自訂彈框插件的封裝實例介紹
- 零下一度原創
- 2017-07-16 15:15:521866瀏覽
先整理一下思路,原生javascript其實是有實作alert()方法的,但是那個會暫時性中斷程式運行,並且足以讓你醜拒!那就拋開這些細細一想,其實彈框就是兩個p層,一個浮在底下的蒙層(遮罩層),將所有的元素遮起來,並且最好是半透明。另一個就是彈框主體部分了,一般情況需要水平垂直居中,並且通常包含標題,主體內容需要可定制,如果是模態框通常還有確認/取消按鈕。最後就是彈出、關閉的時候一些動效。
彈出層提示訊息,這是移動前端開發中最常見的需求,你可能會想到一些流行的彈框插件,例如經典的artDialog 酷炫的Sweetalert等等..
但是慢慢地你其實會發現通常情況下需求客製化要求較高,一般的彈框插件可能只滿足大部分要求,自訂花的時間還不如手動自己封裝一個符合自己開發習慣的彈框組件,這樣後續開發效率將大大提高。
所以說完全可以自己封裝一個,然後放在專案中公共js中去。能自己手寫的盡量不用插件....
一些預設屬性值
#透過一個foreach循環,類似於傳入的opts繼承了defaultOpts屬性,在呼叫彈框之前執行的before()方法,相當於一些準備工作
var defaultOpts = {
        title: '',//标题
        content: '',//内容 文字 || html
        height: 50,//默认屏幕(父级)的50%
        width: 80,//默认屏幕(父级)的80%
        type: 'alert-default',//弹框类型
        effect: 'fadeIn',//出现效果,默认下跌落
        delayTime: 500,//效果延时时间,默认.5s
        autoClose: false,//自动关闭
        autoTime: 2000, //自动关闭时间默认2s
        autoEffect: 'default',//关闭效果
        ok: '确定',
        okCallback: function(){},//确定回调
        cancel: '取消',
        cancelCallback: function(){},//取消回调
        before : function() {
          console.log('before')
        },
        close: function() {
          console.log('close')
        },
        blankclose: false//空白处点击关闭
      }

    for (i in defaultOpts) {
      if (opts[i] === undefined) {
        opts[i] = defaultOpts[i]
      }
    }

  opts.before && opts.before()
##dom結構
定義一個陣列對象,裡面放彈框的dom元素,alert-mask為全螢幕的遮罩層,alert-content為彈框的主要內容區,最後透過.join('')函數將陣列轉換為html ,再用jquery的append()方法追加在body節點最後。var alertHtml = [
'<section class="alert-main" id="alertMain">',
'<p class="alert-mask li-opacity" id="alertMask"></p>',
'<p class="alert-content '+ opts.type +'" id="alertContent">',
opts.content +'</p>',
'</section>'
]
$('body').append(alertHtml.join(''))
設定高寬了,水平垂直居中
我這裡是採用fixed定位,然後height是傳進來的高(百分比),top距離螢幕頂端距離百分比為100-傳進來的高/2 ,這樣就實現了垂直居中,同理寬度也一樣。這種水平垂直居中的辦法也是自己長期實踐總結出來自己認為最簡單最實用的,兼容各種屏幕大小,當然還有很多方法,可以自行嘗試var $alertContent = $('#alertContent'),
$alertMain = $('#alertMain');
$alertContent.css({
'height': opts.height + '%',
'top': (100 - opts.height)/2 + '%',
'width': opts.width + '%',
'left': (100 - opts.width)/2 + '%'
})
$('.li-opacity').css({
'-webkit-animation-duration' : opts.delayTime/1000 + 's'
})最後一句是為遮罩層賦一個動畫執行時間,實現淡入效果。詳情請見下面的CSS @-webkit-keyframes opacity
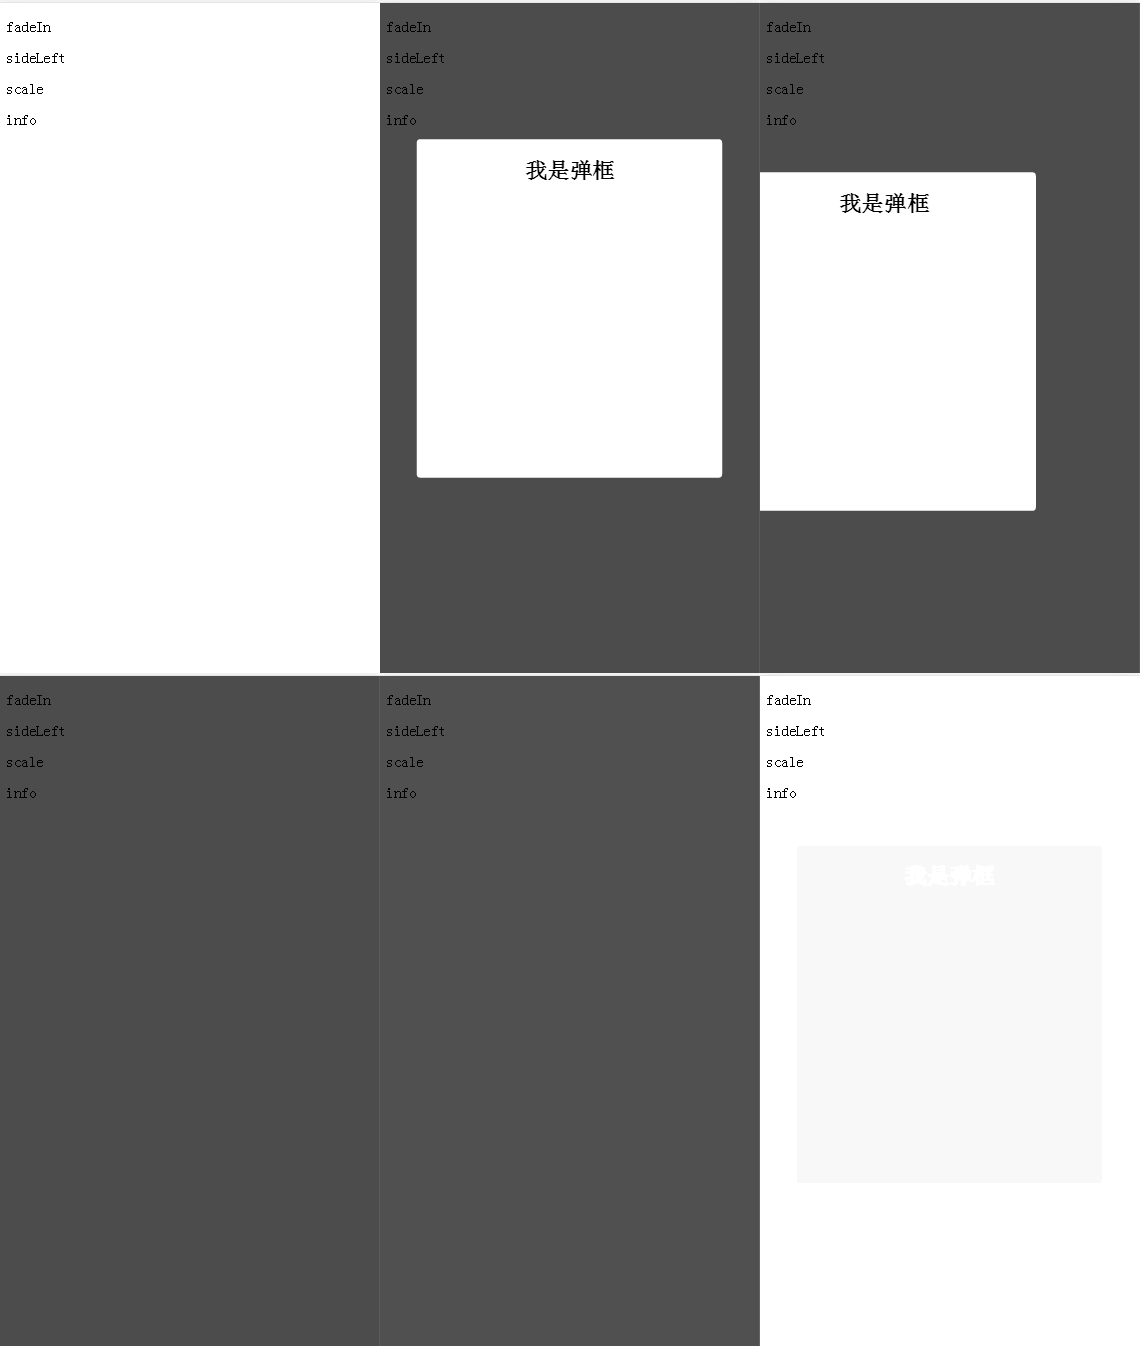
彈框效果
我在這裡實現了四個效果,分別是fadeIn跌落,sideLeft從左側飛入,scale放大,info提示訊息。可以看到,我定義了一個集合對象,分別放置了對應的css屬性,然後透過兩個setTimeout函數統一賦值var effect = {
'fadeIn': 'top',
'fadeInStart': '-100%',
'fadeInValue': (100 - opts.height)/2 + '%',
'sideLeft': 'left',
'sideLeftStart': '-100%',
'sideLeftValue': (100 - opts.width)/2 + '%',
'scale': '-webkit-transform',
'scaleStart': 'scale(0)',
'scaleValue': 'scale(1)',
'info': '-webkit-transform',
'infoStart': 'scale(1.2)',
'infoValue': 'scale(1)'
}
setTimeout(function(){
$alertContent.css(effect[opts.effect],effect[opts.effect + 'Start']).addClass('alert-show')
setTimeout(function(){
$alertContent.css(effect[opts.effect], effect[opts.effect + 'Value'])
opts.close && opts.close()
},10)
},opts.delayTime)
空白處點擊關閉
通常情況下的需求,都會是要點擊彈框空白處關閉彈框,一個點擊事件搞定,重點是前面的選擇器,jquery給了我們太多方便... . 當然最後為了防止點擊到頁面其他元素,阻止事件冒泡,元件預設行為..if(opts.blankclose) {
$('.alert-main :not(.alert-content)').on('click',function(event){
$alertMain.remove()
opts.close && opts.close()
event.stopPropagation()
event.preventDefault()
})
}
自動關閉
#當autoClose為true,且autoTime大於零時,用一個延時事件自動關閉彈框
#
if(opts.autoClose && opts.autoTime > 0) {
      setTimeout(function(){$alertMain.remove()},opts.autoTime)
      opts.close && opts.close()
    }
示範:
css@-webkit-keyframes opacity {
0% {
opacity: 0; /*初始状态 透明度为0*/
}
50% {
opacity: 0; /*中间状态 透明度为0*/
}
100% {
opacity: 1; /*结尾状态 透明度为1*/
}
}
.li-opacity {
-webkit-animation-name: opacity; /*动画名称*/
-webkit-animation-iteration-count: 1; /*动画次数*/
-webkit-animation-delay: 0s; /*延迟时间*/
}
.alert-mask {
position: fixed;
height: 100%;
width: 100%;
left: 0%;
top: 0%;
z-index: 9998;
background-color: rgba(0,0,0,.7);
}
.alert-content {
position: fixed;
box-sizing: border-box;
border-radius: 4px;
z-index: 9999;
-webkit-transition: .4s;
-moz-transition: .4s;
transition: .4s;
display: none;
}
.alert-show {
display: block;
}
.alert-default {
background-color: white;
}html<p class="alert" data-flag="fadeIn">fadeIn</p> <p class="alert" data-flag="sideLeft">sideLeft</p> <p class="alert" data-flag="scale">scale</p> <p class="alert" data-flag="info">info</p>js
require.config({
jquery:'component/jquery/jquery-3.1.0.min',
liAlert: 'li/li-alert',//常用弹框组件
})
require(['jquery'],function($){
require(['liAlert'],function(){
$('.alert').on('click',function(event){
$.alert({
content: '<h1 style="display:flex;justify-content:center;">我是弹框</h1>',
effect: $(event.currentTarget).attr('data-flag'),
blankclose: true,
//autoClose: true
})
})
})
})效果圖

以上是js自訂彈框插件的封裝實例介紹的詳細內容。更多資訊請關注PHP中文網其他相關文章!
陳述:
本文內容由網友自願投稿,版權歸原作者所有。本站不承擔相應的法律責任。如發現涉嫌抄襲或侵權的內容,請聯絡admin@php.cn

