UWP中使用Composition API實作吸頂的實例教學
- 零下一度原創
- 2017-06-23 15:25:091661瀏覽
前幾天需要在UWP中實現吸頂,就在網路上找了一些文章:
吸頂大法-- UWP中的工具列吸頂的實作方式之一
在UWP中頁面滑動導覽列置頂
發現前人的實作方式大多是控制ListViewBase的Header變換高度,或是建立ScrollViewer在裡面放置ListViewBase。經過測試,這兩種方法或多或少的都有問題。所以我想試試用Composition API實作吸頂的效果。
首先先了解Composition API是什麼。
Windows.UI.Composition 是可以從任何通用 Windows 平台 (UWP) 應用程式呼叫的宣告式保留模式 API ,因此可以直接在應用程式中建立合成物件、 動畫和效果。 該 API 是對諸如 XAML 等現有框架的一個強大補充,從而為 UWP 應用程式開發人員提供了一個熟悉的 C# 圖紙以供添加到其應用程式。 這些 API 還可以用於創建 DX 樣式框架較少的應用程式。
XAML 開發人員可以使用WinRT「下拉」到採用C# 的合成層,以便在該合成層上執行自訂工作,而無需一直下拉到圖形層並針對任何自訂UI 工作使用DirectX 和C++。 此技術可用於使用合成 API 對現有元素進行動畫處理,也可用於透過在 XAML 元素樹內建立 Windows.UI.Composition 內容的「視覺島」來增加 UI。
只看這幾句微軟給的介紹也是雲端裡來霧裡去的,還是看程式碼吧。
CompositionAPI中有一種動畫叫表達式動畫。大致效果就是讓一個Visual或PropertySet的屬性隨著自己另一個屬性,或是另一個Visual或PropertySet的屬性的改變而改變。
對於不含Pivot的簡單情況,就有這樣一個基本的思路了:
#取得到ListViewBase的ScrollViewer;
- ##取得到ScrollViewer的ManipulationPropertySet和ListViewHeader的Visual;
- 讓ManipulationPropertySet和Visual發生關係。
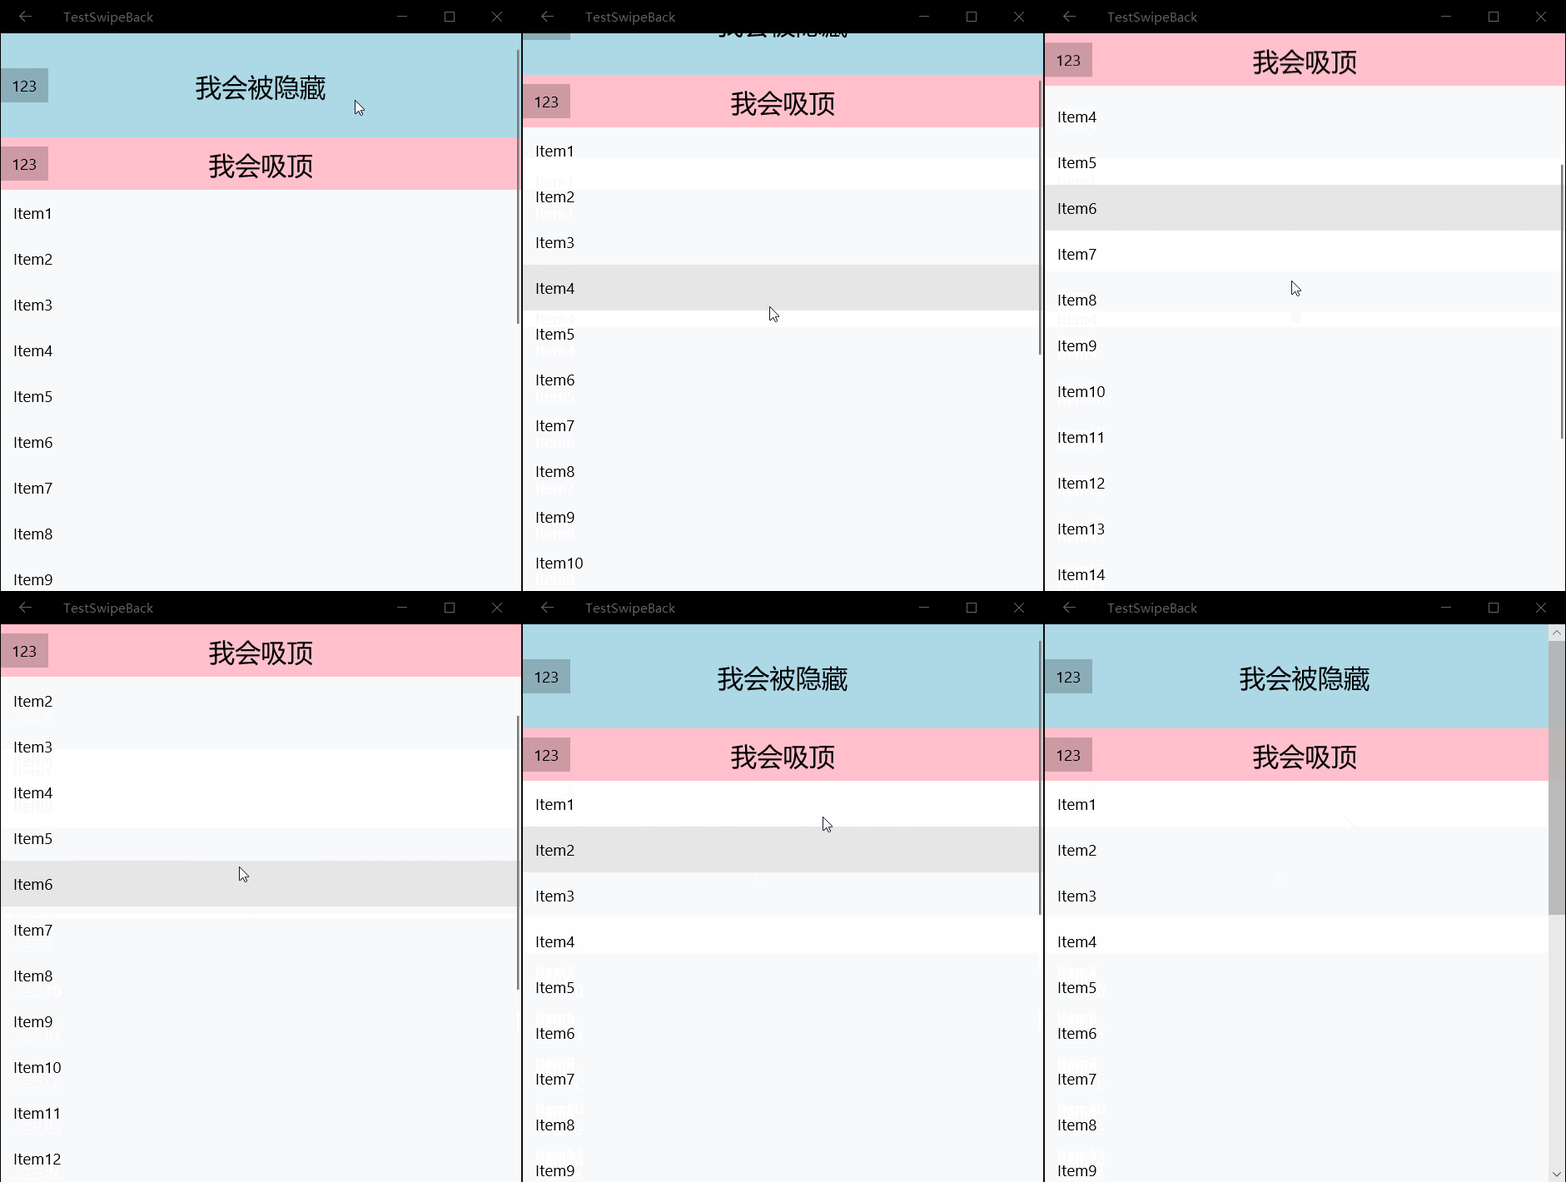
<Pagex:Class="TestSwipeBack.ScrollTest"xmlns="http://schemas.microsoft.com/winfx/2006/xaml/presentation"xmlns:x="http://schemas.microsoft.com/winfx/2006/xaml"xmlns:local="using:TestSwipeBack"xmlns:d="http://schemas.microsoft.com/expression/blend/2008"xmlns:mc="http://schemas.openxmlformats.org/markup-compatibility/2006"mc:Ignorable="d" Loaded="Page_Loaded"><Grid Background="{ThemeResource ApplicationPageBackgroundThemeBrush}"><ListView x:Name="_listview" ItemsSource="{x:Bind ItemSource,Mode=OneWay}"><ListView.Header><Grid x:Name="_header"><Grid.RowDefinitions><RowDefinition Height="100" /><RowDefinition Height="50" /></Grid.RowDefinitions><Grid Background="LightBlue"><Button>123</Button><TextBlock FontSize="25" HorizontalAlignment="Center" VerticalAlignment="Center">我会被隐藏</TextBlock></Grid><Grid Background="Pink" Grid.Row="1"><Button>123</Button><TextBlock FontSize="25" HorizontalAlignment="Center" VerticalAlignment="Center">我会吸顶</TextBlock></Grid></Grid></ListView.Header><ListView.ItemTemplate><DataTemplate><TextBlock Text="{Binding }" /></DataTemplate></ListView.ItemTemplate></ListView></Grid></Page>
原本ListViewBase裡Header是在ItemsPanelRoot下方的,使用Canvans.SetZIndex把ItemsPanelRoot設定到下方。
Canvas.SetZIndex(_listview.ItemsPanelRoot, -1);然後在背景取得ListView內的ScrollViewer。
_scrollviewer = FindFirstChild<ScrollViewer> T FindFirstChild<T>(FrameworkElement element) childrenCount = children = ( i = ; i < childrenCount; i++ child = VisualTreeHelper.GetChild(element, i) = (child ( i = ; i < childrenCount; i++ (children[i] != subChild = FindFirstChild<T> (subChild !=取得ListViewHeader的Visual和ScrollViewer的ManipulationPropertySet。
var _headerVisual = ElementCompositionPreview.GetElementVisual(_header);var _manipulationPropertySet = ElementCompositionPreview.GetScrollViewerManipulationPropertySet(_scrollviewer);建立表達式動畫,然後運行。
var _compositor = Window.Current.Compositor;var _headerAnimation = _compositor.CreateExpressionAnimation("_manipulationPropertySet.Translation.Y > -100f ? 0: -100f -_manipulationPropertySet.Translation.Y");//_manipulationPropertySet.Translation.Y是ScrollViewer滚动的数值,手指向上移动的时候,也就是可视部分向下移动的时候,Translation.Y是负数。_headerAnimation.SetReferenceParameter("_manipulationPropertySet", _manipulationPropertySet);

_headerVisual.StartAnimation("Offset.Y", _headerAnimation);
現在滑動Demo看看,是不是在捲動100像素之後,Header就停住了? 
以上是UWP中使用Composition API實作吸頂的實例教學的詳細內容。更多資訊請關注PHP中文網其他相關文章!

