JS實作圖片無序預載功能碼
- 零下一度原創
- 2017-05-13 11:00:501403瀏覽
這篇文章主要介紹了JS實現圖片預加載之無序預加載功能代碼,非常不錯,具有參考借鑒價值,需要的朋友可以參考下
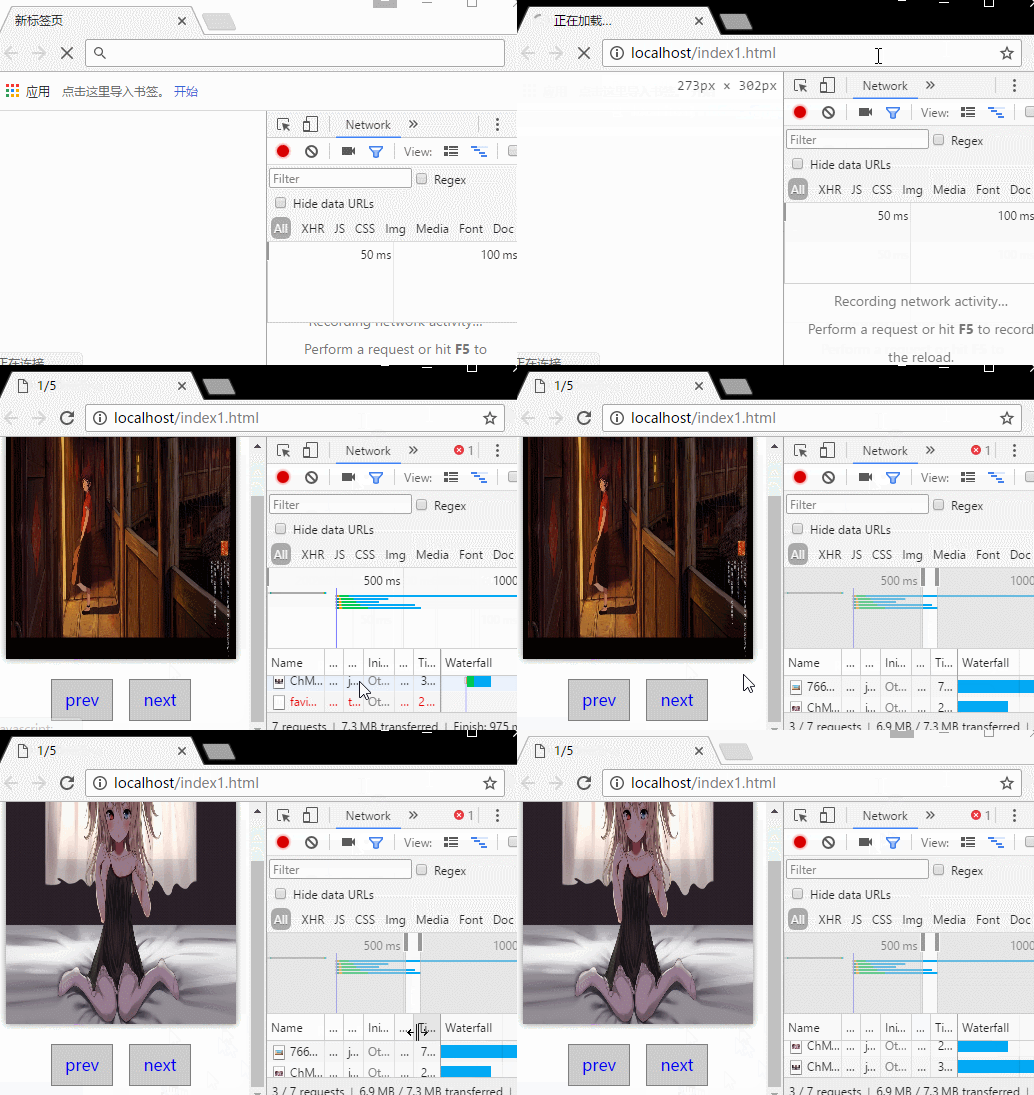
圖片預先載入之無序預先載入的效果圖如下圖所示,如果大家感覺不錯,請參考實作程式碼。

具體程式碼如下:
<!DOCTYPE html>
<html lang="zh-CN">
<head>
<meta charset="UTF-8">
<title>PreLoading</title>
<style>
*{margin:0; padding:0; border:none; outline:0; text-decoration:none;}
html,body,.box{width:100%; height:100%;}
.box{display:none;}
#img{width:90%; height:90%; margin:2vh auto 0; display:block; box-shadow:0 0 10px gray;}
.box .btns{width:140px; height:40px; display:block; margin:20px auto;}
.box .btns .btn{width:60px; height:40px; display:block; border:1px gray solid; background-color:#ccc; text-align:center; line-height:40px; float:left;}
.box .btns .btn:nth-of-type(2){margin-left:16px;}
.load{width:100%; height:100%; display:block; font-size:60px; font-family:"微软雅黑"; color:#ccc; text-align:center; line-height:100vh; position:fixed;}
</style>
</head>
<body>
<p class="box">
<img id="img" src="" alt="pic">
<p class="btns"><a href="javascript:" rel="external nofollow" rel="external nofollow" class="btn">prev</a><a href="javascript:" rel="external nofollow" rel="external nofollow" class="btn">next</a></p>
</p>
<p class="load">0%</p>
<script type="text/javascript">
var imgs = ['http://down.699pic.com/photo/50036/7661.jpg?_upt=da51378d1494571758&_upd=500367661.jpg',
'http://desk.fd.zol-img.com.cn/t_s1920x1080c5/g5/M00/09/0F/ChMkJljskIqIPX9bAAMPyuIn8DcAAbj8QB7XpYAAw_i343.jpg',
'http://desk.fd.zol-img.com.cn/t_s1920x1080c5/g5/M00/09/0F/ChMkJljskLeIaW-JAAIudN_yqvgAAbj8gDQO5AAAi6M64.jpeg',
'http://desk.fd.zol-img.com.cn/t_s1920x1080c5/g5/M00/0F/08/ChMkJlauzISIH0uXAARUHuJLVX8AAH8-gHu6zsABFQ2166.jpg',
'http://desk.fd.zol-img.com.cn/t_s1920x1080c5/g5/M00/0F/08/ChMkJlauzISIIL5TAAObxg4-XeUAAH8-gHzP3EAA5ve000.jpg'];
// 绑定按钮事件
var btns = document.getElementsByClassName('btn'),
img = document.getElementById('img'),
index = 0;
for(var i=0;i<btns.length;i++){
btns[i].onclick = function(){
if(this.innerHTML === 'next'){
index = Math.min(++index , imgs.length-1);
img.setAttribute('src',imgs[index]);
}
if(this.innerHTML === 'prev'){
index = Math.max(--index , 0);
img.setAttribute('src',imgs[index]);
}
}
}
// 计数变量
var count = 0,
load = document.getElementsByClassName('load')[0],
box = document.getElementsByClassName('box')[0];
// 无序预加载
for(var i=0;i<imgs.length;i++){
(function(i){
var imgObj = new Image();
imgObj.onload = function(){
load.innerHTML = Math.round((count + 1) / imgs.length * 100) + '%';
count++;
if(count >= imgs.length-1){
load.style.display = 'none';
box.style.display = 'block';
img.setAttribute('src',imgs[0]);
document.title = '1/' + imgs.length;
}
}
imgObj.onerror = function(){
load.innerHTML = Math.round((count + 1) / imgs.length * 100) + '%';
count++;
if(count >= imgs.length-1){
load.style.display = 'none';
box.style.display = 'block';
img.setAttribute('src',imgs[0]);
document.title = '1/' + imgs.length;
}
}
imgObj.src = imgs[i];
})(i);
}
</script>
</body>
</html> 【相關建議】
1. ##特別推薦:「php程式設計師工具箱」V0.1版本下載
#2. 3.以上是JS實作圖片無序預載功能碼的詳細內容。更多資訊請關注PHP中文網其他相關文章!
陳述:
本文內容由網友自願投稿,版權歸原作者所有。本站不承擔相應的法律責任。如發現涉嫌抄襲或侵權的內容,請聯絡admin@php.cn
上一篇:js各種繼承方式與優缺點的介紹下一篇:js各種繼承方式與優缺點的介紹

