


1)用路徑繪圖:
beginPath()-開始一條新路徑;
# closePath()-試著關閉現有路徑,方法是繪製一條線,連接最後那條線的終點與初始座標;
fill()-填入用子路徑描述的圖形;
isPointInPath(x,y)-若指定的點在目前路徑所描述的圖形之內則傳回true;
 lineTo(x,y)-繪製一條到指定座標的子路徑;
moveTo(x,y)-移動到指定座標而不繪製子路徑;
rect(x,y,w,h)-繪製一個長方形,其左上角位於(x,y),寬度為w,高度為h;

stroke()-給子路徑描述的圖形繪製輪廓線;

<style type="text/css">
        canvas{
            border:thin solid black;
            margin: 4px;
        }
        body > *{
            float: left;
        }
    </style>
<canvas id="canvas1" width="500" height="140">
您的浏览器不支持<code>canvas</code>!
</canvas> <script>
//由直线创建路径
var ctx=document.getElementById("canvas1").getContext("2d");
ctx.fillStyle="#136455";
ctx.strokeStyle="blue";
ctx.lineWidth=4;
ctx.beginPath();
ctx.moveTo(10,10);
ctx.lineTo(110,10);
ctx.lineTo(110,120);
ctx.closePath();
ctx.fill();
ctx.beginPath();
ctx.moveTo(150,10);
ctx.lineTo(200,10);
ctx.lineTo(200,120);
ctx.lineTo(190,120);
ctx.fill();
ctx.stroke();
ctx.beginPath();
ctx.moveTo(250,10);
ctx.lineTo(250,120);
ctx.stroke();
</script>#lineCap-在繪製線條或閉合圖形時設定線條末端的樣式;## <canvas id="canvas2" width="500" height="140">
您的浏览器不支持<code>canvas</code>!
</canvas> <script>
//设置lineCap属性
var ctx2=document.getElementById("canvas2").getContext("2d");
ctx2.strokeStyle="red";
ctx2.lineWidth=2;
ctx2.beginPath();
ctx2.moveTo(0,50);
ctx2.lineTo(200,50);
ctx2.stroke();
ctx2.strokeStyle="black";
ctx2.lineWidth=40;
var xpos=50;
var styles=["butt","round","square"];
for(var i=0;i<styles.length;i++){
ctx2.beginPath();
ctx2.lineCap=styles[i];
ctx2.moveTo(xpos,50);
ctx2.lineTo(xpos,150);
ctx2.stroke();
xpos+=50;
}
</script>
    <canvas id="canvas3" width="500" height="140">
        您的浏览器不支持<code>canvas</code>!
    </canvas>
<script>
//用Rect方法绘制矩形
var ctx3=document.getElementById("canvas3").getContext("2d");
ctx3.fillStyle="yellow";
ctx3.strokeStyle="black";
ctx3.lineWidth=4;
ctx3.beginPath();
ctx3.moveTo(110,10);
ctx3.lineTo(110,100);
ctx3.lineTo(10,10);
ctx3.closePath();
ctx3.rect(110,10,100,90);
ctx3.rect(110,100,130,30);
ctx3.fill();
ctx3.stroke();
</script>
2)繪製圓弧:
arc(x,y,rad,startAngle,end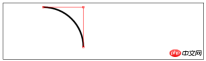 Angle,
direction
direction指定了圓弧的方向

    <canvas id="canvas4" width="500"  style="max-width:90%">
        您的浏览器不支持<code>canvas</code>!
    </canvas>
<script>
//使用arcTo方法
var ctx4=document.getElementById("canvas4").getContext("2d");
var point1=[100,10];
var point2=[200,10];
var point3=[200,110];
ctx4.fillStyle="yellow";
ctx4.strokeStyle="black";
ctx4.lineWidth=4;
ctx4.beginPath();
ctx4.moveTo(point1[0],point1[1]);
ctx4.arcTo(point2[0],point2[1],point3[0],point3[1],100);
ctx4.stroke();
drawPoint(point1[0],point1[1]);
drawPoint(point2[0],point2[1]);
drawPoint(point3[0],point3[1]);
ctx4.beginPath();
ctx4.moveTo(point1[0],point1[1]);
ctx4.lineTo(point2[0],point2[1]);
ctx4.lineTo(point3[0],point3[1]);
ctx4.stroke();
function drawPoint(x,y){
ctx4.lineWidth=1;
ctx4.strokeStyle="red";
ctx4.strokeRect(x-2,y-2,4,4);
}
</script>


    <canvas id="canvas5" width="500"    style="max-width:90%">
        您的浏览器不支持<code>canvas</code>!
    </canvas>
<script>
//响应鼠标移动绘制圆弧
var canvasElem = document.getElementById("canvas5");
var ctx5 = canvasElem.getContext("2d");
var point1 = [100, 10];
var point2 = [200, 10];
var point3 = [200, 110];
draw();
canvasElem.onmousemove = function (e) {
if (e.ctrlKey) {
point1 = [e.clientX, e.clientY];
} else if(e.shiftKey) {
point2 = [e.clientX, e.clientY];
} else {
point3 = [e.clientX, e.clientY];
}
ctx5.clearRect(0, 0, 540, 140);
draw();
}
function draw() {
ctx5.fillStyle = "yellow";
ctx5.strokeStyle = "black";
ctx5.lineWidth = 4;
ctx5.beginPath();
ctx5.moveTo(point1[0], point1[1]);
ctx5.arcTo(point2[0], point2[1], point3[0], point3[1], 50);
ctx5.stroke();
drawPoint(point1[0], point1[1]);
drawPoint(point2[0], point2[1]);
drawPoint(point3[0], point3[1]);
ctx5.beginPath();
ctx5.moveTo(point1[0], point1[1]);
ctx5.lineTo(point2[0], point2[1]);
ctx5.lineTo(point3[0], point3[1]);
ctx5.stroke();
}
function drawPoint(x, y) {
ctx5.lineWidth = 1;
ctx5.strokeStyle = "red";
ctx5.strokeRect(x -2, y-2, 4, 4);
}
</script>############ <canvas id="canvas6" width="500" height="140">
您的浏览器不支持<code>canvas</code>!
</canvas> <script>
//使用arc方法
var ctx6=document.getElementById("canvas6").getContext("2d");
ctx6.fillStyle="yellow";
ctx6.lineWidth=3;
ctx6.beginPath();
ctx6.arc(70,70,60,0,Math.PI,true);
ctx6.stroke();
ctx6.beginPath();
ctx6.arc(200,70,60,Math.PI/2,Math.PI/4,false);
ctx6.fill();
ctx6.stroke();
ctx6.beginPath();
var val=0;
for(var i=0;i<4;i++){
ctx6.arc(350,70,60,val,val+Math.PI/4,false);
val+=Math.PI/2;
}
ctx6.closePath();
ctx6.fill();
ctx6.stroke();
</script>#########3)繪製貝塞爾曲線######### bezierCurveTo(cx1,cy1,cx2, cy2,x,y)-繪製一段貝塞爾曲線到點(x,y),控制點為(cx1,cy1)和###(cx2,cy2);########## ##### quadraticCurveTo(cx,xy,x,y)-繪製一段二次貝塞爾曲線到點(x,y),控制點為(cx,cy);###### ## ################<canvas id="canvas" width="500" height="140">
Your browser doesn't support the <code>canvas</code> element
</canvas> <script>
var canvasElem = document.getElementById("canvas");
var ctx = canvasElem.getContext("2d");
var startPoint = [50, 100];
var endPoint = [400, 100];
var cp1 = [250, 50];
var cp2 = [350, 50];
canvasElem.onmousemove = function(e) {
if (e.shiftKey) {
cp1 = [e.clientX, e.clientY];
} else if (e.ctrlKey) {
cp2 = [e.clientX, e.clientY];
}
ctx.clearRect(0, 0, 500, 140);
draw();
}
draw();
function draw() {
ctx.lineWidth = 3;
ctx.strokeStyle = "black";
ctx.beginPath();
ctx.moveTo(startPoint[0], startPoint[1]);
ctx.bezierCurveTo(cp1[0], cp1[1], cp2[0], cp2[1],
endPoint[0], endPoint[1]);
ctx.stroke();
ctx.lineWidth = 1;
ctx.strokeStyle = "red";
var points = [startPoint, endPoint, cp1, cp2];
for (var i = 0; i < points.length; i++) {
drawPoint(points[i]);
}
drawLine(startPoint, cp1);
drawLine(endPoint, cp2);
}
function drawPoint(point) {
ctx.beginPath();
ctx.strokeRect(point[0] -2, point[1] -2, 4, 4);
}
function drawLine(from, to) {
ctx.beginPath();
ctx.moveTo(from[0], from[1]);
ctx.lineTo(to[0], to[1]);
ctx.stroke();
}
</script>########## <canvas id="canvas" width="500" height="140">
Your browser doesn't support the <code>canvas</code> element
</canvas> <script>
//绘制二次贝塞尔曲线
var canvasElem = document.getElementById("canvas");
var ctx = canvasElem.getContext("2d");
var startPoint = [50, 100];
var endPoint = [400, 100];
var cp1 = [250, 50];
canvasElem.onmousemove = function(e) {
if (e.shiftKey) {
cp1 = [e.clientX, e.clientY];
}
ctx.clearRect(0, 0, 500, 140);
draw();
}
draw();
function draw() {
ctx.lineWidth = 3;
ctx.strokeStyle = "black";
ctx.beginPath();
ctx.moveTo(startPoint[0], startPoint[1]);
ctx.quadraticCurveTo(cp1[0], cp1[1], endPoint[0], endPoint[1]);
ctx.stroke();
ctx.lineWidth = 1;
ctx.strokeStyle = "red";
var points = [startPoint, endPoint, cp1];
for (var i = 0; i < points.length; i++) {
drawPoint(points[i]);
}
drawLine(startPoint, cp1);
drawLine(endPoint, cp1);
}
function drawPoint(point) {
ctx.beginPath();
ctx.strokeRect(point[0] -2, point[1] -2, 4, 4);
}
function drawLine(from, to) {
ctx.beginPath();
ctx.moveTo(from[0], from[1]);
ctx.lineTo(to[0], to[1]);
ctx.stroke();
}
</script>#########4)建立剪輯區域########## ###clip###()-建立新的裁切區域;###### ################## <canvas id="canvas7" width="500" height="140">
您的浏览器不支持<code>canvas</code>!
</canvas> <script>
var ctx7=document.getElementById("canvas7").getContext("2d");
ctx7.fillStyle="yellow";
ctx7.beginPath();
ctx7.rect(0,0,500,140);
ctx7.fill();
ctx7.beginPath();
ctx7.rect(100,20,300,100);
ctx7.clip();
ctx7.fillStyle="red";
ctx7.beginPath();
ctx7.rect(0,0,500,140);
ctx7.fill();
</script>########################################################################################### #5)繪製文字:### fillText(
strokeText(
font——设置绘制文本时使用的字体;
textAlign——设置文本的对齐方式:start、end、left、right、center;
textBaseline——设置文本的基线:top、hanging、middle、alphabetic、ideographic、bottom;
6)使用特效和转换:
6.1)使用阴影:
shadowBlur——设置阴影的模糊程度;
shadowColor——设置阴影的颜色;
shadowOffsetX——设置阴影的水平偏移量;
shadowOffsetY——设置阴影的垂直偏移量;
   <canvas id="canvas8" width="500" height="140">
        您的浏览器不支持<code>canvas</code>!
    </canvas>
<script>
//给图形和文本应用阴影
var ctx8=document.getElementById("canvas8").getContext("2d");
ctx8.fillStyle="lightgrey";
ctx8.strokeStyle="black";
ctx8.lineWidth=3;
ctx8.shadowOffsetX=5;
ctx8.shadowOffsetY=5;
ctx8.shadowBlur=5;
ctx8.shadowColor="grey";
ctx8.beginPath();
ctx8.arc(420,70,50,0,Math.PI,true);
ctx8.stroke();
ctx8.beginPath();
ctx8.arc(420,80,40,0,Math.PI,false);
ctx8.fill();
ctx8.font="100px sans-serif";
ctx8.fillText("hello",50,100);
ctx8.strokeText("hello",50,100);
</script>
6.2)使用透明度:
globalAlpha——给文本和图形设置透明度(从0到1);
    <canvas id="canvas9" width="300" height="120">
        您的浏览器不支持<code>canvas</code>!
    </canvas>
<script>
//使用globalAlpha属性,设置透明度
var ctx9=document.getElementById("canvas9").getContext("2d");
ctx9.fillStyle="lightgrey";
ctx9.strokeStyle="black";
ctx9.lineWidth=3;
ctx9.font="100px sans-serif";
ctx9.fillText("hello",10,100);
ctx9.strokeText("hello",10,100);
ctx9.fillStyle="red";
ctx9.globalAlpha=0.5;
ctx9.fillRect(10,10,240,100);
</script>
6.3)使用合成:
globalCompositeOperation——与透明度属性结合使用,来控制图形和文本在画布上绘制的方式;
globalCompositeOperation允许的值:
=copy——将来源绘制于目标之上,忽略一切透明度设置;
=source-atop——在两个图像都不透明处显示来源图像,
目标图像不透明但来源图像透明处显示目标图像,其它位置显示为透明;
=source-in——来源图像和目标图像都不透明处显示来源图像。其它位置显示为透明;
=source-out——来源图像不透明但目标图像透明处显示来源图像。其它位置显示为透明;
=source-over——来源图像不透明处显示来源图像。其它位置显示目标图像;
=destination-atop——与source-atop相同,但用目标图像替代来源图像,反之亦然;
=destination-in——与source-in相同,但用目标图像替代来源图像,反之亦然;
=destination-over——与source-over相同,但用目标图像替代来源图像,反之亦然;
=destination-out——与source-out相同,但用目标图像替代来源图像,反之亦然;
=lighter——显示来源图像与目标图像的总和,颜色值限制最高255(100%);
=xor——对来源图像和目标图像执行异或运算;
    <canvas id="canvas10" width="300" height="120">
        您的浏览器不支持<code>canvas</code>!
    </canvas>
    <label>Comosition Value:</label>
    <select id="list">
        <option>copy</option>
        <option>destination-atop</option>
        <option>destination-in</option>
        <option>destination-over</option>
        <option>destination-out</option>
        <option>lighter</option>
        <option>source-atop</option>
        <option>source-in</option>
        <option>source-out</option>
        <option>source-over</option>
        <option>xor</option>
    </select>
<script>
//使用globalCompositeOperation属性
var ctx10=document.getElementById("canvas10").getContext("2d");
ctx10.fillStyle="lightgrey";
ctx10.strokeStyle="black";
ctx10.lineWidth=3;
var compVal="copy";
document.getElementById("list").onchange=function(e){
compVal= e.target.value;
draw();
}
draw();
function draw(){
ctx10.clearRect(0,0,300,120);
ctx10.globalAlpha=1.0;
ctx10.font="100px sans-serif";
ctx10.fillText("hello",10,100);
ctx10.strokeText("hello",10,100);
ctx10.globalCompositeOperation=compVal;
ctx10.fillStyle="red";
ctx10.globalAlpha=0.5;
ctx10.fillRect(100,10,150,100);
}
</script>
6.4)使用变换:
scale(
rotate(
translate(
transform(a,b,c,d,e,f)——合并现有的变换和a-f值所指定的矩阵;
setTansform(a,b,c,d,e,f)——用a-f值所指定的矩阵替换现有的变换;
    <canvas id="canvas11" width="400" height="200">
        您的浏览器不支持<code>canvas</code>!
    </canvas>
<script>
//使用变换
var ctx11=document.getElementById("canvas11").getContext("2d");
ctx11.fillStyle="lightgrey";
ctx11.strokeStyle="black";
ctx11.lineWidth=3;
ctx11.clearRect(0,0,300,120);
ctx11.globalAlpha=1.0;
ctx11.font="100px sans-serif";
ctx11.fillText("hello",10,100);
ctx11.strokeText("hello",10,100);
ctx11.scale(1.3,1.3);
ctx11.translate(100,-50);
ctx11.rotate(0.5);
ctx11.fillStyle="red";
ctx11.globalAlpha=0.5;
ctx11.fillRect(100,10,150,100);
ctx11.strokeRect(0,0,300,200);
</script>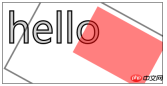
以上是html5之canvas進階的程式碼詳解(圖)的詳細內容。更多資訊請關注PHP中文網其他相關文章!

 H5:如何增強網絡上的用戶體驗Apr 19, 2025 am 12:08 AM
H5通過多媒體支持、離線存儲和性能優化提升網頁用戶體驗。 1)多媒體支持:H5的和元素簡化開發,提升用戶體驗。 2)離線存儲:WebStorage和IndexedDB允許離線使用,提升體驗。 3)性能優化:WebWorkers和元素優化性能,減少帶寬消耗。
 解構H5代碼:標籤,元素和屬性Apr 18, 2025 am 12:06 AM
HTML5代碼由標籤、元素和屬性組成:1.標籤定義內容類型,用尖括號包圍,如。 2.元素由開始標籤、內容和結束標籤組成,如內容。 3.屬性在開始標籤中定義鍵值對,增強功能,如。這些是構建網頁結構的基本單位。
 了解H5代碼:HTML5的基本原理Apr 17, 2025 am 12:08 AM
HTML5是構建現代網頁的關鍵技術,提供了許多新元素和功能。 1.HTML5引入了語義化元素如、、等,增強了網頁結構和SEO。 2.支持多媒體元素和,無需插件即可嵌入媒體。 3.表單增強了新輸入類型和驗證屬性,簡化了驗證過程。 4.提供了離線和本地存儲功能,提升了網頁性能和用戶體驗。
 H5代碼:Web開發人員的最佳實踐Apr 16, 2025 am 12:14 AM
H5代碼的最佳實踐包括:1.使用正確的DOCTYPE聲明和字符編碼;2.採用語義化標籤;3.減少HTTP請求;4.使用異步加載;5.優化圖像。這些實踐能提升網頁的效率、可維護性和用戶體驗。
 H5:網絡標準和技術的發展Apr 15, 2025 am 12:12 AM
Web标准和技术从HTML4、CSS2和简单的JavaScript演变至今,经历了显著的发展。1)HTML5引入了Canvas、WebStorage等API,增强了Web应用的复杂性和互动性。2)CSS3增加了动画和过渡功能,使页面效果更加丰富。3)JavaScript通过Node.js和ES6的现代化语法,如箭头函数和类,提升了开发效率和代码可读性,这些变化推动了Web应用的性能优化和最佳实践的发展。
 H5是HTML5的速記嗎?探索細節Apr 14, 2025 am 12:05 AM
H5不僅僅是HTML5的簡稱,它代表了一個更廣泛的現代網頁開發技術生態:1.H5包括HTML5、CSS3、JavaScript及相關API和技術;2.它提供更豐富、互動、流暢的用戶體驗,能在多設備上無縫運行;3.使用H5技術棧可以創建響應式網頁和復雜交互功能。
 H5和HTML5:網絡開發中常用的術語Apr 13, 2025 am 12:01 AM
H5與HTML5指的是同一個東西,即HTML5。 HTML5是HTML的第五個版本,帶來了語義化標籤、多媒體支持、畫布與圖形、離線存儲與本地存儲等新功能,提升了網頁的表現力和交互性。
 H5指的是什麼?探索上下文Apr 12, 2025 am 12:03 AM
H5referstoHTML5,apivotaltechnologyinwebdevelopment.1)HTML5introducesnewelementsandAPIsforrich,dynamicwebapplications.2)Itsupportsmultimediawithoutplugins,enhancinguserexperienceacrossdevices.3)SemanticelementsimprovecontentstructureandSEO.4)H5'srespo


熱AI工具

Undresser.AI Undress
人工智慧驅動的應用程序,用於創建逼真的裸體照片

AI Clothes Remover
用於從照片中去除衣服的線上人工智慧工具。

Undress AI Tool
免費脫衣圖片

Clothoff.io
AI脫衣器

AI Hentai Generator
免費產生 AI 無盡。

熱門文章
熱工具

MinGW - Minimalist GNU for Windows
這個專案正在遷移到osdn.net/projects/mingw的過程中,你可以繼續在那裡關注我們。 MinGW:GNU編譯器集合(GCC)的本機Windows移植版本,可自由分發的導入函式庫和用於建置本機Windows應用程式的頭檔;包括對MSVC執行時間的擴展,以支援C99功能。 MinGW的所有軟體都可以在64位元Windows平台上運作。

SublimeText3漢化版
中文版,非常好用

EditPlus 中文破解版
體積小,語法高亮,不支援程式碼提示功能

Atom編輯器mac版下載
最受歡迎的的開源編輯器

禪工作室 13.0.1
強大的PHP整合開發環境

