使用CSS3實現Material Design效果的方法
- 高洛峰原創
- 2017-03-10 09:53:011955瀏覽
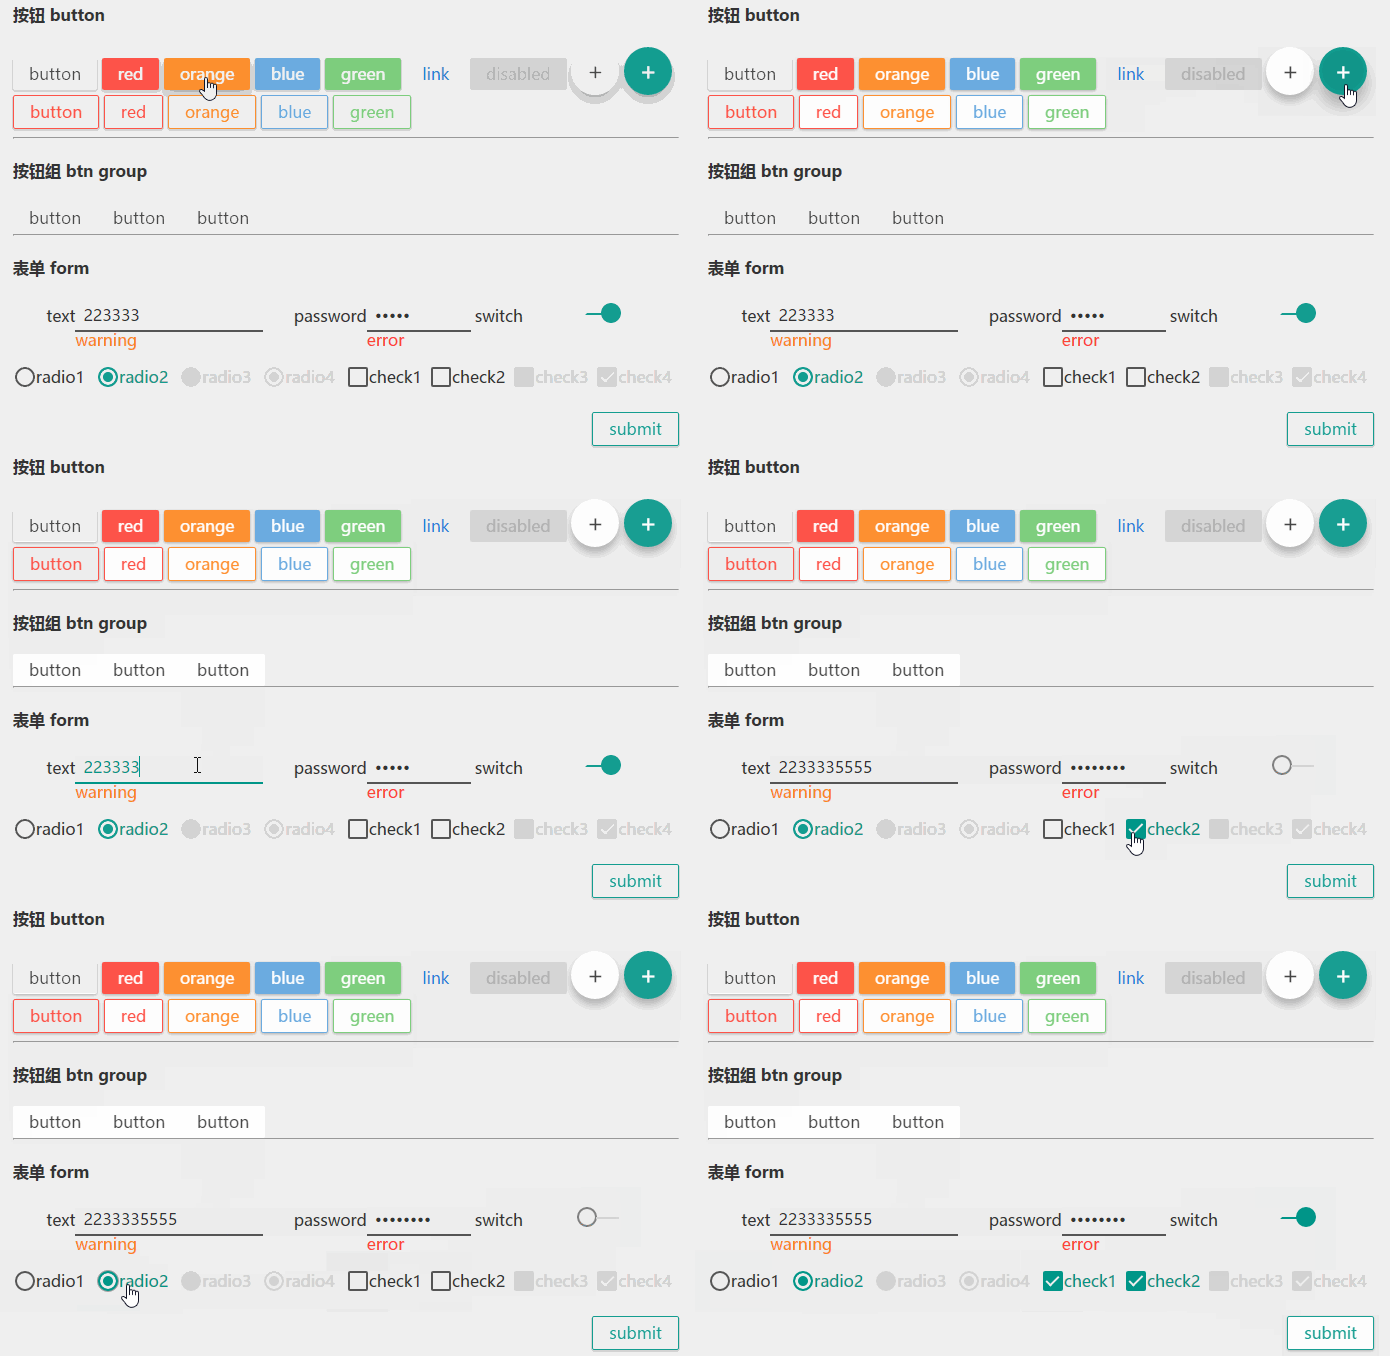
本篇文章主要介紹了使用CSS3實現Material Design效果的方法。是對原生元件基於標籤屬性做了美化,具有一定的參考價值,有興趣的可以了解一下。
預覽

這是一個正在完善的css文件,是對原生元件基於標籤屬性做了美化,對datepicker ,select等無法用css實現的暫不考慮在本文內。
按鈕Button
#初始按鈕
    <button>button</button>
    <button class="red">red</button>
    <button class="orange">orange</button>
    <button class="blue">blue</button>
    <button class="green">green</button>
    <button class="link">link</button>
    <button class="b-red bk-n">button</button>
    <button class="b-red">red</button>
    <button class="b-orange">orange</button>
    <button class="b-blue">blue</button>
    <button class="b-green">green</button>
停用按鈕
<button disabled>disabled</button>
上浮按鈕
    <button class="circle">+</button>
    <button class="circle teal">+</button>
按鈕群組
    <nav class="btn-group">
        <button>button</button>
        <button>button</button>
        <button>button</button>
    </nav>
#表單Form
##文字輸入
<input type="text">
<input type="password" >
<input type="checkbox" id="switch1" class="switch"><label for="switch1"></label>
單選
<input type="radio" id="test_radio1" name="ra"><label for="test_radio1">radio1</label>
<input type="radio" disabled id="test_radio3" name="ra"><label for="test_radio3">radio3</label>
<input type="radio" checked disabled id="test_radio4" name="ras"><label for="test_radio4">radio4</label>
多選
<input id="test_checkbox1" type="checkbox"><label for="test_checkbox1">check1</label>
<input id="test_checkbox3" disabled type="checkbox"><label for="test_checkbox3">check3</label>
<input id="test_checkbox4" checked disabled type="checkbox"><label for="test_checkbox4">check4</label>
以上就是本文的全部內容,希望對大家的學習有所幫助,也希望大家多多支持PHP中文網。
以上是使用CSS3實現Material Design效果的方法的詳細內容。更多資訊請關注PHP中文網其他相關文章!
陳述:
本文內容由網友自願投稿,版權歸原作者所有。本站不承擔相應的法律責任。如發現涉嫌抄襲或侵權的內容,請聯絡admin@php.cn

