
支援Angular 2的表格控件

- 黄舟原創
- 2017-02-10 10:07:431369瀏覽
前端框架一直這最近幾年特別火的一個話題,尤其是Angular 2擁有眾多的粉絲。在2016年9月份Angular 2正式發布之後,大量的粉絲的開始投入了Angular 2的懷抱。當然這其中也包括我。如果你想了解Angular 2,推薦官方網站:英文版、中文版。透過快速起步,可以快速體驗Angular 2。
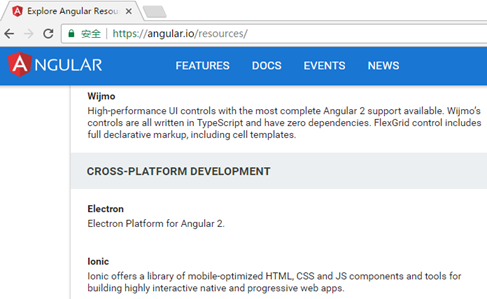
公司的一個專案想基於Angular 2的2.4 版本進行開發,目前還在進行前期的研究階段。我擔任的任務是研究基於Angular 2的UI控件,在官方網站的資源中列出了許多支援Angular 2的資源。發現Wijmo的Flexgrid控制已經支援Angular 2的2.4版本,初步滿足我們的需求。
一、環境搭建
Angular 2不僅是功能上和Angular 1有很多的差別,環境搭建也是差別很大。很多初學者回饋Angular 2的程式碼很難運作起來。 Angular2是基於ES6來開發的,所以會有很多第三方依賴。由於許多瀏覽器還不支援ES6,所以Angular2引入了很多polyfill或shim, 導致我們引入了第三方依賴。以下以FlexGrid為例來說明如何建置運作環境。
1、 安裝NodeJS
可以從Node官網下載 http://www.php.cn/。
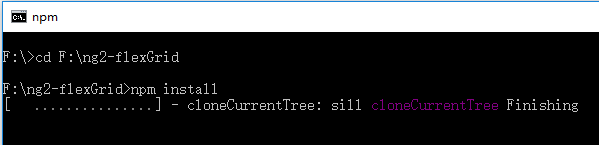
2、 新目錄來存放專案
mkdir ng2-flexGrid
cd ng2-flexGrid
3、
- 用來標記項目需要使用的npm依賴包。
{
  "name": "wj-ng2-flexgrid",
  "version": "1.0.0",
  "scripts": {
    "start": "tsc && concurrently \"tsc -w\" \"lite-server\" ",
    "lite": "lite-server",
    "tsc": "tsc",
    "tsc:w": "tsc -w"
  },
  "licenses": [
    {
      "type": "MIT",
      "url": "https://github.com/angular/angular.io/blob/master/LICENSE"
    }
  ],
  "dependencies": {
    "@angular/common": "~2.1.1",
    "@angular/compiler": "~2.1.1",
    "@angular/core": "~2.1.1",
    "@angular/forms": "~2.1.1",
    "@angular/http": "~2.1.1",
    "@angular/platform-browser": "~2.1.1",
    "@angular/platform-browser-dynamic": "~2.1.1",
    "@angular/router": "~3.1.1",
    "@angular/upgrade": "~2.1.1",
    "angular-in-memory-web-api": "~0.1.13",
    "core-js": "^2.4.1",
    "reflect-metadata": "^0.1.8",
    "rxjs": "5.0.0-beta.12",
    "systemjs": "0.19.39",
    "zone.js": "^0.6.25"
  },
  "devDependencies": {
    "@types/core-js": "^0.9.34",
    "@types/node": "^6.0.45",
    "concurrently": "^3.0.0",
    "lite-server": "^2.2.2",
    "typescript": "^2.0.3"
  }
}
- TypeScript的設定文件,定義TypeScript 程式碼原始碼檔案。
{
  "compilerOptions": {
    "target": "es5",
    "module": "commonjs",
    "moduleResolution": "node",
    "sourceMap": true,
    "emitDecoratorMetadata": true,
    "experimentalDecorators": true,
    "removeComments": false,
    "noImplicitAny": false
  }
}
- 為SystemJS(模組載入器)提供到哪裡尋找應用程式的資訊,並註冊了所有必備的模組載入器。
/**
* System configuration for Angular samples
* Adjust as necessary for your application needs.
*/
(function (global) {
  System.config({
    paths: {
      // paths serve as alias
      'npm:': 'node_modules/'
    },
    // map tells the System loader where to look for things
    map: {
      // our app is within the app folder
      app: 'app',
      // angular bundles
      '@angular/core': 'npm:@angular/core/bundles/core.umd.js',
      '@angular/common': 'npm:@angular/common/bundles/common.umd.js',
      '@angular/compiler': 'npm:@angular/compiler/bundles/compiler.umd.js',
      '@angular/platform-browser': 'npm:@angular/platform-browser/bundles/platform-browser.umd.js',
      '@angular/platform-browser-dynamic': 'npm:@angular/platform-browser-dynamic/bundles/platform-browser-dynamic.umd.js',
      '@angular/http': 'npm:@angular/http/bundles/http.umd.js',
      '@angular/router': 'npm:@angular/router/bundles/router.umd.js',
      '@angular/forms': 'npm:@angular/forms/bundles/forms.umd.js',
      '@angular/upgrade': 'npm:@angular/upgrade/bundles/upgrade.umd.js',
      // other libraries
      'rxjs':                      'npm:rxjs',
      'angular-in-memory-web-api': 'npm:angular-in-memory-web-api/bundles/in-memory-web-api.umd.js'
    },
    // packages tells the System loader how to load when no filename and/or no extension
    packages: {
      app: {
        main: './main.js',
        defaultExtension: 'js'
      },
      rxjs: {
        defaultExtension: 'js'
      }
    }
  });
})(this);
4、 運行npm install
1、HTML
<html>
<head>
    <meta charset="UTF-8">
    <title>使用 Angular 2 来创建FlexGrid控件</title>
    <!--angular 2 模块-->
    <!--用于填充旧版浏览器-->
    <script src="node_modules/core-js/client/shim.min.js"></script>
    <script src="node_modules/zone.js/dist/zone.js"></script>
    <script src="node_modules/reflect-metadata/Reflect.js"></script>
    <script src="node_modules/systemjs/dist/system.src.js"></script>
    <!--systemjs 配置-->
    <script src="systemjs.config.js"></script>

    <!--wijmo 模块-->
    <script src="scripts/vendor/wijmo.min.js"></script>
    <script src="scripts/vendor/wijmo.grid.min.js"></script>
    <link rel="stylesheet" href="styles/wijmo.min.css">
    <script src="scripts/vendor/wijmo.angular2.min.js"></script>
    <!--mine-->
    <script>
      System.import('./app/main').catch(function(err){ console.error(err); });
    </script>
</head>
<body>
    <!--申明根组件-->
    <app-cmp>
        Loading
    </app-cmp>
</body>
</html>
在HTML宿主頁面中,除了Angular 2中必須的組件,還需要引入Wijmo腳本。
2、編寫資料服務
'use strict'
import { Injectable } from '@angular/core';
@Injectable()
export class DataService {
    getData(count: number): wijmo.collections.ObservableArray {
        var countries = 'US,Germany,UK,Japan,Italy,Greece'.split(','),
            data = new wijmo.collections.ObservableArray();
        for (var i = 0; i < count; i++) {
            data.push({
                id: i,
                country: countries[i % countries.length],
                date: new Date(2014, i % 12, i % 28),
                amount: Math.random() * 10000,
                active: i % 4 == 0
            });
        }
        return data;
    }
}
3、寫根組件
app.component.ts:
import { Component, Inject } from '@angular/core';
import { DataService } from '../services/data.service';
@Component ({
    selector:'app-cmp',
    templateUrl:'app/components/app.component.html',
})
export class  AppComponent{
    protected dataSvc:DataService;
    data: wijmo.collections.CollectionView;
    constructor(@Inject(DataService) dataSvc:DataService){
        this.dataSvc = dataSvc;
        this.data = new wijmo.collections.CollectionView(this.dataSvc.getData(50));
    }
}
app.component.html:
<div class="header">
    <h2>
        展示如何在angular 2上使用 Wijmo的FlexGrid。
    </h2>
</div>
<div>
<wj-flex-grid [itemsSource]="data">  </wj-flex-grid>
</div>
在這裡只需要引入wj-flex-gridlex,就可以建立標記wj-flex-grid 元件是作為一個子元件存在,在app.module 模組中註入。 itemsSource 綁定一個資料來源,這個itemsSource就是flexgrid已經封裝完成的屬性。
在Angular 2下使用FlexGrid的最大好處是:Angular 2元件提供了使用標記語言來宣告控制項的能力。聲明標記很好地遵循了MVVM設計模式,我們可以完全透過View(標記語言)來配置我們的元件。 FlexGrid支援使用Angular 2標記語言來宣告完整的API。你完全可以使用標記語言設定屬性,附加事件,配置子元件。
4、編寫根模組
在根模組中將組件注入,需要將引用的所有的組件和模組都要注入進來。
import { NgModule } from '@angular/core';
import { BrowserModule } from '@angular/platform-browser';
import { WjGridModule } from 'wijmo/wijmo.angular2.grid';
import { AppComponent } from './components/app.component';
import { DataService } from './services/data.service';
@NgModule({
    imports: [ WjGridModule, BrowserModule],
    declarations: [AppComponent],
    providers:[DataService],
    bootstrap: [AppComponent],
})
export class AppModule { }
5、引導程式
pmreee
start,這時,程式會自動開啟預設瀏覽器並渲染頁面。
start 指令是執行定義在 package.json 檔案中的scripts指令。 會將ts程式碼編譯為原生js,並且會啟動一個靜態伺服器。 這個伺服器會偵測檔案的變化,當發現檔案改動,那麼就會自動編譯ts程式碼。
FlexGrid內建的基本功能例如:排序、過濾、分組、編輯等,也以透過可選的擴充功能來提供其他功能。 FlexGrid和其它產品比較,性能還是不錯的。它的檔案尺寸比較小壓縮後約25K。
下載原始碼
以上就是支援Angular 2的表格控制的內容,更多相關內容請關注PHP中文網(www.php.cn)!