


Macoft Word中的Macsoft Word中的Master吊林懸掛:綜合指南
適當的格式對於學術和法律文件至關重要。 懸掛凹痕經常使用段落的第一行左側,而後續行被縮進,尤其是在引用中。本指南詳細介紹瞭如何使用“段落設置”和“標尺”。

> 在Setapp上可用的怪物Writer提供了直觀功能來簡化文檔格式。
嘗試MonsterWriter Free> >假設您是在海洋生物學論文中格式化的引用。 這是應用懸掛凹痕的方法:
選擇需要懸掛凹痕的段落。
- 轉到
 。
。 - >在
Format > Paragraph節中,從 >下拉菜單中選擇 - 。
IndentationHangingSpecial在>字段中調整縮進尺寸(默認為1.27 cm),如有必要。 >
- 單擊
By。 -
OK
 。
。  >字段中調整縮進尺寸(默認為1.27 cm),如有必要。
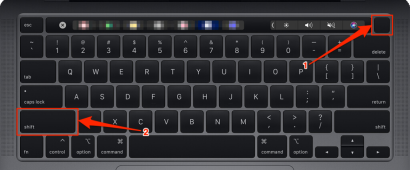
 對於更快的方法,請使用鍵盤快捷鍵:
個人注意:>
當Word的焦點模式存在時,我更喜歡Ulysses的無干擾寫作環境,其中包括語法/樣式檢查,Versatile Export Option,Markdown Exting和直接發布功能。
相關文章:
在Mac 上免費獲取Microsoft Word
- >如何在Mac
- 上鍵入指數 在Mac
- 上鍵入重音 在 >
- 使用標尺 創建一個懸掛凹痕 標尺工具提供了另一種方法:
-
- 打開您的Word Document。
- >轉到
View > Ruler以顯示標尺(如果隱藏)。
- 選擇文本。
- >在標尺上拖動底部三角形(懸掛凹痕標記)以設置凹痕。
>提示:
Monsterwriter簡化了學術文檔格式,處理頭條,腳註和引用。 >
>故障排除懸掛凹痕問題>
- 不正確的凹痕:
避免同時使用左和一線凹痕。確保左右凹痕值在段落設置中為0,並且僅在標尺上拖動底部三角形。 不適用於列表: - 分別調整列表縮進設置,因為列表通常具有獨特的格式。
> 結論
使用標尺,段落設置或⌘t快捷方式,創建懸掛凹痕很簡單。 探索Ulysses和Monsterwriter(可通過Setapp的7天免費試用版獲得),以增強寫作和格式化體驗。
>常見問題>我如何在Mac中創建一個懸掛凹痕?
- 是否有鍵盤快捷鍵?
- >如何調整縮小尺寸?
Format > Paragraph(請記住將包圍的鏈接替換為實際鏈接。) >


以上是如何在Mac上的Word上懸掛:找到簡單的步驟的詳細內容。更多資訊請關注PHP中文網其他相關文章!

 如何安裝MacOS紅杉公共BetaMay 15, 2025 am 10:39 AM
MACOS紅杉公共Beta計劃現已可用,為MAC用戶提供了較早的機會來探索新的MACOS系統軟件更新。但是,重要的是要注意,像所有Beta版本一樣,Macos紅杉公共Beta可能是MOR
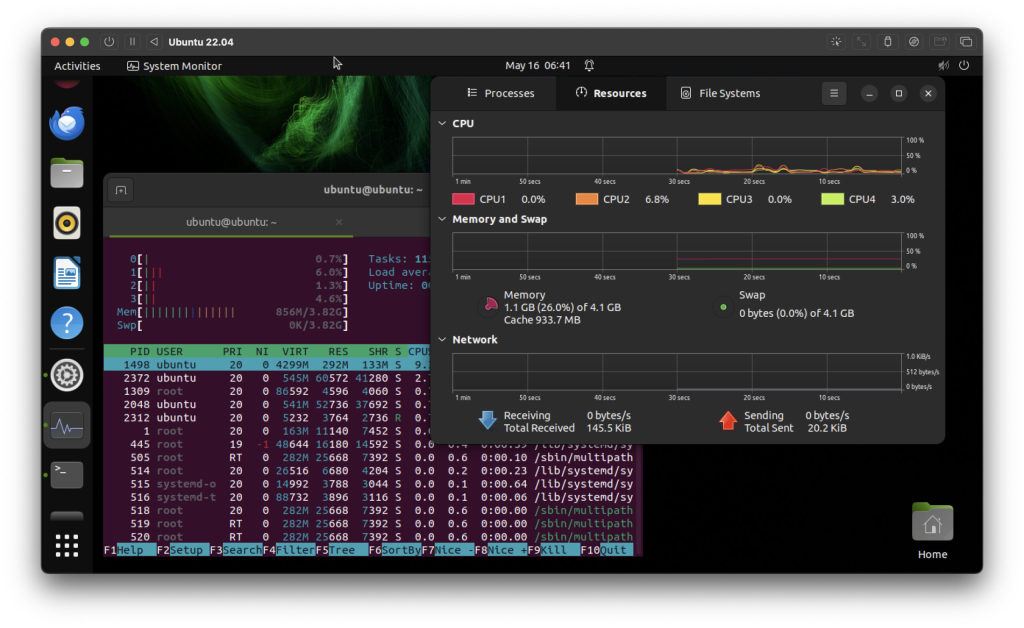 如何在Apple Silicon Mac上運行Ubuntu LinuxMay 15, 2025 am 10:37 AM
有興趣在Apple Silicon Mac上運行Ubuntu Linux嗎?現在,與MacOS一起運行Ubuntu比以往任何時候都要簡單,而無需分區,雙啟動或冒著Mac的操作系統冒險。多虧了虛擬機技術,您
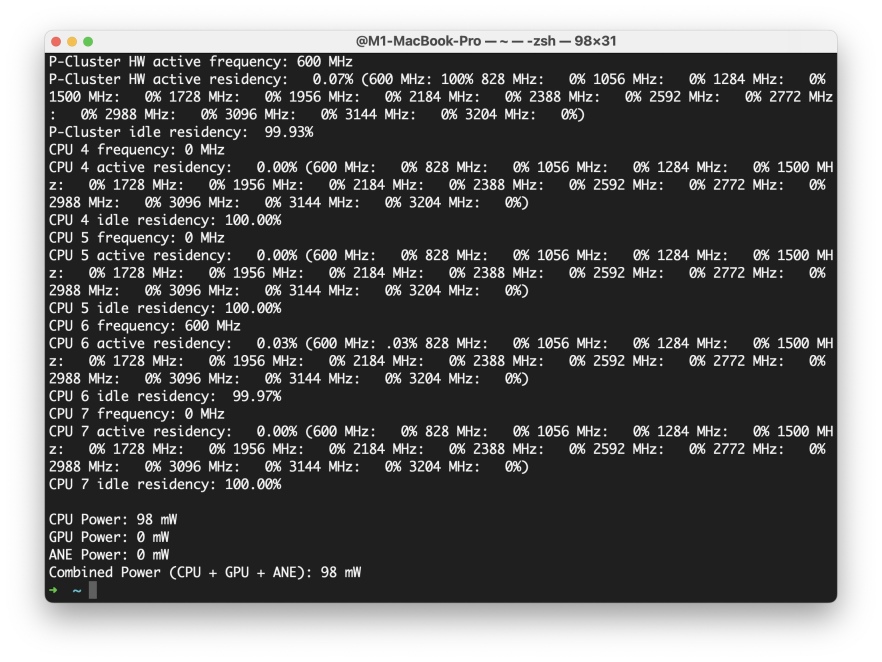 如何使用Powermetrics在Mac上查看單個核心CPU使用情況May 15, 2025 am 10:31 AM
有多種方法可以在Mac上跟踪CPU使用率,其中最受歡迎的是圖形接口的活動監視器,HTOP或命令行用戶的頂部。活動監視器可以顯示可選的核心圖,而HTOP顯示CPU核心
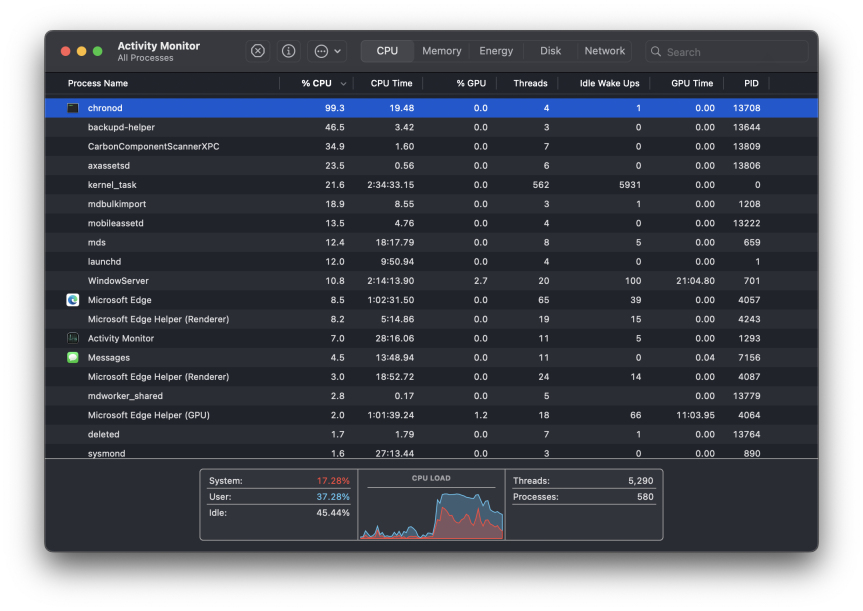 Mac– CPU使用和網絡訪問請求解釋了May 15, 2025 am 10:18 AM
一些Mac用戶偶爾會發現MacOS中的“chronod”進程要么消耗大量系統資源,要么請求訪問網絡連接。有時,chronod也會被過度警覺的防病毒應用程序標記。雖然很多人會忽略這種情況,但還有一些好奇的Mac用戶會積極探究那些消耗大量資源的進程具體是什麼,或者一個需要或要求互聯網訪問的進程的意圖是什麼。那麼,Mac上的chronod是什麼?為什麼它會使用高CPU和系統資源?為什麼它需要網絡訪問?讓我們深入探討一下chronod進程,以更好地理解它的功能。什麼是chronod? chronod進程是
 Mac上的安全代理:它是什麼,它在MacBook Air/Pro上做什麼?May 15, 2025 am 10:11 AM
MAC上的MacScurity代理上的安全代理是什麼是負責管理用戶身份驗證,系統安全通知以及應用程序權限請求的背景過程。它與MacOS的安全服務器t合作
 Mac最好的2位編輯:IMHEX和HEX FIENDMay 15, 2025 am 10:05 AM
十六進制編輯器是專門的軟件工具,旨在查看和編輯六邊形數據以及文件中的原始二進制數據。這些工具對於需要檢查,調試和ANA的程序員,開發人員和反向工程都是必不可少的
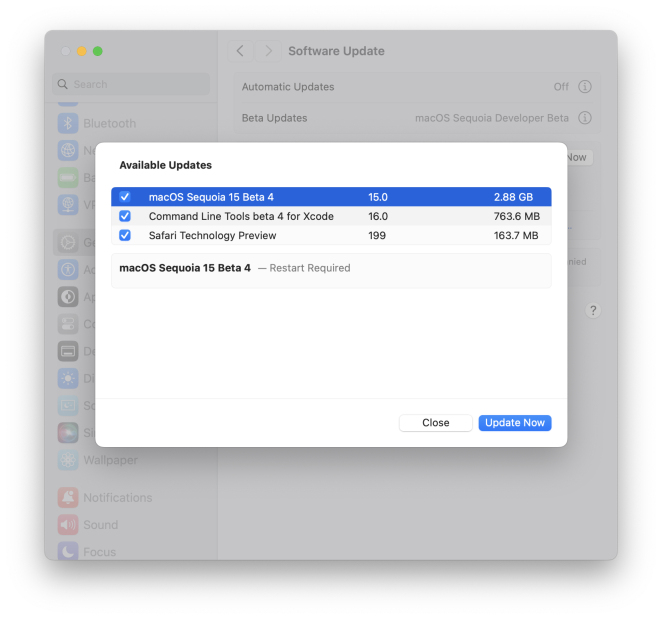 MacOS紅杉15 Beta 4可供下載May 15, 2025 am 09:54 AM
Apple已針對參加MACOS紅杉開發人員Beta測試計劃的人推出了MacOS紅杉15版的第四次Beta版本。通常,標記為MacOS紅杉公共Beta 2的公共Beta測試人員的相應構建已發布
 FaceTime不在Mac上工作?這是解決它的方法May 15, 2025 am 09:49 AM
Apple的FaceTime應用程序旨在無縫連接Apple用戶,從而提供諸如智能手機上的雙攝像機支持,以增強視頻聊天體驗。但是,FaceTime可能無法按預期運行。本文d


熱AI工具

Undresser.AI Undress
人工智慧驅動的應用程序,用於創建逼真的裸體照片

AI Clothes Remover
用於從照片中去除衣服的線上人工智慧工具。

Undress AI Tool
免費脫衣圖片

Clothoff.io
AI脫衣器

Video Face Swap
使用我們完全免費的人工智慧換臉工具,輕鬆在任何影片中換臉!

熱門文章
熱工具

SecLists
SecLists是最終安全測試人員的伙伴。它是一個包含各種類型清單的集合,這些清單在安全評估過程中經常使用,而且都在一個地方。 SecLists透過方便地提供安全測試人員可能需要的所有列表,幫助提高安全測試的效率和生產力。清單類型包括使用者名稱、密碼、URL、模糊測試有效載荷、敏感資料模式、Web shell等等。測試人員只需將此儲存庫拉到新的測試機上,他就可以存取所需的每種類型的清單。

SublimeText3 英文版
推薦:為Win版本,支援程式碼提示!

SublimeText3 Linux新版
SublimeText3 Linux最新版

VSCode Windows 64位元 下載
微軟推出的免費、功能強大的一款IDE編輯器

SublimeText3 Mac版
神級程式碼編輯軟體(SublimeText3)

