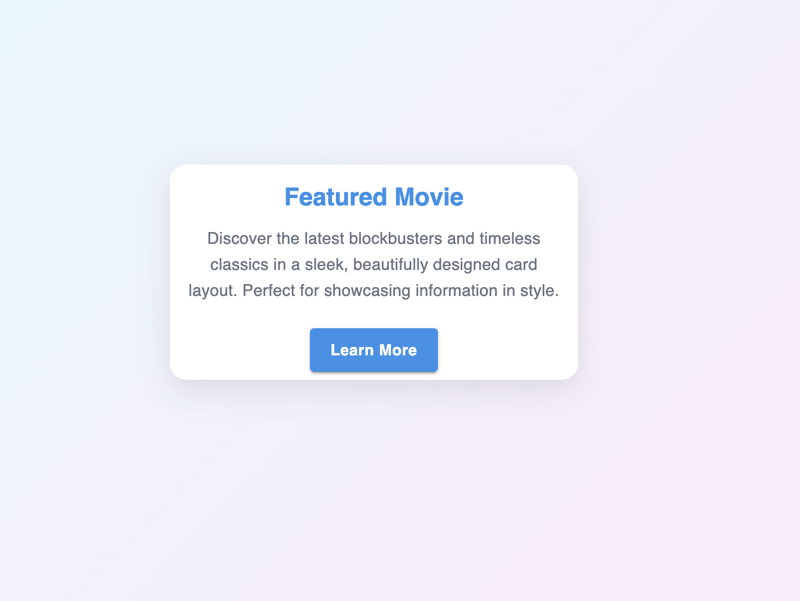
MUI 元件:建立現代 React UI 的完整指南
- Susan Sarandon原創
- 2024-12-29 17:53:11476瀏覽
MUI 元件簡介
Material-UI (MUI) 是一個受歡迎的 React UI 函式庫,它簡化了建立響應式且具有視覺吸引力的 Web 應用程式。有豐富的預先建構組件,例如自動完成、堆疊、選擇、卡片、手風琴、步進器和徽章, MUI節省了開發時間,同時確保了設計的一致性和回應能力。
本指南探討如何有效地使用和自訂這些組件,並透過實際範例幫助您將它們無縫整合到您的專案中。無論您是初學者還是經驗豐富的開發人員,本文都將增強您對 MUI 及其功能的理解。
先決條件
在深入研究 MUI 元件之前,請確保您的開發環境已準備就緒。本指南假設您對 React 有基本的了解並且已經設定了 React 應用程式。如果您是新手或更喜歡更快、輕量級的設置,請考慮使用 Vite——一種用於前端專案的現代構建工具。有關使用 React 設定 Vite 的詳細步驟,請參閱我們的使用 Vite 與 React 的入門指南。
此外,請確保您的專案中安裝了Material-UI (MUI)。您可以透過執行以下命令來完成此操作:
npm install @mui/material @emotion/react @emotion/styled
設定 React 應用程式後,下一步就是整合 MUI
設定主題
Material-UI (MUI) 提供了強大的主題系統,可確保應用程式中所有元件的設計一致性。自訂主題控制顏色、排版、間距等,確保與您的品牌保持一致。
以下是在 MUI 中設定基本主題的方法:
匯入所需的實用程式:使用 createTheme 定義您的自訂主題,並使用 ThemeProvider 將其全域應用。
定義您的主題:指定調色盤、排版和其他設計屬性的值。
包裝您的應用程式:使用 ThemeProvider 將主題傳遞到整個應用程式或特定部分。
範例:建立並套用自訂主題
import React from 'react';
import { createTheme, ThemeProvider } from '@mui/material/styles';
import { Button } from '@mui/material';

// Define a custom theme
const theme = createTheme({
  palette: {
    primary: {
      main: '#1976d2', // Primary color
    },
    secondary: {
      main: '#dc004e', // Secondary color
    },
  },
  typography: {
    fontFamily: 'Roboto, Arial, sans-serif',
  },
});

function App() {
  return (
    <ThemeProvider theme={theme}>
      <Button variant="contained" color="primary">
        Primary Button
      </Button>
      <Button variant="outlined" color="secondary">
        Secondary Button
      </Button>
    </ThemeProvider>
  );
}

export default App;
客製化技巧:
- 擴展主題:增加額外的設計屬性,例如間距或斷點,以根據您的應用需求自訂主題。
- 使用 sx Prop:為了在每個元件的基礎上進行快速自訂,MUI 的 sx prop 可讓您覆蓋內聯樣式,同時仍遵循主題。
透過設定主題,您可以簡化設計流程、保持一致性並簡化應用外觀的未來更新。
關鍵 MUI 元件
MUI 提供了各種元件來簡化 UI 開發。下面,我們探討一些最常用的元件、它們的基本用法和自訂選項。
1. MUI 自動完成
自動完成功能透過提供預先定義清單中的建議來增強使用者輸入。
基本範例:
npm install @mui/material @emotion/react @emotion/styled
客製化:
- 使用 freeSolo 啟用自由打字。
- 使用 groupBy 將選項分組。
- 動態取得選項以實現可擴充性。

2. MUI 堆疊
Stack 以一維佈局(水平或垂直)排列組件。
基本範例:
import React from 'react';
import { createTheme, ThemeProvider } from '@mui/material/styles';
import { Button } from '@mui/material';

// Define a custom theme
const theme = createTheme({
  palette: {
    primary: {
      main: '#1976d2', // Primary color
    },
    secondary: {
      main: '#dc004e', // Secondary color
    },
  },
  typography: {
    fontFamily: 'Roboto, Arial, sans-serif',
  },
});

function App() {
  return (
    <ThemeProvider theme={theme}>
      <Button variant="contained" color="primary">
        Primary Button
      </Button>
      <Button variant="outlined" color="secondary">
        Secondary Button
      </Button>
    </ThemeProvider>
  );
}

export default App;
客製化:
- 更改方向(行、列)和間距。
- 使用響應式道具進行動態佈局。

3. MUI 選擇
Select 是供使用者選擇的下拉元件。
基本範例:
import React from 'react';
import { Autocomplete, TextField } from '@mui/material';

const options = ['Option 1', 'Option 2', 'Option 3'];

function AutocompleteExample() {
  return (
    <Autocomplete
      options={options}
      renderInput={(params) => <TextField {...params} label="Select an Option" />}
    />
  );
}

export default AutocompleteExample;
客製化:
- 使用 CardMedia 新增影像。
- 使用 CardActions 包含動作。

5. MUI 手風琴
手風琴式非常適合常見問題等可折疊部分。
基本範例:
import React from 'react';
import { Stack, Button } from '@mui/material';

function StackExample() {
  return (
    <Stack direction="row" spacing={2}>
      <Button variant="contained">Button 1</Button>
      <Button variant="outlined">Button 2</Button>
    </Stack>
  );
}

export default StackExample;
客製化:
- 使用 Expanded 和 onChange 來控制狀態。
- 使用disableGutters刪除填充。

6. MUI 步進器
Stepper 建立工作流程或多步驟流程。
基本範例:
import React, { useState } from 'react';
import { Select, MenuItem, FormControl, InputLabel } from '@mui/material';

function SelectExample() {
  const [value, setValue] = useState('');

  const handleChange = (event) => setValue(event.target.value);

  return (
    <FormControl fullWidth>
      <InputLabel>


<p><strong>Customization:</strong>  </p>

<ul>
<li>Enable multiple selections with multiple.
</li>
<li>Render custom items with renderValue.</li>
</ul>

<p><img src="/static/imghwm/default1.png"  data-src="https://img.php.cn/upload/article/000/000/000/173546599689834.jpg"  class="lazy" alt="MUI Components: Your Complete Guide to Building Modern React UIs" /></p>

<h4>


  <strong>4. MUI Card</strong>
</h4>

<p>Card displays structured content like text, images, and actions.</p>

<p><strong>Basic Example:</strong><br>
</p>

<pre class="brush:php;toolbar:false">import React from 'react';
import { Card, CardContent, Typography } from '@mui/material';

function CardExample() {
  return (
    <Card>
      <CardContent>
        <Typography variant="h5">Card Title</Typography>
        <Typography variant="body2">Card Content</Typography>
      </CardContent>
    </Card>
  );
}

export default CardExample;
客製化:
- 為步驟新增圖示。
- 使用 sx 設定活動或已完成步驟的樣式。

這些關鍵的 MUI 元件為創建直覺且響應靈敏的介面奠定了基礎。透過自訂選項和實際範例,您可以輕鬆調整它們以滿足您的專案需求。
使用 MUI 元件的最佳實踐
為了最大限度地提高使用 Material-UI (MUI) 的專案的效率和可維護性,請考慮以下最佳實踐:
1.利用主題保持一致
- 原因: 使用 MUI 的主題系統可確保設計的一致性,減少冗餘樣式並提高可維護性。
- 如何: 使用 createTheme 定義自訂主題並使用 ThemeProvider 將其全域應用。這可確保所有組件的顏色、版式和間距保持一致。
- 範例: 使用主題調整應用程式中的主要和次要顏色或版式樣式。
2.使用 sx Prop 進行快速自訂
- 原因: sx 屬性提供了一種簡潔的方法,可以將樣式直接應用於元件,而無需外部 CSS 檔案。
- 如何: 將樣式物件或主題為基礎的值傳遞給 sx 屬性以實現靈活的內聯樣式。
- 範例:
npm install @mui/material @emotion/react @emotion/styled
3.透過延遲載入最佳化效能
- 原因: 延遲載入僅在需要時渲染元件,從而減少了初始載入時間。
- 如何: 使用React的lazy()和Suspense按需載入MUI元件。
- 範例:
import React from 'react';
import { createTheme, ThemeProvider } from '@mui/material/styles';
import { Button } from '@mui/material';

// Define a custom theme
const theme = createTheme({
  palette: {
    primary: {
      main: '#1976d2', // Primary color
    },
    secondary: {
      main: '#dc004e', // Secondary color
    },
  },
  typography: {
    fontFamily: 'Roboto, Arial, sans-serif',
  },
});

function App() {
  return (
    <ThemeProvider theme={theme}>
      <Button variant="contained" color="primary">
        Primary Button
      </Button>
      <Button variant="outlined" color="secondary">
        Secondary Button
      </Button>
    </ThemeProvider>
  );
}

export default App;
4.喜歡有斷點的響應式設計
- 原因: 響應式元件可確保跨裝置的無縫使用者體驗。
- 如何: 使用 Grid 系統或 sx 屬性以及 xs、sm、md 等斷點的回應值。
- 範例:
import React from 'react';
import { Autocomplete, TextField } from '@mui/material';

const options = ['Option 1', 'Option 2', 'Option 3'];

function AutocompleteExample() {
  return (
    <Autocomplete
      options={options}
      renderInput={(params) => <TextField {...params} label="Select an Option" />}
    />
  );
}

export default AutocompleteExample;
5.避免過度使用內聯樣式
- 原因: 雖然 sx 屬性很強大,但過多的內聯樣式會使程式碼變得混亂並降低可讀性。
- 如何: 使用 makeStyles 或 styled API 來實作可重複使用且有組織的樣式。
6.探索元件 API 的進階功能
- 原因: MUI 元件提供了廣泛的 API,可實現進階自訂。
- 如何:定期查閱 MUI 文檔,以利用 Select 中的 MenuProps 或自動完成中的 renderInput 等屬性來滿足特定需求。
7.確保可訪問性 (A11y)
- 原因: 輔助使用可確保您的應用程式可供所有使用者(包括殘障人士)使用。
- 如何: 使用語意 HTML 和可訪問性屬性,如 aria-* 屬性。例如,將 aria-expanded 新增至 Accordion 或將 aria-labelledby 新增至對話方塊元素。
8.在生產中測試組件性能
- 原因: 某些 MUI 元件可能會對效能產生重大影響,尤其是在大型應用程式中。
- 如何: 使用 React DevTools 和 Lighthouse 等工具來分析效能並識別瓶頸。
9.隨時了解 MUI 文件的最新動態
- 原因: MUI 積極維護,定期推出新功能和改進。
- 如何:定期檢查官方文件以獲取更新、最佳實踐和新版本。
10。重複使用元件以實現可擴充性
- 原因: 重複使用元件可以減少開發工作並確保一致性。
- 如何: 將常見 UI 模式抽象化為可重複使用元件(例如按鈕、表單、卡片)以避免重複程式碼。
透過遵循這些最佳實踐,您可以建立高效、可擴展且可維護的應用程序,同時充分利用 MUI 的潛力。
結論
Material-UI (MUI) 元件簡化了建立響應式、現代 Web 應用程式和強大的主題系統的過程。透過遵循本指南中概述的最佳實踐,您可以建立一致、可存取且高度可自訂的介面,從而增強使用者體驗。無論您是初學者還是經驗豐富的開發人員,MUI 都提供了有效提升您的 React 專案的工具。
以上是MUI 元件:建立現代 React UI 的完整指南的詳細內容。更多資訊請關注PHP中文網其他相關文章!

