
如何在 Windows 10 和 11 中強制刪除或解除安裝印表機

- WBOYWBOYWBOYWBOYWBOYWBOYWBOYWBOYWBOYWBOYWBOYWBOYWB原創
- 2024-06-14 22:16:531275瀏覽
您可以從「設定」面板中刪除任何已連接的印表機。如果這不起作用,您可以使用命令提示字元和其他方式刪除印表機。在這裡,我們向您展示在 Windows 電腦上刪除印表機的多種方法。
1. 如何透過設定從 Windows 移除印表機
您可以從「設定」應用程式輕鬆新增或移除印表機。操作方法如下:
- 按 Win + I 開啟「設定」。
- 在左側窗格中開啟藍牙和裝置標籤。這將列出連接到您的電腦的所有印表機。
 按一下要刪除的印表機裝置。
 - 如果遇到錯誤,請停止「服務」管理單元中的「後台列印程式」服務,然後重試!
 如何停止列印後台處理程序服務
 - 如果 Windows 因錯誤而無法刪除印表機,請嘗試停止列印後台處理程序服務並刪除印表機。 Print Spooler 是一項重要的印表機服務,用於在 PC 和印表機之間傳送列印作業。但是,它有時會幹擾並阻止您卸載印表機。
停止列印背景處理程序服務:
按 Win + R 開啟「執行」。 鍵入 services.msc 並按一下「確定」以開啟「服務」管理單元。 在「服務」視窗中,找到「Print Spooler」服務。- 右鍵點選 Print Spooler,然後選擇停止。
- 現在開啟 Windows 設定面板,前往藍牙和裝置 >掃描器和印表機,並嘗試刪除您的印表機裝置。
- 刪除印表機後,返回「服務」視窗。
-
 需要重新啟動 Printer Spooler 服務。如果已停用,您可能會在 PC 上遇到印表機背景處理程序服務未執行錯誤。
 - 2.刪除印表機軟體以刪除印表機
- 如果仍出現已刪除的印表機選項,您可以刪除與該裝置關聯的印表機驅動程式以將其徹底卸載。您可以使用 Windows 10 和 11 中的應用程式和功能標籤刪除驅動程式。
-
 按一下左側窗格中的「應用程式」標籤。應用程式清單可能需要幾秒鐘的時間才能填充,因此請等待所有應用程式都列出。
 - 在應用程式清單下,您可以捲動瀏覽或搜尋印表機驅動程式。

卸載後,重新啟動您的電腦。
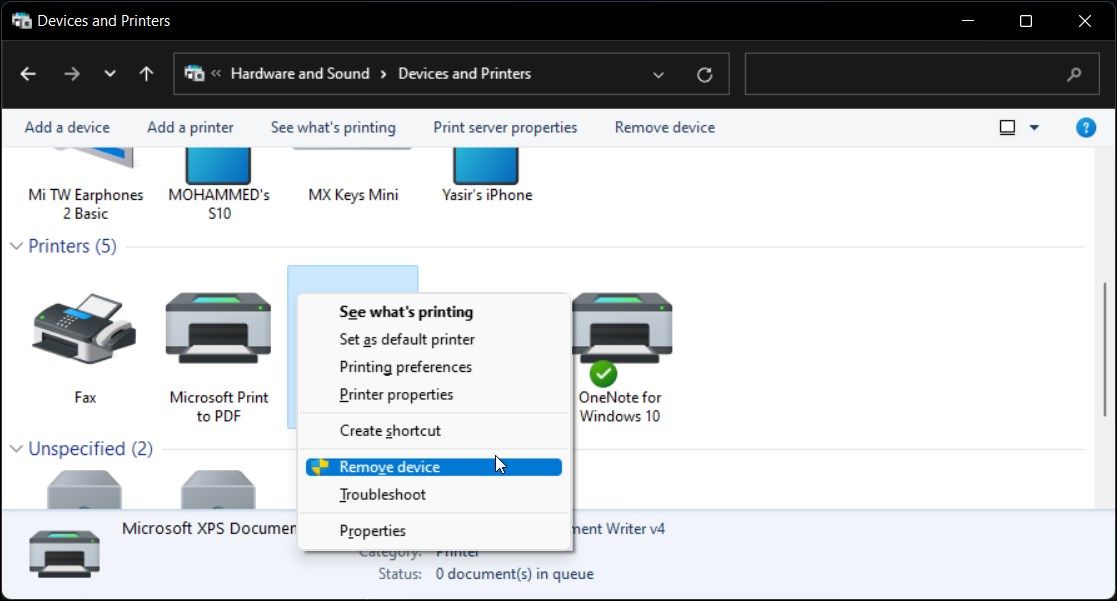
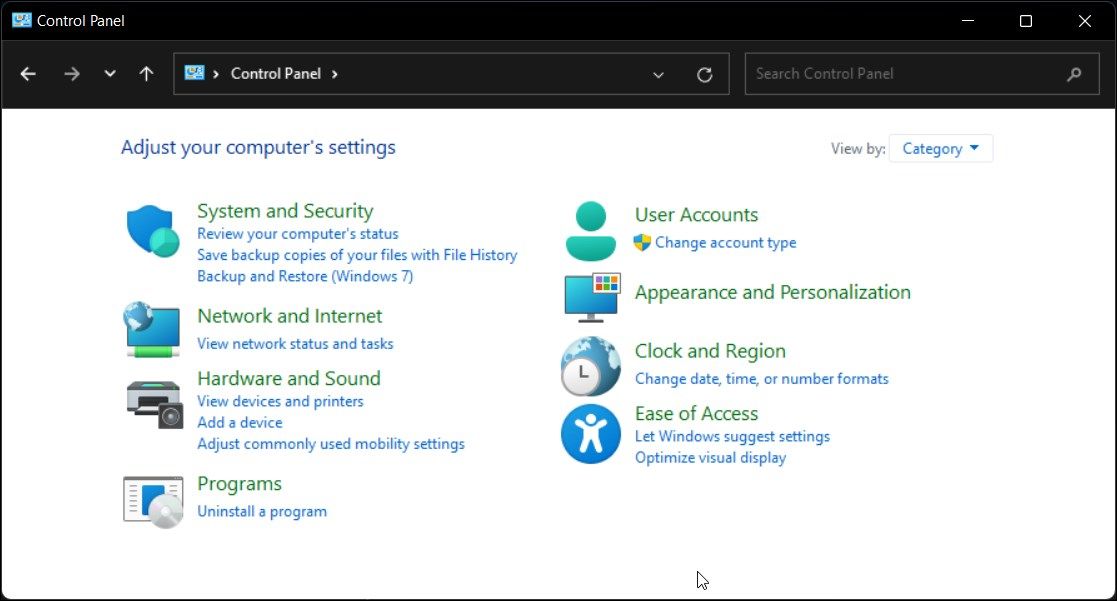
3. 使用控制台刪除印表機
- 您可以使用經典的控制台來管理印表機。如果在卸載過程中未正確刪除印表機,則應該可以從控制台中刪除印表機。
- 若要使用控制台刪除印表機:
- 按 Win + R 開啟「執行」。
- 鍵入 control 並按一下「確定」開啟控制面板。您也可以使用 Windows 搜尋列搜尋該應用程式。
- 在控制台中,前往硬體和聲音。
 在印表機部分下,找到並選擇要刪除的印表機裝置。
 - 點選「是」確認操作。
-
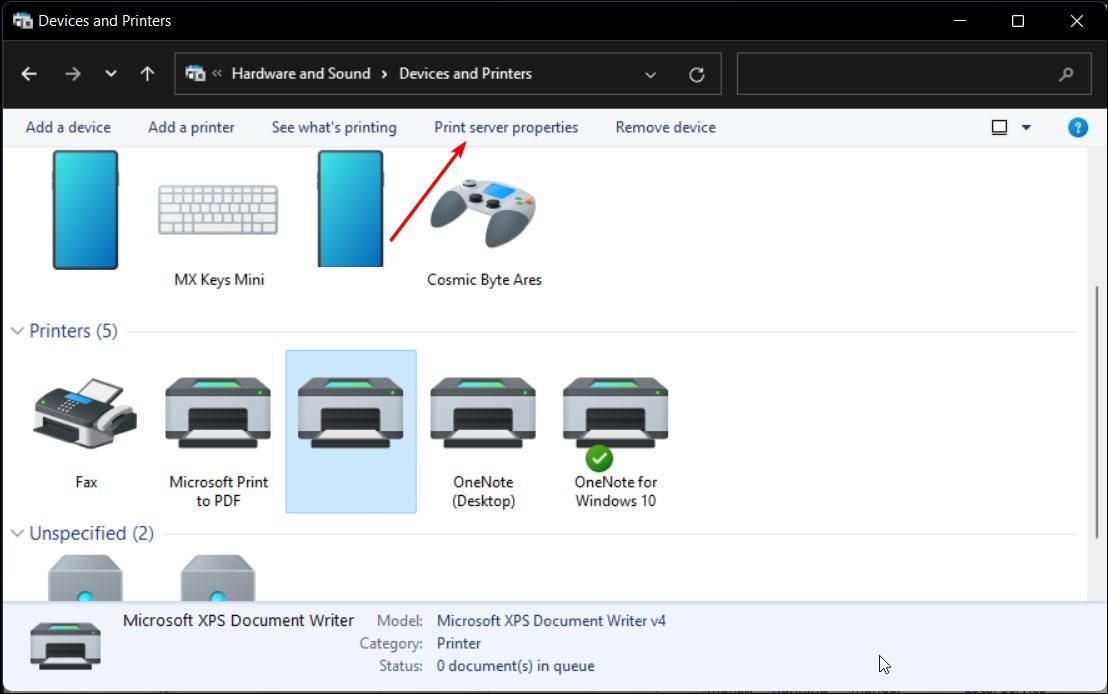
 4. 使用 Windows 列印伺服器屬性刪除印表機
 - 有時,刪除印表機裝置並不能完全刪除驅動程序,並且可能導致印表機停止運作。在這種情況下,您可以使用「列印伺服器屬性」對話方塊刪除已安裝的印表機驅動程式。
- 若要卸載印表機驅動程式:
- 在「已安裝的印表機驅動程式」下,選擇要卸載的印表機驅動程序,然後按一下「刪除」。驅動程式包”選項。
- 按一下「確定」確認操作並刪除驅動程式。
- 重新啟動電腦以完成驅動程式刪除程序。
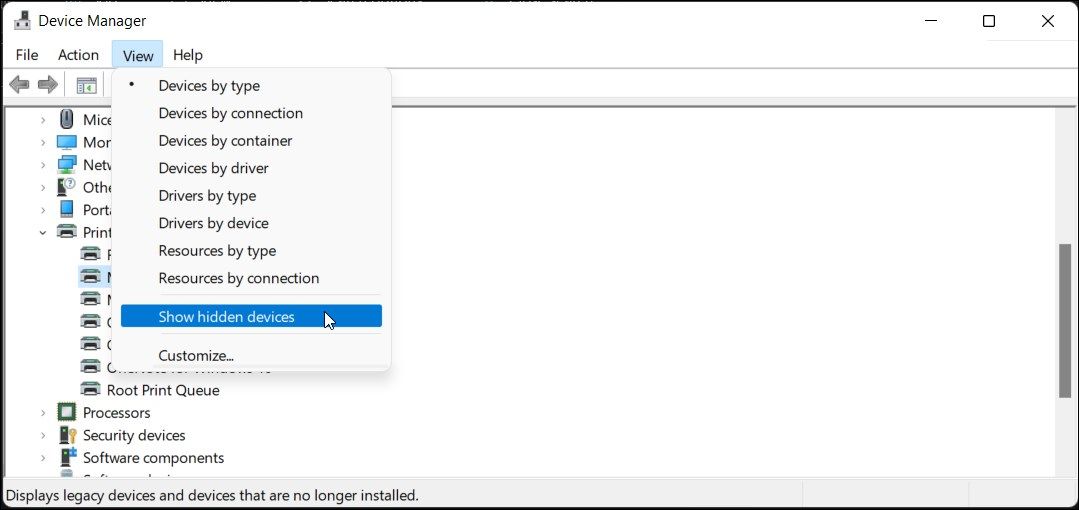
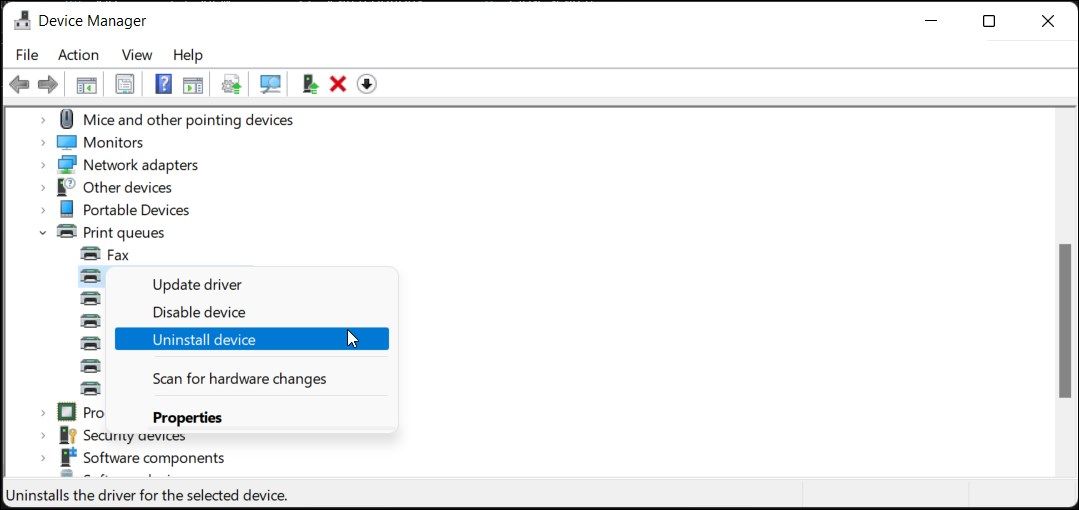
- 5. 使用裝置管理員卸載印表機
 裝置管理員可讓您管理連接到系統的所有周邊設備和內部設備。您可以使用裝置管理員對 Windows 系統進行故障排除、更新驅動程式、新增裝置以及刪除連線的裝置。
 - 若要使用裝置管理員刪除印表機:
 按 Win + X 開啟 WinX 選單。
 - 從上下文功能表中按一下「裝置管理員」。
- 在「裝置管理員」中,按一下「檢視」並選擇「顯示隱藏的裝置」。 。
- 右鍵點選印表機並選擇卸載裝置。
- 如果您喜歡命令提示字元而不是傳統的 UI,則可以使用dl 命令。
- 若要卸載印表機,請使用命令提示字元:
 # 按 Win 並在 Windows 搜尋列中鍵入 cmd。
 - 右鍵點選「命令提示字元」選項,然後選擇「以管理員身分執行」。
-
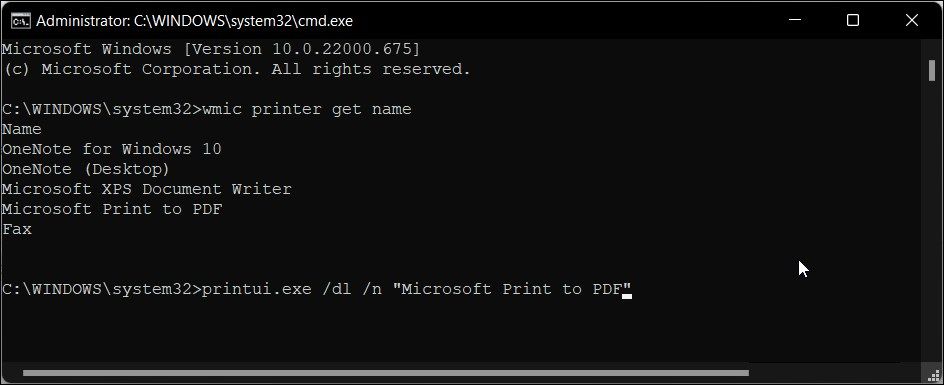
 在命令提示字元視窗中,鍵入以下命令以查看 PC 上所有已安裝的印表機:
<code class="hljs javascript">wmic printer get name </code>
- 若要刪除印表機,請鍵入下列命令:
<code class="hljs xml">printui.exe /dl /n "Your_Printer_Name" </code>
- #在上述命令中,將Your_Printer_Name 替換為您的印表機名稱。
- 按 Enter 執行指令。
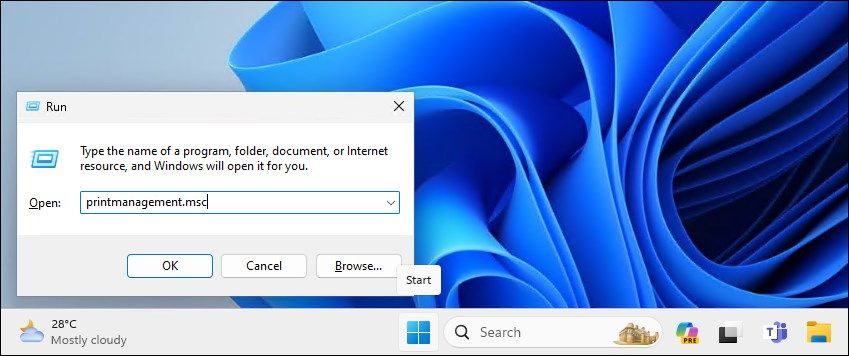
- Press Win + R to open Run.
- Type printmanagement.msc and click OK to open Print Management.
- In the left pane, expand the Print Servers section,
- Click on your Local Printer server name to expand it.
- Next, select Printers to view all the installed printers.
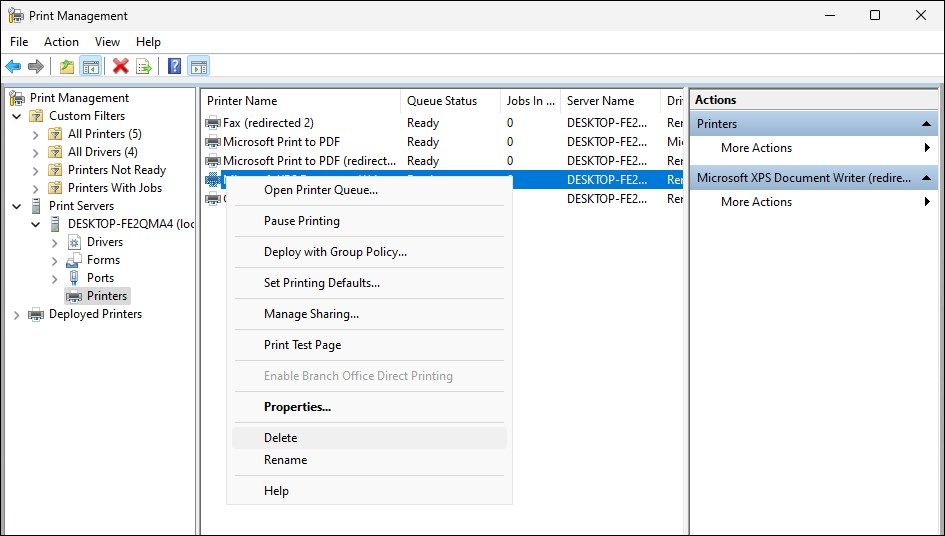
- In the right pane, select and right-click on the printer you want to remove.
- Select Delete and click Yes to confirm the action.
- Press the Win key and type powershell.
- Right-click on Windows PowerShell and select Run as administrator.
- In the PowerShell dialog, type the following command and press Enter to view the list of printers installed on your computer:
<code class="hljs php">Get-PrinterDriver | Format-List Name</code>
- Once you have the list of printers installed, type the following command to remove the printer you want to delete:
<code class="hljs xml">Remove-PrinterDriver -Name "Printer-Name"</code>
- In the above command, replace Printer-Name with the printer name you want to remove.
如果「印表機」部分不可用,請展開「列印佇列」部分並重複刪除印表機的步驟。
關閉裝置管理員並重新啟動電腦以完成卸載程序。
6. 如何使用命令提示字元卸載印表機7. 使用列印管理移除印表機磁碟機
 列印管理是控製印表機、驅動程式、連接埠和伺服器的 Windows 公用程式。您可以使用該工具從 Windows 電腦中移除印表機驅動程式。列印管理實用程式在 Windows 作業系統家用版中不可用。 使用列印管理移除印表機驅動程式:
8. Delete a Printer Driver with PowerShell
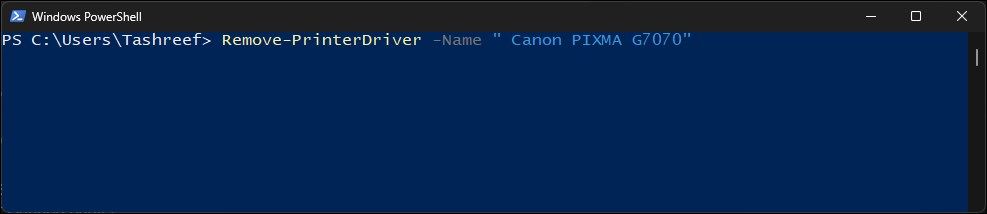
Alternatively, you can delete the printer driver package using PowerShell as an alternative to Print Management. This is also a quicker way to remove multiple printers in your Windows computer.
To remove a printer driver using PowerShell:
The Many Ways to Remove a Printer in Windows 10 and 11
You can easily remove a printer in Windows using the Settings panel. However, if the deleted printer keeps reappearing, you can use the print server properties, Command Prompt, or delete the printer software to remove the printer altogether.
以上是如何在 Windows 10 和 11 中強制刪除或解除安裝印表機的詳細內容。更多資訊請關注PHP中文網其他相關文章!
陳述:
本文內容由網友自願投稿,版權歸原作者所有。本站不承擔相應的法律責任。如發現涉嫌抄襲或侵權的內容,請聯絡admin@php.cn