
如何修復 Windows 11 中遺失的 Wi-Fi 選項

- WBOYWBOYWBOYWBOYWBOYWBOYWBOYWBOYWBOYWBOYWBOYWBOYWB原創
- 2024-06-14 16:28:51654瀏覽
由於各種原因,您的 Windows 11 電腦可能不會顯示 Wi-Fi 連線選項。 Wi-Fi 驅動程式損壞、硬體問題甚至 Windows 作業系統問題都可能是導致此問題的潛在原因。您可能還會注意到 Wi-Fi 連線經常斷線。
以下是一些故障排除步驟,可協助您解決Windows 11 中Wi-Fi 無法運作的問題。提供內建- 故障排除程式可解決電腦週邊設備和網路設備的常見問題。您可以執行 Internet 連線疑難排解來掃描系統中的常見網路問題並自動修復它們。
若要執行 Internet 連線疑難排解:
按 Win + I 開啟「設定」。 在左窗格中開啟「系統」標籤。- 在「選項」下,按一下「其他疑難排解」。 Windows 將啟動疑難排解程式並顯示 Windows 可以解決的問題。
- 按一下「排除我的 Internet 連線故障」。故障排除程序將掃描系統是否有問題並建議潛在的修復方案。應用修復並檢查是否有任何改進。

- 如果問題仍然存在,請執行網路介面卡疑難排解。以下是具體操作方法。
- ## 按 Win + I 開啟「設定」。 在系統標籤中,前往故障排除 >其他疑難排解。
- 向下捲動並點擊網路介面卡的“執行”按鈕。 。


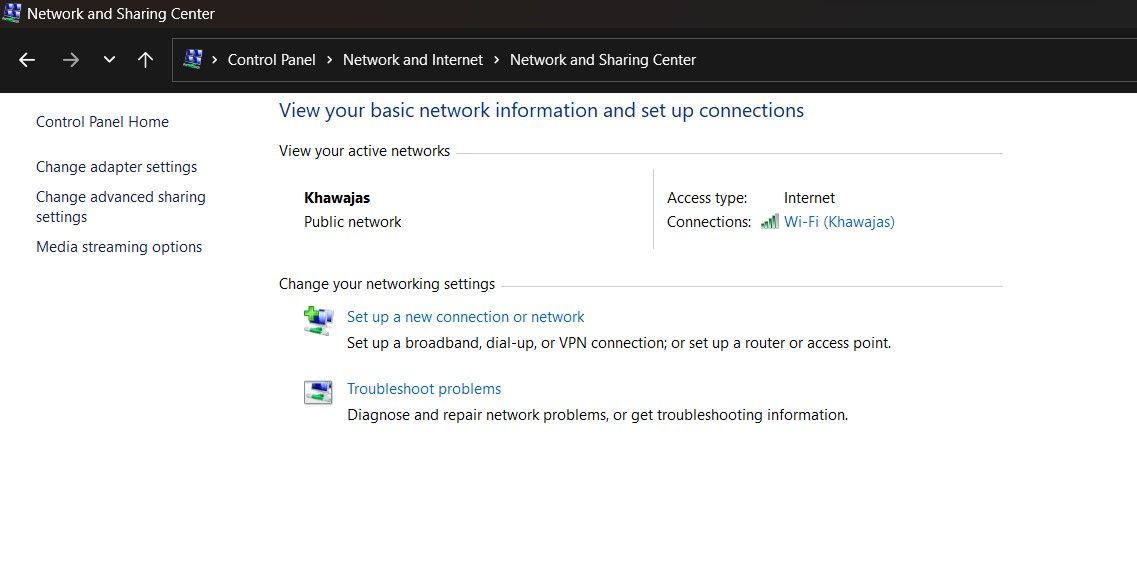
- 如果停用 Wi-Fi 適配器,Windows 11 將不會顯示 Wi-Fi 選項。您可以在控制台中手動啟用或停用網路設備。
- 按 Win + R 開啟「執行」對話方塊。
-
鍵入 control 並按一下「確定」開啟控制面板。您也可以在Windows 搜尋中搜尋“控制面板”,然後從搜尋結果中將其開啟。 。網路和共用中心。 Wi-Fi 轉接器,然後選擇選擇啟用。
- 執行網路診斷以對驅動程式進行故障排除(如果已啟用)。右鍵點選 Wi-Fi 轉接器並選擇診斷。
 鍵入 control 並按一下「確定」開啟控制面板。您也可以在Windows 搜尋中搜尋“控制面板”,然後從搜尋結果中將其開啟。 。網路和共用中心。 Wi-Fi 轉接器,然後選擇選擇啟用。
 Windows 將掃描裝置是否有問題並建議潛在的修復方案。點擊“應用此修復”以解決問題。如果沒有,請按照螢幕上的指示嘗試其他建議。
3. 更新網路介面卡驅動程式
如果您最近執行了升級,Windows 可能未安裝最新的網路驅動程式。網路介面卡驅動程式損壞或故障也可能導致 Wi-Fi 連線故障。您可以將網路介面卡驅動程式更新至最新版本來解決此問題。
- ## 按 Win 鍵開啟 Windows 搜尋。輸入裝置管理員並從搜尋結果中開啟。
- 在裝置管理員中,展開網路介面卡部分。 右鍵點選您的 Wi-Fi 裝置。例如,Intel (R) Wi-Fi AX200 並選擇更新驅動程式。
-
選擇自動搜尋驅動程式。 Windows 將掃描新驅動程式並安裝它們(如果有)。
- 關閉裝置管理員並檢查 Wi-Fi 選項是否已恢復。
- 如果您在裝置管理員中找不到網路介面卡,請依照本指南修復 Windows 中遺失的網路介面卡,然後重試。
- 開啟裝置管理員並展開網路介面卡。
- 右鍵單擊您的Wi-Fi 適配器並選擇“屬性”。 取消選取「允許」電腦關閉此裝置以節省電量的選項。
-
按一下「確定」儲存變更並重新啟動電腦以查看問題是否已解決。
- 5. 啟用 WLAN 自動設定服務
- WLAN 自動設定是無線網路連線的關鍵服務。檢查服務是否已停止並重新啟動以解決 Wi-Fi 問題。
- 在「屬性」對話方塊中,按一下「啟動類型」下拉清單並選擇「自動」。
- 選擇「套用」和「確定」以儲存變更。
- 6. 啟用系統設定工具中的所有服務
- 系統設定公用程式可讓您設定啟動服務以對 Windows 電腦進行故障排除。如果您最近使用它來排除電腦故障,請確保所有服務都已啟用。 ## 按 Win + R 開啟「執行」。
- 鍵入 msconfig.msc 並按一下「確定」。
- 接下來,開啟「系統設定」對話方塊中的「服務」標籤。
- 您也可以重新安裝網路介面卡裝置。此過程將刪除並重新安裝網路裝置驅動程式以解決常見問題。
- 開啟裝置管理員並展開網路介面卡部分。
- 右鍵點選 Wi-Fi 裝置並卸載裝置。按一下“卸載”按鈕確認操作。 Windows 將掃描遺失但已連接的裝置並重新安裝必要的驅動程式。
- 如果問題仍然存在,請依照下列步驟操作:
- 右鍵點選命令提示字元並選擇以管理員身份執行。
-
在命令提示字元視窗中,鍵入以下命令以執行電腦完全關閉:
<code class="hljs ">shutdown /s /f /t 0 </code>
- 重新啟動後,Windows 將自動重新安裝 Wi-Fi 裝置驅動程式並關閉復原Wi-Fi 連線。
-
- Open Device Manager and expand the Network Adapters section.
- Select and right-click on your Wi-Fi adapter and select Update Driver.
- Select Browse my computer for drivers.
- Select the Let me pick from a list of available drivers on my computer option.
- Select the first driver in the list and click Next. Device Manager will start installing the selected driver. Once completed, check if your Wi-Fi is working.
7. Perform a Network Reset
Windows 11 offers a built-in option to perform a network reset. This process will remove and reinstall the network adapters. In addition, other networking components will reset to their default settings to fix problems triggered due to incorrect network configuration.
- Open Settings and click on the Network & Internet tab in the left pane.
- Scroll down and click on Advanced network settings to view all network devices and the network reset option.
- Scroll down to the More settings section and click on Network reset.
- Click the Reset now button for Network reset. Click Yes to confirm the action.
- Once the reset is complete, you should have the Wi-Fi connection restored. However, after the reset, you might need to reinstall and reconfigure other networking devices and software.
8. Reset the Network Device and Network Stack Using the Command Prompt
You can use the Command Prompt to reset your network devices. These commands will reset TCP/IP, restore advanced firewall settings, and Winsock reset.
Execute all the commands below in order, even if you encounter errors during execution.
- Press the Win + X key to open the WinX menu.
- Next, click on Windows Terminal (Admin). Click Yes if prompted by User Account Control.
- In the Windows Terminal window, type the following command in the given order:
<code class="hljs bash">netsh int ip resetnetsh advfirewall resetnetsh winsock resetipconfig /flushdnsipconfig /releaseipconfig /renew</code>
- Once all the commands are executed, restart your computer. After the restart, check if the Wi-Fi option is restored.
9. Check For Windows Updates
This is another fix for PCs with a fresh Windows installation. If you haven't already, run the Windows Update tool to check for pending Windows and third-party vendor updates. These updates can contain bug fixes and essential driver releases for the network devices.
- Press Win + I to open Settings.
- Open the Windows update tab in the left pane.
- Click on Check for updates. Windows will take a few seconds to look for new updates. Download and install them and restart your PC to apply the changes if available.
- Next, on the Windows update page, click on Advanced options.
- Scroll down and click on Optional updates.
- Click on Driver updates to view all the available updates. Select any update from your system manufacturer and click Download & install. Restart your PC to apply the changes.
If you don't have access to a wired Internet connection, use your smartphone's tethering capabilities.
Finally, if the problem persists, consider going back to the previous version of Windows 11. This is particularly useful if the Wi-Fi connectivity issue occurs after performing an upgrade.
To do this, open Settings > System > Recovery. Under Recovery options, click the Go back button and follow on-screen instructions to restore the earlier version of Windows.
但是,此功能具有時間敏感性,僅在執行升級後十天內可用。您可以在Windows 11 中將10 天回溯期延長至60 天。原因而停止工作。但是,您通常可以使用內建的網路故障排除程式來修復它。此外,重新安裝或更新網路驅動程式以解決問題。
如果系統仍然拒絕偵測您的無線網絡,請檢查您的 Wi-Fi 卡是否有硬體問題。您可以更換故障的 Wi-Fi 卡或選擇 Wi-Fi 轉接器作為快速即插即用解決方案。

 選擇自動搜尋驅動程式。 Windows 將掃描新驅動程式並安裝它們(如果有)。
4. 設定網路介面卡電源管理設定
預設情況下,Windows 可以在電腦進入睡眠模式時關閉網路介面卡以節省電力。但是,此設定可能會導致 Wi-Fi 連線問題。您可以透過關閉網路介面卡的電源管理設定來快速解決此問題。

 按一下「確定」儲存變更並重新啟動電腦以查看問題是否已解決。

按一下「全部啟用」以啟用所有服務。重新啟動電腦以啟用所有服務。
5. 重新安裝網路介面卡驅動程式

 在命令提示字元視窗中,鍵入以下命令以執行電腦完全關閉:
6. 手動重新安裝 Wi-Fi 裝置驅動程式
- 您可以手動安裝 Wi-Fi 裝置驅動程式來恢復遺失的 Wi-Fi 選項。具體做法如下:


以上是如何修復 Windows 11 中遺失的 Wi-Fi 選項的詳細內容。更多資訊請關注PHP中文網其他相關文章!