jQuery jcrop外掛截圖使用方法_jquery
- WBOYWBOYWBOYWBOYWBOYWBOYWBOYWBOYWBOYWBOYWBOYWBOYWB原創
- 2016-05-16 17:13:382211瀏覽
在後台來進行圖片切割。
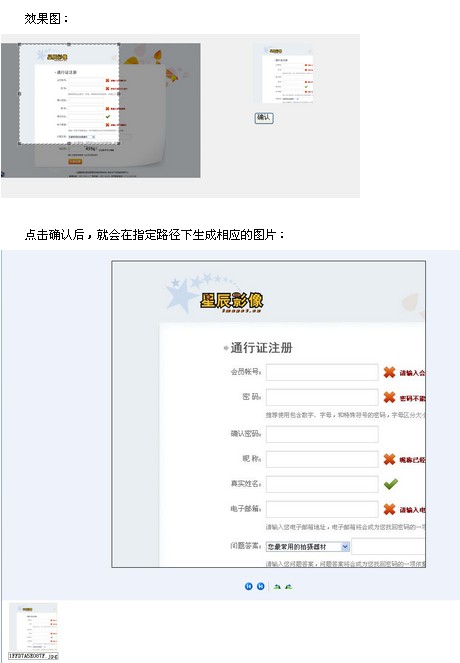
頭像截取的原理:在前台使用jcrop取得切面的x軸座標、y軸座標、切面高度、切面寬度,然後將這四個值傳給後
台。在後台要進行放大處理:將切面放大N倍,N=原圖/前台展示的頭像。即X = X*原圖寬/前圖寬,Y = Y*原圖高/前
圖高,W = W*原圖寬/前圖寬,H = H*原圖高/前圖高。
實例:
JSP:
樣式:大圖、小圖展示都需要固定高度、寬度,因為後台需要進行放大處理。即:
將下載的壓縮包解壓縮後可以看到三個資料夾及一個index.html文件,/ css下放置的是Jcorp的樣式文件,/demo下放置的是幾個簡單的例子(index.html中引用的連結就是放置在這個資料夾下),/js下放置的是Jcorp中最重要的腳本檔案。我們只需要使用三個檔案:jquery.Jcrop.css、jquery.Jcrop.js、JQuery.js
程式碼如下:
//裁切圖片 $("#srcImg").Jcrop( {
aspectRatio : 1,
onChange : showCoords,
onChange : showCoords,
:[200,200]
});
//簡單的事件處理程序,響應自onChange,onSelect事件,依照上面的Jcrop呼叫
function showCoords(obj) {
$("#x").val(obj.x);
$("#y").val(obj.y);
$("#w").val(obj.w);
$("#h").val(obj. h);
if (parseInt(obj.w) > 0) {
//計算預覽區域圖片縮放的比例,透過計算顯示區域的寬度(與高度)與剪裁的寬度(與高度)之比得到
var rx = $("#preview_box").width() / obj.w;
var ry = $("#preview_box").height() / obj.h;
/ /透過比例值控制圖片的樣式與顯示
$("#previewImg").css( {
width : Math.round(rx * $("#srcImg").width()) "px" , //預覽圖片寬度為計算比例值與原圖寬度的乘積
height : Math.round(rx * $("#srcImg").height()) "px", //預覽圖片高度為計算比例值與原圖片高度的乘積
marginLeft : "-" Math.round(rx * obj.x) "px",
marginTop : "-" Math.> marginTop : "-" Math. "
});
}
}
還有一種呼叫的方法,
onChange: showPreview,
onSelect: showPreview,
aspectRatio: 1 });
This method is to assign the object generated by Jcrop to a global variable, which will make the operation more convenient.
Through the above js, the four values of X-axis coordinate, Y-axis coordinate, height H, and width W are passed to the background. The background only needs to enlarge and then cut based on these four values
That’s it.
Action
/**
* Crop avatar
*/
public String cutImage(){
/*
* Get parameters
* x,y,w,h,bigImage
*/
HttpServletRequest request = (HttpServletRequest) ActionContext.getContext ().get(ServletActionContext.HTTP_REQUEST);
int x = Integer.valueOf(request.getParameter("x"));
int y = Integer.valueOf(request.getParameter("y"));
int w = Integer.valueOf(request.getParameter("w"));
int h = Integer.valueOf(request.getParameter("h"));
String bigImage = request.getParameter( "bigImage");
//Get the real path of the file
//Get the file name
String[] imageNameS = bigImage.split("/");
String imageName = imageNameS[ imageNameS.length-1];
//Formal path of the file
String imagePath = getSavePath() "\" imageName;
//Cut the image
ImageCut imageCut = new ImageCut();
imageCut.cutImage(imagePath, x, y, w, h);
//After the avatar is cropped, save the image path to the user
UserBean userBean = (UserBean) request.getSession( ).getAttribute("userBean");
userBean.setUserPhoto(bigImage);
//Save avatar
UserCenterService centerService = new UserCenterService();
centerService.updatePhoto(userBean);
//Save the modified user into the session
request.getSession().setAttribute("userBean", userBean);
return "updatePhoto";
}
}
Crop image tool class: ImageCut.java
public class ImageCut {
/* *
* Image cutting
* @param imagePath Original image address
* @param x Target slice coordinates X-axis starting point
* @param y Target slice coordinates Y-axis starting point
* @param w Target Slice width
* @param h Target slice height
*/
public void cutImage(String imagePath, int x,int y,int w,int h){
try {
Image img;
ImageFilter cropFilter;
/ / Read source image
BufferedImage bi = ImageIO.read(new File(imagePath));
int srcWidth = bi.getWidth(); // Source image width
int srcHeight = bi.getHeight() ; // Source image height
// If the original image size is larger than the slice size, cut it
if (srcWidth >= w && srcHeight >= h) {
Image image = bi. getScaledInstance(srcWidth, srcHeight,Image.SCALE_DEFAULT);
int x1 = x*srcWidth/400;
int y1 = y*srcHeight/270;
int w1 = w*srcWidth/400;
int h1 = h*srcHeight/270;
cropFilter = new CropImageFilter(x1, y1, w1, h1);
img = Toolkit.getDefaultToolkit().createImage(new FilteredImageSource(image. getSource(), cropFilter));
BufferedImage tag = new BufferedImage(w1, h1,BufferedImage.TYPE_INT_RGB);
Graphics g = tag.getGraphics();
g.drawImage(img, 0, 0 , null); // Draw the reduced image
g.dispose();
// Output as a file
ImageIO.write(tag, "JPEG", new File(imagePath));
}
} catch (IOException e) {
e.printStackTrace();
}
}
}


