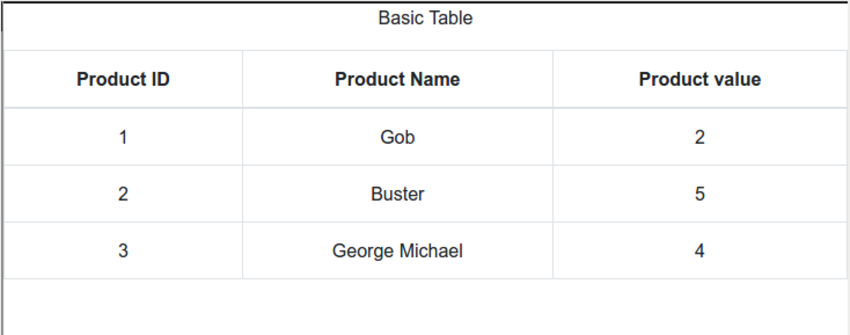
We know that Dreamweaver has done an excellent job in making tables, but at some point it still has to be combined with CSS to achieve some specific effects. Let’s first sort out the CSS syntax for table borders, and then introduce how to use CSS to beautify it. The border of the table.
CSS syntax for table borders
Specific contents include: top border width, right border width, bottom border width, left border width, Border width, border color, border style, top border, bottom border, left border, right border, border, width, height, related labels, etc.
1. Top border width
Syntax: border-top-width:
Allowed values: thin | medium | thick |
Initial value: medium
Applicable to: all objects
Backward compatibility: no
Top border width property is used Specifies the width of an element's top border. The value can be one of three keywords, none of which are affected by font size or length, and can be used to implement proportional widths. Negative values are not allowed. It can also be used to abbreviate the top border, the width of the border, or the properties of the border.
2. Right border width
Syntax: border-right-width:
Allowed values: thin | medium | thick |
Initial value: medium
Applicable to: all objects
Backwards compatible: no
The right border width property is used for Specifies the width of the element's right border. The value can be one of three keywords, none of which are affected by font size or length, and can be used to implement proportional widths. Negative values are not allowed. Can also be used to abbreviate the right border, border width, or border properties.
3. Bottom border width
Syntax: border-bottom-width:
Allowed values: thin | medium | thick |
Initial value: medium
Applicable to: all objects
Backward compatibility: no
The bottom border width attribute is used Specifies the width of the element's bottom border. The value can be one of three keywords, none of which are affected by font size or length, and can be used to implement proportional widths. Negative values are not allowed. It can also be used to abbreviate the bottom border, the width of the border, or the properties of the border.
4. Left border width
Syntax: border-left-width:
Allowed values: thin | medium | thick |
Initial value: medium
Applicable to: all objects
Backwards compatible: no
The left border width property is used for Specifies the width of the element's left border. The value can be one of three keywords, none of which are affected by font size or length, and can be used to implement proportional widths. Negative values are not allowed. It can also be used to abbreviate the left border, the width of the border, or the properties of the border.
5. Border width
Syntax: border-width:
Allowed values: [ thin | medium | thick | < ;Length> ]{1,4}
Initial value: undefined
Applicable to: all objects
Backward compatibility: No
Border The width attribute sets the bounds of an element with one to four values, where the value is a keyword or length. Negative lengths are not allowed. If all four values are given, they apply to the top, right, bottom, and left border styles respectively. If a value is given, it will be applied to each edge. If two or three values are given, the omitted value is equal to the opposite side. This property is shorthand for the top, right, bottom, and left properties. You can also use the abbreviated border attribute.
6. Border color
Syntax: border-color:
Allowed values:
Initial value: the value of the color attribute
Applicable to: all objects
Backward compatibility: No
The border color attribute sets the value of an element Border color. You can use one to four keywords. If all four values are given, they apply to the top, right, bottom, and left border styles respectively. If a value is given, it will be applied to each edge. If two or three values are given, the omitted value is equal to the opposite side. You can also use the abbreviated border attribute.
7. Border style
Syntax: border-style:
Allowed values: [ none | dotted | dashed | solid | double | groove | ridge | inset | outset ]{1,4}
Initial value: none
Applicable to: all objects
Backward compatibility: No
邊框樣式屬性用來設定一個元素邊框的樣式。這個屬性必須用來指定可見的邊框。可以使用一到四個關鍵字。如果四個值都給了,它們分別應用於上、右、下和左邊框框的式樣。如果給予一個值,它將被運用到各邊上。如果兩個或三個值給出了,省略了的值與對邊相等。也可以使用略寫的邊框屬性。
none:無樣式;
dotted:點線;
dashed:虛線;
solid:實線; :槽線;
ridge:脊線;
inset:內凹;
outset:外凸。
語法: border-top:
寬度允許值: ||
初始值: 未定義
適用於: 所有物件
向下相容:用於設定一個元素上邊框的寬度、式樣和顏色的略寫。注意只能給一個邊框式樣。也可以使用略寫的邊框屬性。
9.右邊框語法: border-right: 寬度允許值:
寬度允許值: ||
初始值: 未定義
適用於: 所有物件
向下相容:用於設定一個元素右邊框的寬度、式樣、和顏色的略寫。注意只能給一個邊框式樣。也可以使用略寫的邊框屬性。
10.下邊框
語法: border-bottom: 允許值: 🎜>
允許值: > || 初始值: 未定義 適用於: 所有物件 向下相容:用於設定一個元素的下邊框的寬度、式樣和顏色的略寫。注意只能給一個邊框式樣。也可以使用略寫的邊框屬性。11.左邊框
語法: border-left:寬允許值: > ||
初始值: 未定義 適用於: 所有物件 向下相容:用來設定一個元素左邊框的寬度、式樣和顏色的略寫。注意只能給一個邊框式樣。也可以使用略寫的邊框屬性。12.邊框
語法: border: 語法: border:語法:>
初始值: 未定義 適用於: 所有物件 〜化物>否 向下對應邊框的寬度、式樣和顏色的略寫。 邊框聲明的例子包括: H2 { border: groove 3em }A:link {order: solid 3em }
A:linkorder {order: solid 3em }A:linkorder {order: solid 3em }
A:linkorder {order: solid 3em } }
A:active { border: thick double red }
邊框屬性只能設定四種邊框;只能給出一組邊框的寬度和式樣。為了給出一個元素的四種邊框的不同的值,網頁製作者必須用一個或更多的屬性,如:上邊框、右邊框、下邊框、左邊框、邊框顏色、邊框寬度、邊框式樣、上邊框寬度、右邊框寬度、下邊框寬度或左邊框寬度。
語法: width:
允許值: |
允許值: | 🎜> 初始值: auto
適用於: 區塊級與替換元素
向下相容: 否
向下相容: 否
向下相容: 否
14.高度 語法: height: 允許值: 允許值: 允許值: | : auto 適用於: 區塊級和替換元素 向下相容: 否高度屬性的初始值為否「auto」高度(有就是元素自己的高度,)。百分比參考上級元素的寬度。不允許使用負的長度值。
15.相關標籤 table:表格標籤,對整個表格樣式的定義要放在table中;
td:單元格標籤,單元格樣式的定義要放在td中。
 如何使用 JavaScript 实现表格列宽拖拽调整功能?Oct 21, 2023 am 08:14 AM
如何使用JavaScript实现表格列宽拖拽调整功能?随着Web技术的发展,越来越多的数据以表格的形式展示在网页上。然而,有时候表格的列宽并不能满足我们的需求,可能会出现内容溢出或者宽度不足的情况。为了解决这个问题,我们可以使用JavaScript实现表格的列宽拖拽调整功能,使用户可以根据需求自由调整列宽。实现表格列宽拖拽调整功能,需要以下三个主
 表格有一条虚线外打印不到怎么办Mar 28, 2023 am 11:38 AM
表格有一条虚线外打印不到的解决办法:1、打开excel文件,在打开的页面中点击“打印”;2、在预览页找到“无缩放”,选择调整为一页;3、选择打印机打印文档即可。
 css怎么去掉表格重复的边框Sep 29, 2021 pm 06:05 PM
在css中,可以使用border-collapse属性来去掉表格中重复的边框,该属性可以设置表格边框是折叠为单一边框还是分开的,只需要将值设置为collapse即可把重叠的边框合并在一起,成为一个边框,实现单线边框的效果。
 Vue中如何实现表格数据的导出和导入Oct 15, 2023 am 08:30 AM
Vue中如何实现表格数据的导出和导入,需要具体代码示例在使用Vue开发的Web项目中,经常会遇到需要将表格数据导出为Excel或导入Excel文件的需求。本文将介绍如何使用Vue来实现表格数据的导出和导入功能,并提供具体的代码示例。一、表格数据的导出安装依赖首先,我们需要安装一些依赖,用于导出Excel文件。在Vue项目中的命令行中运行以下命令:npmin
 使用JavaScript实现表格筛选功能Aug 10, 2023 pm 09:51 PM
使用JavaScript实现表格筛选功能随着互联网技术的不断发展,表格成为了网页中常见的展示数据的方式。然而,当数据量庞大时,用户往往会面临找到特定数据的困难。因此,为表格添加筛选功能,让用户可以快速找到所需的数据,成为了很多网页设计的需求。本文将介绍如何使用JavaScript实现表格筛选功能。首先,我们需要有一份表格数据。下面是一个简单的例子:<t
 如何使用 JavaScript 实现表格分页功能?Oct 20, 2023 pm 06:19 PM
如何使用JavaScript实现表格分页功能?随着互联网的发展,越来越多的网站都会使用表格来展示数据。在一些数据量较大的情况下,需要将数据进行分页展示,以提升用户体验。本文将介绍如何使用JavaScript实现表格分页功能,并提供具体的代码示例。一、HTML结构首先,我们需要准备一个HTML结构来承载表格和分页按钮。我们可以使用<tab
 使用JavaScript实现表格数据的分页显示Jun 16, 2023 am 10:00 AM
随着数据的不断增长,表格显示变得更加困难。大多数情况下,表格中的数据量过大,导致表格在加载时变得缓慢,而且用户需要不断地浏览页面才能找到自己想要的数据。本文将介绍如何使用JavaScript实现表格数据的分页显示,让用户更容易找到自己想要的数据。一、动态创建表格为了使分页功能更加可控,需要动态创建表格。在HTML页面中,添加一个类似于下面的table元素。
 React中使用表格:第一部分Sep 04, 2023 pm 07:21 PM
用于呈现数据的最常见的用户界面元素之一是表格。事实证明,使用表格时需要控制很多方面,例如:定义列和标题各种单元格格式(文本、数字、复选框)调整大小过滤动态成长样式在这个由两部分组成的系列中,您将了解使用ReactBootstrapTable组件在React中处理表格数据的细节。您将能够轻松创建复杂且具有专业外观的表格,并且能够自定义各个方面。开始使用 首先,您应该熟悉React本身。如果您需要React入门知识,EnvatoTuts+有一个很棒的系列可以帮助您开始使用React。在本教程中,我们


熱AI工具

Undresser.AI Undress
人工智慧驅動的應用程序,用於創建逼真的裸體照片

AI Clothes Remover
用於從照片中去除衣服的線上人工智慧工具。

Undress AI Tool
免費脫衣圖片

Clothoff.io
AI脫衣器

AI Hentai Generator
免費產生 AI 無盡。

熱門文章

熱工具

SublimeText3漢化版
中文版,非常好用

MinGW - Minimalist GNU for Windows
這個專案正在遷移到osdn.net/projects/mingw的過程中,你可以繼續在那裡關注我們。 MinGW:GNU編譯器集合(GCC)的本機Windows移植版本,可自由分發的導入函式庫和用於建置本機Windows應用程式的頭檔;包括對MSVC執行時間的擴展,以支援C99功能。 MinGW的所有軟體都可以在64位元Windows平台上運作。

禪工作室 13.0.1
強大的PHP整合開發環境

SublimeText3 Mac版
神級程式碼編輯軟體(SublimeText3)

WebStorm Mac版
好用的JavaScript開發工具


