






frp 内网穿透一站式 skill,覆盖从零到日常运维全流程。首次使用会引导用户:从 gitee.com/DYXZYT/frp-cli 安装 frp-cli 二进制(带源码构建兜底)、可选购阿里云轻量应用服务器和域名(含套餐选型、地域选择、ICP 备案说明)、配置阿里云控制台和系统双层防火墙、在云端部署 frps 服务端、本机连接客户端、按场景(SSH / Web / RDP / MySQL / Minecraft / NAS / Webhook)添加第一条端口映射;已初始化的用户会自动跳
frp-cli技能(统一设置+操作). frp-cli是一款围绕 frp(frpc + frps)的 git 风格包装器,配置配置配置,结构化的 JSON 输出
功能概述
frp-cli技能(统一设置+操作). frp-cli是一款围绕 frp(frpc + frps)的 git 风格包装器,配置配置配置,结构化的 JSON 输出是一项面向实际任务的技能。它将相关步骤、工具调用和结果整理方式集中到统一流程中,帮助使用者更快完成目标并减少重复操作。
核心要点
- 使用时应结合输入条件选择合适的执行方式,核对必要参数、依赖环境与输出内容,并按原始要求处理异常情况。
- 该技能适合需要稳定复用相关能力的场景,可作为自动化工作流的一部分,也便于后续检查、调整和扩展。
- 从功能定位来看,该技能强调把分散的操作要求整理成清晰、可复用的处理流程,使用户能够围绕既定目标快速准备输入、选择执行方式并获得结构化结果。
使用与执行
实际使用前应先确认任务范围、数据来源、运行环境、必要权限和关键参数,再依据技能说明逐步执行;若输入条件不完整,应先补齐信息或采用保守配置,避免因错误假设导致结果偏离需求。
结果检查与注意事项
执行过程中需要关注工具调用是否成功、接口或依赖是否可用、输出格式是否符合预期,并对异常提示、缺失字段和边界情况进行处理;涉及批量任务时,还应保存进度,避免中断后重复操作。
frp-cli skill (unified setup + operations)
frp-cli is a git-style wrapper around frp (frpc + frps) with profiles, structured JSON output, daemon management, and an admin/dashboard API passthrough. Always prefer it over hand-editing TOML or invoking frpc / frps directly.
This skill covers the whole journey: from a blank machine to a working tunnel, then ongoing operations. It is stateful — a marker at $FRP_HOME/.setup-done (default ~/.frp-cli/.setup-done) tells future invocations to skip Section A.
Step 0 — Idempotent gate (ALWAYS run first, before anything else)
Check three things. If all three pass → skip Section A entirely, go to Section B (Operations).
# Linux / macOS
FRP_HOME="${FRP_HOME:-$HOME/.frp-cli}"
command -v frp-cli >/dev/null 2>&1
  && test -f "$FRP_HOME/config.toml"
  && test -f "$FRP_HOME/.setup-done"
  && echo "ALREADY_INITIALIZED"
# Windows PowerShell
$frpHome = if ($env:FRP_HOME) { $env:FRP_HOME } else { "$HOME.frp-cli" }
if ((Get-Command frp-cli -ErrorAction SilentlyContinue) `
    -and (Test-Path "$frpHomeconfig.toml") `
    -and (Test-Path "$frpHome.setup-done")) {
    "ALREADY_INITIALIZED"
}
If ALREADY_INITIALIZED:
- Greet briefly with
frp-cli profile list --jsonandfrp-cli status --all --json. - Ask what the user wants to do today (add tunnel? change server? diagnose? switch env?).
- Jump to the matching subsection in Section B.
- Do NOT re-run install / Aliyun guidance. Do NOT re-create profiles.
If any check fails, resume Section A from the corresponding step:
frp-clinot found → A.1 (install)- config missing → A.5 (
frp-cli init) - marker missing only → A.8 (just write marker after verifying state)
Section A — First-time setup (only if Step 0 failed)
A.0 — Mental model (tell the user this first)
内网穿透有三个角色:
- frpc(client):跑在你家里 / 实验室 / 公司这台想被外网访问的机器上。
- frps(server):跑在一台有公网 IP 的机器上(云服务器 / VPS),充当中转。
frp-cli:一个二进制,可同时扮演 client 或 server,靠 profile 区分。完整链路:
公网用户 → 服务器公网 IP:remotePort → frps → frpc → 本机:localPort
然后必须问用户:
"你目前有没有一台带公网 IP 的服务器(云主机 / VPS)?"
- 有,且 frps 已经在跑 → 跳到 A.6(只装客户端)
- 有,但 frps 没装 → A.1 → A.5 → A.6 → A.7
- 没有,想自建 → A.1 → A.3(阿里云购买)→ A.4(防火墙)→ A.5 → A.6 → A.7
- 不想买服务器 → 建议改用 cpolar / ngrok(本 skill 不覆盖),或退出
A.1 — Install frp-cli(本机 + 云端都要装)
三级 fallback,第一条成功就停。装完用 frp-cli version 验证。
A.1.a Linux / macOS
set -e
case "$(uname -s)" in Linux) os=linux ;; Darwin) os=darwin ;; *) echo "Unsupported OS"; exit 1 ;; esac
case "$(uname -m)" in x86_64|amd64) arch=amd64 ;; aarch64|arm64) arch=arm64 ;; *) echo "Unsupported arch"; exit 1 ;; esac
BINDIR="$HOME/.local/bin"
mkdir -p "$BINDIR"

# Source 1: gitee release latest (国内首选)
VER=$(curl -fsSL https://gitee.com/api/v5/repos/DYXZYT/frp-cli/releases/latest
        | grep -oE '"tag_name":"[^"]+"' | head -n1 | cut -d'"' -f4 || true)
if [ -n "$VER" ]; then
  URL="https://gitee.com/DYXZYT/frp-cli/releases/download/${VER}/frp-cli-${os}-${arch}.tar.gz"
  if curl -fsSL "$URL" | tar xz -C /tmp 2>/dev/null && [ -f /tmp/frp-cli ]; then
    mv /tmp/frp-cli "$BINDIR/frp-cli" && chmod +x "$BINDIR/frp-cli"
  fi
fi

# Source 2: source build from gitee clone (兜底,要 Go 1.25+)
if ! "$BINDIR/frp-cli" version >/dev/null 2>&1; then
  if ! command -v go >/dev/null; then
    echo "Go 未安装。装 Go 1.25+: https://golang.google.cn/dl/  然后重跑本节"; exit 1
  fi
  SRC="$HOME/.cache/frp-cli-src"
  [ -d "$SRC/.git" ] || git clone --depth 1 https://gitee.com/DYXZYT/frp-cli.git "$SRC"
  (cd "$SRC" && GOPROXY=https://goproxy.cn,direct go build -trimpath -ldflags="-s -w" -o "$BINDIR/frp-cli" ./cmd/frp-cli/)
fi

# PATH 持久化
case ":$PATH:" in *":$BINDIR:"*) ;; *)
  echo 'export PATH="$HOME/.local/bin:$PATH"' >> "${ZDOTDIR:-$HOME}/.zshrc" 2>/dev/null || true
  echo 'export PATH="$HOME/.local/bin:$PATH"' >> "$HOME/.bashrc" 2>/dev/null || true
  export PATH="$BINDIR:$PATH"
;;
esac

frp-cli version
A.1.b Windows PowerShell
$ErrorActionPreference = "Stop"
$arch = if ([Environment]::Is64BitOperatingSystem) { "amd64" } else { throw "Need 64-bit Windows" }
$bin  = "$HOMEbin"
New-Item -ItemType Directory -Force $bin | Out-Null

# Source 1: gitee release latest
$ok = $false
try {
    $ver = (Invoke-RestMethod "https://gitee.com/api/v5/repos/DYXZYT/frp-cli/releases/latest").tag_name
    $url = "https://gitee.com/DYXZYT/frp-cli/releases/download/$ver/frp-cli-windows-$arch.zip"
    $zip = "$env:TEMPfrp-cli.zip"
    Invoke-WebRequest $url -OutFile $zip -UseBasicParsing
    Expand-Archive $zip -DestinationPath $bin -Force
    $ok = $true
} catch { $ok = $false }

# Source 2: source build
if (-not $ok) {
    if (-not (Get-Command go -ErrorAction SilentlyContinue)) {
        throw "Go 未安装。装 Go 1.25+: https://golang.google.cn/dl/"
    }
    $src = "$HOME.cachefrp-cli-src"
    if (-not (Test-Path "$src.git")) {
        git clone --depth 1 https://gitee.com/DYXZYT/frp-cli.git $src
    }
    Push-Location $src
    $env:GOPROXY = "https://goproxy.cn,direct"
    go build -trimpath -ldflags="-s -w" -o "$binfrp-cli.exe" ./cmd/frp-cli/
    Pop-Location
}

# 持久化用户级 PATH
$userPath = [Environment]::GetEnvironmentVariable("Path", "User")
if ($userPath -notlike "*$bin*") {
    [Environment]::SetEnvironmentVariable("Path", "$userPath;$bin", "User")
    $env:Path = "$env:Path;$bin"
}

frp-cli version
若失败:明确告诉用户错误信息,让其选择 (a) 装 Go 重试源码构建 (b) 换网络 (c) 提供预下载好的二进制。
A.2 — 决策
- 已有 frps 且知道
server-addr / server-port / token→ A.6 - 自建 frps,服务器已就绪 → A.5
- 自建 frps,还没有云服务器 → A.3
A.3 — 购买阿里云轻量应用服务器
入口:https://www.aliyun.com/product/swas(轻量应用服务器,非"云服务器 ECS";轻量便宜且足够穿透)。
A.3.1 套餐选择(按场景)
| 场景 | 配置 | 带宽 | 估价(/月) |
|---|---|---|---|
| 个人 SSH / Web 穿透 / 远程办公 | 2c2g | 3 Mbps | ¥30 起 |
| 中等并发 Web、3-5 人 Minecraft | 2c2g | 5 Mbps | ¥50 起 |
| 大文件传输、RDP 远程桌面、20+ 人 MC | 2c4g | 6-10 Mbps | ¥100 起 |
| 多人 / 团队 / 直播推流 | 4c8g | 10+ Mbps | ¥200+ |
带宽是关键——frps 转发吃满你买的带宽上限。穿透只看带宽,CPU/内存够用就行。
A.3.2 地域
- 用户主要在国内 → 杭州 / 上海 / 北京 / 广州 任选离用户群近的。
- 跨境 / 不想备案 → 香港 / 新加坡(不用备案,但带宽贵 + 延迟高)。
A.3.3 镜像
Ubuntu 22.04 LTS 或 Debian 12。Centos 7 已 EOL,不推荐。
A.3.4 时长
新用户 3 个月 / 1 年套餐通常大幅折扣,按年比按月便宜 30-50%。
A.3.5 域名(可选)
| 选项 | 适用 | 代价 |
|---|---|---|
| 不买域名 | 只做 SSH / RDP / TCP / 数据库 / MC 等纯端口透传,IP:端口 访问 |
¥0 |
| 买域名 + 国内服务器 | 想用 https://app.example.com 访问 Web |
域名 ~¥55/年 + ICP 备案(7-20 天、绑定服务器 ≥3 个月) |
| 买域名 + 香港/海外服务器 | 域名 + HTTPS 又不想备案 | 域名 ~¥55/年(带宽贵) |
| 买域名 + Cloudflare 反代 | 隐藏源 IP、CDN 加速 | 域名钱 + Cloudflare 免费 |
新手建议:第一次穿透先不买域名,跑通 SSH / TCP 隧道。后续真要 HTTPS / 多服务再加。
域名购买:https://wanwang.aliyun.com/。备案:阿里云控制台 → ICP 备案。
A.3.6 开机
阿里云轻量付款后 1-3 分钟开通。控制台 → 实例 → 拿到公网 IP 和初始 root 密码(或重置密码)。
A.4 — 防火墙开放端口(两道都要开**)
- 阿里云控制台防火墙:实例 → 防火墙 → 添加规则。
- 系统防火墙(ufw / firewalld):Ubuntu 22.04 默认关闭,无需动;如启用要
ufw allow。
| 端口 | 协议 | 用途 | 必须 |
|---|---|---|---|
| 22 | TCP | SSH 登服务器 | ✅ |
| 7000 | TCP | frps 主端口(客户端连接) | ✅ |
| 7500 | TCP | frps dashboard | 推荐 |
| 7022 | TCP | 暴露的 SSH 端口(recipe S) | 看 recipe |
| 7080 | TCP | 暴露的 Web 端口(recipe W1) | 看 recipe |
| 80 / 443 | TCP | 用域名 vhost 时 | 看 recipe |
每加一条隧道前先放行 remotePort,否则公网访问会超时。
A.5 — 部署 frps(云服务器上)
SSH 进服务器后:
# 装 frp-cli(重复 A.1.a)
frp-cli init

frp-cli profile add prod --role server
    --bind-port 7000
    --dashboard-port 7500 --dashboard-user admin
# token + dashboard 密码自动生成

# 拿凭证(客户端必须用 token;dashboard 密码登 Web 界面)
frp-cli profile show prod --json
# 关心 .meta.token 和 .meta.dashboardPassword

frp-cli server start
frp-cli server status --json
frp-cli doctor --json
记下 <服务器公网 IP>:7000 和 TOKEN。dashboard:http://<服务器公网 IP>:7500,账号 admin,密码 = dashboardPassword。
A.6 — 客户端连接 frps(本机上)
# A.1 装好 frp-cli,A.5 拿到 token
frp-cli init

frp-cli profile add home --role client
    --server-addr <服务器公网 IP>
    --server-port 7000
    --token
frp-cli profile use home
先不要 start,A.7 加完至少一条隧道再启。
A.7 — 加第一条隧道(按目的选 recipe)
全部假设
profile use home已生效。 添加后用frp-cli client start(首次)或frp-cli client reload(已运行)生效。 每个 recipe 的remotePort都要在 A.4 阿里云防火墙放行。
Recipe S — 暴露本机 SSH(本机 22 → 公网 7022)
frp-cli template apply ssh --var remotePort=7022
frp-cli client start
公网访问:ssh -p 7022 user@<服务器公网 IP>
Recipe W1 — 暴露本机 Web(HTTP, 无域名, 本机 8080 → 公网 7080)
frp-cli tunnel add web --type tcp --local-port 8080 --remote-port 7080
frp-cli client reload          # 首次:client start
公网访问:http://<服务器公网 IP>:7080
Recipe W2 — 暴露 Web(HTTP + 自定义域名,需备案 + vhost)
前置:A.3.5 域名 + ICP 备案完成;80 端口已放行。
服务端一次性:
frp-cli config edit          # 在 [webServer] 之后加:
# vhostHTTPPort = 80
frp-cli server restart
客户端:
frp-cli tunnel add web --type http
    --local-port 8080
    --custom-domain app.example.com
frp-cli client reload
DNS:在阿里云域名控制台为 app.example.com 加 A 记录指向服务器公网 IP,等 DNS 生效后访问 http://app.example.com。
Recipe R — 暴露 Windows RDP(本机 3389 → 公网 7389)
frp-cli tunnel add rdp --type tcp --local-port 3389 --remote-port 7389
frp-cli client reload
公网访问:mstsc /v:<服务器公网 IP>:7389
Recipe M — 暴露 MySQL(本机 3306 → 公网 7306)
frp-cli tunnel add mysql --type tcp --local-port 3306 --remote-port 7306
frp-cli client reload
⚠️ 公网暴露数据库高危——强密码 + bind-address 限制 + 防火墙白名单 IP。
Recipe G — Minecraft 服务器(本机 25565 → 公网 25565)
frp-cli tunnel add mc --type tcp --local-port 25565 --remote-port 25565
frp-cli client reload
玩家加服务器:<服务器公网 IP>(端口默认)。
Recipe N — 家庭 NAS Web 界面(本机 5000 → 公网 7150)
frp-cli tunnel add nas --type tcp --local-port 5000 --remote-port 7150
frp-cli client reload
更安全方案(P2P 直连,不占公网带宽):B.4 xtcp/stcp。
Recipe H — Webhook 临时调试(本机 3000 → app.example.com)
frp-cli tunnel add webhook --type http
    --local-port 3000 --custom-domain hooks.example.com
frp-cli client reload
用完即删:frp-cli tunnel remove webhook && frp-cli client reload。
A.8 — 写入幂等标记 + 验证
# Linux/macOS
touch "${FRP_HOME:-$HOME/.frp-cli}/.setup-done"
echo "Setup complete at $(date -Iseconds)" >> "${FRP_HOME:-$HOME/.frp-cli}/.setup-done"
frp-cli status --all --json
frp-cli doctor --json
# Windows
$frpHome = if ($env:FRP_HOME) { $env:FRP_HOME } else { "$HOME.frp-cli" }
"Setup complete at $(Get-Date -Format o)" | Out-File "$frpHome.setup-done" -Encoding utf8
frp-cli status --all --json
frp-cli doctor --json
向用户输出小结:服务器 IP / token / dashboard URL / 已配隧道列表 / 每条公网访问地址。建议存密码管理器。
Section B — Operations(Step 0 已通过 / Section A 完成后走这里)
B.1 — Quick decision tree(用户来意识别)
- 用户加新隧道 → B.2 add
- 改/删现有隧道 → B.2 update/remove
- 切环境/服务器 → B.3 profile use
- 看状态 →
frp-cli status --all --json+frp-cli server clients/proxies - 诊断问题 → B.5 troubleshooting flow
- P2P 直连 NAS / 大文件 → B.4 xtcp/stcp
- 升级 / 卸载 → B.6 / B.7
B.2 — 加 / 改 / 删隧道(核心操作)
加:参考 A.7 任一 recipe。每加一条 TCP/UDP 隧道前先在 A.4 阿里云防火墙放行 remotePort。
改(不重启,热更新):
frp-cli tunnel update web --remote-port 9080
frp-cli client reload          # 其它隧道连接不受影响
删:
frp-cli tunnel remove web
frp-cli client reload
暂停 / 恢复(保留配置):
frp-cli tunnel disable web && frp-cli client reload
frp-cli tunnel enable  web && frp-cli client reload
B.3 — 多 profile / 多环境切换
frp-cli profile list                  # 看有哪些
frp-cli profile use prod              # 切到 prod,后续命令默认 prod
frp-cli --profile dev tunnel list     # 单条命令临时覆盖
B.4 — P2P 直连(xtcp / stcp,不占公网带宽)
适合家庭 NAS / 大文件传输——provider 端(NAS)和 visitor 端(要访问的设备)都得跑 frpc,但实际流量不过 frps。
NAS 侧(provider):
frp-cli tunnel add nas --type xtcp
    --local-ip 127.0.0.1 --local-port 5000
    --secret-key
笔记本侧(visitor,单独 client profile):
frp-cli visitor add nas --type xtcp --server-name nas
    --secret-key  --bind-port 6000
连接:本地 127.0.0.1:6000。
stcp 同结构,但走 frps 中转(更稳,但耗带宽)。
B.5 — 故障排查(按顺序跑)
frp-cli doctor --json                 # 5 项体检:config/parse/process/server-reach/admin-api,先看这个
frp-cli client logs --tail 100        # 客户端日志
frp-cli server logs --tail 100        # 服务端(如你在服务端)
frp-cli config validate               # 重跑 frp loader
frp-cli api get /api/proxy/tcp        # 服务端:看 dashboard 真实在转什么
frp-cli status --all --json           # 全 profile 聚合
| doctor 输出 | 含义 | 修法 |
|---|---|---|
server-reachable: fail |
客户端连不上服务端 | (1) 服务器公网 IP 对不对(2)7000 在阿里云防火墙放行(3)token 是否与服务端 profile show prod 里的 token 一致 |
admin-api: warn (client not running) |
进程没启动 | frp-cli client start |
dashboard: fail |
端口没开 / 密码错 | 检查防火墙 7500、profile show 拿正确密码 |
公网访问超时但 client status OK |
remotePort 没在阿里云防火墙放行 |
控制台加规则;规则生效有 1-2 分钟延迟 |
| 端口已被占用 | 服务端 7000/7500 撞车 | 改 bind-port/dashboard-port,或 lsof -i:7000 杀冲突进程 |
B.6 — 升级 frp-cli
# 重跑 A.1 的安装脚本即可覆盖二进制;配置不动
frp-cli version
frp-cli client restart    # 或 server restart
frp-cli doctor --json
B.7 — 卸载(用户主动要求才执行,先双确认)
frp-cli client stop && frp-cli server stop 2>/dev/null || true
rm -rf "${FRP_HOME:-$HOME/.frp-cli}"
rm -f ~/.local/bin/frp-cli     # 或 $HOMEbinfrp-cli.exe
Section C — Output contract(AI 解析规则)
所有读类命令支持 --json,需要解析时必须显式带(非 TTY 自动结构化,但显式更安全)。
稳定 JSON 形状:
frp-cli profile list --json→[{name, role, active, configPath}, ...]frp-cli tunnel list --json→{tunnels: [{name, type, localPort, remotePort, ...}]}frp-cli status --json/--all --json→[{profile, role, state:{running,pid,...}, admin:{reachable,endpoint}, counts:{...}}]frp-cli doctor --json→[{name, status:"ok"|"warn"|"fail", detail}]frp-cli api get→ 原样透传 dashboard / admin JSONfrp-cli profile show→ 含--json meta.token、meta.dashboardPassword等
全局 flags:--profile --json --frp-home -v -vv。
Section D — Danger guards(执行前显式确认)
下列操作影响运行中的服务或持久状态。除非用户在当前对话明确要求,先 ask before doing:
frp-cli client stop/server stop/restart针对疑似生产 profilefrp-cli profile remove(需--yes;连同 tunnel/visitor TOML 一起删)frp-cli tunnel remove+client reload(断该代理在线连接)- 公网暴露数据库 / RDP 不带防火墙白名单——提醒高危
- 修改阿里云防火墙规则(用户在控制台操作,但提醒"加完安全组规则有 1-2 分钟生效延迟")
- 卸载(B.7)
非生产 smoke test → 用 --frp-home 起一次性 profile,不污染主目录。
Section E — Escape hatches
frp-cli api get/post—— 透传 dashboard/admin APIfrp-cli config show --json/frp-cli config edit—— 直接看/改底层 TOMLfrp-cli profile export/profile import—— 备份/迁移整个 profile- 真要直接调
frpc/frps原生二进制 → 仅作为最后手段,并告诉用户 CLI 在哪缺位
Summary(assistant 自检清单)
- 每次进入本 skill 第一件事跑 Step 0。已初始化 → 直接 Section B。
- 未初始化 → A.0 讲架构 → 引导决策 → A.1 装 → 按需 A.3-A.4 买/配阿里云 → A.5 部 frps → A.6 接 client → A.7 加第一条隧道 → A.8 标记完成。
- 加端口映射的标准动作永远是:
tunnel add → 阿里云防火墙放行 remotePort → client reload。 - 操作影响生产时先确认。所有读类命令带
--json方便解析。 - 不要重复初始化。
.setup-done是单一事实来源。


相关专题

本专题聚焦GoFrame框架的Web开发,拆解路由注册与匹配规则、请求参数获取、参数校验与中间件执行顺序,说明统一响应、JWT鉴权、文件上传与接口文档生成的落地方式,并补充优雅重启与测试实践。
2026.11.17
0
15

本专题围绕GoFrame框架的安装与工具链配置展开,讲清Go版本要求、gf命令行的安装方式、代理镜像与依赖准备,说明项目初始化、热编译、交叉编译打包的做法,并整理安装阶段的常见报错与验证步骤。
2026.11.17
0
15

本专题整理GoFrame框架的入门知识,从模块化设计理念、环境准备到跑通第一个Web服务,讲清目录分层、配置加载、日志与中间件的用法,并对比Gin、Go-Zero的差异,帮助Go开发者建立整体认知。
2026.11.17
0
15
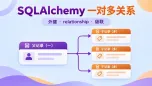
SQLAlchemy 一对多关系怎么建立?本专题整理父子表外键、relationship 双向映射、关联查询、级联删除和加载优化等相关文章,帮助你理解并实现常见的 ORM 关系建模。
2026.11.17
0
10
SQLAlchemy 如何增删改查?本专题整理 ORM 新增记录、条件查询、更新和删除、Session 事务提交与批量处理等实用文章,帮助你掌握 Python 数据库操作流程。
2026.11.17
0
11
SQLAlchemy ORM 模型怎么写?本专题整理模型类定义、Mapped 字段映射、主键与约束、表结构创建和常见报错的相关文章,帮助你从基础配置到实际建模逐步掌握 SQLAlchemy。
2026.11.17
0
16

本专题聚焦Go-Zero的API开发,拆解.api描述文件的语法结构、路由与分组定义、参数绑定与校验规则,说明统一响应体、JWT鉴权、跨域与接口文档生成的落地方式,并给出网关聚合与接口测试的实践建议。
2026.11.12
0
15

本专题围绕Go-Zero的安装与工具链配置展开,讲清Go版本要求、goctl安装方式、代理镜像、protoc依赖与环境变量设置,说明多版本共存、升级回退与CI流水线安装的做法,并整理安装阶段的常见报错与验证步骤。
2026.11.12
0
15

本专题整理Go-Zero的入门知识,从框架定位、环境准备到跑通第一个API服务,讲清目录分层、配置加载、日志与中间件的基本用法,并对比Gin、Kratos的差异,帮助Go开发者建立整体认知,判断它是否适合当前项目。
2026.11.12
0
15
热门下载
相关下载
精品课程

共6课时 | 54.7万人学习

共89课时 | 134.3万人学习

共49课时 | 82.7万人学习


最新文章