Python 学习笔记 - 操作MySQL
Python里面操作MySQL可以通过两个方式:
pymysql模块
ORM框架的SQLAchemey
先学习第一种方式。
学习Python模块之前,首先看看MySQL的基本安装和使用,具体语法可以参考豆子之前的博客http://beanxyz.blog.51cto.com/5570417/1609972
或者官方简介
https://mariadb.com/kb/en/mariadb/basic-sql-statements/
简单的回顾一下基本环境的搭建:
首先安装Mariadb(我的环境是CentOS7)
yum install mariadb*
systemctl start mariadb
配置防火墙
firewall-cmd --add-port=3306/tcp --permanent
systemctl restart firewalld
配置root密码
mysqladmin -u root password 'mysql'
mysql -uroot -p
创建一个测试用的数据库和表
MariaDB [(none)]> create database mydb;
Query OK, 1 row affected (0.00 sec)

MariaDB [(none)]> use mydb
Database changed
MariaDB [mydb]> create table student(id int not null auto_increment,name varchar(10), primary key(id));
Query OK, 0 rows affected (0.04 sec)

MariaDB [mydb]> insert into student(name) values('Jay'),('Bob'),('Alex');
Query OK, 3 rows affected (0.00 sec)
Records: 3  Duplicates: 0  Warnings: 0

MariaDB [mydb]> select * from student;
+----+------+
| id | name |
+----+------+
|  1 | Jay  |
|  2 | Bob  |
|  3 | Alex |
+----+------+
3 rows in set (0.00 sec)
创建一个远程访问的账户
MariaDB [(none)]> create user yli@10.2.100.60;
Query OK, 0 rows affected (0.00 sec)
MariaDB [(none)]> set password for yli@'10.2.100.60'=password('yli');
Query OK, 0 rows affected (0.01 sec)
MariaDB [(none)]> grant all privileges on mydb.* to yli@10.2.100.60;
Query OK, 0 rows affected (0.00 sec)
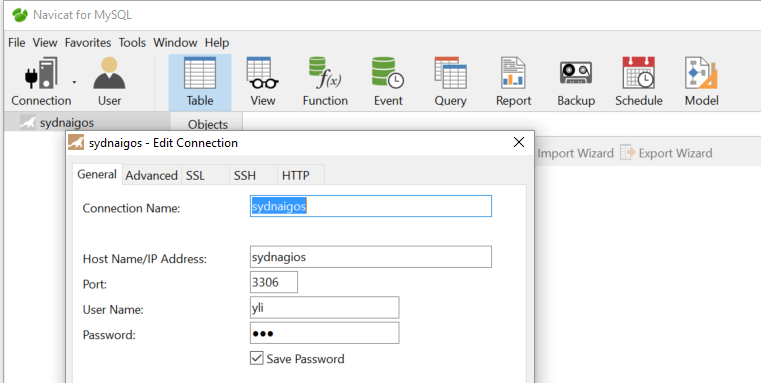
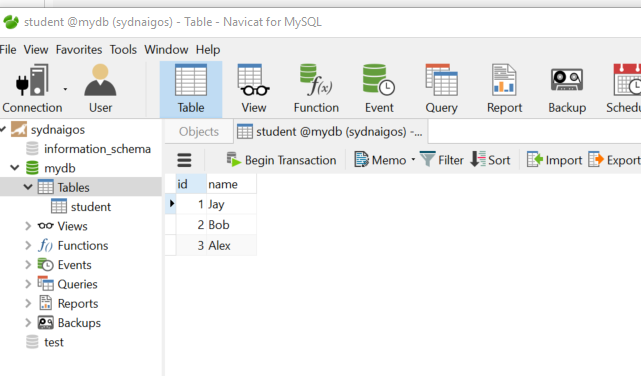
然后安装一个图形界面的工具Navicat,绑定数据库


这样一个基本的测试环境就搭建好了。
现在来看看pymysql的使用。
在我的客户端安装一下pymysql的模块
C:\WINDOWS\system32>pip install pymysql
Collecting pymysql
  Downloading PyMySQL-0.7.9-py3-none-any.whl (78kB)
    100% |################################| 81kB 610kB/s
Installing collected packages: pymysql
Successfully installed pymysql-0.7.9
Python源码演示
查询
#!/usr/bin/env python
# -*- coding:utf-8 -*-
import pymysql
#打开数据库连接
conn = pymysql.connect(host='sydnagios', port=3306, user='yli', passwd='yli', db='mydb')
#创建一个游标对象
cursor = conn.cursor(cursor=pymysql.cursors.DictCursor)
#SQL查询
cursor.execute("select * from student")
# 获取第一行数据
# row_1 = cursor.fetchone()
# print(row_1)
# 获取前n行数据
# row_2 = cursor.fetchmany(3)
# 获取所有数据
row_3 = cursor.fetchall()
print(row_3)
#scroll可以使用相对位置或者绝对位置,这里相对位置(末尾)向上移动2行
cursor.scroll(-2,mode='relative')
row_3 = cursor.fetchall()
print(row_3)
#提交,不然无法保存新的数据
conn.commit()
#关闭游标
cursor.close()
#关闭连接
conn.close()
-----------
[{'id': 1, 'name': 'Jay'}, {'id': 2, 'name': 'Bob'}, {'id': 3, 'name': 'Alex'}]
[{'id': 2, 'name': 'Bob'}, {'id': 3, 'name': 'Alex'}]
修改
#!/usr/bin/env python
# -*- coding:utf-8 -*-
import pymysql
conn = pymysql.connect(host='sydnagios', port=3306, user='yli', passwd='yli', db='mydb')
cursor = conn.cursor(cursor=pymysql.cursors.DictCursor)
cursor.execute("Update student set name='BoB' where id=2")
cursor.execute("select * from student")
row_3 = cursor.fetchall()
print(row_3)
conn.commit()
cursor.close()
conn.close()
----------
[{'id': 1, 'name': 'Chris'}, {'id': 2, 'name': 'BoB'}, {'id': 3, 'name': 'Alex'}]
删除
#!/usr/bin/env python
# -*- coding:utf-8 -*-
import pymysql
conn = pymysql.connect(host='sydnagios', port=3306, user='yli', passwd='yli', db='mydb')
cursor = conn.cursor(cursor=pymysql.cursors.DictCursor)
cursor.execute("delete from student where id=2")
cursor.execute("select * from student")
row_3 = cursor.fetchall()
print(row_3)
conn.commit()
cursor.close()
conn.close()
----------
[{'id': 1, 'name': 'Chris'}, {'id': 2, 'name': 'BoB'}, {'id': 3, 'name': 'Alex'}]
添加
#!/usr/bin/env python
# -*- coding:utf-8 -*-
import pymysql
conn = pymysql.connect(host='sydnagios', port=3306, user='yli', passwd='yli', db='mydb')
cursor = conn.cursor(cursor=pymysql.cursors.DictCursor)
cursor.execute("insert into student(name) value ('ZhangSan'),('LiSi')")
cursor.execute("select * from student")
row_3 = cursor.fetchall()
print(row_3)
conn.commit()
cursor.close()
conn.close()
----------
[{'name': 'Chris', 'id': 1}, {'name': 'Alex', 'id': 3}, {'name': 'ZhangSan', 'id': 4}, {'name': 'LiSi', 'id': 5}]