
 Article Tags


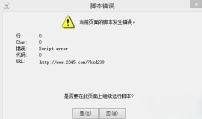
How to solve the problem that when accessing a webpage on a Windows 7 computer, it prompts that an error occurs in the script of the current page?
Hello everyone, today I want to share with you how to solve the problem of script errors when accessing web pages on Windows 7 computers. What should we do when encountering this situation? Don't worry, I have three methods here to help you solve this problem. Interested friends can take a look at the following steps! The solution is as follows: Method 1. Use the Win+E shortcut key to bring up the Explorer → open the Control Panel. 2. Control Panel → Network and Internet. 3. Network and Internet→Internet Options. 4. Advanced → Browse → Check the "Disable script debugging" option → OK. Method 2 1. There is another situation where there is such a script error prompt as soon as the computer is turned on, and there is a corresponding URL at the bottom. This is a boot-up error.
Sep 09, 2024 am 10:40 AM
The newly added hard disk does not appear in Win11. The solution to the problem that the newly added hard disk in Win11 does not appear.
Hello everyone, today I want to share with you a solution to the problem that the newly added hard drive is not displayed in Win11. Win11 system is becoming more and more popular now, but sometimes it encounters some minor problems. If you have also encountered this problem, then quickly take a look at this method! Hope it helps you! Solution to Win11 newly added hard drive not showing up 1. First, press the [Win+X] key combination on the keyboard, or right-click the [Windows Start Icon] at the bottom of the taskbar, and select [Disk Management] from the hidden menu item that opens. . 2. In the disk management window, select the [disk] whose drive letter you want to change, and click [right-click]. In the menu item that opens, select [Change drive letter and path]. 3. Under the Change Drive Letter and Path window,
Sep 09, 2024 am 10:40 AM
What should I do if I cannot delete a folder in Win11? What should I do if I cannot delete a folder in Win11?
When a computer is used for a long time, there will be a lot of useless folders in the disk, which will take up most of the space over time. Some users using win11 system find that they cannot delete folders, maybe because the permissions have been turned off. Next, I will teach you how to solve this problem, let’s take a look at the steps! The solution is as follows: 1. Find the folder that cannot be deleted, right-click and select "Properties" in the option list. 2. In the window that opens, click the "Security" tab at the top. 3. Then select the account currently in use and click "Advanced" below. 4. Then double-click to open the account you are using. 5. Then set the "Type" to "Allow", check all the permissions below, and finally click OK to save.
Sep 09, 2024 am 10:40 AM
How to change the computer name in Win11 How to change the computer name in Win11
How to change the name of Win11 computer? When we use Win11 system, sometimes we need to share or remotely connect, then our computer name will be displayed. But many people are too lazy to change it, so they want to come up with a name they like, but don't know how. So how do you change the name of your computer? Follow me and take a look. How to change the computer name in Win11 1. First, right-click the start menu and open "Settings". 2. After opening, see the computer name at the top and click "Rename" below. 3. Then enter the desired name in the location shown and click "Next Page". 4. Finally, just click “Restart Now&”
Sep 09, 2024 am 10:40 AM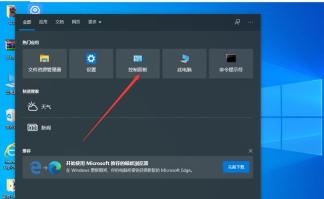
What should I do if Win10 cannot set this to be a home computer?
Many people using win10 find that setting up their home computers fails. What should they do? It's actually very simple, just go to the Network and Sharing Center in the Control Panel, then click on Advanced Sharing Settings, and you're done! Let’s talk in detail about how to set up a home computer on Win10. Win10 cannot be set up. This is a home computer. Detailed explanation: 1. Press the Win+S key combination, open Windows Search, then find and click the Control Panel (control) under Popular Applications. 2. In all control panel item windows, change the view mode to large icons, then find and click Network and Sharing Center under Adjust Computer Settings. 3. In the Network and Sharing Center window, click Change advanced sharing settings on the left. 4. In the advanced sharing settings window, click Start
Sep 09, 2024 am 10:39 AM
What should I do if Win10 cannot uninstall software? What should I do if my computer cannot uninstall software normally?
Sometimes when we use computers, we encounter situations where we cannot uninstall software. This may be due to many reasons, such as an error in the uninstaller, corrupted system files, or residuals in the registry. At this time, we may feel very annoyed and helpless, so I will teach you three methods to help you solve this problem! Solution to the problem that the computer cannot uninstall the software normally. Method 1. Click the start menu in the lower left corner and select the gear-shaped settings to open. 2. Then select the app to open. 3. Click "Apps and Features" to select the first item. 4. After opening, all the programs and applications installed on the computer are displayed here. After clicking on an application you want to uninstall, an "Uninstall" button will pop up below, and then click Uninstall. 5. In addition, if it is installed on the computer
Sep 09, 2024 am 10:37 AM
How to operate win11 magnifying glass to zoom in to 150 win11 magnifying glass shortcut key sharing
The win11 system has many practical functions, giving users a different experience. However, some users do not know how to operate the magnifying glass to magnify 150 times. It's actually very simple, just click on Settings under the start menu and then select Accessibility options. Next, let me teach you how to use the win11 magnifying glass shortcut keys to zoom in and out! Win11 magnifying glass shortcut key sharing 1. The user clicks the Start icon in the taskbar at the bottom of the computer desktop, the Start tab will pop up, and the user selects the Settings icon. 2. Then enter the settings page. The user clicks on the accessibility options in the left tab, and the relevant function options will be displayed on the right page. 3. Then the user finds the image section on the right page and clicks the magnifying glass
Sep 09, 2024 am 10:37 AM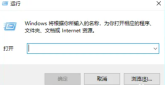
What to do if win10 cannot access shared folders
Some friends set up a shared folder on their computer in order to make it easier to read files while working. However, some people using Win10 saw this folder through the LAN, but did not have permission to enter. So what should we do to add permissions? Today I will teach you how to do it, come and take a look! Win10 shared folder does not have permission to access solution 1. First, press the "Win+R" keys to open the run window. 2. Enter "gpedit.msc" in the run window, and then press the Enter key to start the Local Group Policy Editor. 3. In the editor, navigate to "Computer Configuration". 4. Under this configuration, find and click the "Manage Templates" option. 5. Find "Network" in "Administrative Templates", and then find "Network" again under "Network"
Sep 09, 2024 am 10:36 AM
How to close pop-up notifications in win10 How to close pop-up notifications in win10
Hello everyone, today I will teach you how to close those annoying pop-up notifications in win10. It pops up every time I use the computer, which is really annoying. But don’t worry, I have a little trick to help you solve this problem. Just go to "Windows Security Center" in "Computer Configuration" and you can easily do it! Come with me now to see the specific operation! How to close pop-up notifications in win10 Method 1. 1. Use the shortcut key Win+R to open [Run] and enter the [gpedit.msc] command. 2. Click [Computer Configuration] - [Administrative Templates] - [Windows Components], find [Windows Security Center] on the right and open it. 3. In [Notifications] on the right, double-click [Hide All Notifications]
Sep 09, 2024 am 10:36 AM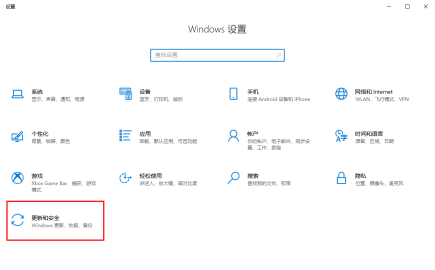
How to add files to the trust zone in win10 How to add files to the trust zone in win10 system
When we use Win10 system, we often need to modify some files, but some files become less safe after modification. So how to make Win10 join the trust zone? Just set it up in the "Update and Security" interface. Now I will teach you how to add a trust zone in Win10 system! How to add trust zone to win10 system files 1. Directly press the win and i keys on the keyboard to open the settings window. After entering the page, click [Update and Security] to enter. 2. Then enter the page, select [Windows Security Center] on the left, and then click the [Virus and Threat Protection] option on the right page. 3. Then you will enter the page of this function option.
Sep 09, 2024 am 10:35 AM
How to open the Win10 input method if it is disabled? How to cancel the Win10 input method if it is disabled?
Hey, you know what? The input method can help us type! However, some friends find that the input method suddenly cannot be used when using Win10 system. What should they do? Don’t worry, it’s actually very simple! You just need to right-click the task scheduler in Computer Management and set it up. Let me teach you how to operate it! How to cancel the disabled input method in Win10? 1. On the computer desktop, right-click Computer/Manage. 2. In the computer management interface, click to open the task scheduler. 3. Click on the Task Scheduler Library, as shown in the figure. 4. Click Windows under Microsoft. 5. Click TextServicesFramwork. 6. Right-click the mouse and click Run.
Sep 09, 2024 am 10:35 AM
What to do if win11 account is locked and unable to log in win11 account is locked and cannot be logged in solution
Many people use account passwords to protect the information in their computers, but some Win11 system users find that commonly used accounts have been disabled and cannot enter the system. What should you do if you encounter this situation? Today I will teach you a solution. I hope this Win11 tutorial can help more people! The solution is as follows: 1. First log in with an account that can be logged in. 2. After logging in, right-click "This PC" on the desktop and select "Manage" in the option list. 3. After entering the new interface, click the "User" option in "Local Users and Groups" on the left. 4. Then find the account that is locked and unable to log in on the right side and double-click to open it. 5. Finally, uncheck the "Account is disabled" box and click OK to save.
Sep 09, 2024 am 10:35 AM
What should I do if Win11 cannot wake up from sleep? What should I do if Win11 cannot wake up from sleep?
When we don't use the computer at ordinary times, the computer will automatically enter sleep mode, which can save power. However, some friends find that the computer cannot wake up after entering sleep mode. What should they do? Don’t worry, let’s follow the editor to see how to solve the problem of Win11 not being able to wake up from sleep! Solution to Win11 unable to wake up from sleep method 1. If the screen is black and cannot be woken up, you can only use the power button to force restart. 2. After restarting, enter the system, right-click the start menu and open "Device Manager". 3. Then double-click to open the keyboard or mouse device. 4. After opening, enter "Power Management", check "Allow this device to wake the computer" and save. 5. After that, we only need to use the selected device to wake up from sleep. Method 2 1. If method
Sep 09, 2024 am 10:34 AM
What should I do if the taskbar disappears in Win11? Detailed explanation of the taskbar disappearing in Win11
Sometimes when we use win11 system, we may encounter the situation that the taskbar is missing. What should I do if the win11 taskbar disappears? It may be related to Microsoft's server time, or you can try opening the control panel to set the time. Below, this site will tell you in detail how to solve the problem of missing win11 taskbar. Detailed explanation of the Win11 taskbar disappearing 1. According to tests, this problem may be related to Microsoft's server time error. So you can solve the problem by changing the time. 2. So how to change the time without the taskbar? First use the "ctrl+shift+esc" shortcut key to open the task manager. 3. Then run the new task in the file, as shown in the figure. 4. for
Sep 09, 2024 am 10:34 AM
Hot tools Tags

Undresser.AI Undress
AI-powered app for creating realistic nude photos

AI Clothes Remover
Online AI tool for removing clothes from photos.

Undress AI Tool
Undress images for free

Clothoff.io
AI clothes remover

Video Face Swap
Swap faces in any video effortlessly with our completely free AI face swap tool!

Hot Article
How to fix KB5055523 fails to install in Windows 11?
How to fix KB5055518 fails to install in Windows 10?
Strength Levels for Every Enemy & Monster in R.E.P.O.
Roblox: Grow A Garden - Complete Mutation Guide
Roblox: Bubble Gum Simulator Infinity - How To Get And Use Royal Keys
Hot Tools

vc9-vc14 (32+64 bit) runtime library collection (link below)
Download the collection of runtime libraries required for phpStudy installation

VC9 32-bit
VC9 32-bit phpstudy integrated installation environment runtime library

PHP programmer toolbox full version
Programmer Toolbox v1.0 PHP Integrated Environment

VC11 32-bit
VC11 32-bit phpstudy integrated installation environment runtime library

SublimeText3 Chinese version
Chinese version, very easy to use

