Paint API - Detailed explanation of Xfermode and PorterDuff (1)
Introduction to this section:
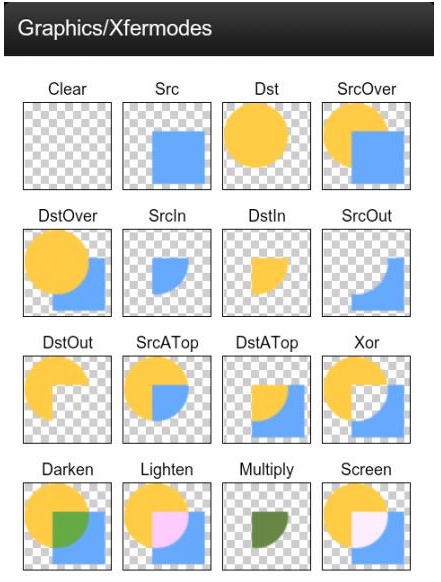
I don’t know if you are familiar with these two things in the title. If you have implemented rounded corners or circular images, I believe you are familiar with these two terms. It's not a pattern. Didn't you remember it for a while? It doesn’t matter. Have you seen the picture below?
PS: It is said on the Internet at: \samples\android-XX\legacy\ApiDemos\src\com\example\android\apis\graphics I can find this picture - -, but I can't find it. I don't know if it's because my sample is android-22. I only found a Java file of Xfermodes.java here! Here I will directly post what I found on the Internet~
Well, speaking of it, I believe most of my friends have seen this picture. It doesn’t matter if you haven’t. In this section, we will take you to learn a little bit. This thing~, look back at our previous Android basic introductory tutorial - 8.3.1 Detailed explanation of three drawing tool classes
setXfermode(Xfermode xfermode): Set graphics Processing methods for overlapping, such as merging, intersection or union, Often used to create eraser effects!
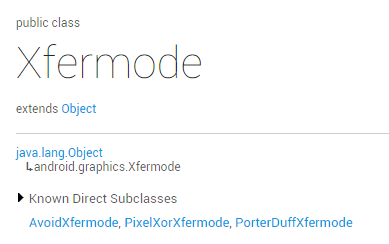
We come to the official document: Xfermode, and we find that he has three sons:
In this section we will learn about his first two sons~
Eldest son: AvoidXfermode
Well, like the two subclasses of MaskFilter learned earlier, it does not support hardware acceleration, so if it is a version above API 14, You need to turn off hardware acceleration to have any effect! How to close yourself? Look at the previous section~
Let’s take a look at the construction method he provided us! Official API document: AvoidXfermode
There are three parameters, in order:
opColor: a hexadecimal value with transparency Color value, such as 0x00C4C4;
tolerance: Tolerance value. If you have studied PS, you may have used the magic wand tool, which is to set the range of selected color values, such as The tolerance is 0, and you select a small dot of pure black. When the tolerance is adjusted to 40, the range has expanded to a large black area! if I don’t quite understand it yet, but we’ll find out later when we write the code!
mode: AvoidXfermode mode, there are two types: TARGET and AVOID
Mode 1 :AvoidXfermode.Mode.TARGET
This mode will determine whether there is a color on the canvas that is different from the color value we set. If so, these areas will be Stain a layer of the color defined by the brush, and leave other areas unstained! Let's write code to demonstrate below, and let everyone feel it. This tolerance value!
Usage code example:
Running renderings:
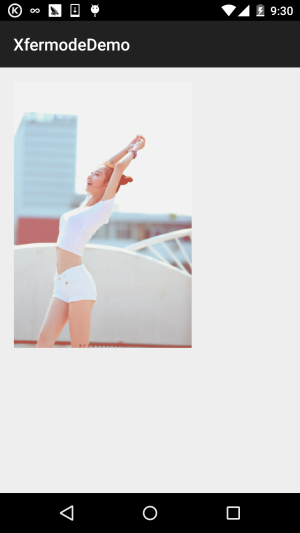
Well, let’s go up and down the original picture first, the material comes from gank.io:

Next, let’s just use the color picker to remove the color somewhere on the wall, and then write a simple View!
PS: You need to add to the application node in AndroidManifest.xml to turn off hardware acceleration: android:hardwareAccelerated="false"
/**
 * Created by Jay on 2015/10/22 0022.
 */
public class AvoidXfermodeView1 extends View {

    private Paint mPaint;
    private Bitmap mBitmap;
    private AvoidXfermode avoidXfermode;

    public AvoidXfermodeView1(Context context) {
        super(context);
        init();
    }

    public AvoidXfermodeView1(Context context, AttributeSet attrs) {
        super(context, attrs);
        init();
    }

    public AvoidXfermodeView1(Context context, AttributeSet attrs, int defStyleAttr) {
        super(context, attrs, defStyleAttr);
        init();
    }

    private void init() {
        mPaint = new Paint(Paint.ANTI_ALIAS_FLAG);  //抗锯齿
        avoidXfermode = new AvoidXfermode(0XFFCCD1D4, 0, AvoidXfermode.Mode.TARGET);
        mBitmap = BitmapFactory.decodeResource(getResources(), R.mipmap.iv_meizi);

    }

    @Override
    protected void onDraw(Canvas canvas) {
        canvas.drawBitmap(mBitmap, 50, 50, mPaint);
        mPaint.setARGB(255, 222, 83, 71);
        mPaint.setXfermode(avoidXfermode);
        canvas.drawRect(50, 50, 690, 1010, mPaint);
    }
}
The effect after running:
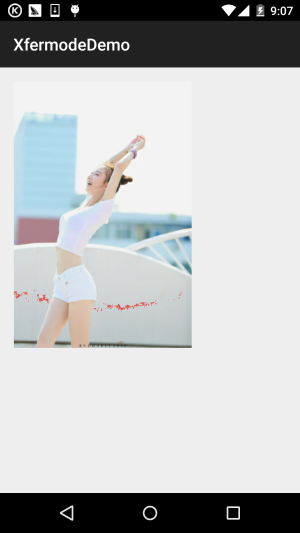
See if the pile of aunts on the wall is red? The effect is great. Our tolerance value here does not play a role. Let’s change it. The girl's white clothes turned into auntie red!
We changed the content of the AvoidXfermode structure above to:
avoidXfermode = new AvoidXfermode(0XFFD9E5F3, 25, AvoidXfermode.Mode.TARGET);
Then, the white clothes on the girl’s body turned into aunt’s red... , full of guilt... .
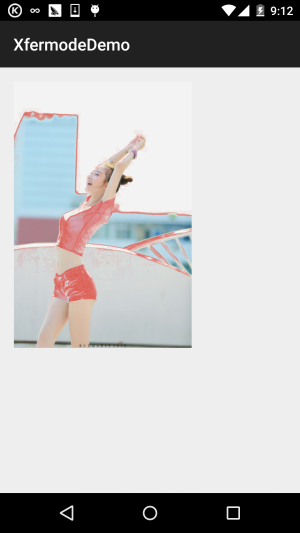
Mode 2: Avoid , here the color is different but the color changes. The tolerance value also brings the opposite result. When the tolerance value is 0, only when the pixel color value in the picture is completely different from the set color value It will be dyed when the tolerance value reaches the maximum value of 255, and it will be dyed if the color is slightly different! We only need to simply modify the above example. The same is to modify the content of constructing AvoidXfermode! We changed it to the following sentence:
:avoidXfermode = new AvoidXfermode(0XFFD9E5F3,230, AvoidXfermode.Mode.AVOID);Running renderings
 Second son: PixelXorXfermode
This is another image mixing mode, which is simpler than the eldest son. Its construction method is as follows:
Official API document::PixelXorXfermode
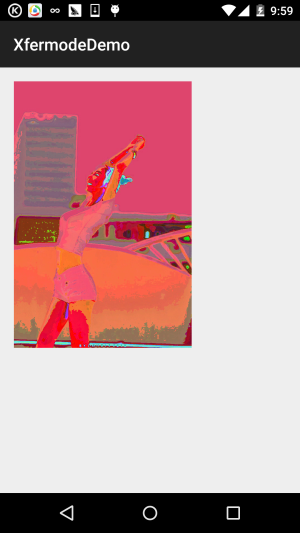
It’s just a hexadecimal color value with a transparent value. As for the role of this value, there is an algorithm: PixelXorXfermode internally operates according to the XOR algorithm of " opColor ^ src ^ dst ". Get an opaque (alpha = 255) color value and set it to the image! Okay, I searched this online I don’t know the specifics, so I’ll write an example to try the effect~Code example
Running effect diagram
:
Implementation code:
/**
 * Created by Jay on 2015/10/22 0022.
 */
public class PixelXorXfermodeView1 extends View{

    private Paint mPaint;
    private Bitmap mBitmap;
    private PixelXorXfermode pixelxorXfermode;

    public PixelXorXfermodeView1(Context context) {
        super(context);
        init();

    }

    public PixelXorXfermodeView1(Context context, AttributeSet attrs) {
        super(context, attrs);
        init();
    }

    public PixelXorXfermodeView1(Context context, AttributeSet attrs, int defStyleAttr) {
        super(context, attrs, defStyleAttr);
        init();
    }

    private void init() {
        mPaint = new Paint(Paint.ANTI_ALIAS_FLAG);  //抗锯齿
        pixelxorXfermode = new PixelXorXfermode(0XFFD9E5F3);
        mBitmap = BitmapFactory.decodeResource(getResources(), R.mipmap.iv_meizi);
    }

    @Override
    protected void onDraw(Canvas canvas) {
        canvas.drawBitmap(mBitmap, 50, 50, mPaint);
        mPaint.setARGB(255, 222, 83, 71);
        mPaint.setXfermode(pixelxorXfermode);
        canvas.drawRect(50, 50, 690, 1010, mPaint);
    }

}
Download the sample code in this section:
Summary of this section:
Okay, full of guilt, a very beautiful girl, ended up writing a demo for me like this, don’t Blame me,
Well, by the way, I forgot to mention that Xfermode’s eldest son and second son have passed away (expired). In versions after API 16, It's expired, which means this section is of no use...
It can't be said that Apache has been castrated in versions after 4.4, but some people still use HttpClient, or The HTTP request framework written by this library ~ Of course, there are basically very few such people! But it never hurts to learn more, right? The third son PorterDuffXfermode in the next section is timeless and very important. Well, don’t worry, it won’t ruin the photos again! Well, that’s all, thank you~
