
Rumah >hujung hadapan web >html tutorial >Menambah Pilihan Jenis Warna dan Jenis Muat Naik: Panduan Langkah demi Langkah Pemula untuk Rangka Kerja Titan
Menambah Pilihan Jenis Warna dan Jenis Muat Naik: Panduan Langkah demi Langkah Pemula untuk Rangka Kerja Titan

- WBOYWBOYWBOYWBOYWBOYWBOYWBOYWBOYWBOYWBOYWBOYWBOYWBasal
- 2023-09-01 11:13:09887semak imbas
Adalah perkara biasa untuk menambah pilihan warna dinamik pada tema WordPress. Rangka Kerja Titan membolehkan anda membuat pilihan warna. Mari lihat cara menambah pemilih warna dalam panel pentadbir, kotak meta atau bahagian penyesuai tema menggunakan rangka kerja Titan.
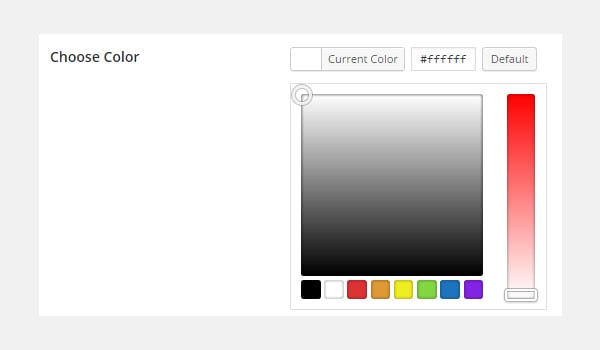
Pilihan jenis warna dalam Titan Framework
Terdapat medan jenis color dalam rangka kerja Titan, seperti yang ditunjukkan di bawah: color 类型字段,如下所示:
此选项会加载整个调色板,您可以从中选择任何颜色。要在Titan Framework中添加这个选项,需要了解它携带的参数,这些参数是:
- 名称:它控制选项的显示名称。
- id:此参数分配一个唯一的名称,该名称在整个过程中用于检索保存的选项值。
- desc:此参数添加带有选项名称的简短描述。
-
default:设置默认的
color值。 - 实时预览:(可选)它有助于显示主题定制器部分内更改的实时预览。
-
css:(可选)当您在管理页面和/或主题定制器部分添加
color选项时,它会自动生成 CSS。
所有这些参数的共同点是它们的类型,即字符串。
颜色类型选项的可用容器
可以在以下区域添加此选项:
- 管理面板
- 管理选项卡
- 元框
- 主题定制器部分
文本区域选项是如何创建的?
按照以下步骤在这些容器内创建 color 类型选项:
- 通过
getInstance()函数获取实例。 - 通过
createOption()函数创建选项。 - 通过
getOption()函数获取保存的值。
您可以参考我之前的文章来了解这些容器的创建。
在管理面板内创建颜色类型选项
声明示例
首先,我将在管理面板中创建一个 color 类型选项:
<?php
    /**
     *
     * Create the options
     *
     */
    $aa_panel->createOption( array(

        'id'      => 'aa_color', // The ID which will be used to get the value of this option
        'type'    => 'color', // Type of option we are creating
        'name'    => 'My Color Option', // Name of the option which will be displayed in the admin panel
        'desc'    => 'This is our option', // Description of the option which will be displayed in the admin panel
        'default' => '#fffff' // Default value of the option which will be displayed in the admin panel

    ) );
我在管理面板 $aa_panel 中创建了一个 color 类型选项。然后,通过 createOption() 函数,我添加了一个 color 类型选项,其 ID 为 aa_color。该函数采用选项类型支持的参数数组。因此,会相应地使用 id、type、name、desc 和默认参数。请注意 id 的值,即aa_color,应该始终是唯一的。
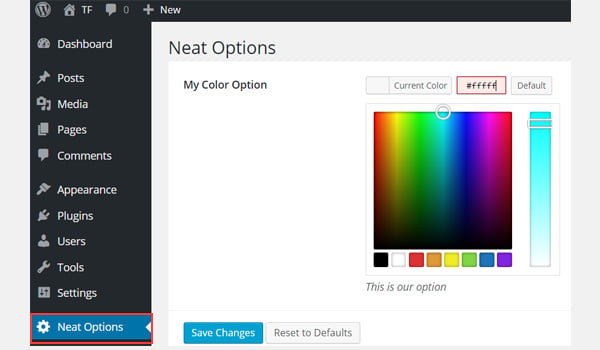
上面的屏幕截图显示了一个名为 My Color Option 的 color 选项在Neat Options管理面板中。
用法示例
让我们获取保存的选项值。
<?php
// 1. Get the titan framework instance and save it to a variable
$titan = TitanFramework::getInstance( 'neat' ); // we will initialize $titan only once for every file where we use it.
// 2. Get the value via ID using getOption function
$aa_color_val = $titan->getOption( 'aa_color' );

/**
 *
 * Print Admin panel options
 *
 */
 <h3> <?php echo $aa_color_val; ?> </h3>
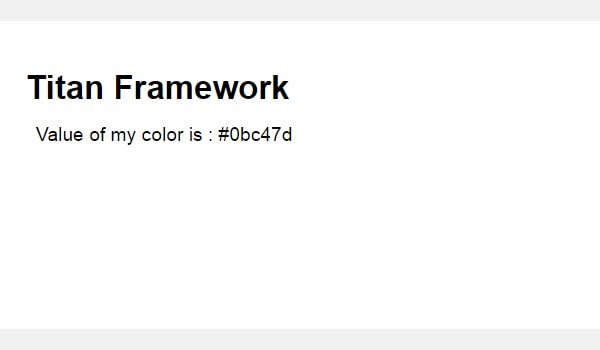
要检索已保存的选项值,请通过 get<em></em>Instance() 函数获取唯一实例。然后使用 getOption() 函数,并将 color 类型选项的 ID 注册为参数。将其值保存到新变量 $aa_color_val 中,然后在前端 echo 这个变量。
在前端显示结果
假设我选择了任何颜色,例如#cecece,并保存其值。
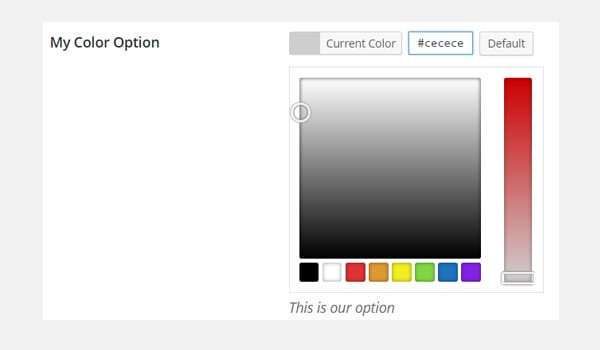
现在,根据代码,将打印所选颜色的十六进制值,如下所示。

在本文后面,我还将展示如何将此选项用作样式属性。
我们不会在生产主题中像这样打印它,而是将其用作内联样式,或者使用 Titan Framework 自动生成 CSS 文件,但这将在本系列的后面讨论,并且不在本文的范围。
在管理选项卡内创建颜色类型选项
声明示例
<?php

    // Create options for $aa_panel2 inside the $aa_tab1
    $aa_tab1->createOption( array(

        'id'      => 'aa_color_in_tab1_panel2', // IDs should always be unique. The ID which will be used to get the value of this option
        'type'    => 'color', // Type of option we are creating
        'name'    => 'My Color Option', // Name of the option which will be displayed in the admin panel
        'desc'    => 'This is our option', // Description of the option which will be displayed in the admin panel
        'default' => '#fffff' // Default value of the option which will be displayed in the admin panel

    ) );
这次我在管理选项卡 $aa_tab1 内创建了一个 color 类型选项。该选项的 ID 为 aa_color_in_tab1_panel2
🎜🎜Pilihan ini memuatkan keseluruhan palet warna yang mana anda boleh memilih mana-mana warna. Untuk menambah pilihan ini dalam Rangka Kerja Titan, anda perlu memahami parameter yang dibawanya, parameter ini ialah: 🎜
- Nama: Ini mengawal nama paparan pilihan.
- id: Parameter ini memberikan nama unik yang digunakan sepanjang proses untuk mendapatkan semula nilai pilihan yang disimpan.
- desc: Parameter ini menambah penerangan ringkas dengan nama pilihan.
-
lalai: Tetapkan nilai lalai
color. - Pratonton Langsung: (Pilihan) Ini membantu untuk menunjukkan pratonton langsung perubahan dalam bahagian penyesuai tema.
-
css: (Pilihan) Apabila anda menambah pilihan
warnadalam halaman pentadbir dan/atau bahagian penyesuai tema, ia CSS akan dijana secara automatik.
- Panel Pentadbiran
- Urus tab
- Kotak meta
- Bahagian penyesuai tema
Bagaimanakah pilihan kawasan teks dibuat?
🎜Ikuti langkah ini untuk membuat pilihan jeniscolor di dalam bekas ini: 🎜
- Dapatkan contoh melalui fungsi
getInstance(). - Buat pilihan melalui fungsi
createOption(). - Dapatkan nilai yang disimpan melalui fungsi
getOption().
Buat pilihan jenis warna dalam panel pentadbir
Contoh pengisytiharan
🎜Mula-mula, saya akan membuat pilihan jeniscolor dalam panel admin: 🎜
<?php
// 1. Get the titan framework instance and save it to a variable
$titan = TitanFramework::getInstance( 'neat' ); // we will initialize $titan only once for every file where we use it.
// Value of tab.
$aa_color_in_tab1_panel2_val = $titan->getOption( 'aa_color_in_tab1_panel2' );

/**
 *
 * Print Admin tab options
 *
 */
 <div>
    Value of my color is : <?php echo $aa_color_in_tab1_panel2_val; ?>
 </div>
🎜Saya membuat pilihan jenis color dalam panel admin $aa_panel. Kemudian, melalui fungsi createOption(), saya menambah pilihan jenis color dengan ID aa_color. Fungsi ini mengambil tatasusunan hujah yang disokong oleh jenis pilihan. Oleh itu, id, jenis, nama, desc dan parameter lalai digunakan dengan sewajarnya. Sila ambil perhatian bahawa nilai id, iaitu aa_color, hendaklah sentiasa unik. 🎜
🎜🎜🎜Tangkapan skrin di atas menunjukkan pilihan color bernama My Color Option dalam pentadbir Neat Options panel . 🎜
Contoh penggunaan
🎜Jom dapatkan nilai pilihan yang disimpan. 🎜<?php
/**
*
* Create the options for metabox
*
*/
$aa_metbox->createOption( array(
'id' => 'aa_mb_color', // The ID which will be used to get the value of this option
'type' => 'color', // Type of option we are creating
'name' => 'My Color Option', // Name of the option which will be displayed in the admin panel
'desc' => 'This is our option', // Description of the option which will be displayed
'default' => '#fffff' // Default value of the option which will be displayed
) );
🎜Untuk mendapatkan semula nilai pilihan yang disimpan, dapatkan tika unik melalui fungsi get<em></em>Instance(). Kemudian gunakan fungsi getOption() dan daftarkan ID pilihan jenis color sebagai parameter. Simpan nilainya pada pembolehubah baharu $aa_color_val dan kemudian echo pembolehubah ini di bahagian hadapan. 🎜
Paparkan hasil pada bahagian hadapan
🎜Andaikan saya memilih mana-mana warna seperti#cecece dan menyimpan nilainya. 🎜
🎜🎜🎜Kini, mengikut kod, nilai hex bagi warna yang dipilih akan dicetak seperti yang ditunjukkan di bawah. 🎜
🎜🎜🎜 Kemudian dalam artikel ini saya juga akan menunjukkan cara menggunakan pilihan ini sebagai atribut gaya. 🎜
🎜Kami tidak akan mencetaknya seperti ini dalam tema pengeluaran, sebaliknya menggunakannya sebagai gaya sebaris, atau menggunakan Rangka Kerja Titan untuk menjana fail CSS secara automatik, tetapi itu akan dibincangkan kemudian dalam siri ini, dan berada di luar skop artikel ini. 🎜🎜🎜
Buat pilihan jenis warna dalam tab pentadbir
Contoh pengisytiharan
<?php // 1. Get the titan framework instance and save it to a variable $titan = TitanFramework::getInstance( 'neat' ); // we will initialize $titan only once for every file where we use it. /** * * Getting Values. * * Notice the use of get_the_ID(). It is because metabox is created for all * the post types we defined. TO get the value of a metabox option for a specific page/post * we need to give getOptions() function the ID of our post/page. Which is done like this. * */ $aa_mb_color_val = $titan->getOption( 'aa_mb_color', get_the_ID() ); /** * * Print metabox options * */ <div class="aa_content" style= "background: <?php echo $aa_mb_color_val; ?>;"></div>🎜Kali ini saya mencipta pilihan jenis
color di dalam tab admin $aa_tab1. ID pilihan ini ialah aa_color_in_tab1_panel2, yang sepatutnya unik. 🎜
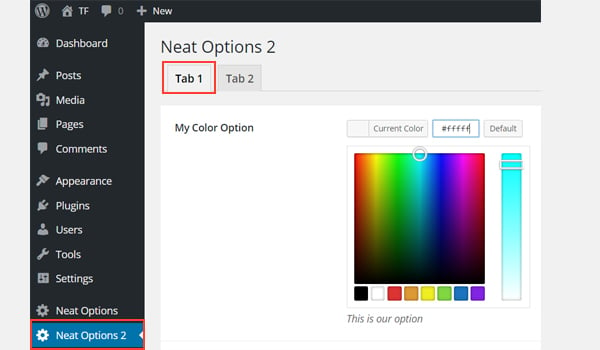
您可以在管理的选项卡 1 中找到 color 选项面板Neat Options 2。
用法示例
现在我将获取保存的选项值。
<?php
// 1. Get the titan framework instance and save it to a variable
$titan = TitanFramework::getInstance( 'neat' ); // we will initialize $titan only once for every file where we use it.
// Value of tab.
$aa_color_in_tab1_panel2_val = $titan->getOption( 'aa_color_in_tab1_panel2' );
/**
*
* Print Admin tab options
*
*/
<div>
Value of my color is : <?php echo $aa_color_in_tab1_panel2_val; ?>
</div>
我将通过 getInstance() 函数获取一个实例,然后使用 getOption() 函数。在此函数(第 5 行)内,我输入 ID aa_color_in_tab1_panel2 作为其参数。最后,我创建了一个div并以文本形式打印了保存的值。
在前端显示结果
这次我选择了 #0bc47d 作为我的颜色值。因此,输出将像这样打印:
在 Metabox 内创建颜色类型选项
声明示例
<?php
    /**
     *
     * Create the options for metabox
     *
     */
    $aa_metbox->createOption( array(

        'id'      => 'aa_mb_color', // The ID which will be used to get the value of this option
        'type'    => 'color', // Type of option we are creating
        'name'    => 'My Color Option', // Name of the option which will be displayed in the admin panel
        'desc'    => 'This is our option', // Description of the option which will be displayed
        'default' => '#fffff' // Default value of the option which will be displayed

    ) );
现在,我将通过 createOption() 函数在元框 $aa_metbox 中创建一个 color 类型选项。该选项的 ID 为 aa_mb_color,用于检索保存的选项值。元框出现在所有帖子/页面编辑屏幕上。
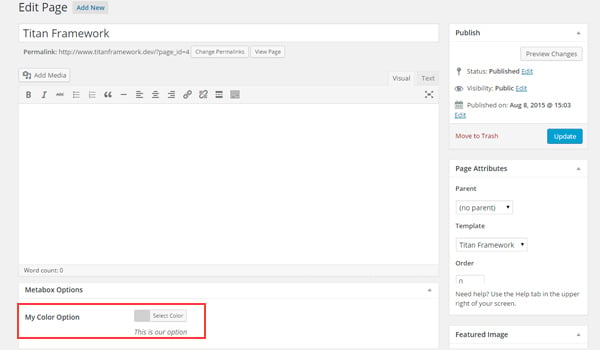
您可以在页面编辑结束时显示的元框中找到 color 类型选项屏幕。
用法示例
接下来我将获取选项值。
<?php
// 1. Get the titan framework instance and save it to a variable
$titan = TitanFramework::getInstance( 'neat' ); // we will initialize $titan only once for every file where we use it.
/**
 *
 * Getting Values.
 *
 * Notice the use of get_the_ID(). It is because metabox is created for all
 * the post types we defined. TO get the value of a metabox option for a specific page/post
 * we need to give getOptions() function the ID of our post/page. Which is done like this.
 *
 */
$aa_mb_color_val = $titan->getOption( 'aa_mb_color', get_the_ID() );

/**
 *
 * Print metabox options
 *
 */

<div class="aa_content" style= "background: <?php echo $aa_mb_color_val; ?>;"></div>
现在,这段代码与为管理面板和选项卡编写的代码有些不同。但是,getInstance() 和 getOption() 函数的使用是相同的。差异在于第 13 行,其中 getOption() 函数带有两个参数:
-
aa_mb_color,颜色类型选项ID -
get_the_ID()函数,返回当前帖子/页面/帖子类型的 ID
接下来看第 19 行,我在 div 中使用了内联 CSS 样式。这意味着 color 类型选项的值在前端显示为颜色。
在前端显示结果
我选择 #ffff00 作为我的十六进制颜色值并发布了该页面。这是我得到的:
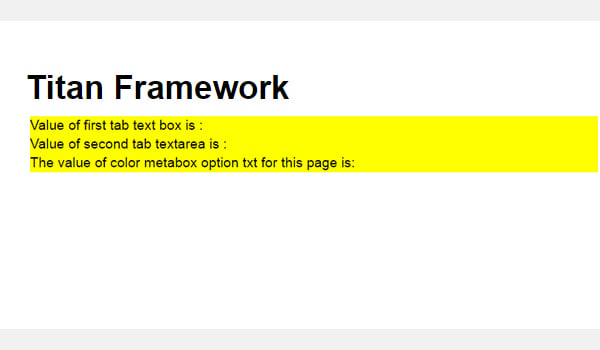
现在您可以在上面的屏幕截图中看到保存的值显示为颜色,并且整个 div 更改其背景颜色.
在主题定制器中创建颜色类型选项
声明示例
<?php

    /**
     *
     * Create the options for $aa_section1
     *
     */

    // Body bg color
    $aa_section1->createOption( array(

        'id'      => 'aa_sec_body_bg_clr', // The ID which will be used to get the value of this option
        'type'    => 'color', // Type of option we are creating
        'name'    => 'Site Background Color',// Name of the option which will be displayed in the admin panel
        'default' => '#fff' // Default value of our option

    ) );
createOption() 函数在主题定制器部分 $aa_section1 中添加 color 类型选项。该选项的ID是aa_sec_body_bg_clr,用于设置body背景颜色。
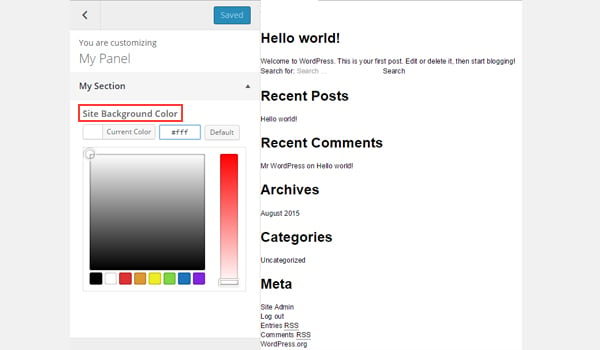
屏幕截图显示了一个名为网站背景颜色的 color 选项定制器面板我的部分。
用法示例
最后,我将获得保存的选项值。
<?php
// 1. Get the titan framework instance and save it to a variable
$titan = TitanFramework::getInstance( 'neat' ); // we will initialize $titan only once for every file where we use it.

// Body bg color
$aa_sec_body_bg_clr_val = $titan->getOption( 'aa_sec_body_bg_clr' );

/**
 *
 * Print customizer options
 *
 */

<style>
/* ----------------------------------------------------------------------------
 * CSS values from customizer
 * ------------------------------------------------------------------------- */
    body{
        background: <?php echo $aa_sec_body_bg_clr_val; ?> !important;

    }
    h1,
    h2,
    h3,
    h4,
    h5,
    h6,
    a,

</style>
一切都几乎相同,除了我通过 <style></style> 标记内的内部 CSS 样式获取保存的值(第 12 到 28 行)。第 16 行显示了 echo 命令,该命令打印变量 $aa_sec_body_bg_clr_val 的值。
在前端显示结果
这次我选择 #eeee22 作为 color 的十六进制值。所以,这是实时预览:
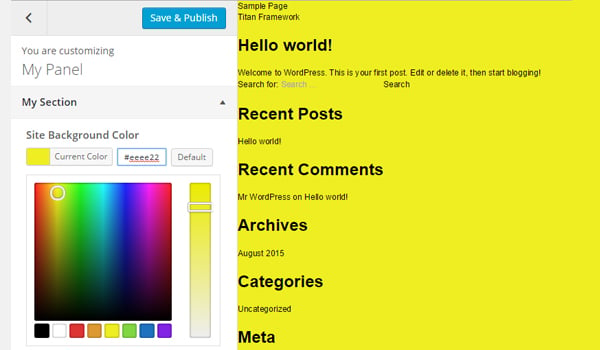
我的网站背景颜色从 #ffffff 更改为 #eeee22。酷!
上传文件
图像在使您的网络内容引人入胜且引人注目方面发挥着至关重要的作用。 WordPress 架构提供了 CPT(自定义帖子类型),用于通过媒体库添加图像。但是如果您想在其他地方添加图像上传器怎么办?
创建此类选项的方法有多种,而 Titan Framework 还提供图像上传器作为其选项类型之一。因此,让我们看看如何使用几行代码在管理面板、元框或主题定制器部分中添加媒体上传选项。
Titan Framework 中的上传类型选项
Titan Framework 中有一个 upload 类型选项,可添加不同格式的图像文件,例如jpg、jpeg、gif、png 等。看起来像这样:

此选项具有以下一组参数:
-
名称:此参数显示
upload选项的名称。 - id:它指定一个唯一的名称,用于获取保存的选项值。
- desc:它添加带有选项名称的一行描述。
-
大小:(可选)此参数定义可在
css参数(稍后解释)中使用的图像大小。它仅采用wp_get_attachment_image_src()函数的$size参数中定义的值(了解更多信息)。 - 默认:(可选)设置默认图像。
- livepreview:(可选)您可以使用此参数在主题定制器部分中找到更改的实时预览。
-
css:(可选)当您在管理页面和/或主题定制器部分添加
upload类型选项时,它会生成 CSS。 - 占位符:(可选)当此选项类型为空时,此参数会显示虚拟文本。
上传类型选项的可用容器
可以在内部添加 upload 类型选项:
- 管理面板
- 管理选项卡
- 元框
- 主题定制器部分
如果您想了解有关这些容器的创建的更多信息,请浏览本系列之前的文章。
但是,此选项是通过以下步骤添加的:
- 调用
getInstance()函数。 - 通过
createOption()函数创建选项类型。 - 通过
getOption()函数获取保存的选项值。
在管理面板中创建上传类型选项
声明示例
让我们编写它的代码。
<?php
    /**
     * Create the options
     *
     * Now we will create options for our panel that we just created called $aa_panel
     *
     */
    $aa_panel->createOption( array(
        'id'   => 'aa_img_id', // The ID which will be used to get the value of this option
        'type' => 'upload', // Type of option we are creating
        'name' => 'My Upload Option', // Name of the option which will be displayed in the admin panel
        'desc' => 'This is our option' // Description of the option which will be displayed in the admin panel
    ) );
我将通过 createOption() 函数在管理面板 $aa_panel 中添加一个 upload 类型选项。该函数采用一系列参数,例如id、type、name和desc。保持您的 ID 唯一,因为这些 ID 将在整个过程中用于检索保存的值。所以,这里的 ID 是 aa_img_id。
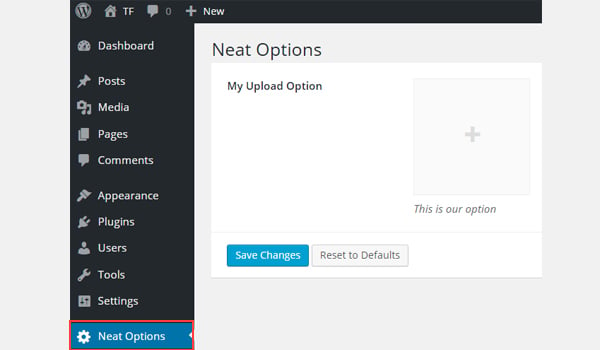
在上面的屏幕截图中,您可以在 我的上传选项 中找到一个名为我的上传选项的图片上传器strong>Neat Options 管理面板。
用法示例
现在我将进入重要部分:检索保存的选项值。
<?php
// 1. Get the titan framework instance and save it to a variable
$titan = TitanFramework::getInstance( 'neat' ); // we will initialize $titan only once for every file where we use it.

// 2. Get the value via ID using getOption function
$aa_img_id_val = $titan->getOption( 'aa_img_id' );


/**
 *  Print the value saved in aa_img_id option
 */
$aa_img_URL_val= 'http://placehold.it/500x500';
if ( is_numeric( $aa_img_id_val ) ) {
    $aa_img_attachment = wp_get_attachment_image_src( $aa_img_id_val );
    $aa_img_URL_val = $aa_img_attachment[0];
}
?>

    <h2>The image is shown below:</h2>
    <img src='<?php echo $aa_img_URL_val; ?>' />
获取 upload 类型选项值的过程与我之前讨论过的选项有些不同。那么,让我解释一下它的代码。
第 3 行和第 6 行非常相似,我在其中调用了 getInstance() 函数来调用唯一实例,该实例最好是您的主题名称(这就是为什么 neat 在我的例子中)。然后我使用了 getOption() 函数,在该函数中我将我的 upload 选项的 ID 作为参数写入。我将其值保存在变量 $aa_img_id_val 中。
接下来,我使用了 if 语句,该语句调用 is_numeric() 函数来检查 $ 的值是否为aa_img_id_val 是一个数字。如果为真,则会进一步处理代码。
为了通过附件 ID 获取上传图像值的源网址,我创建了一个新变量 $aa_img_URL_val(第 12 行),并为其分配了占位符图像(避免任何垃圾值和给它一个演示占位符图像)。
附件ID可用于获取上传图片的URL;在这方面,我使用了 WordPress 的 wp_get_attachment_image_src() 函数(第 14 行)。此函数返回一个图像对象数组,其中包含位置“0”处图像 src url 的值(在 Codex 中了解更多信息)。
参数 $aa_img_id_val 保存了 aa_img_id 的 ID。该函数的整体输出保存在新变量 $aa_img_attachment 中。
现在,正如我们所知,wp_get_attachment_image_sr()函数返回src url位于数组的位置“0”,因此我定义了它在数组中的确切位置,即 $aa_img_attachment[0](第 15 行)。然后我将该值分配给 $aa_img_URL_val,它最初带有一个占位符图像。现在 $aa_img_URL_val 拥有所选图像的源 URL。
最后(第 19 行),我只是通过 echo 命令打印了图像。我建议在此处使用 esc_url() 函数,该函数会转义您的图像 URL。我不会详细讨论,因为它超出了本文的范围。但这是修改第 #19 行的方法:
<img src='<?php echo esc_url( $aa_img_URL_val ); ?>' />
在前端显示结果
假设我上传了此图像并保存了设置。
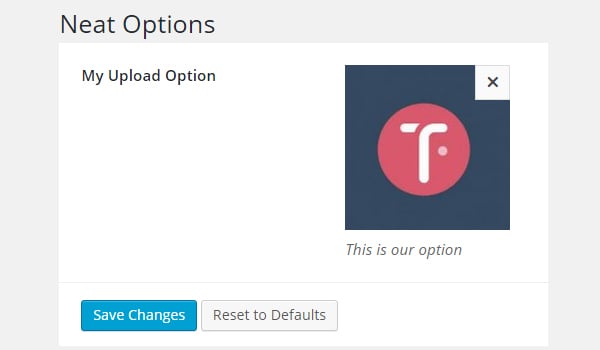
所以,这就是它在前端的显示方式。

在“管理”选项卡中创建上传类型选项
声明示例
现在我将在管理选项卡中创建此选项。
<?php
    // Create options for $aa_panel2 inside the $aa_tab1
    $aa_tab1->createOption( array(

        'id'   => 'aa_img_in_tab1_panel2', // IDs should always be unique. The ID which will be used to get the value of this option
        'type' => 'upload', // Type of option we are creating
        'name' => 'My Upload Option', // Name of the option which will be displayed in the admin panel
        'desc' => 'This is our option' // Description of the option which will be displayed in the admin panel

    ) );
在管理选项卡 $aa_tab1 内创建 ID 为 aa_img_in_tab1_panel2 的 upload 选项。
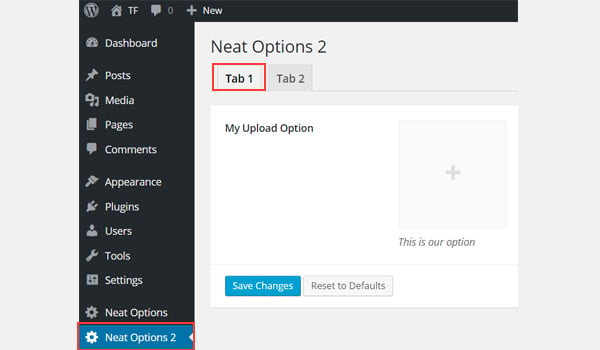
您可以在管理面板Neat Options 2标签 1 内找到此选项/strong>.
用法示例
让我们获取保存的值。
<?php
// 1. Get the titan framework instance and save it to a variable
$titan = TitanFramework::getInstance( 'neat' ); // we will initialize $titan only once for every file where we use it.
// 2. Get the value via ID using getOption function
$aa_img_in_tab1_panel2_val = $titan->getOption( 'aa_img_in_tab1_panel2' );
/**
* Print the value saved in option
*/
$aa_img_in_tab1_panel2_URL_val= 'http://placehold.it/500x500';
if ( is_numeric( $aa_img_in_tab1_panel2_val ) ) {
$aa_img_in_tab1_panel2_attachment = wp_get_attachment_image_src($aa_img_in_tab1_panel2_val );
$aa_img_in_tab1_panel2_URL_val = $aa_img_in_tab1_panel2_attachment[0];
}
?>
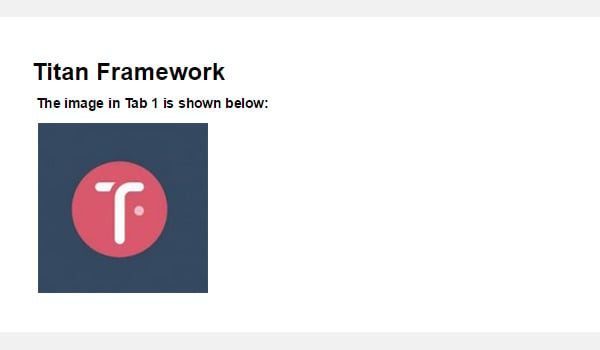
<h2>The image in Tab 1 is shown below:</h2>
<img src='<?php echo $aa_img_in_tab1_panel2_URL_val; ?>' />
在前端显示结果
我再次上传了相同的图像并保存了它。在前端看起来像这样:
在 Metabox 内创建上传类型选项
声明示例
现在我将在元框中创建此选项。
<?php
    /**
     * Create the options for metabox
     *
     */
    $aa_metbox->createOption( array(

            'id'   => 'aa_mb_img', // The ID which will be used to get the value of this option
            'type' => 'upload', // Type of option we are creating
            'name' => 'My Upload Option', // Name of the option which will be displayed in the admin panel
            'desc' => 'This is our option' // Description of the option which will be displayed in the admin panel

        ) );
upload 类型选项是通过 createOption() 函数在元盒 $aa_metbox 内创建的。它出现在所有页面/帖子编辑屏幕上。
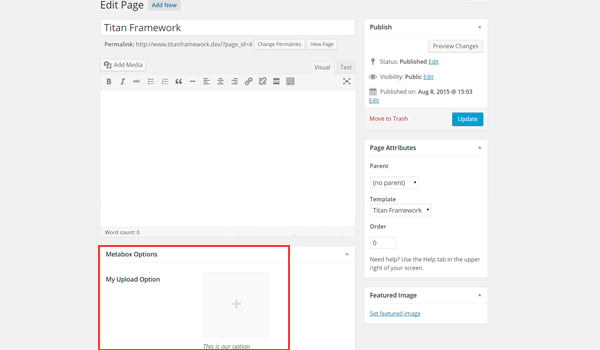
在上面的屏幕截图中,您可以在元框中找到一个名为我的上传选项的图片上传器在页面编辑屏幕的末尾。
用法示例
使用以下代码。
<?php
// 1. Get the titan framework instance and save it to a variable
$titan = TitanFramework::getInstance( 'neat' ); // we will initialize $titan only once for every file where we use it.
/**
Getting values for metabox
*/
/**
*
*
* Notice the use of get_the_ID(). It is because metabox is created for all
* the post types we defined. TO get the value of a metabox option for a specific page/post
* we need to give getOptions() function the ID of our post/page. Which is done like this.
*
*/
$aa_mb_img_val = $titan->getOption( 'aa_mb_img', get_the_ID() );
/**
* Print the value saved in option
*/
$aa_mb_img_URL_val= 'http://placehold.it/500x500';
if ( is_numeric( $aa_mb_img_val ) ) {
$aa_mb_img_attachment = wp_get_attachment_image_src($aa_mb_img_val );
$aa_mb_img_URL_val = $aa_mb_img_attachment[0];
}
?>
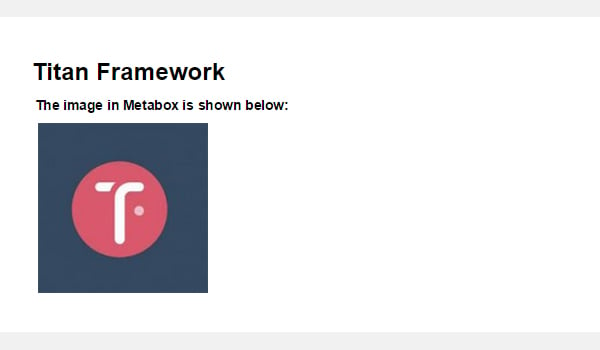
<h2>The image in Metabox is shown below:</h2>
<img src='<?php echo $aa_mb_img_URL_val; ?>' />
在前端显示结果
我们在前端查看结果:
在主题定制器部分中创建上传类型选项
声明示例
最后,我将在定制器中创建一个图像上传器字段。
<?php
    /**
     *
     * Create the options for $aa_section1
     *
     */

    $aa_section1->createOption( array(

        'id'   => 'aa_sec_img', // The ID which will be used to get the value of this option
        'type' => 'upload', // Type of option we are creating
        'name' => 'My Upload Option',// Name of the option which will be displayed in the admin panel
        'desc' => 'This is our option' // Description of our option

    ) );
upload 类型选项显示在主题定制器部分 $aa_section1 内。它的 ID 是 aa_sec_img。
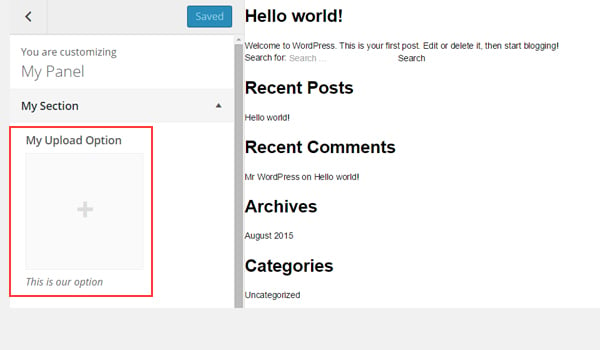
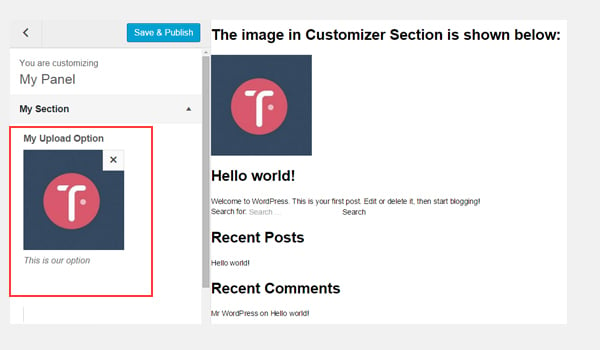
您可以在上图中的我的部分自定义面板中找到上传者字段。
用法示例
使用以下代码获取值:
<?php
// 1. Get the titan framework instance and save it to a variable
$titan = TitanFramework::getInstance( 'neat' ); // we will initialize $titan only once for every file where we use it.

// Sec Img
$aa_sec_img_val = $titan->getOption( 'aa_sec_img' );

/**
 * Print the value saved in option
 */

$aa_sec_img_URL_val= 0;
if ( is_numeric( $aa_sec_img_val ) ) {
    $aa_sec_img_attachment = wp_get_attachment_image_src($aa_sec_img_val );
    $aa_sec_img_URL_val =  $aa_sec_img_attachment[0];
}

?>
    <h1>The image in Customizer Section is shown below:</h1>
    <img src='<?php echo $aa_sec_img_URL_val; ?>' />
在前端显示结果
让我们上传实时预览屏幕截图:
结论
就是这样!
颜色选项很容易使用 Titan Framework 实现。在接下来的文章中,我将向您展示如何通过此选项自动生成 CSS 文件或使用它来创建实时预览作品。
我们还介绍了如何使用 Titan Framework 引入上传选项。您可以通过多种方式在 WordPress 插件或主题中使用此选项。例如,您可以允许用户选择徽标或自定义背景图片。
仔细阅读,如果您有任何疑问,请将其留在下面的评论框中,或者您可以在 Twitter 上联系我。
Atas ialah kandungan terperinci Menambah Pilihan Jenis Warna dan Jenis Muat Naik: Panduan Langkah demi Langkah Pemula untuk Rangka Kerja Titan. Untuk maklumat lanjut, sila ikut artikel berkaitan lain di laman web China PHP!