
Rumah >Operasi dan penyelenggaraan >Nginx >Bagaimana untuk memasang dan mengkonfigurasi nginx di bawah Linux
Bagaimana untuk memasang dan mengkonfigurasi nginx di bawah Linux

- PHPzke hadapan
- 2023-05-23 23:22:044085semak imbas
1. Pasang dan konfigurasikan nginx di bawah Linux
Apabila memasang nginx buat kali pertama, masalah yang timbul semasa pemasangan akan diselesaikan langkah demi langkah.
Alat securecrt digunakan untuk menyambung dan log masuk ke pelayan.
Arahan 1.1 rz, kotak dialog akan muncul, pilih pakej mampat nginx untuk dimuat naik.
#rz
1.2 Nyahzip
[root@vw010001135067 ~]# cd /usr/local/
[root@vw010001135067 local]# tar -zvxf nginx-1.10.2.tar.gz
1.3 Masukkan folder nginx dan laksanakan arahan ./configure
[root@vw010001135067 local]# cd nginx-1.10.2
[root@vw010001135067 nginx-1.10.2]# ./configure
Ralat dilaporkan seperti berikut:
checking for os
 + linux 2.6.32-431.el6.x86_64 x86_64
checking for c compiler ... not found

./configure: error: c compiler cc is not found
Ini ralat berlaku. Kemudian pakej gcc tidak dipasang.
1.3.1 Pasang gcc
Lihat gcc
[root@vw010001135067 nginx-1.10.2]# whereis gcc
gcc:
Pasang gcc
[root@vw010001135067 nginx-1.10.2]# yum -y install gcc
Semak semula selepas pemasangan berjaya
[root@vw010001135067 nginx-1.10.2]# whereis gcc
gcc: /usr/bin/gcc /usr/lib/gcc /usr/libexec/gcc /usr/share/man/man1/gcc.1.gz
gcc dipasang .
1.3.2 Teruskan melaksanakan ./configure
[root@vw010001135067 nginx-1.10.2]# ./configure
checking for os
 + linux 2.6.32-431.el6.x86_64 x86_64
checking for c compiler ... found
......
checking for pcre library ... not found
checking for pcre library in /usr/local/ ... not found
checking for pcre library in /usr/include/pcre/ ... not found
checking for pcre library in /usr/pkg/ ... not found
checking for pcre library in /opt/local/ ... not found

./configure: error: the http rewrite module requires the pcre library.
you can either disable the module by using --without-http_rewrite_module
option, or install the pcre library into the system, or build the pcre library
statically from the source with nginx by using --with-pcre=<path> option.
Ralat di atas berlaku. Pasang pcre-devel
[root@vw010001135067 nginx-1.10.2]# yum install pcre-devel
1.3.3 dan laksanakan ./configure
error: the http gzip module requires the zlib library.
you can either disable the module by using --without-http_gzip_module
option, or install the zlib library into the system, or build the zlib library
statically from the source with nginx by using --with-zlib=<path> option.
Jika terdapat ralat ini, maka laksanakan
yum install zlib-devel
1.3.4 Tiada ralat dilaporkan selepas melaksanakan ./configure
[root@vw010001135067 nginx-1.10.2]# ./configure
checking for os
 + linux 2.6.32-431.el6.x86_64 x86_64
checking for c compiler ... found
 + using gnu c compiler
 + gcc version: 4.4.7 20120313 (red hat 4.4.7-17) (gcc)
.......
configuration summary
 + using system pcre library
 + openssl library is not used
 + md5: using system crypto library
 + sha1: using system crypto library
 + using system zlib library

 nginx path prefix: "/usr/local/nginx"
 nginx binary file: "/usr/local/nginx/sbin/nginx"
 nginx modules path: "/usr/local/nginx/modules"
 nginx configuration prefix: "/usr/local/nginx/conf"
 nginx configuration file: "/usr/local/nginx/conf/nginx.conf"
 nginx pid file: "/usr/local/nginx/logs/nginx.pid"
 nginx error log file: "/usr/local/nginx/logs/error.log"
 nginx http access log file: "/usr/local/nginx/logs/access.log"
 nginx http client request body temporary files: "client_body_temp"
 nginx http proxy temporary files: "proxy_temp"
 nginx http fastcgi temporary files: "fastcgi_temp"
 nginx http uwsgi temporary files: "uwsgi_temp"
 nginx http scgi temporary files: "scgi_temp"
1.4 Jika anda ingin menggunakan fungsi openssl, fungsi sha1. Kemudian pasang openssl, sha1
[root@vw010001135067 nginx-1.10.2]# yum install openssl openssl-devel
[root@vw010001135067 nginx-1.10.2]# install perl-digest-sha1.x86_64
1.4.1 Dayakan modul ssl dan jalankan ./configure –with-http_ssl_module
[root@vw010001135067 nginx-1.10.2]# ./configure --with-http_ssl_module
1.4.2 Dayakan halaman “server+status” dan jalankan ./ configure – with-http_stub_status_module
[root@vw010001135067 nginx-1.10.2]# ./configure --with-http_stub_status_module
Dua arahan di atas boleh dimulakan pada masa yang sama
Salin kod Kod adalah seperti berikut:
[root@ vw010001135067 nginx-1.10.2]# ./ configure --with-http_stub_status_module --with-http_ssl_module
1.5 Konfigurasi di atas lulus
Laksanakan arahan make install arahan
[root@vw010001135067 nginx-1.10.2]# make
[root@vw010001135067 nginx-1.10.2]# make install
Pada ketika ini, nginx Perlaksanaan telah berjaya
1.6 Konfigurasikan pembolehubah persekitaran
Tambah konfigurasi dalam /etc/profile
Buka fail konfigurasi
[root@vw010001135067 nginx-1.10.2]# vi /etc/profile
Dalam fail konfigurasi Tambah
#nginx configure
export nginx_home=/usr/local/nginx-1.10.2
export path=$path:$nginx_home/sbin
dan saya mula mengisinya seperti di atas, tetapi ia tidak dapat ditemui apabila menggunakan nginx -v. Perhatikan bahawa alamat konfigurasi nginx_home saya di atas adalah salah. Mula-mula cari alamat pemasangan nginx
[root@vw010001135067 nginx-1.10.2]# whereis nginx
nginx: /usr/local/nginx
Alamatnya benar-benar salah Tukar alamat di atas kepada
#nginx configure
export nginx_home=/usr/local/nginx
export path=$path:$nginx_home/sbin
Kompil, simpan dan keluar, dan jalankan
[root@vw010001135067 nginx-1.10.2]# source /etc/profile
untuk membuat. konfigurasi berkesan.
1.7 Semak versi nginx
[root@vw010001135067 nginx]# nginx -v
nginx version: nginx/1.10.2
Seluruh proses telah berjaya!
2. Ubah suai nginx.conf
2.1 Mulakan nginx
Perkhidmatan nginx saya ada di http://10.1.135.67/, selepas konfigurasi berjaya , sekarang mulakan nginx
[root@vw010001135067 nginx]# cd /usr/local/nginx
[root@vw010001135067 nginx]# nginx -c conf/nginx.conf
dengan jayanya, buka http://10.1.135.67/ dalam penyemak imbas, nombor port lalai ialah 80.
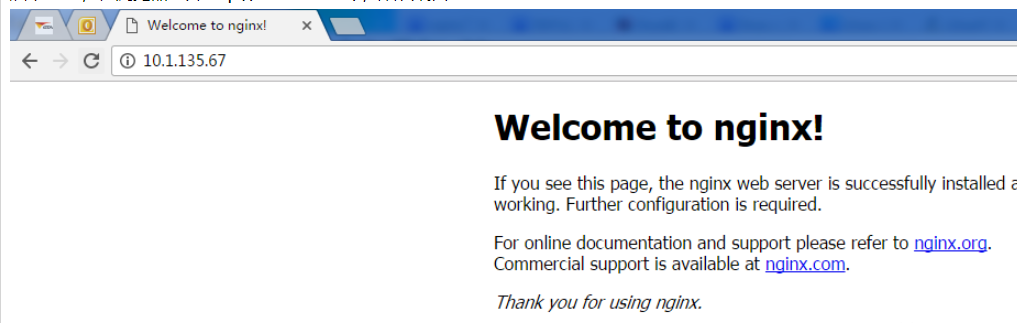
Seperti yang ditunjukkan di atas, nginx sudah berfungsi seperti biasa.
2.2 Konfigurasikan perkhidmatan tomcat
Sekarang perkhidmatan tomcat saya pada 10.1.29.15 dan perlu dimajukan melalui nginx. Kemudian buka nginx.conf dan ubah suai fail konfigurasi. Seperti berikut, tambah:
#user nobody;
worker_processes 1;

#error_log logs/error.log;
#error_log logs/error.log notice;
#error_log logs/error.log info;

#pid  logs/nginx.pid;


events {
 worker_connections 1024;#最大连接数,默认为512
 accept_mutex on; #设置网路连接序列化,防止惊群现象发生,默认为on
 multi_accept on; #设置一个进程是否同时接受多个网络连接,默认为off
 #use epoll;  #事件驱动模型,select|poll|kqueue|epoll|resig|/dev/poll|eventport
}


http {
 #文件扩展名与文件类型映射表
 include  mime.types;

 #默认文件类型,默认为text/plain
 default_type application/octet-stream;

 #自定义格式
 log_format main '$remote_addr - $remote_user [$time_local] "$request" '
      '$status $body_bytes_sent "$http_referer" '
      '"$http_user_agent" "$http_x_forwarded_for"';

 #combined为日志格式的默认值
 access_log logs/access.log main;

 #允许sendfile方式传输文件,默认为off,可以在http块,server块,location块
 sendfile  on;
 sendfile_max_chunk 100k; #每个进程每次调用传输数量不能大于设定的值,默认为0,即不设上限。

 #tcp_nopush  on;

 #连接超时时间,默认为75s,可以在http,server,location块。
 keepalive_timeout 65;

 #gzip on;

 upstream upload {
  server 10.1.29.15:8080;
 }

 error_page 404 https://www.baidu.com; #错误页

 server {
  keepalive_requests 120; #单连接请求上限次数。
  listen  80; #监听端口
  server_name localhost; #监听地址

  #charset koi8-r;

  #access_log logs/host.access.log main;

  location ~ ^.*?/upload/[^/]*?$ {
   proxy_connect_timeout 15;
   proxy_send_timeout 15;
   proxy_read_timeout 15;
   proxy_set_header host $host;
   proxy_set_header x-real-ip $remote_addr;
   proxy_set_header x-forwarded-for $proxy_add_x_forwarded_for;
   proxy_set_header connection "";
   proxy_pass http://upload; #请求转向upload 定义的服务器列表
   client_max_body_size 1024m;
}
 }
}
Selepas konfigurasi, simpan fail konfigurasi dan mulakan semula nginx
[root@vw010001135067 nginx]# nginx -s reload
Sama ada memanggil projek muat naik dalam penyemak imbas berjaya

Seperti yang ditunjukkan dalam gambar, projek boleh diakses dengan betul dan konfigurasi berjaya!
Atas ialah kandungan terperinci Bagaimana untuk memasang dan mengkonfigurasi nginx di bawah Linux. Untuk maklumat lanjut, sila ikut artikel berkaitan lain di laman web China PHP!