Rumah >Operasi dan penyelenggaraan >Nginx >Cara menggunakan cPanel untuk mengkonfigurasi proksi terbalik Nginx dalam CentOS 7
Cara menggunakan cPanel untuk mengkonfigurasi proksi terbalik Nginx dalam CentOS 7
- WBOYWBOYWBOYWBOYWBOYWBOYWBOYWBOYWBOYWBOYWBOYWBOYWBke hadapan
- 2023-05-21 17:43:361587semak imbas
cPanel kini merupakan sistem kawalan hos maya yang paling berkuasa, paling mudah digunakan dan paling popular di dunia. Banyak hos asing menggunakan panel kawalan ini.

Pertama, kita perlu memasang perpustakaan EPEL untuk memulakan proses ini
Langkah 1: Pasang perpustakaan EPEL
root@server1 [/usr]# yum -y install epel-releaseLoaded plugins: fastestmirror, tsflags, universal-hooks
Loading mirror speeds from cached hostfile
* EA4: 66.23.237.210
* base: mirrors.linode.com
* extras: mirrors.linode.com
* updates: mirrors.linode.com
Resolving Dependencies
--> Running transaction check
---> Package epel-release.noarch 0:7-5 will be installed
--> Finished Dependency Resolution

Dependencies Resolved

========================================================================================
   Package Arch Version Repository Size
========================================================================================
Installing:
epel-release noarch 7-5 extras 14 k
Langkah 2: Pasang perpustakaan CentOS RPM nDeploy
Anda boleh memasang pustaka CentOS RPM nDeploy untuk memasang perisian web nDeploy dan pemalam Nginx yang kami perlukan
root@server1 [/usr]# yum -y install http://rpm.piserve.com/nDeploy-release-centos-1.0-1.noarch.rpmLoaded plugins: fastestmirror, tsflags, universal-hooks
nDeploy-release-centos-1.0-1.noarch.rpm | 1.7 kB 00:00:00
Examining /var/tmp/yum-root-ei5tWJ/nDeploy-release-centos-1.0-1.noarch.rpm: nDeploy-release-centos-1.0-1.noarch
Marking /var/tmp/yum-root-ei5tWJ/nDeploy-release-centos-1.0-1.noarch.rpm to be installed
Resolving Dependencies
--> Running transaction check
---> Package nDeploy-release-centos.noarch 0:1.0-1 will be installed
--> Finished Dependency Resolution

Dependencies Resolved

========================================================================================
Package Arch Version Repository Size
========================================================================================
Installing:
nDeploy-release-centos noarch 1.0-1 /nDeploy-release-centos-1.0-1.noarch 110
Langkah Ketiga : Pasang pemalam nDeploy dan Nginx nDeploy
root@server1 [/usr]# yum --enablerepo=ndeploy install nginx-nDeploy nDeployLoaded plugins: fastestmirror, tsflags, universal-hooks
epel/x86_64/metalink | 9.9 kB 00:00:00
epel | 4.3 kB 00:00:00
ndeploy | 2.9 kB 00:00:00
(1/4): ndeploy/7/x86_64/primary_db | 14 kB 00:00:00
(2/4): epel/x86_64/group_gz | 169 kB 00:00:00
(3/4): epel/x86_64/primary_db | 3.7 MB 00:00:02

Dependencies Resolved

========================================================================================
Package Arch Version Repository Size
========================================================================================
Installing:
nDeploy noarch 2.0-11.el7 ndeploy 80 k
nginx-nDeploy x86_64 1.8.0-34.el7 ndeploy 36 M
Installing for dependencies:
PyYAML x86_64 3.10-11.el7 base 153 k
libevent x86_64 2.0.21-4.el7 base 214 k
memcached x86_64 1.4.15-9.el7 base 84 k
python-inotify noarch 0.9.4-4.el7 base 49 k
python-lxml x86_64 3.2.1-4.el7 base 758 k

Transaction Summary
========================================================================================
Install 2 Packages (+5 Dependent packages)
Kami memasang pemalam Nginx pada pelayan kami dan menyelesaikan pemasangan mengikut langkah di atas. Kini kita boleh mengkonfigurasi Nginx sebagai proksi terbalik dan mencipta hos maya untuk akaun pengguna cPanel sedia ada, yang mana kita boleh menjalankan skrip berikut.
Langkah 4: Mulakan Nginx sebagai pelayan web front-end lalai dan buat fail konfigurasi lalai
root@server1 [/usr]# /opt/nDeploy/scripts/cpanel-nDeploy-setup.sh enableModifying apache http and https port in cpanel

httpd restarted successfully.
Created symlink from /etc/systemd/system/multi-user.target.wants/nginx.service to /usr/lib/systemd/system/nginx.service.
Created symlink from /etc/systemd/system/multi-user.target.wants/ndeploy_watcher.service to /usr/lib/systemd/system/ndeploy_watcher.service.
Created symlink from /etc/systemd/system/multi-user.target.wants/ndeploy_backends.service to /usr/lib/systemd/system/ndeploy_backends.service.
ConfGen:: saheetha
ConfGen:: satest
Anda boleh melihat bahawa skrip ini akan mengubah suai port Apache daripada 80 ke port lain untuk menggunakan Nginx sebagai pelayan web bahagian hadapan dan mencipta profil hos maya untuk pengguna cPanel sedia ada. Setelah selesai, sahkan status Apache dan Nginx.
Status Apache:
root@server1 [/var/run/httpd]# systemctl status httpd● httpd.service - Apache Web Server
Loaded: loaded (/usr/lib/systemd/system/httpd.service; enabled; vendor preset: disabled)
Active: active (running) since Mon 2016-01-18 06:34:23 UTC; 12s ago
Process: 25606 ExecStart=/usr/sbin/apachectl start (code=exited, status=0/SUCCESS)
Main PID: 24760 (httpd)
CGroup: /system.slice/httpd.service
‣ 24760 /usr/local/apache/bin/httpd -k start

Jan 18 06:34:23 server1.centos7-test.com systemd[1]: Starting Apache Web Server...
Jan 18 06:34:23 server1.centos7-test.com apachectl[25606]: httpd (pid 24760) already running
Jan 18 06:34:23 server1.centos7-test.com systemd[1]: Started Apache Web Server.
Status Nginx:
root@server1 [~]# systemctl status nginx● nginx.service - nginx-nDeploy - high performance web server
Loaded: loaded (/usr/lib/systemd/system/nginx.service; enabled; vendor preset: disabled)
Active: active (running) since Sun 2016-01-17 17:18:29 UTC; 13h ago
Docs: http://nginx.org/en/docs/
Main PID: 3833 (nginx)
CGroup: /system.slice/nginx.service
├─ 3833 nginx: master process /usr/sbin/nginx -c /etc/nginx/nginx.conf
├─25473 nginx: worker process
├─25474 nginx: worker process
└─25475 nginx: cache manager process

Jan 17 17:18:29 server1.centos7-test.com systemd[1]: Starting nginx-nDeploy - high performance web server...
Jan 17 17:18:29 server1.centos7-test.com nginx[3804]: nginx: the configuration file /etc/nginx/nginx.conf syntax is ok
Jan 17 17:18:29 server1.centos7-test.com nginx[3804]: nginx: configuration file /etc/nginx/nginx.conf test is successful
Jan 17 17:18:29 server1.centos7-test.com systemd[1]: Started nginx-nDeploy - high performance web server.
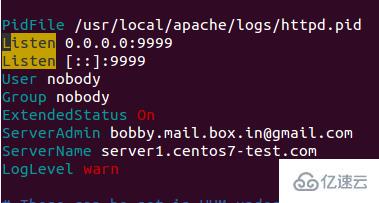
Nginx berjalan sebagai pelayan bahagian hadapan pada port 80, dan konfigurasi Apache ialah Tukar untuk mendengar pada port http 9999 dan https port 4430. Sila lihat situasi mereka:
root@server1 [/usr/local/src]# netstat -plan | grep httpdtcp 0 0 0.0.0.0:4430 0.0.0.0:* LISTEN 17270/httpd
tcp 0 0 0.0.0.0:9999 0.0.0.0:* LISTEN 17270/httpd
tcp6 0 0 :::4430 :::* LISTEN 17270/httpd
tcp6 0 0 :::9999 :::* LISTEN 17270/httpd

root@server1 [/usr/local/src]# netstat -plan | grep nginxtcp 0 0 127.0.0.1:80 0.0.0.0:* LISTEN 17802/nginx: master
tcp 0 0 45.79.183.73:80 0.0.0.0:* LISTEN 17802/nginx: master
Fail konfigurasi hos maya yang dibuat untuk pengguna sedia ada adalah dalam "/etc/nginx/sites- didayakan". Laluan fail ini mengandungi fail konfigurasi Nginx utama.
root@server1 [/etc/nginx/sites-enabled]# ll | grep .conf-rw-r--r-- 1 root root 311 Jan 17 09:02 saheetha.com.conf-rw-r--r-- 1 root root 336 Jan 17 09:02 saheethastest.com.conf
Contoh hos maya untuk nama domain:
server {

listen 45.79.183.73:80;#CPIPVSIX:80;# ServerNamesserver_name saheetha.com www.saheetha.com;
access_log /usr/local/apache/domlogs/saheetha.com main;
access_log /usr/local/apache/domlogs/saheetha.com-bytes_log bytes_log;

include /etc/nginx/sites-enabled/saheetha.com.include;

}
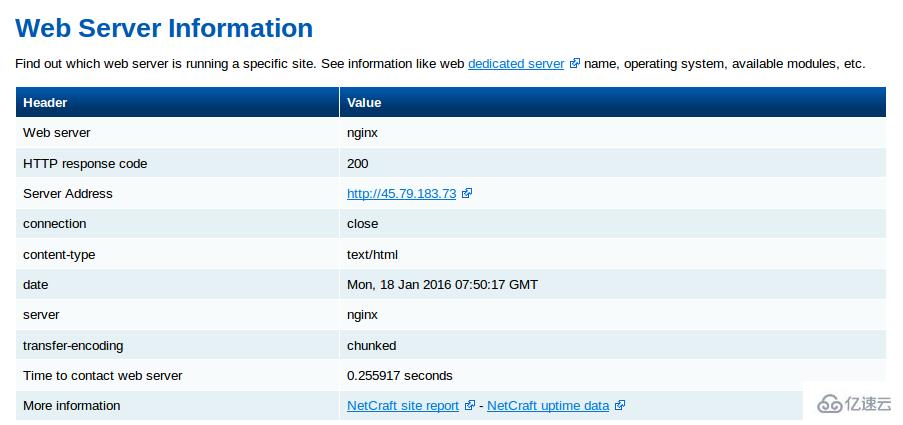
Kami boleh memulakan penyemak imbas untuk melihat tapak web untuk menentukan status berfungsi pelayan web. Selepas pemasangan, baca maklumat perkhidmatan web pada pelayan.
root@server1 [/home]# ip a | grep -i eth03: eth0:  mtu 1500 qdisc pfifo_fast state UP qlen 1000
inet 45.79.183.73/24 brd 45.79.183.255 scope global dynamic eth0
root@server1 [/home]# nginx -vnginx version: nginx/1.8.0

Tulis semula ayat ini untuk mendapatkan: Untuk semua akaun yang baru dibuat dalam cPanel, Nginx akan mencipta hos maya untuk mereka. Dengan langkah mudah ini, kami boleh mengkonfigurasi Nginx sebagai proksi terbalik pada pelayan CentOS 7 / cPanel.
Kelebihan Nginx sebagai proksi terbalik
Mudah dipasang dan dikonfigurasikan.
Kecekapan tinggi dan prestasi yang baik.
Cegah serangan Ddos.
Sokongan menggunakan .htaccess sebagai peraturan penulisan semula untuk PHP.
Atas ialah kandungan terperinci Cara menggunakan cPanel untuk mengkonfigurasi proksi terbalik Nginx dalam CentOS 7. Untuk maklumat lanjut, sila ikut artikel berkaitan lain di laman web China PHP!

