
Rumah >Java >javaTutorial >web.xml Apakah kaedah untuk SpringBoot membungkus Jar boleh laku untuk menjalankan SpringMVC?
web.xml Apakah kaedah untuk SpringBoot membungkus Jar boleh laku untuk menjalankan SpringMVC?

- 王林ke hadapan
- 2023-05-17 21:37:541642semak imbas
Sediakan ke direktori webapps dan mulakan
Versi Spring yang digunakan dalam artikel ini ialah Spring6, versi SpringBoot ialah 3 dan JDK ialah 17. Ia mungkin berbeza sedikit daripada sebelumnya, tetapi proses keseluruhannya tidak terlalu berbeza.
Jika aplikasi yang digunakan dimulakan di bawah direktori tomcat webapps, anda perlu mengkonfigurasi fail web.xml dalam projek
fail web.xml
Konfigurasikan aplikasi Spring context
<context-param>
    <param-name>contextConfigLocation</param-name>
    <param-value>/WEB-INF/spring/application-context.xml</param-value>
</context-param>
<listener>
    <listener-class>org.springframework.web.context.ContextLoaderListener</listener-class>
</listener>
context-param
Dalam skop konteks aplikasi web, anda boleh menggunakan teg konteks-param untuk menetapkan parameter permulaan. Parameter ini tersedia di seluruh aplikasi web dan boleh diperoleh melalui kaedah getInitParameter() objek ServletContext.
ContextLoaderListener
ContextLoaderListener melaksanakan antara muka ServletContextListener antara muka ini adalah antara muka yang ditinggalkan oleh tomcat untuk konteks permulaan aplikasi dan digunakan untuk memuatkan ApplicationContext apabila aplikasi web dimulakan.
ServletContextListener mempunyai dua kaedah lalai
// 在所有的servlet和filter初始化之前被调用
default public void contextInitialized(ServletContextEvent sce) {
}
// 在所有的servlet和filter销毁之后被调用
default public void contextDestroyed(ServletContextEvent sce) {
}
ContextLoaderListener juga mewarisi kelas ContextLoader dan semua operasi konteks dilakukan dalam kelas ini.
ContextLoaderListener melaksanakan kaedah contextInitialized, dan kemudian memanggil kaedah initWebApplicationContext kelas induk ContextLoader untuk dihantar dalam ServletContext.
@Override
public void contextInitialized(ServletContextEvent event) {
   initWebApplicationContext(event.getServletContext());
}
Mulakan Konteks Musim Bunga.
Kod kunci kaedah InitWebApplicationContext
...
if (this.context == null) {
    // 创建ApplicationContext
    this.context = createWebApplicationContext(servletContext);
}
...
// 刷新ApplicationContext
configureAndRefreshWebApplicationContext(cwac, servletContext);
...
// 将当前ApplicationContext添加到ServletContext的属性中,后面有用再说
// String ROOT_WEB_APPLICATION_CONTEXT_ATTRIBUTE = WebApplicationContext.class.getName() + ".ROOT";
servletContext.setAttribute(WebApplicationContext.ROOT_WEB_APPLICATION_CONTEXT_ATTRIBUTE, this.context);
...
Buat Konteks Aplikasi
Dalam kaedah createWebApplicationContext, mula-mula panggil kaedah determineContextClass untuk menentukan ApplicationContext yang hendak digunakan Selepas menemuinya, segerakannya.
Kaedah determineContextClass terutamanya menentukan ApplicationContext untuk digunakan pertama kali daripada web.xml Jika pengguna telah mentakrifkannya, yang ditentukan pengguna digunakan secara langsung.
String contextClassName = servletContext.getInitParameter(CONTEXT_CLASS_PARAM);
Konfigurasi dalam web.xml adalah seperti berikut
<context-param>
    <param-name>contextClass</param-name>
    <param-value>com.xxx.XxxContext</param-value>
</context-param>
Jika tiada konfigurasi, kelas XmlWebApplicationContext Spring akan digunakan.
Kelas ini ditakrifkan dalam fail ContextLoader.properties di bawah pakej laluan yang sama ContextLoader.
org.springframework.web.context.WebApplicationContext=org.springframework.web.context.support.XmlWebApplicationContext
Konfigurasikan dan muat semula ApplicationContext
configureAndRefreshWebApplicationContext kod kunci
protected void configureAndRefreshWebApplicationContext(ConfigurableWebApplicationContext wac,ServletContext sc) {
    // ...
    // 获取web.xml中配置的contextConfigLocation参数
    String configLocationParam = sc.getInitParameter(CONFIG_LOCATION_PARAM);
    if (configLocationParam != null) {
        wac.setConfigLocation(configLocationParam);
    }
    // ...
    // 刷新上下文
    wac.refresh();
}
Pada ketika ini, Tomcat telah memulakan persekitaran Spring, dan susulan ialah proses permulaan Spring, yang tidak akan diterangkan di sini.
Initialize DispatcherServlet
<servlet>
    <servlet-name>dispatcher</servlet-name>
    <servlet-class>org.springframework.web.servlet.DispatcherServlet</servlet-class>
    <init-param>
       <param-name>contextConfigLocation</param-name>
       <param-value>/WEB-INF/spring/dispatcher-servlet.xml</param-value>
    </init-param>
    <load-on-startup>1</load-on-startup>
</servlet>
<servlet-mapping>
    <servlet-name>dispatcher</servlet-name>
    <url-pattern>/</url-pattern>
</servlet-mapping>
ContextConfigLocation di sini tergolong dalam kelas induk DispatcherServlet, FrameworkServlet dan digunakan terutamanya untuk memuatkan konfigurasi berkaitan SpringMVC Contohnya seperti berikut:
>Diagram kelas DispatcherServlet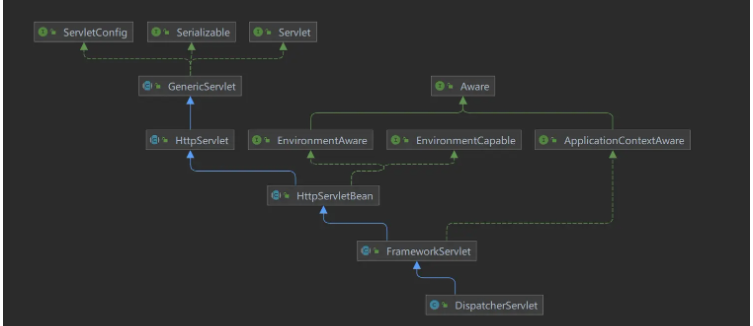
<beans xmlns="http://www.springframework.org/schema/beans"
    xmlns:context="http://www.springframework.org/schema/context"
    xmlns:mvc="http://www.springframework.org/schema/mvc"
    xmlns:xsi="http://www.w3.org/2001/XMLSchema-instance"
    xsi:schemaLocation="
        http://www.springframework.org/schema/beans
        http://www.springframework.org/schema/beans/spring-beans-4.3.xsd
        http://www.springframework.org/schema/context
        http://www.springframework.org/schema/context/spring-context-4.3.xsd
        http://www.springframework.org/schema/mvc
        http://www.springframework.org/schema/mvc/spring-mvc-4.3.xsd">
    <!-- 扫描控制器和其他组件 -->
    <context:component-scan base-package="com.example.controller" />
    <!-- 配置视图解析器 -->
    <bean class="org.springframework.web.servlet.view.InternalResourceViewResolver">
        <property name="prefix" value="/WEB-INF/views/" />
        <property name="suffix" value=".jsp" />
    </bean>
    <!-- 启用Spring MVC注解支持 -->
    <mvc:annotation-driven />
</beans>
FrameworkServlet.initServletBean()public final void init() throws ServletException {
// Set bean properties from init parameters.
PropertyValues pvs = new ServletConfigPropertyValues(getServletConfig(), this.requiredProperties);
if (!pvs.isEmpty()) {
try {
BeanWrapper bw = PropertyAccessorFactory.forBeanPropertyAccess(this);
ResourceLoader resourceLoader = new ServletContextResourceLoader(getServletContext());
bw.registerCustomEditor(Resource.class, new ResourceEditor(resourceLoader, getEnvironment()));
initBeanWrapper(bw);
bw.setPropertyValues(pvs, true);
}
catch (BeansException ex) {
if (logger.isErrorEnabled()) {
logger.error("Failed to set bean properties on servlet '" + getServletName() + "'", ex);
}
throw ex;
}
}
// Let subclasses do whatever initialization they like.
initServletBean();
}
FrameworkServlet.initWebApplicationContext()DisempurnakanServletServlet()
DisempurnakanServletServlet()DisempurnakanServletSpapers 🎜>
Mengapa kita memerlukan bekas ibu bapa-anak
Fungsi utama bekas ibu bapa-anak adalah untuk membahagikan sempadan rangka kerja dan melaksanakan penggunaan semula kacang.- Dalam seni bina tiga peringkat J2EE, kami biasanya menggunakan rangka kerja Spring dalam lapisan perkhidmatan, manakala terdapat banyak pilihan dalam lapisan web, seperti Spring MVC, Struts, dll. Untuk membolehkan lapisan web menggunakan kacang lapisan perkhidmatan, kita perlu menggunakan bekas lapisan perkhidmatan sebagai bekas induk bagi bekas lapisan web, supaya penyepaduan rangka kerja boleh dicapai.
- Peranan bekas ibu bapa-anak ialah apabila kita cuba mendapatkan sebiji kacang daripada bekas anak (Servlet WebApplicationContext), jika ia tidak dijumpai, ia akan diwakilkan kepada bekas induk (Root WebApplicationContext). Takrifan berulang bagi kacang yang sama dielakkan dalam setiap sub-bekas, dengan itu meningkatkan kebolehgunaan semula dan kebolehselenggaraan kod.
protected final void initServletBean() throws ServletException {
    ...
    // 在这里初始化ApplicationContext
    this.webApplicationContext = initWebApplicationContext();
    // 初始化servlet
    initFrameworkServlet();
}
- HandlerMapping ialah pemetaan antara permintaan dan objek pengendali Ia boleh mencari pengendali yang sepadan berdasarkan permintaan. Objek pengendali boleh terdiri daripada sebarang jenis, seperti kelas beranotasi dengan @Controller, kelas yang melaksanakan antara muka Pengawal atau kelas yang melaksanakan antara muka HttpRequestHandler.
- HandlerExecutionChain ialah rantai pelaksanaan pengendali, yang membalut objek pengendali dan satu set HandlerInterceptor. HandlerInterceptor ialah pemintas yang boleh melakukan beberapa operasi tambahan sebelum dan selepas pelaksanaan pengendali, seperti semakan kebenaran, pengelogan, dsb.
- HandlerAdapter ialah penyesuai pengendali Ia boleh mengendalikan pelbagai jenis objek pengendali, memanggil kaedah yang sepadan dan mengembalikan objek ModelAndView. HandlerAdapter boleh melakukan pengikatan parameter, pemprosesan nilai pulangan dan operasi lain mengikut jenis objek pengendali.
HandlerInterceptor menggunakan
- untuk mentakrifkan kelas pemintas, melaksanakan antara muka HandlerInterceptor atau mewarisi kelas HandlerInterceptorAdapter dan mengatasi preHandle, Terdapat tiga kaedah: postHandle dan afterCompletion.
在preHandle方法中,可以获取请求和响应对象,进行预处理,比如检查请求头中的token,或者判断请求的url是否有权限访问等。如果返回true,则继续执行后续的拦截器或者处理器;如果返回false,则中断请求,不再执行后续的拦截器或者处理器。
在postHandle方法中,可以获取请求和响应对象,以及处理器返回的ModelAndView对象,进行后处理,比如修改模型数据或者视图信息等。只有在preHandle方法返回true并且处理器成功执行后,该方法才会被调用。
在afterCompletion方法中,可以获取请求和响应对象,以及处理器抛出的异常对象(如果有的话),进行清理资源或者异常处理等。只有当preHandle方法返回true时,无论处理器是否成功执行,该方法才会被调用。
在SpringMVC配置文件中,需注册拦截器类并指定拦截的URL模式。可以注册多个拦截器,并指定顺序。拦截器会按照顺序执行preHandle方法,然后按照逆序执行postHandle和afterCompletion方法。
HandlerInterceptor和Filter的区别
HandlerInterceptor利用Java反射机制实现,而Filter则通过函数回调方式实现。HandlerInterceptor可以利用Spring的AOP技术,实现更灵活的拦截逻辑,而Filter只能在请求前后进行简单的处理。
HandlerInterceptor不依赖于Servlet容器,而Filter依赖于Servlet容器。HandlerInterceptor是SpringMVC框架提供的,可以在任何情况下使用,而Filter是Servlet规范的一部分,只能在Web应用中使用。
HandlerInterceptor的执行由SpringMVC框架控制,而Filter的执行由Servlet容器控制。HandlerInterceptor可以通过IoC容器来管理,可以注入其他的Bean,而Filter则需要在web.xml中配置,或者使用@WebFilter注解,并且需要@ServletComponentScan扫描。
HandlerInterceptor只能拦截DispatcherServlet处理的请求,而Filter可以拦截任何请求。HandlerInterceptor只能对Controller方法进行拦截,而Filter可以对静态资源、JSP页面等进行拦截。
HandlerInterceptor有三个方法:preHandle,postHandle和afterCompletion,分别在请求处理前后和视图渲染前后执行,而Filter只有一个方法:doFilter,在请求处理前后执行。
处理controller返回结果
对于被controller方法,使用的适配器是RequestMappingHandlerAdapter,在handlerAdapter.handle方法执行时,会去执行对应的controller方法,处理controller方法返回的结果。
invocableMethod.invokeAndHandle(webRequest, mavContainer);
ServletInvocableHandlerMethod.invokeAndHandle
// 执行controller方法
Object returnValue = invokeForRequest(webRequest, mavContainer, providedArgs);
...
// 处理返回数据,会判断是不是有@ResponseBody注解,如果有,会使用RequestResponseBodyMethodProcessor来处理返回值
// 然后会解析请求头等等,判断应该返回什么类型的数据,然后使用对应的HttpMessageConverter写入输出流
this.returnValueHandlers.handleReturnValue(
      returnValue, getReturnValueType(returnValue), mavContainer, webRequest);
SpringBoot Jar启动
SpringBoot使用嵌入式Servlet容器启动应用,有Tomcat,Jetty,Undertow。
选择Servlet容器
SpringBoot默认使用Tomcat,可以在配置文件中看出。
<dependency>
    <groupId>org.springframework.boot</groupId>
    <artifactId>spring-boot-starter-web</artifactId>
</dependency>
web模块自动引入了tomcat
<dependency>
  <groupId>org.springframework.boot</groupId>
  <artifactId>spring-boot-starter-tomcat</artifactId>
</dependency>
如果不使用Tomcat可以排除,引入其他服务器。
<dependency>
  <groupId>org.springframework.boot</groupId>
  <artifactId>spring-boot-starter-web</artifactId>
  <!-- 剔除Tomcat -->
  <exclusions>
    <exclusion>
      <artifactId>spring-boot-starter-tomcat</artifactId>
      <groupId>org.springframework.boot</groupId>
    </exclusion>
  </exclusions>
</dependency>
<!-- 使用jetty -->
<dependency>
  <groupId>org.springframework.boot</groupId>
  <artifactId>spring-boot-starter-jetty</artifactId>
</dependency>
如果没有排除Tomcat,直接引入其他服务器,比如下面。
<dependency>
  <groupId>org.springframework.boot</groupId>
  <artifactId>spring-boot-starter-web</artifactId>
  <!-- 没有排除Tomcat -->
</dependency>
<!-- 引入jetty -->
<dependency>
  <groupId>org.springframework.boot</groupId>
  <artifactId>spring-boot-starter-jetty</artifactId>
</dependency>
如果项目中同时引入了Tomcat和其他服务器的依赖,那么SpringBoot会按照以下顺序来选择启动的服务器。
Tomcat > Jetty > Undertow
也就是说,如果有Tomcat,就优先使用Tomcat,如果没有Tomcat,就看有没有Jetty,如果有Jetty,就使用Jetty,以此类推。这个顺序是在SpringBoot的ServletWebServerFactoryConfiguration类中定义的。
// 只展示必要代码
class ServletWebServerFactoryConfiguration {
   // 当Servlet、Tomcat、UpgradeProtocol类在类路径存在时
   // 并且ServletWebServerFactory类存在,则会创建tomcatServletWebServerFactory bean。
   @ConditionalOnClass({ Servlet.class, Tomcat.class, UpgradeProtocol.class })
   @ConditionalOnMissingBean(value = ServletWebServerFactory.class, search = SearchStrategy.CURRENT)
   static class EmbeddedTomcat {
      @Bean
      TomcatServletWebServerFactory tomcatServletWebServerFactory(
         ... 代码省略
      }
   }
   // 当Servlet、Server、WebAppContext类在类路径存在时
   // 并且ServletWebServerFactory类型的Bean不存在时,则会创建JettyServletWebServerFactory bean。
   // ServletWebServerFactory是TomcatServletWebServerFactory、JettyServletWebServerFactory、
   // UndertowServletWebServerFactory的父类
   // 所以如果Tomcat被引入,上面的tomcatServletWebServerFactory就会被创建,这里的条件就不满足,不会被创建。
   @ConditionalOnClass({ Servlet.class, Server.class, Loader.class, WebAppContext.class })
   @ConditionalOnMissingBean(value = ServletWebServerFactory.class, search = SearchStrategy.CURRENT)
   static class EmbeddedJetty {
      @Bean
      JettyServletWebServerFactory JettyServletWebServerFactory(
         ... 代码省略
      }
   }
   // 分析同上
   @ConditionalOnClass({ Servlet.class, Undertow.class, SslClientAuthMode.class })
   @ConditionalOnMissingBean(value = ServletWebServerFactory.class, search = SearchStrategy.CURRENT)
   static class EmbeddedUndertow {
      @Bean
      UndertowServletWebServerFactory undertowServletWebServerFactory(
        ... 代码省略
      }
   }
下面继续以Tomcat为例
Tomcat配置、启动
Tomcat是在Spring容器启动的时候启动的
SpringApplication.run方法
首先创建一个ConfigurableApplicationContext对象,并调用其refresh()方法,这个对象一般是AnnotationConfigServletWebServerApplicationContext。
context = createApplicationContext();
-> refreshContext(context);
-> refresh(context);
-> applicationContext.refresh();
refresh()方法会调用其父类ServletWebServerApplicationContext的refresh()方法,在父类的refresh()中再次调用父类AbstractApplicationContext的refresh()方法,主要在onRefresh阶段,会进行服务器的配置。
... refresh()代码简略
// 这里会初始化Tomcat配置
onRefresh();
// 这里会启动Tomcat
finishRefresh();
...
回到ServletWebServerApplicationContext类的onRefresh()方法,会调用createWebServer()方法,创建web服务器。
protected void onRefresh() {
   super.onRefresh();
   try {
      // 创建服务器
      createWebServer();
   }
   catch (Throwable ex) {
      throw new ApplicationContextException("Unable to start web server", ex);
   }
}
private void createWebServer() {
... 代码简略
// 获取工厂类,这里获取的就是在配置类中生效的那一个,这里为TomcatServletWebServerFactory
ServletWebServerFactory factory = getWebServerFactory();
createWebServer.tag("factory", factory.getClass().toString());
// 获取服务器
this.webServer = factory.getWebServer(getSelfInitializer());
}TomcatServletWebServerFactory.getWebServer
public WebServer getWebServer(ServletContextInitializer... initializers) {
   if (this.disableMBeanRegistry) {
      Registry.disableRegistry();
   }
   Tomcat tomcat = new Tomcat();
   File baseDir = (this.baseDirectory != null) ? this.baseDirectory : createTempDir("tomcat");
   tomcat.setBaseDir(baseDir.getAbsolutePath());
   for (LifecycleListener listener : this.serverLifecycleListeners) {
      tomcat.getServer().addLifecycleListener(listener);
   }
   // 设置Connector,对应与Tomcat Server.xml 中的<Connector></Connector>
   Connector connector = new Connector(this.protocol);
   connector.setThrowOnFailure(true);
   // 对应于Server.xml 中
   // <Service name="Catalina">
   //   <Connector port="8080" protocol="HTTP/1.1"
   //     connectionTimeout="20000"
   //     redirectPort="8443" relaxedQueryChars="[|]"/>
   // </Service>
   tomcat.getService().addConnector(connector);
   customizeConnector(connector);
   tomcat.setConnector(connector);
   tomcat.getHost().setAutoDeploy(false);
   configureEngine(tomcat.getEngine());
   for (Connector additionalConnector : this.additionalTomcatConnectors) {
      tomcat.getService().addConnector(additionalConnector);
   }
   // 准备好Context组件
   prepareContext(tomcat.getHost(), initializers);
   return getTomcatWebServer(tomcat);
}
// 创建Tomcat服务器
protected TomcatWebServer getTomcatWebServer(Tomcat tomcat) {
return new TomcatWebServer(tomcat, getPort() >= 0, getShutdown());
}至此,Tomcat配置已经初始化完成,准备启动。
在finishRefresh()方法中,会启动Tomcat
getLifecycleProcessor().onRefresh();
> DefaultLifecycleProcessor.startBeans(true);
> LifecycleGroup::start
> doStart(this.lifecycleBeans, member.name, this.autoStartupOnly);
> bean.start();
> WebServerStartStopLifecycle.start
> TomcatWebServer.start();
private void startBeans(boolean autoStartupOnly) {
   Map<String, Lifecycle> lifecycleBeans = getLifecycleBeans();
   Map<Integer, LifecycleGroup> phases = new TreeMap<>();
   lifecycleBeans.forEach((beanName, bean) -> {
      if (!autoStartupOnly || (bean instanceof SmartLifecycle smartLifecycle && smartLifecycle.isAutoStartup())) {
         int phase = getPhase(bean);
         phases.computeIfAbsent(
               phase,
               p -> new LifecycleGroup(phase, this.timeoutPerShutdownPhase, lifecycleBeans, autoStartupOnly)
         ).add(beanName, bean);
      }
   });
   if (!phases.isEmpty()) {
      phases.values().forEach(LifecycleGroup::start);
   }
}
public void start() {
this.webServer.start();
this.running = true;
this.applicationContext
.publishEvent(new ServletWebServerInitializedEvent(this.webServer, this.applicationContext));
}DispatchServlet配置
ServletContextInitializer
在prepareContext方法中,有一个方法configureContext
configureContext(context, initializersToUse);
configureContext方法,在这里面创建了一个TomcatStarter对象,这个类实现了ServletContainerInitializer接口,所以在容器启动过程中会被调用。
TomcatStarter starter = new TomcatStarter(initializers);
context.addServletContainerInitializer(starter, NO_CLASSES);
initializers是Spring自己定义的初始化接口ServletContextInitializer,传入TomcatStarter之后,在onStartup方法中循环调用onStartup方法。
public void onStartup(Set<Class<?>> classes, ServletContext servletContext) throws ServletException {
   try {
      for (ServletContextInitializer initializer : this.initializers) {
         initializer.onStartup(servletContext);
      }
   }
   ...
}需要注意的是,这里的initializers有些传过来的时候是一个函数式接口,在上面的factory.getWebServer(getSelfInitializer());这里传进来的,就是一个函数式接口
private org.springframework.boot.web.servlet.ServletContextInitializer getSelfInitializer() {
   return this::selfInitialize;
}
实际调用在下面这个方法
private void selfInitialize(ServletContext servletContext) throws ServletException {
   prepareWebApplicationContext(servletContext);
   registerApplicationScope(servletContext);
   WebApplicationContextUtils.registerEnvironmentBeans(getBeanFactory(), servletContext);
   for (ServletContextInitializer beans : getServletContextInitializerBeans()) {
      beans.onStartup(servletContext);
   }
}
在此处绕过所有ServletContextInitializer,随后执行它们的onStartup方法。
其中有一个DispatcherServletRegistrationBean,这个类实现了ServletContextInitializer接口,主要是用来添加DispatchServlet。
DispatcherServletAutoConfiguration配置类中有DispatcherServlet,DispatcherServletRegistrationBean两个Bean。
protected static class DispatcherServletRegistrationConfiguration {
   @Bean(name = DEFAULT_DISPATCHER_SERVLET_REGISTRATION_BEAN_NAME)
   @ConditionalOnBean(value = DispatcherServlet.class, name = DEFAULT_DISPATCHER_SERVLET_BEAN_NAME)
   public DispatcherServletRegistrationBean dispatcherServletRegistration(DispatcherServlet dispatcherServlet,
         WebMvcProperties webMvcProperties, ObjectProvider<MultipartConfigElement> multipartConfig) {
      // 创建DispatcherServletRegistrationBean,并把dispatcherServlet传进去
      DispatcherServletRegistrationBean registration = new DispatcherServletRegistrationBean(dispatcherServlet,
            webMvcProperties.getServlet().getPath());
      registration.setName(DEFAULT_DISPATCHER_SERVLET_BEAN_NAME);
      registration.setLoadOnStartup(webMvcProperties.getServlet().getLoadOnStartup());
      multipartConfig.ifAvailable(registration::setMultipartConfig);
      return registration;
   }
}
protected static class DispatcherServletConfiguration {
    @Bean(name = DEFAULT_DISPATCHER_SERVLET_BEAN_NAME)
    public DispatcherServlet dispatcherServlet(WebMvcProperties webMvcProperties) {
        // 创建DispatcherServlet
        DispatcherServlet dispatcherServlet = new DispatcherServlet();
        dispatcherServlet.setDispatchOptionsRequest(webMvcProperties.isDispatchOptionsRequest());
        dispatcherServlet.setDispatchTraceRequest(webMvcProperties.isDispatchTraceRequest());
        dispatcherServlet.setThrowExceptionIfNoHandlerFound(webMvcProperties.isThrowExceptionIfNoHandlerFound());
        dispatcherServlet.setPublishEvents(webMvcProperties.isPublishRequestHandledEvents());
        dispatcherServlet.setEnableLoggingRequestDetails(webMvcProperties.isLogRequestDetails());
        return dispatcherServlet;
    }
}
ServletContextInitializer.onStartup方法由子类RegistrationBean实现
public final void onStartup(ServletContext servletContext) throws ServletException {
    String description = getDescription();
    if (!isEnabled()) {
        logger.info(StringUtils.capitalize(description) + " was not registered (disabled)");
        return;
    }
    // register是一个抽象方法,由子类DynamicRegistrationBean实现
    register(description, servletContext);
}
protected abstract void register(String description, ServletContext servletContext);
DynamicRegistrationBean.register
protected final void register(String description, ServletContext servletContext) {
   // addRegistration是一个抽象方法,由子类ServletRegistrationBean实现
   D registration = addRegistration(description, servletContext);
   if (registration == null) {
      logger.info(StringUtils.capitalize(description) + " was not registered (possibly already registered?)");
      return;
   }
   // Servlet被添加到Context后,这里对Servlet进行配置,如拦截路径
   configure(registration);
}
protected abstract D addRegistration(String description, ServletContext servletContext);
ServletRegistrationBean.addRegistration,作用类似下面
<servlet>
    <servlet-name>dispatcher</servlet-name>
    <servlet-class>org.springframework.web.servlet.DispatcherServlet</servlet-class>
</servlet>
protected ServletRegistration.Dynamic addRegistration(String description, ServletContext servletContext) {
String name = getServletName();
// 添加Servlet到Context中,这里的servlet就是DispatchServlet。
return servletContext.addServlet(name, this.servlet);
}ServletRegistrationBean.configure,作用类似下面
<servlet-mapping>
    <servlet-name>dispatcher</servlet-name>
    <url-pattern>/</url-pattern>
</servlet-mapping>
protected void configure(ServletRegistration.Dynamic registration) {
super.configure(registration);
String[] urlMapping = StringUtils.toStringArray(this.urlMappings);
if (urlMapping.length == 0 && this.alwaysMapUrl) {
// DEFAULT_MAPPINGS默是“/”
urlMapping = DEFAULT_MAPPINGS;
}
if (!ObjectUtils.isEmpty(urlMapping)) {
// 设置mapping
registration.addMapping(urlMapping);
}
registration.setLoadOnStartup(this.loadOnStartup);
if (this.multipartConfig != null) {
registration.setMultipartConfig(this.multipartConfig);
}
}至此,DispatchServlet已配置好,后续流程和web.xml配置调用流程基本相同。
FrameworkServlet.initWebApplicationContext()
protected WebApplicationContext initWebApplicationContext() {
    // 此处获取根容器,就是Spring初始化的XmlWebApplicationContext,
    // 在上面把它添加到了ServletContext的属性中,标记根容器,这里把它获取出来
    // String ROOT_WEB_APPLICATION_CONTEXT_ATTRIBUTE = WebApplicationContext.class.getName() + ".ROOT";
    // servletContext.getAttribute(WebApplicationContext.ROOT_WEB_APPLICATION_CONTEXT_ATTRIBUTE);
    // ===========上面为使用web.xml时的分析,下面为SpringBoot嵌入式Tomcat分析============
    // 同样是获取根容器,不过一般为AnnotationConfigServletWebServerApplicationContext
   WebApplicationContext rootContext =
         WebApplicationContextUtils.getWebApplicationContext(getServletContext());
   WebApplicationContext wac = null;
   // 此时webApplicationContext还是null,因为DispatchServlet是被tomcat创建的,需要无参构造器
   // 构造器中没有设置webApplicationContext的代码,所以此时webApplicationContext还是null
   // ===========上面为使用web.xml时的分析,下面为SpringBoot嵌入式Tomcat分析============
   // 注意:在SpringBoot使用嵌入式Tomcat时,这个webApplicationContext不为null,因为FrameworkServlet还
   // 实现了ApplicationContextAware接口,所以当SpringBoot的上下文准备好之后,会回调setApplicationContext方法
   // 注入ApplicationContext,后面在细说
   if (this.webApplicationContext != null) {
      // A context instance was injected at construction time -> use it
      wac = this.webApplicationContext;
      if (wac instanceof ConfigurableWebApplicationContext cwac && !cwac.isActive()) {
         // The context has not yet been refreshed -> provide services such as
         // setting the parent context, setting the application context id, etc
         if (cwac.getParent() == null) {
            // The context instance was injected without an explicit parent -> set
            // the root application context (if any; may be null) as the parent
            cwac.setParent(rootContext);
         }
         configureAndRefreshWebApplicationContext(cwac);
      }
   }
   if (wac == null) {
      // No context instance was injected at construction time -> see if one
      // has been registered in the servlet context. If one exists, it is assumed
      // that the parent context (if any) has already been set and that the
      // user has performed any initialization such as setting the context id
      // 此处主要是获取web.xml配置的WebApplicationContext
      // 可以通过设置参数contextAttribute来设置加载SpringMVC的ApplicationContext
      // 比如下面这样。除非项目中有多个WebApplicationContext,需要使用其他WebApplicationContext才会用到
      // 一般都是null
      // <context-param>
      //    <param-name>contextAttribute</param-name>
      //    <param-value>myWebApplicationContext</param-value>
      // </context-param>
      // ===========上面为使用web.xml时的分析,下面为SpringBoot嵌入式Tomcat分析
      // 因为wac此时不为null,这里不会进入
      wac = findWebApplicationContext();
   }
   if (wac == null) {
      // 现在进入到创建SpringMVC的ApplicationContext流程
      // 也就是加载contextConfigLocation定义的xml文件
      // ===========上面为使用web.xml时的分析,下面为SpringBoot嵌入式Tomcat分析
      // 因为wac此时不为null,这里不会进入,所以没有SpringMVC的容器,也就是没有父子容器之分,SpringBoot项目中只有一个容器
      // No context instance is defined for this servlet -> create a local one
      wac = createWebApplicationContext(rootContext);
   }
   if (!this.refreshEventReceived) {
      // Either the context is not a ConfigurableApplicationContext with refresh
      // support or the context injected at construction time had already been
      // refreshed -> trigger initial onRefresh manually here.
      synchronized (this.onRefreshMonitor) {
         // 初始化策略对象
         // 比如:HandlerMapping,HandlerAdapter,ViewResolver等等
         onRefresh(wac);
      }
   }
   if (this.publishContext) {
      // Publish the context as a servlet context attribute.
      String attrName = getServletContextAttributeName();
      getServletContext().setAttribute(attrName, wac);
   }
   return wac;
}
Atas ialah kandungan terperinci web.xml Apakah kaedah untuk SpringBoot membungkus Jar boleh laku untuk menjalankan SpringMVC?. Untuk maklumat lanjut, sila ikut artikel berkaitan lain di laman web China PHP!