
Rumah >Java >javaTutorial >Bagaimana untuk mengkonfigurasi pen luaran SpringBoot
Bagaimana untuk mengkonfigurasi pen luaran SpringBoot

- WBOYWBOYWBOYWBOYWBOYWBOYWBOYWBOYWBOYWBOYWBOYWBOYWBke hadapan
- 2023-05-15 09:43:051499semak imbas
Konfigurasi luaran SpringBoot (berdasarkan 2.4.0 dan lebih baru)
But Musim Bunga membolehkan anda membuat luaran konfigurasi supaya anda boleh menggunakan kod aplikasi yang sama dalam persekitaran yang berbeza. Anda boleh menggunakan pelbagai sumber konfigurasi luaran, termasuk fail sifat Java, fail YAML, pembolehubah persekitaran dan parameter baris arahan.
Nilai sifat boleh disuntik terus ke dalam kacang anda menggunakan anotasi @Value, diakses melalui Spring's Environment atau terikat pada objek melalui @ConfigurationProperties. Pada masa yang sama, Spring Boot juga menyediakan PropertyOrder yang sangat istimewa untuk membolehkan pengguna mengatasi nilai harta tertentu dalam senario yang sesuai.
Keutamaan adalah dalam susunan berikut dari rendah ke tinggi Nilai sifat yang terakhir mengatasi sebelumnya Semua konfigurasi akan membentuk konfigurasi pelengkap:
Sifat lalai (dinyatakan menggunakan SpringApplication.setDefaultProperties)
Sifat konfigurasi yang diperkenalkan oleh anotasi pada kelas @Configuration@PropertySource
Sila ambil perhatian bahawa sumber sifat tersebut tidak akan ditambahkan pada persekitaran sehingga ApplicationContext dimuat semula. Ini sudah terlambat untuk mengkonfigurasi beberapa sifat, seperti logging.* dan spring.main.* , yang dibaca sebelum muat semula bermula.
Data konfigurasi (seperti fail application.properties)
Untuk sifat dalam bentuk random.*, ia diperoleh daripada RandomValuePropertySource dahulu (merujuk kepada keutamaan berbanding yang terakhir)
Pembolehubah persekitaran OS((pembolehubah persekitaran sistem pengendalian)
Sifat Sistem Java (Sifat sistem JavaSystem.getProperties())
Sifat JNDI
Parameter permulaan ServletContext
Apabila devtools didayakan, konfigurasi di bawah laluan $HOME/.config/spring-boot
Fail data konfigurasi dipertimbangkan dalam susunan pemuatan berikut:
Dibungkus dalam balang Sifat aplikasi (application.properties dan YAML) dalam
Sifat aplikasi (application-{profile}.properties and YAML) dibungkus dalam balang
- Sifat aplikasi (application.properties dan YAML) di luar balang yang dibungkus
- Sifat aplikasi (application.properties dan YAML) untuk tertentu fail konfigurasi di luar balang berpakej -{profile}.properties dan YAML)
- Fail konfigurasi SpringBoot
Jenis fail konfigurasi biasa dalam Spring
Sumber XML
Sumber Properties
- Sumber YAML
- Gambaran Keseluruhan Profil
-
Profil Pada asasnya mewakili dimensi untuk menyusun maklumat konfigurasi, yang boleh mewakili makna yang berbeza dalam senario yang berbeza Contohnya, jika Profil mewakili keadaan, kami boleh menggunakan nilai seperti terbuka, separuh terbuka dan dekat untuk mewakili terbuka sepenuhnya. dan ditutup masing-masing. Separuh terbuka dan tertutup, dsb. Contoh lain ialah sistem perlu menyediakan satu siri templat, setiap templat menyimpan satu siri item konfigurasi:
/{application}.yml
/{application}-{profile}.yml
/{label}/{application}-{profile}.yml
/{application}-{profile}.properties
/{label}/{application}-{profile}.properties
Tempahan pemuatan fail konfigurasi - Apabila Spring Boot bermula, ia akan memuatkan fail konfigurasi secara automatik (Fail Properties, fail YAML) di dalam pakej JAR dan di lokasi yang ditentukan dalam direktori di mana pakej JAR berada. Senarai diisih mengikut keutamaan (nilai untuk item yang lebih rendah mengatasi nilai untuk item terdahulu) classpath ( –classpath )
. project-sample
├── config
│   ├── application.yml (4)
│   └── src/main/resources
|   │   ├── application.yml (1)
|   │   └── config
|   |   │   ├── application.yml (2)
├── application.yml (3)
Urutan memuatkan fail konfigurasi semasa permulaan: 1 > 3 > 4Perubahan konfigurasi profil (selepas 2.4.0)
Dalam versi terdahulu, susunan pemuatan lalai adalah seperti berikut:
Sifat aplikasi (application.properties dan YAML) dibungkus dalam balang.
Sifat aplikasi (application.properties dan YAML) di luar balang berpakej
Aplikasi khusus profil yang dibungkus dalam balang Sifat aplikasi (aplikasi -{profile}.properties and YAML) 2.4.0
- Profile-specific application properties (application-{profile}.properties and YAML) di luar balang yang dibungkus
- Nota: Dalam versi sebelumnya, fail konfigurasi
di luar pakej JAR tidak akan menimpa fail konfigurasi
berasaskan "profil" di dalam pakej JAR. Dalam versi akan datang, susunan carian lalai adalah seperti berikut: memastikan bahawa parameter aplikasi di luar pakej JAR harus diutamakan berbanding parameter konfigurasi khusus pengaktifan di dalam pakej JAR
Sifat aplikasi (application.properties dan YAML) dibungkus dalam balang.
Sifat aplikasi khusus profil (aplikasi-{profile}.properties dan YAML) dibungkus dalam balang application.propertiesapplication-{profile}.properties
Balang berbungkus Sifat aplikasi di luar application.properties dan YAML 2.4.0
打包 jar 之外的特定于配置文件的应用程序属性(application-{profile}.properties 和 YAML)
注意:同一位置下,Properties 文件优先级高于 YAML 文件 , 如果Spring Boot在优先级更高的位置找到了配置,那么它就会无视优先级低的配置。
文档排序(2.4.0以后)
从 Spring Boot 2.4 开始,加载 Properties 和 YAML 文件时候会遵循, 在文档中声明排序靠前的属性将被靠后的属性覆盖 。
激活指定配置文件
命令行激活: --spring.profiles.active=prod
spring:
  profiles:
    active: dev #激活开发环境配置
配置文件激活如上,只需要在application.yml或者properties文件中配置即可
注意:在application.yml或者properties文件存在的情况下,不管激活的是prod还是dev,还是会读取默认的配置文件,只不过指定的配置文件会覆盖默认配置文件中的属性
导入额外的配置文件(2.4.0以后)
可以使用spring.config.import属性从其他地方导入更多的配置数据,比如spring.config.import=my.yaml 。它会将 my.yaml 文件作为临时文件放在当前配置文件之后处理,因此其属性具有更高的优先级
激活外部配置文件
在运行Jar包的命令中加入这个参数就可以指定Jar包以外的配置文件的位置了,也可以在application的配置文件中配置该属性
$ java -jar myproject.jar --spring.config.location=classpath:/default.properties,classpath:/override.properties
这个参数就是指定外部application.yml配置文件位置的参数,它支持classpath和file路径
java -jar myproject.jar --spring.config.name=myproject
如果您不喜欢application.properties作为配置文件名,您可以通过指定spring.config.name环境属性来切换到另一个文件名
optional可选的配置文件
对于spring.config.location、spring.config.additional-location和spring.config.import等属性的路径,添加optional:前缀,则当对应文件不存在时应用仍可以正常启动
比如spring.config.location=optional:file:/my.yaml,当应用启动加载文件 my.yaml 不存在时,不会抛出异常
嵌入系统配置信息
例如,如果想要获取当前应用程序的名称并作为一个配置项进行管理,那么很简单,我们直接通过 ${spring.application.name} 占位符:
myapplication.name : ${spring.application.name}假设我们使用 Maven 来构建应用程序,那么可以按如下所示的配置项来动态获取与系统构建过程相关的信息:
info:
  app:
    encoding: @project.build.sourceEncoding@
    java:
      source: @java.version@
      target: @java.version@
# 等同于下述效果
info:
  app:
    encoding: UTF-8
    java:
        source: 1.8.0_31
        target: 1.8.0_31
配置参数提示
additional-spring-configuration-metadata.json、spring-configuration-metadata.json在springboot-starter官方项目或第三方starter项目中随处可见,那它起的作用是什么?
配置
additional-spring-configuration-metadata.json文件后,在开发人员的IDE工具使用个人编写的配置读取很有效的在application.properties或application.yml文件下完成提示
配置处理器
在Maven中,该依赖关系应被声明为可选的,如以下例子所示。
<dependency>
    <groupId>org.springframework.boot</groupId>
    <artifactId>spring-boot-configuration-processor</artifactId>
    <optional>true</optional>
</dependency>
创建additional-spring-configuration-metadata.json
在resources/META-INF目录下创建additional-spring-configuration-metadata.json,分类为 “groups” 或 “properties”,附加值提示分类为 "hints",如以下例子所示:
{
    "groups": [
        {
            "name": "server",
            "type": "org.springframework.boot.autoconfigure.web.ServerProperties",
            "sourceType": "org.springframework.boot.autoconfigure.web.ServerProperties"
        },
        {
            "name": "spring.jpa.hibernate",
            "type": "org.springframework.boot.autoconfigure.orm.jpa.JpaProperties$Hibernate",
            "sourceType": "org.springframework.boot.autoconfigure.orm.jpa.JpaProperties",
            "sourceMethod": "getHibernate()"
        }
    ...
    ],
    "properties": [
        {
            "name": "server.port",
            "type": "java.lang.Integer",
            "sourceType": "org.springframework.boot.autoconfigure.web.ServerProperties"
        },
        {
            "name": "server.address",
            "type": "java.net.InetAddress",
            "sourceType": "org.springframework.boot.autoconfigure.web.ServerProperties"
        },
        {
            "name": "spring.jpa.hibernate.ddl-auto",
            "type": "java.lang.String",
            "description": "DDL mode. This is actually a shortcut for the "hibernate.hbm2ddl.auto" property.",
            "sourceType": "org.springframework.boot.autoconfigure.orm.jpa.JpaProperties$Hibernate"
        }
    ...
    ],
    "hints": [
        {
            "name": "spring.jpa.hibernate.ddl-auto",
            "values": [
                {
                    "value": "none",
                    "description": "Disable DDL handling."
                },
                {
                    "value": "validate",
                    "description": "Validate the schema, make no changes to the database."
                },
                {
                    "value": "update",
                    "description": "Update the schema if necessary."
                },
                {
                    "value": "create",
                    "description": "Create the schema and destroy previous data."
                },
                {
                    "value": "create-drop",
                    "description": "Create and then destroy the schema at the end of the session."
                }
            ]
        }
    ]
}
Property 属性
properties 数组中包含的JSON对象可以包含下表中描述的属性。
| Name | 类型 | 目的 |
|---|---|---|
| name | String | 属性的全名。 名称采用小写的句号分隔形式(例如,server.address)。 这个属性是强制性的。 |
| type | String | 该属性的数据类型的完整签名(例如,java.lang.String),但也有完整的通用类型(例如 java.util.Map |
| description | String | 可以显示给用户的该property的简短描述。 如果没有描述,可以省略。 描述中的最后一行应以句号(.)结束。 |
| sourceType | String | 贡献此属性的来源的类名。 例如,如果该属性来自于一个用 @ConfigurationProperties 注解的类,该属性将包含该类的完全限定名称。 如果源类型未知,可以省略。 |
| defaultValue | Object | 默认值,如果没有指定该属性,则使用该值。 如果该属性的类型是一个数组,它可以是一个数组的值。 如果默认值是未知的,它可以被省略。 |
| deprecation | Deprecation | 指定该属性是否被废弃。 如果该字段没有被废弃,或者不知道该信息,可以省略。 下表提供了关于 deprecation 属性的更多细节。 |
Sifat pembayang
Objek JSON yang terkandung dalam tatasusunan pembayang boleh mengandungi sifat-sifat dalam jadual di bawah.
| Name | 类型 | 目的 |
|---|---|---|
| name | String | 此提示所指向的属性的全名。 名称采用小写的句号分隔形式(如 spring.mvc.servlet.path)。 这个属性是强制性的。 |
| values | ValueHint[] | 由 ValueHint 对象定义的有效值的列表(在下表中描述)。 每个条目都定义了值,并且可以有一个description。 |
Objek JSON yang terkandung dalam atribut nilai setiap elemen pembayang boleh mengandungi sifat yang diterangkan dalam jadual berikut.
| Name | 类型 | 目的 |
|---|---|---|
| value | Object | 提示所指的元素的一个有效值。 如果该属性的类型是一个数组,它也可以是一个数组的值。 这个属性是强制性的。 |
| description | String | 可以显示给用户的价值的简短描述。 如果没有描述,可以省略。 描述中的最后一行应以句号(.)结束。 |
SpringBoot命令行参数
参考:https://www.yisu.com/article/191629.htm
启动Spring Boot项目时传递参数,有三种参数形式:
选项参数,基本格式为
--optName[=optValue](--为连续两个减号)
--foo
--foo=bar
--foo="bar then baz"
--foo=bar,baz,biz
非选项参数
java -jar xxx.jar abc def
系统参数
java -jar -Dserver.port=8081 xxx.jar
相当于 SpringBoot 基于 Java 命令行参数中的非选项参数自定义了选项参数的规则,具体可以看解析器SimpleCommandLineArgsParser,它里面调用其parse方法对参数进行解析
class SimpleCommandLineArgsParser {
    public CommandLineArgs parse(String... args) {
        CommandLineArgs commandLineArgs = new CommandLineArgs();
        for (String arg : args) {
            // --开头的选参数解析
            if (arg.startsWith("--")) {
                // 获得key=value或key值
                String optionText = arg.substring(2, arg.length());
                String optionName;
                String optionValue = null;
                // 如果是key=value格式则进行解析
                if (optionText.contains("=")) {
                    optionName = optionText.substring(0, optionText.indexOf('='));
                    optionValue = optionText.substring(optionText.indexOf('=')+1, optionText.length());
                } else {
                    // 如果是仅有key(--foo)则获取其值
                    optionName = optionText;
                }
                // 如果optionName为空或者optionValue不为空但optionName为空则抛出异常
                if (optionName.isEmpty() || (optionValue != null && optionValue.isEmpty())) {
                    throw new IllegalArgumentException("Invalid argument syntax: " + arg);
                }
                // 封装入CommandLineArgs
                commandLineArgs.addOptionArg(optionName, optionValue);
            } else {
                commandLineArgs.addNonOptionArg(arg);
            }
        }
        return commandLineArgs;
    }
}
参数值的获取
如果您需要访问传递给应用程序的参数SpringApplication.run(…),您可以注入一个ApplicationArguments。该ApplicationArguments接口提供对原始String[]参数以及选项参数和非选项参数的访问,如以下示例所示:
@Component
public class MyBean {
    @Autowired
    public MyBean(ApplicationArguments args) {
        boolean debug = args.containsOption("debug");
        List<String> files = args.getNonOptionArgs();
        // if run with "--debug logfile.txt" debug=true, files=["logfile.txt"]
    }
}
另外,选项参数,也可以直接通过
@Value在类中获取系统参数可以通过java.lang.System提供的方法获取
参数值的区别
关于参数值区别,重点看选项参数和系统参数。通过上面的示例我们已经发现使用选项参数时,参数在命令中是位于xxx.jar之后传递的,而系统参数是紧随java -jar之后。
如果不按照该顺序进行执行,比如使用如下方式使用选项参数:
java -jar --server.port=8081 xxx.jar
则会抛出如下异常:
Unrecognized option: --server.port=8081
Error: Could not create the Java Virtual Machine.
Error: A fatal exception has occurred. Program will exit.
如果将系统参数放在jar包后面,问题会更严重,会出现可以正常启动,但参数无法生效。这个错误是最坑的,所以一定谨记:通过-D传递系统参数时,务必放置在待执行的jar包之前。
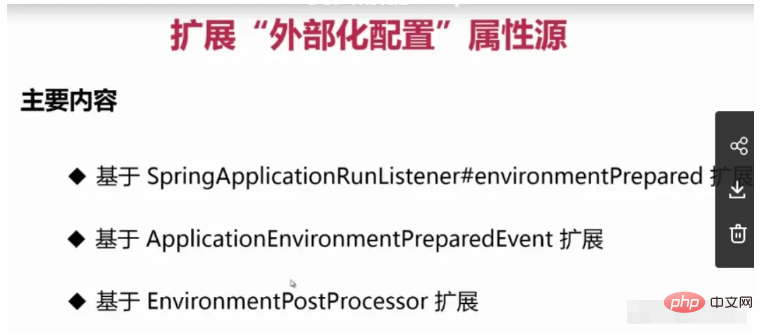
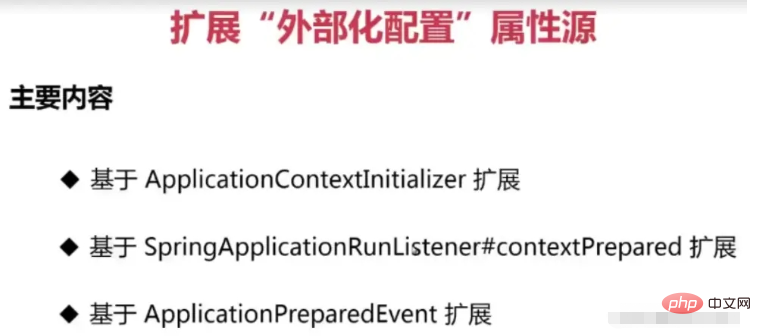
扩展“外部化配置”属性源
SpingBoot怎么支持YAML配置文件解析?
处理@PropertySource注解从ConfigurationClassParser#processPropertySource方法进
Spring中@PropertySource默认不支持YAML格式的解析,但是SpringBoot的配置文件却可以解析YAML,这说明SpringBoot中已经实现了YAML文件的解析,我们只需要复用即可,我们可以看该注解源码
/**
 * Specify a custom {@link PropertySourceFactory}, if any.
 * <p>By default, a default factory for standard resource files will be used.
 * @since 4.3
 * @see org.springframework.core.io.support.DefaultPropertySourceFactory
 * @see org.springframework.core.io.support.ResourcePropertySource
 */
Class<? extends PropertySourceFactory> factory() default PropertySourceFactory.class;
PropertySourceFactory的默认实现是DefaultPropertySourceFactory
public class DefaultPropertySourceFactory implements PropertySourceFactory {
	@Override
	public PropertySource<?> createPropertySource(@Nullable String name, EncodedResource resource) throws IOException {
		return (name != null ? new ResourcePropertySource(name, resource) : new ResourcePropertySource(resource));
	}
}
ResourcePropertySource默认不支持YAML,所以我们可以通过实现PropertySourceFactory接口,然后用@PropertySource的factory属性来实现YAML的解析
public class YamlPropertySourceFactory implements PropertySourceFactory {
    @Override
    public PropertySource<?> createPropertySource(String name, EncodedResource resource) throws IOException {
        YamlPropertiesFactoryBean yamlPropertiesFactoryBean = new YamlPropertiesFactoryBean();
        yamlPropertiesFactoryBean.setResources(resource.getResource());
        Properties yamlProperties = yamlPropertiesFactoryBean.getObject();
        return new PropertiesPropertySource(name, yamlProperties);
    }
}
关于ApplicationEnvironmentPreparedEvent没有被执行的原因
官方文档中有说到:有些事件实际上是在ApplicationContext被创建之前触发的,所以我们不能将这些事件的监听器注册为@Bean。
因为这个时候应用上下文还没有被创建,也就是说监听器也还没有被初始化,这个先后顺序不对,会导致这些事件的监听器不会被触发
但可以使用SpringApplication.addListeners(...) 方法或SpringApplicationBuilder.listeners(...) 方法注册它们。
如果您希望这些侦听器自动注册的话,可以通过新建一个META-INF/spring.factories文件,添加类似以下内容,SpringBoot会自动帮你注册。
org.springframework.context.ApplicationListener=com.example.project.MyListener
应用程序事件
应用程序运行时,应用程序事件按以下顺序发送:
An ApplicationStartingEvent is sent at the start of a run but before any processing, except for the registration of listeners and initializers.
An ApplicationEnvironmentPreparedEvent is sent when the Environment to be used in the context is known but before the context is created.
An ApplicationContextInitializedEvent is sent when the ApplicationContext is prepared and ApplicationContextInitializers have been called but before any bean definitions are loaded.
An ApplicationPreparedEvent is sent just before the refresh is started but after bean definitions have been loaded.
An ApplicationStartedEvent is sent after the context has been refreshed but before any application and command-line runners have been called.
An AvailabilityChangeEvent is sent right after with LivenessState.CORRECT to indicate that the application is considered as live.
An ApplicationReadyEvent is sent after any application and command-line runners have been called.
A AvailabilityChangeEvent dihantar sejurus selepas dengan ReadinessState.ACCEPTING_TRAFFIC untuk menunjukkan bahawa aplikasi sedia untuk melayani permintaan.
A ApplicationFailedEvent dihantar jika terdapat pengecualian pada permulaan.
Senarai di atas hanya termasuk SpringApplicationEvents yang terikat dengan SpringApplication. Selain daripada ini, acara berikut juga diterbitkan selepas ApplicationPreparedEvent dan sebelum ApplicationStartedEvent:
WebServerInitializedEvent dihantar selepas WebServer sedia. ServletWebServerInitializedEvent dan ReactiveWebServerInitializedEvent masing-masing ialah servlet dan varian reaktif.
ContextRefreshedEvent dihantar apabila ApplicationContext dimuat semula.
Atas ialah kandungan terperinci Bagaimana untuk mengkonfigurasi pen luaran SpringBoot. Untuk maklumat lanjut, sila ikut artikel berkaitan lain di laman web China PHP!