
Rumah >Java >javaTutorial >Bagaimana SpringBoot melaksanakan fungsi biasa WEB
Bagaimana SpringBoot melaksanakan fungsi biasa WEB

- 王林ke hadapan
- 2023-05-12 14:37:131403semak imbas
Sokongan bersepadu SpringMVC
Untuk merealisasikan dan memudahkan pembangunan web, Spring Boot menyediakan sokongan bersepadu untuk beberapa rangka kerja pembangunan web yang biasa digunakan, seperti Spring MVC, Spring WebFlux dan rangka kerja lain. Apabila menggunakan Spring Boot untuk pembangunan Web, anda hanya perlu memperkenalkan pemula kebergantungan yang sepadan dengan rangka kerja pembangunan Web ke dalam projek.
Konfigurasi automatik Spring MVC
Dalam projek Spring Boot, setelah Web dependency starter spring-boot-starter-web diperkenalkan, SpringBoot menyepadukan beberapa konfigurasi automatik xxxAutoConfiguration yang dilaksanakan secara lalai dalam Spring MVC rangka kerja Kelas akan berkuat kuasa secara automatik, dan pembangunan Web boleh dijalankan hampir tanpa sebarang konfigurasi tambahan. Untuk menyepadukan rangka kerja Spring MVC untuk melaksanakan pembangunan Web, Spring Boot terutamanya menyediakan ciri konfigurasi automatik berikut.
(1) Dua penyelesai paparan terbina dalam: ContentNegotatingViewResolver dan BeanNameViewReso
(2) Menyokong sumber statik dan WebJars.
(3) Penukar dan pemformat didaftarkan secara automatik.
(4) Menyokong penukar mesej Http.
(5) Penghurai kod mesej didaftarkan secara automatik.
(6) Sokong laman utama projek statik index.html.
(7) Sokong ikon aplikasi tersuai favicon.ico.
(8) Mulakan secara automatik pengikat data Web ConfigurableWebBindinglinitializer.
Spring Boot menyepadukan Spring MVC untuk menyediakan banyak konfigurasi lalai untuk pembangunan web, dan kebanyakan masa, menggunakan konfigurasi lalai boleh memenuhi keperluan pembangunan. Sebagai contoh, apabila Spring Boot menyepadukan Spring MVC untuk pembangunan web, tidak perlu mengkonfigurasi penyelesai paparan luaran.
Pelaksanaan sambungan fungsi Spring MVC
Spring Boot menyediakan banyak konfigurasi automatik apabila menyepadukan Spring MVC untuk pembangunan web, tetapi dalam pembangunan sebenar, pembangun masih perlu melanjutkan dan melaksanakan beberapa fungsi. Di bawah ini kami menggunakan kes khusus untuk menerangkan cara Spring Boot menyepadukan rangka kerja Spring MVC untuk merealisasikan fungsi lanjutan pembangunan web.
Membina persekitaran asas projek
Buat projek Spring Boot bernama springboot02 menggunakan kaedah Spring Inifializr dan import kebergantungan Web dan kebergantungan Thymeleaf.
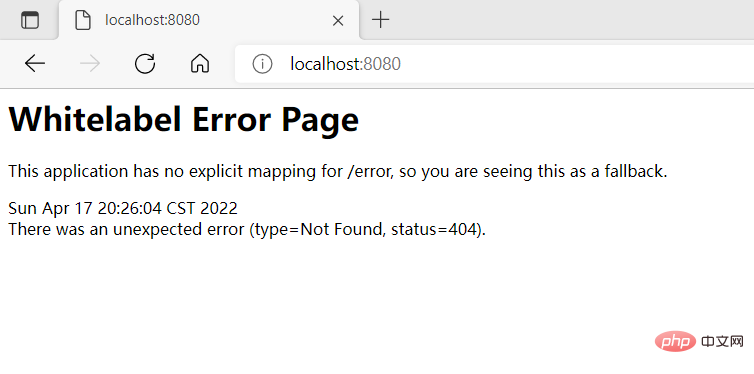
Selepas kami memulakan projek, lawati http://localhost:8080/ Jika anda melihat antara muka berikut, ini bermakna akses berjaya, yang juga bermakna projek kami berjaya dibuat.
Kami mencipta antara muka log masuk login.html dalam pakej templat di bawah sumber
<!DOCTYPE html>
<html>
<head>
    <title>login</title>

</head>
<body>
<form>
    <input type="text" name="username">
    <input type="password" name="password">
    <input type="submit" value="submit">
</form>
</body>
</html>
Akhir sekali, buat pakej pengawal di bawah pakej com.hjk dan buat Kelas LoginController
package com.hjk.controller;

import org.springframework.stereotype.Controller;
import org.springframework.ui.Model;
import org.springframework.web.bind.annotation.GetMapping;
import java.util.Calendar;
@Controller
public class LoginController {
    /**
     * 获取并封装当前年份跳转到登录页login.html
     */
    @GetMapping("/toLoginPage")
    public String toLoginPage(Model model){
        model.addAttribute("currentYear", Calendar.getInstance().get(Calendar.YEAR));
        return "login";
    }
}
pelaksanaan sambungan fungsi
Seterusnya, gunakan Spring Boot untuk menyepadukan Spring MVC untuk pembangunan Web untuk mencapai fungsi lompat halaman yang mudah Di sini kita akan menggunakan antara muka WebMvcConfigurer yang disediakan oleh Spring Boot untuk tulis konfigurasi tersuai dan kembangkan fungsi web dengan sewajarnya. Di sini kami menunjukkan pelaksanaan pengurus paparan dan pemintas masing-masing.
Daftar pengurus paparan
Buat pakej konfigurasi di bawah com.hjk projek springboot dan buat kelas konfigurasi MyMVCconfig yang melaksanakan antara muka WebMvcConfigurer untuk melanjutkan fungsi rangka kerja MVC
package com.hjk.config;

import org.springframework.context.annotation.Configuration;
import org.springframework.web.servlet.config.annotation.InterceptorRegistry;
import org.springframework.web.servlet.config.annotation.ViewControllerRegistry;
import org.springframework.web.servlet.config.annotation.WebMvcConfigurer;
import javax.annotation.Resource;
@Configuration
public class MyMVCconfig implements WebMvcConfigurer {
    @Override
    public void addViewControllers(ViewControllerRegistry registry){
        registry.addViewController("/toLoginPage").setViewName("login");
        registry.addViewController("/login.html").setViewName("login");
    }
}
MMVCconig melaksanakan kaedah addViewControllerse(ViewControllerRegistry registry) antara muka WebMvcConigurer. Di dalam kaedah addViewControllers(), gunakan kaedah addviewController() ViewControllerRegistry untuk menentukan kawalan permintaan "tologinPage" dan "login.html" masing-masing dan gunakan kaedah setViewName("log masuk") untuk memetakan laluan ke log masuk. halaman html.
Selepas menyesuaikan fungsi pengurusan paparan MVC,
boleh menguji kesannya. Untuk menunjukkan kesan penyesuaian ini, mulakan semula projek chapter05 Projek bermula dengan jayanya Anda boleh mengakses halaman login.html dengan mengakses http://localhost:8080/toLoginPage dan http://localhost:8080/login.htm pada. pelayar.
Kaedah kawalan permintaan pengguna yang ditakrifkan menggunakan antara muka WebMvcConfigurer juga menyedari kesan lompatan kawalan permintaan pengguna Berbanding dengan kaedah pemprosesan permintaan tradisional, kaedah ini lebih ringkas dan intuitif dan kemudahan. Ia juga dapat dilihat bahawa data yang diproses di latar belakang tidak boleh diperoleh menggunakan kaedah ini. Perlu diingat bahawa menggunakan kaedah addViewControllers (ViewControllelRegistry registry) dalam antara muka WebMvcConfigurer untuk menyesuaikan kawalan paparan hanya sesuai untuk paparan bebas parameter yang agak mudah Dapatkan permintaan Jika terdapat parameter atau keperluan lompat yang memerlukan pemprosesan perniagaan, adalah yang terbaik untuk menggunakan kaedah tradisional bertanya.
Daftar pemintas tersuai
Antara muka WebMvcConfigurer menyediakan banyak kaedah berkaitan pembangunan MVC, termasuk kaedah pemintas addInterceptors() dan kaedah pemformat addFormatters( ) Kami melaksanakan kaedah pemintas di sini.
Kami mencipta kelas pemintas tersuai MyInterceptor di bawah pakej konfigurasi, kodnya adalah seperti berikut.
package com.hjk.config;

import org.springframework.stereotype.Component;
import org.springframework.web.servlet.HandlerInterceptor;
import org.springframework.web.servlet.ModelAndView;
import javax.servlet.http.HttpServletRequest;
import javax.servlet.http.HttpServletResponse;
import java.io.IOException;
import java.util.Calendar;
@Component
public class MyInterceptor implements HandlerInterceptor {
    @Override
    public boolean preHandle(HttpServletRequest request, HttpServletResponse response, Object handler) throws Exception {
        String uri = request.getRequestURI();
        Object loginUser = request.getSession().getAttribute("loginUser");
        if (uri.startsWith("/admin")&& null==loginUser){
            try {
                response.sendRedirect("/toLoginPage");
            } catch (IOException e) {
                e.printStackTrace();
            }
            return false;
        }
        return true;
    }
    public void postHandle(HttpServletRequest request, HttpServletResponse response, Object handler, ModelAndView modelAndView) throws Exception {
       System.out.println("拦截器拦截");
    public void afterCompletion(HttpServletRequest request, HttpServletResponse response, Object handler, Exception ex) throws Exception {
}
Kelas pemintas tersuai Mylnterceptor melaksanakan antara muka HandlerInterceptor. Dalam kaedah preHandle(), jika permintaan pengguna bermula dengan "/admin", iaitu, apabila mengakses alamat seperti http://localhost:8080/admin, ia akan ditentukan sama ada pengguna telah log masuk. Jika tidak , permintaan akan dialihkan ke "hoLoginPage" Halaman log masuk yang sepadan.
Dalam kaedah postHandle(), cetak pemintas pada konsol.
然后在config包下自定义配置类MyMVCconfig中,重写addlnterceptors()方法注册自定义的拦截器。添加以下代码。
@Autowired
private MyInterceptor myInterceptor;
@Override
public void addInterceptors(InterceptorRegistry registry) {
    registry.addInterceptor(myInterceptor).addPathPatterns("/**").excludePathPatterns("/login.html");
}
先使用@Autowired注解引入自定义的 Mylnterceptor拦截器组件,然后重写其中的 addinterceptors()方法注册自定义的拦截器。在注册自定义拦截器时,使用addPathPatterns("/**)方法拦截所有路径请求,excludePathPatterns("/login.htm")方法对“login.html”路径的请求进行了放行处理。
测试:我们可以访问http://localhost:8080/admin 可以发现它重定向大toLoginPage界面了。
Spring整合Servlet三大组件
在这里我们使用组件注册方式对Servlet、Filter、Listener三大组件进行整合,我们只需要将自定义的组件通过ServletRegistrationBean、FilterRegistrationBean、ServletListenerRegistrationBean类注册到容器中即可。
使用注册方式整合
使用组件注册方式整合Servlet
我们在com.hjk包下创建servletComponent的包,在该包下创建MyServlet类并继承HttpServlet类。
package com.hjk.servletCompont;

import org.springframework.stereotype.Component;
import javax.servlet.ServletException;
import javax.servlet.http.HttpServlet;
import javax.servlet.http.HttpServletRequest;
import javax.servlet.http.HttpServletResponse;
import java.io.IOException;
@Component
public class MyServlet extends HttpServlet {
    @Override
    protected void doGet(HttpServletRequest req, HttpServletResponse resp) throws ServletException, IOException {
        super.doGet(req, resp);
    }
    protected void doPost(HttpServletRequest req, HttpServletResponse resp) throws ServletException, IOException {
        resp.getWriter().write("hello MyServlet");
}
@Component注解将MyServlet类作为组件注入Spring容器。MySeret类继承自HttpServlet,通过HttpServletResponse对象向页面输出“hello MyServlet”。
创建 Servlet组件配置类。在项目com.hjk.confg包下创建一个Servlet组件配置类servietConfig,用来对 Servlet相关组件进行注册,
package com.hjk.config;
import com.hjk.servletCompont.MyServlet;
import org.springframework.boot.web.servlet.ServletRegistrationBean;
import org.springframework.context.annotation.Bean;
import org.springframework.context.annotation.Configuration;
@Configuration
public class ServletConfig {
    @Bean
    public ServletRegistrationBean getServlet(MyServlet myServlet){
        ServletRegistrationBean registrationBean = new ServletRegistrationBean(myServlet, "/myServlet");
        return registrationBean;
    }
}
使用@Configuration 注解将ServletConfig标注为配置类,ServletConfig类内部的 getServlet()方法用于注册自定义的MyServlet,并返回 ServletRegistrationBean类型的Bean对象。
测试:项目启动成功后,在浏览器上访问“http://localhost:8080/myServlet"myServlet并正常显示数据,说明 Spring Boot成功整合Servlet组件。
使用组件注册方式整合Filter
在servletCompont包下创建一个MyFilter类并实现Filter接口,这个Filter的包别导错了
package com.hjk.servletCompont;

import org.springframework.stereotype.Component;
import javax.servlet.*;
import java.io.IOException;
@Component
public class MyFilter implements Filter {
    @Override
    public void init(FilterConfig filterConfig) throws ServletException {
    }
    public void doFilter(ServletRequest servletRequest, ServletResponse servletResponse, FilterChain filterChain) throws IOException, ServletException {
        System.out.println("hello MyFilter");
    public void destroy() {
}
在config包下的ServletConfig类中进行注册,即在该类中添加方法。
@Bean
public FilterRegistrationBean getFilter(MyFilter myFilter){
    FilterRegistrationBean filterRegistrationBean = new FilterRegistrationBean(myFilter);
    filterRegistrationBean.setUrlPatterns(Arrays.asList("/toLogin","/myFilter"));
    return filterRegistrationBean;
}
使用 setUrilPatterns(Arrays.asList("/toLoginPage",/myFilter')方法定义了过滤的请求路径
“/toLoginPage”和“/myFilter”,同时使用@Bean 注解将当前组装好的FilterRegistrationBea对象作为Bean组件返回。
测试:在浏览器上访问“http://localhost:8080/myFilter”查看控制台打印效果(由于没有编写对应路径的请求处理方法,所以浏览器会出现404 错误页面,这里重点关注控制台即可),浏览器访问“http://localhost:8080/
myFilter”时,控制台打印出了自定义 Filter中定义 图5-6 使用组件注册方式整合Filter的运行结果的输出语句“hello MyFilter”,这也就说明Spring Boot 整合自定义Filter 组件成功。
使用组件注册方式整合 Listener
(1)创建自定义Listener类。在com.itheima.senleiComponent包下创建一个类MyListener实现ServletContextListener接口
package com.hjk.servletCompont;

import org.springframework.stereotype.Component;
import javax.servlet.ServletContextEvent;
import javax.servlet.ServletContextListener;
@Component
public class MyListener implements ServletContextListener {
    @Override
    public void contextInitialized(ServletContextEvent sce) {
        System.out.println("contextnitialized...");
    }
    public void contextDestroyed(ServletContextEvent sce) {
        System.out.println("contextDestroyed...");
}
在servletConfig添加注册
@Bean
public ServletListenerRegistrationBean getServletListener(MyListener myListener){
    ServletListenerRegistrationBean servletListenerRegistrationBean = new ServletListenerRegistrationBean(myListener);
    return servletListenerRegistrationBean;
}
需要说明的是,Servlet 容器提供了很多 Listener 接口,例如 ServletRequestListener、ritpSessionListener、ServletContextListener等,我们在自定义Listener类时要根据自身需求选择实现对应接口即可。
测试:程序启动成功后,控制台会打印出自定义Listener组件中定义的输出语句“contextlnitialized..”。单击图中的【Exit】按钮关闭当前项目(注意,如果直接单击红色按钮会强制关闭程序,浏览器就无法打印关闭监听信息),再次查看控制台打印效果。
程序成功关闭后,控制台打印出了自定义Listener组件中定义的输出语句“contextDestroyed..”。通过效果演示,说明了Spring Boot整合自定义Listener组件成功。
文件上传与下载
开发web应用时,文件上传是很常见的一个需求,浏览器通过表单形式将文件以流的形式传递给服务器,服务器在对上传的数据解析处理。
文件上传
编写上传表单界面
这个表单界面名为upload.html,在templates文件夹下
<!DOCTYPE html>
<html lang="en">
<head>
    <meta charset="UTF-8">
    <title>文件上传</title>
</head>
<body>
<div >
    <form action="/uploadFile" method="post" enctype="multipart/form-data">
        上传:<input type="file" name="filename"/>
        <input type="submit" value="submit"/>
    </form>
</div>
</body>
</html>
我们通过表单上传文件,表单提交给uploadFile控制器,提交方式为post必须为这种方式,因为get上传比较少,必须包含enctype="multipart/form-data".
我们通过提交的地址也应该清楚,我们肯定会写一个uploadFile的控制器。
添加文件上传的相关配置
我们在application.properties文件中添加配置,上传文件的大小限制。
## 文件最大限制为10mb,默认为1mb
spring.servlet.multipart.max-file-size=1MB
如果文件超过限制大小,会报错。
编写控制器
我们在com.hjk.controller包下船舰一个名为FileController的类,用于实现文件上传的控制器。
我们这个文件上传只是实现一个简单的文件上传,并没有考虑上传文件重名的情况,实际上重名的话会覆盖之前的文件。要实现文件上传,我们肯定要给它一个唯一名称这个可以使用uuid实现,这里也没考虑文件存放位置问题,都是我自己把地址写死了,这里我们就不实现了。
实现历程:写这个控制器的时候,我的代码是正确的,前端文件也能提交,但是后端获取的文件就是null,我也看了很多博客,有的说是没有注册multipartResolver这个Bean,有的说是版本问题等等,但是都没有解决。最后一个不经意的小细节导致了我这次的代码不能获取到文件。那就是我们有在(@RequestParam("filename") MultipartFile file)前面加@RequestParam这个注解。反正我的这个是加上之后就能用了,我的这个springboot版本是2.6.6.至于真正原因现在不想思考了,等以后遇到再改吧。
@RequestPara("filename")必须获取参数名为filename的file参数
@RequestParam()默认为必传属性,可以通过@RequestParam(required = false)设置为非必传。因为required值默认是true,所以默认必传
@RequestParam("filename")或者@RequestParam(value = "filename")指定参数名
@RequestParam(defaultValue = "0")指定参数默认值
package com.hjk.controller;
import org.springframework.stereotype.Controller;
import org.springframework.web.bind.annotation.*;
import org.springframework.web.multipart.MultipartFile;
import java.io.File;
import java.io.IOException;
@Controller
public class FileController {
@GetMapping("/toUpload")
public String toUpload(){
return "upload";
}
@RequestMapping(value = "/uploadFile",method = RequestMethod.POST)
public String uploadFile(@RequestParam("filename") MultipartFile file){
String filename = file.getOriginalFilename();
String dirPath = "D:/file/";
File filePath = new File(dirPath);
if (!filePath.exists()){
filePath.mkdir();
}
try {
file.transferTo(new File(dirPath+filename));
} catch (IOException e) {
e.printStackTrace();
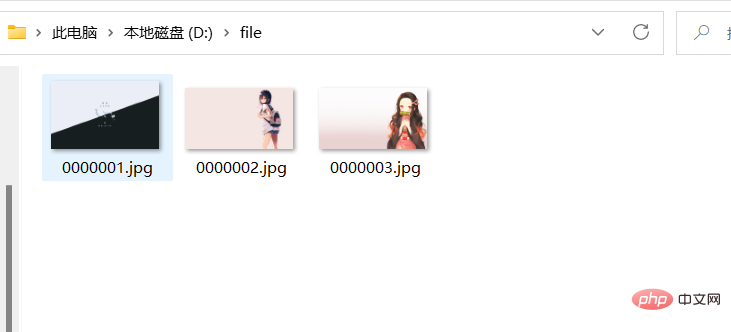
}在这里我们提交三张图片用于下面的文件下载
文件下载
文件下载很多框架都没有进行封装处理,不同的浏览器解析处理不同,有可能出现乱码情况。
在添加完依赖之后我们创建一个名为filedownload.html的html,一会用于编写下载界面。
添加依赖
<dependency>
    <groupId>commons-io</groupId>
    <artifactId>commons-io</artifactId>
    <version>2.6</version>
</dependency>
下载处理控制器
我们还是再FileController类里添加下载处理方法。直接在里面添加就行。
@GetMapping("/toDownload")
public String toDownload(){
    return "filedownload";
}

@GetMapping("/download")
public ResponseEntity<byte[]> fileDownload(String filename){
    //指定下载地址文件路径
    String dirPath = "D:/file/";
    //创建文件下载对象
    File file = new File(dirPath + File.separator + filename);
    //设置响应头
    HttpHeaders httpHeaders = new HttpHeaders();
    //通知浏览器以下载方式打开
    httpHeaders.setContentDispositionFormData("attachment",filename);
    //定义以流的形式下载返回文件
    httpHeaders.setContentType(MediaType.APPLICATION_OCTET_STREAM);
    try {
        return new ResponseEntity<>(FileUtils.readFileToByteArray(file),httpHeaders, HttpStatus.OK);
    } catch (IOException e) {
        e.printStackTrace();
        return new ResponseEntity<byte[]>(e.getMessage().getBytes(), HttpStatus.EXPECTATION_FAILED);
    }
编写前端代码
<!DOCTYPE html>
<html lang="en" xmlns:th="http://www.thymeleaf.org">
<head>
<meta charset="UTF-8">
<title>文件下载</title>
</head>
<body>
<div >文件下载列表</div>
<table>
<tr>
<td>0000001.jpg</td>
<td><a th:href="@{/download(filename='0000001.jpg')}">下载文件</a> </td>
</tr>
<tr>
<td>0000002.jpg</td>
<td><a th:href="@{/download(filename='0000002.jpg')}">下载文件</a> </td>
</tr>
<tr>
<td>0000003.jpg</td>
<td><a th:href="@{/download(filename='0000003.jpg')}">下载文件</a> </td>
</tr>
</table>
</body>
</html>我们这次使用了thymeleaf写前端代码。
实际上我们可能会遇到下载中文文件的问题,那样可能会乱码。
我么在这里写一个解决中文乱码的例子。例如:我把0000001.jpg改为"你好jpg"再重新部署下载,会发现名字为_.jpg
下面我们直接在我们在fileController类的里面加一个getFileName方法,并修改fileDownload方法上做修改。
public String getFileName(HttpServletRequest request,String filename) throws Exception {
    String[] IEBrowserKeyWords = {"MSIE","Trident","Edge"};
    String userAgent = request.getHeader("User-Agent");
    for (String ieBrowserKeyWord : IEBrowserKeyWords) {
        if (userAgent.contains(ieBrowserKeyWord)){
            return URLEncoder.encode(filename,"UTF-8").replace("+"," ");
        }
    }
    return new String(filename.getBytes(StandardCharsets.UTF_8),"ISO-8859-1");
}

   @GetMapping("/download")
    public ResponseEntity<byte[]> fileDownload(HttpServletRequest request,String filename) throws Exception {
        //指定下载地址文件路径
        String dirPath = "D:/file/";
        //创建文件下载对象
        File file = new File(dirPath + File.separator + filename);
        //设置响应头
        HttpHeaders httpHeaders = new HttpHeaders();
        //通知浏览器下载七千及性能转码
        filename = getFileName(request,filename);
        //通知浏览器以下载方式打开
        httpHeaders.setContentDispositionFormData("attachment",filename);
        //定义以流的形式下载返回文件
        httpHeaders.setContentType(MediaType.APPLICATION_OCTET_STREAM);
        try {
            return new ResponseEntity<>(FileUtils.readFileToByteArray(file),httpHeaders, HttpStatus.OK);
        } catch (IOException e) {
            e.printStackTrace();
            return new ResponseEntity<byte[]>(e.getMessage().getBytes(), HttpStatus.EXPECTATION_FAILED);
SpringBoot的打包部署
springboot使用的嵌入式Servlet容器,所以默认是以jar包打包的。也可以进行war包打包,但是需要进行一些配置。
jar包形式打包
我们在创建springboot项目是默认会给我们导入maven的打包插件,如果没有我们手动加上即可。
<build>
    <plugins>
        <plugin>
            <groupId>org.springframework.boot</groupId>
            <artifactId>spring-boot-maven-plugin</artifactId>
        </plugin>
    </plugins>
</build>
双击package等待即可
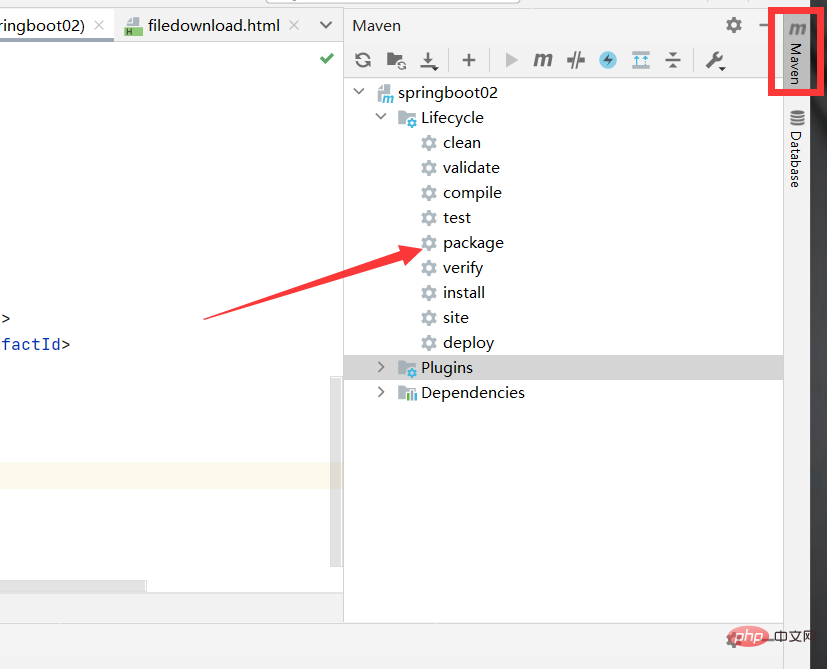
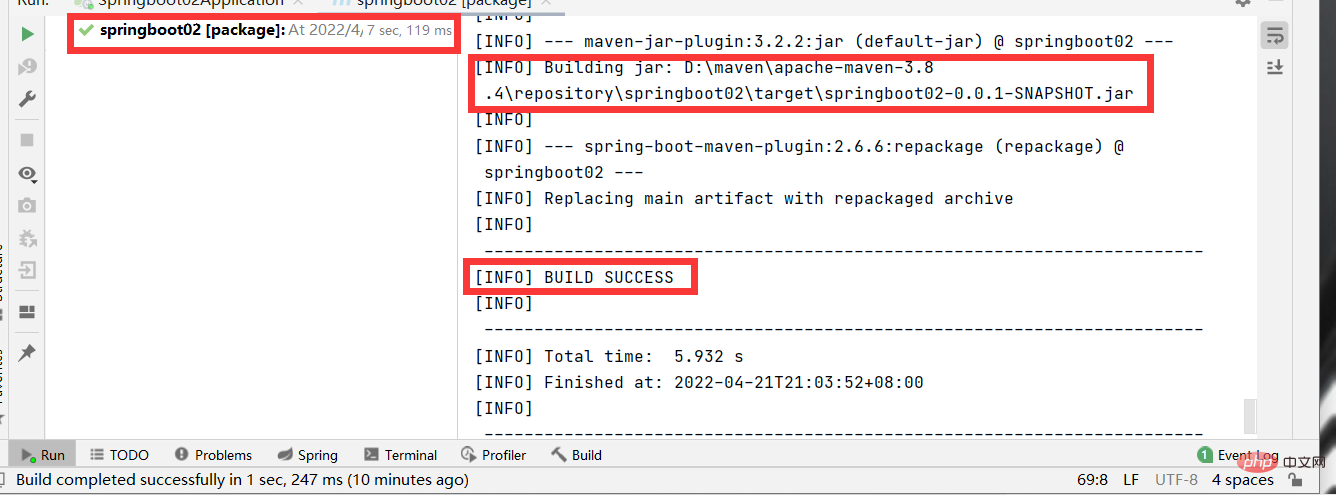
等待完成,可以看到打包时间,存放jar包位置等信息。我们也可以在target包下查看打成的jar包。
启动jar包
我们可以在关闭已启动的springboot项目后,在idea控制台输入命令启动。
java -jar target\springboot02-0.0.1-SNAPSHOT.jar
我们也可以在系统自带的终端窗口启动
war包形式打包
我们首先要把默认打包方式修改为war包
<name>springboot02</name>
<description>Demo project for Spring Boot</description>
<packaging>war</packaging>
<properties>
    <java.version>1.8</java.version>
</properties>
导入外部Tomcat服务器
<dependency>
    <groupId>org.springframework.boot</groupId>
    <artifactId>spring-boot-starter-tomcat</artifactId>
    <scope>provided</scope>
</dependency>
打开启动类,继承springbootServletInitializer类
package com.hjk;
import org.springframework.boot.SpringApplication;
import org.springframework.boot.autoconfigure.SpringBootApplication;
import org.springframework.boot.builder.SpringApplicationBuilder;
import org.springframework.boot.web.servlet.ServletComponentScan;
import org.springframework.boot.web.servlet.support.SpringBootServletInitializer;
@ServletComponentScan
@SpringBootApplication
public class Springboot02Application extends SpringBootServletInitializer {
    public static void main(String[] args) {
        SpringApplication.run(Springboot02Application.class, args);
    }
    @Override
    protected SpringApplicationBuilder configure(SpringApplicationBuilder builder) {
        return builder.sources(Springboot02Application.class);
    }
}
然后就和jar包方式一样了,双击package,等待打包完成。
war包的部署
war包的部署相比于jar包比较麻烦,我们需要外部的服务器,我们需要把war包复制到tomcat安装目录下的webapps目录中,执行目录里的startup.bat命令启动war包,这样我们就完成了。
Atas ialah kandungan terperinci Bagaimana SpringBoot melaksanakan fungsi biasa WEB. Untuk maklumat lanjut, sila ikut artikel berkaitan lain di laman web China PHP!