Rumah >applet WeChat >Pembangunan program mini >小程序调用百度云接口实现人脸识别
小程序调用百度云接口实现人脸识别
- coldplay.xixike hadapan
- 2020-12-14 17:32:504050semak imbas
小程序开发教程栏目介绍不一样的实现人脸识别方法

相关免费学习推荐:小程序开发教程
一 准备好百度云的开发者账号
- 登录
- 进入控制台
- 人工智能------图像识别
- 创建应用

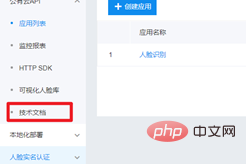
获取接口需要的参数

查看官网API文档

二 页面布局


文件ai.wxml:
<view class="c1">
    <view class="c1-1">

    </view>
    <button type="primary" size="mini" bindtap="chooseImage">选择图片</button>

    <view class="c1-2">
      <image src="{{img}}" mode="widthFix"></image>

       <text>颜值:{{face.beauty}}</text>
       <text>年龄:{{face.age}}</text>
       <text>性别:{{face.gender.type}}</text>
       <text>情绪:{{face.emotion.type}}</text>
    </view>
</view>
编写样式文件ai.wxss
.c1{
  padding: 50rpx;

}
.c1-1{
  height: 800rpx;
  margin-bottom: 20rpx;
  display: flex;
  justify-content: center;
  font-size: 30rpx;
  box-shadow: 0px 0px 10px gray;
}
.c1-2{

}
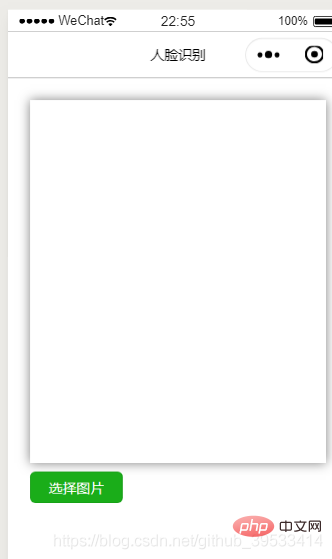
页面布局如下:

ai.js
//获取app.js对象
var app = getApp();

Page({
  data: {
	face: {},//检测结果
	img: '',  //选择的图片
	showResult: false //检测是由有结果
  },
  onLoad: function (options) {
	//console.log('获取全局变量数据:' + app.globalData.access_token);
  },
  //选择图片事件
  chooseImage(){
	  var that = this;
	  wx.chooseImage({
	    count: 1,
	    sizeType: ['original', 'compressed'],
	    sourceType: ['album', 'camera'],
	    success (res) {
	      const tempPath = res.tempFilePaths[0];//获取选择的图片的地址
		  //准备好了access_token和图片后,就可以开始请求百度的人脸检测接口了https://aip.baidubce.com/rest/2.0/face/v3/detect
		  //该接口需要的参数是access_token,图片的base64值
		  //图片的base64值的处理
		  var base64 = wx.getFileSystemManager().readFileSync(tempPath,'base64');
		  //提示
		  wx.showLoading({
			  title: '人脸检测中...',
			  mask: true
		  });
		  //开始请求百度的人脸检测接口
		  wx.request({
		    url: 'https://aip.baidubce.com/rest/2.0/face/v3/detect?access_token='+app.globalData.access_token,

		    data: {
		    image: base64,
			  image_type: 'BASE64',
			 face_field: 'age,beauty,expression,face_shape,gender,glasses,race,emotion'
		    face_field: 'name, kind'
        },
			method: 'POST',
		    header: {'content-type': 'application/json'},
		    //header: {'content-type': 'application/x-www-form-urlencoded'},
        success (res) {
				console.log(res);
				if(res.statusCode == 200 && res.data.error_code == 0){ //检测结果正确
					//将选择的图片回显到页面
					//that.setData({img: tempPath});
          that.setData();
          //植物识别要传入键值对
					//取出检测的结果进行页面显示
					var face = res.data.result.face_list[0];
          console.log(face);
					that.setData({face: face,showResult: true});
					//隐藏加载窗口
					wx.hideLoading();
				}else{
					wx.showToast({
						title: '检测失败'+res.data.error_msg,
						duration: 5000
					});
				}
		    }
		  })
	    }
	  })
  },

  /**
   * 用户点击右上角分享
   */
  onShareAppMessage: function () {

  }
})
app.js
//app.js
App({
  onLaunch: function () {
    var access_token = wx.getStorageSync('access_token');
    var expire_in = wx.getStorageSync('expire_in');
   // var access_token = parse;
    var access_token_date = parseInt(wx.getStorageSync('access_token_date'));
    var now = new Date().getTime();
    if(!access_token){
      this.requestToken();

    } else if(now > access_token_date + expire_in){
      this.requestToken();
    }else{

    }


    // 展示本地存储能力
    var logs = wx.getStorageSync('logs') || []
    logs.unshift(Date.now())
    wx.setStorageSync('logs', logs)

    // 登录
    wx.login({
      success: res => {
        // 发送 res.code 到后台换取 openId, sessionKey, unionId
      }
    })
    // 获取用户信息
    wx.getSetting({
      success: res => {
        if (res.authSetting['scope.userInfo']) {
          // 已经授权,可以直接调用 getUserInfo 获取头像昵称,不会弹框
          wx.getUserInfo({
            success: res => {
              // 可以将 res 发送给后台解码出 unionId
              this.globalData.userInfo = res.userInfo

              // 由于 getUserInfo 是网络请求,可能会在 Page.onLoad 之后才返回
              // 所以此处加入 callback 以防止这种情况
              if (this.userInfoReadyCallback) {
                this.userInfoReadyCallback(res)
              }
            }
          })
        }
      }
    })

  },
  globalData: {
    userInfo: null
  },

  requestToken() {
    var that = this;
    wx.request({
      url: 'https://aip.baidubce.com/oauth/2.0/token',
      data: {
        grant_type: 'client_credentials',
        // aaa那里填写自己的百度key值
        client_id: 'aaa',
        client_secret: 'aaa'

      },
      //header: {'content-type': 'application/json'},
      header: {'content-type': 'application/x-www-form-urlencoded'},
      success (res) {
        if(res.statusCode == 200){
          wx.setStorageSync("access_token", res.data.access_token);
          wx.setStorageSync("expires_in", res.data.expires_in);
          //wx.setStorageSync("access_token_date", res.data.access_token_date);
          wx.setStorageSync("access_token_date", new Date().getTime());
          that.globalData.access_token = res.data.access_token;
        }
      }
    })
  }
})
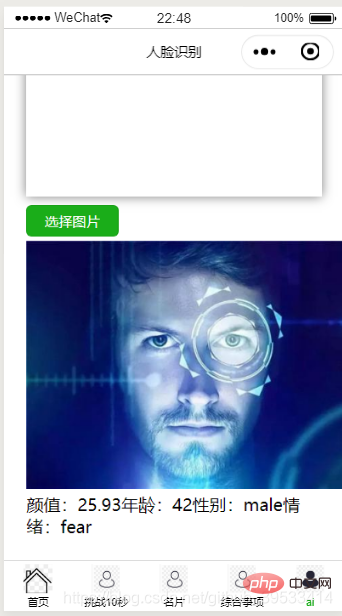
识别结果如下:

Atas ialah kandungan terperinci 小程序调用百度云接口实现人脸识别. Untuk maklumat lanjut, sila ikut artikel berkaitan lain di laman web China PHP!
Kenyataan:
Artikel ini dikembalikan pada:csdn.net. Jika ada pelanggaran, sila hubungi admin@php.cn Padam
Artikel sebelumnya:小程序开发的具体流程是什么Artikel seterusnya:微信小程序开发需要掌握哪些技术

