


本篇文章主要介绍了多步骤进度条的实现原理及代码,具有很好的参考价值。下面一起来看下吧
今天在工作的时候写了一个多步骤进度条的代码,在此跟大家分享一下!
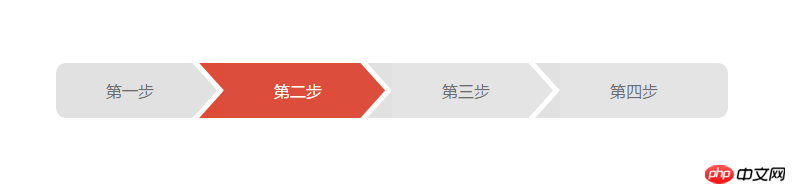
效果图:
代码展示:
<!DOCTYPE html>
<html lang="en">
<head>
    <meta charset="UTF-8">
    <title>step</title>
</head>
<style>
    ul,li{list-style:none;}
    .flow_steps{height:55px;width:1000px;margin:100px  auto;}
    .flow_steps .steps{padding-left:0;}
    .flow_steps ul li { float:left; height:55px; padding:0 70px 0 50px; line-height:55px; text-align:center; background:url(http://7xnlea.com2.z0.glb.qiniucdn.com/stepbg.png) no-repeat 100% 0 #E4E4E4;font-family: "microsoft yahei";color:#6C6C6C;}
    .flow_steps ul li.done { background-position:100% 0px; background-color:#E1E1E1;}
    .flow_steps ul li.current_prev { background-position:100% -55px; background-color:#E1E1E1;}
    .flow_steps ul li.current { color:#fff; background-color:#DD4D3C;}
    .flow_steps ul li.last { background-image:none;}
    .flow_steps ul li.first { border-radius:10px 0 0 10px; }
    .flow_steps ul li.last { border-radius:0 10px 10px 0; }
</style>
<body>
<p class="flow_steps clearfix">
    <ul class="clearfix steps">
        <li class=" done first current_prev ">
            第一步
        </li>
        <li class=" current">
            第二步
        </li>
        <li class=" ">
            第三步
        </li>
        <li class=" last">
            第四步
        </li>
    </ul>
</p>
</body>
</html>
以上就是本文的全部内容,希望对大家的学习有所帮助,更多相关内容请关注PHP中文网!
Atas ialah kandungan terperinci css+div多步骤进度条的实现代码. Untuk maklumat lanjut, sila ikut artikel berkaitan lain di laman web China PHP!

 Apakah grid CSS?Apr 30, 2025 pm 03:21 PM
CSS Grid adalah alat yang berkuasa untuk mewujudkan susun atur web yang rumit dan responsif. Ia memudahkan reka bentuk, meningkatkan kebolehcapaian, dan menawarkan lebih banyak kawalan daripada kaedah yang lebih lama.
 Apakah CSS Flexbox?Apr 30, 2025 pm 03:20 PM
Artikel membincangkan CSS Flexbox, kaedah susun atur untuk penjajaran yang cekap dan pengedaran ruang dalam reka bentuk responsif. Ia menerangkan penggunaan Flexbox, membandingkannya dengan grid CSS, dan butiran sokongan penyemak imbas.
 Bagaimanakah kita boleh membuat laman web kami responsif menggunakan CSS?Apr 30, 2025 pm 03:19 PM
Artikel ini membincangkan teknik untuk membuat laman web responsif menggunakan CSS, termasuk tag Meta Viewport, grid fleksibel, media cecair, pertanyaan media, dan unit relatif. Ia juga meliputi menggunakan grid CSS dan Flexbox bersama -sama dan mengesyorkan rangka kerja CSS
 Apakah harta saiz kotak CSS?Apr 30, 2025 pm 03:18 PM
Artikel ini membincangkan harta saiz kotak CSS, yang mengawal bagaimana dimensi elemen dikira. Ia menerangkan nilai seperti kotak kandungan, kotak sempadan, dan kotak padding, dan kesannya terhadap reka bentuk susun atur dan penjajaran bentuk.
 Bagaimanakah kita boleh menghidupkan CSS?Apr 30, 2025 pm 03:17 PM
Artikel membincangkan membuat animasi menggunakan CSS, sifat utama, dan menggabungkan dengan JavaScript. Isu utama adalah keserasian penyemak imbas.
 Bolehkah kita menambah transformasi 3D ke projek kami menggunakan CSS?Apr 30, 2025 pm 03:16 PM
Artikel membincangkan menggunakan CSS untuk transformasi 3D, sifat utama, keserasian penyemak imbas, dan pertimbangan prestasi untuk projek web. (Kira -kira aksara: 159)
 Bagaimana kita boleh menambah kecerunan dalam CSS?Apr 30, 2025 pm 03:15 PM
Artikel ini membincangkan menggunakan kecerunan CSS (linear, radial, mengulangi) untuk meningkatkan visual laman web, menambah kedalaman, fokus, dan estetika moden.
 Apakah unsur-unsur pseudo dalam CSS?Apr 30, 2025 pm 03:14 PM
Artikel membincangkan unsur-unsur pseudo dalam CSS, penggunaannya dalam meningkatkan gaya HTML, dan perbezaan dari kelas pseudo. Menyediakan contoh praktikal.


Alat AI Hot

Undresser.AI Undress
Apl berkuasa AI untuk mencipta foto bogel yang realistik

AI Clothes Remover
Alat AI dalam talian untuk mengeluarkan pakaian daripada foto.

Undress AI Tool
Gambar buka pakaian secara percuma

Clothoff.io
Penyingkiran pakaian AI

Video Face Swap
Tukar muka dalam mana-mana video dengan mudah menggunakan alat tukar muka AI percuma kami!

Artikel Panas
Alat panas

MantisBT
Mantis ialah alat pengesan kecacatan berasaskan web yang mudah digunakan yang direka untuk membantu dalam pengesanan kecacatan produk. Ia memerlukan PHP, MySQL dan pelayan web. Lihat perkhidmatan demo dan pengehosan kami.

EditPlus versi Cina retak
Saiz kecil, penyerlahan sintaks, tidak menyokong fungsi gesaan kod

SublimeText3 versi Inggeris
Disyorkan: Versi Win, menyokong gesaan kod!

SublimeText3 Linux versi baharu
SublimeText3 Linux versi terkini

Notepad++7.3.1
Editor kod yang mudah digunakan dan percuma

