Rumah >hujung hadapan web >tutorial js >vue2.0选中active后其他选项互斥实现步骤
vue2.0选中active后其他选项互斥实现步骤
- php中世界最好的语言asal
- 2018-04-28 13:52:501379semak imbas
这次给大家带来vue2.0选中active后其他选项互斥实现步骤,vue2.0选中active后其他选项互斥的注意事项有哪些,下面就是实战案例,一起来看一下。
在正常的js中。我们如果要实现点击选中active然后其他取消的效果,我们可以定义一个类,当点击的时候给给多有的dom取消active的类,给当前元素加上这个类名,说的很啰嗦,直接来看代码说话吧(表示楼主用的是jq):
 <style>
  * {
   margin: 0;
   padding: 0;
  }
  li {
   list-style: none;
   width: 100px;
   margin-top: 10px;
   border: 1px solid red;
  }
  li:active {
   cursor: pointer;
  }
  .active {
   background-color: aqua;
  }
 </style>
 <script src="http://g.ydbcdn.com/jquery/latest/jquery.min.js"></script>
</head>
<body>
<ul>
 <li>this is pne</li>
 <li>this is two</li>
 <li>this is three</li>
</ul>
</body>
<script>
 $(() => {
  $("li").click((e) => {
   $("li").removeClass("active");
   $(e.target).addClass("active");
  })
 })
</script>
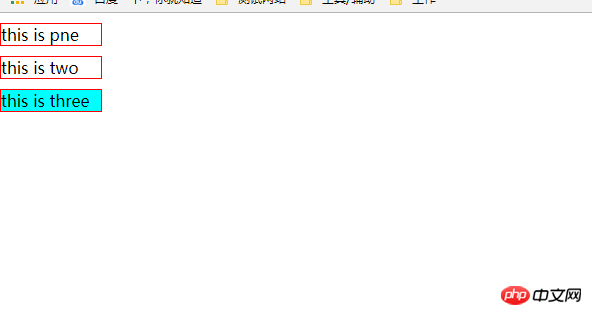
效果如下图所示:

但是在vue里面,是不提倡进行dom操作的,如果非进行dom的话,vue2.0里面有一个ref的属性,是可以达到dom的效果的。那么接下来我们不接住dom来进行操作:
由于习惯了webpack和vue-cli脚手架,所以楼主所有vue的代码都是放在webpack的脚手架当中进行,还使用了pug和scss的预处理器,vue的代码如下:
<template lang="pug">
 ul
  li(v-for="(item,index) in classArr", @click="result(index)", :class="resultNum === index?'active':''") this is {{item}}
</template>
<style lang="scss">
 li {
  list-style: none;
  width: 100px;
  margin-top: 10px;
  border: 1px solid red;
  &:hover {
   cursor: pointer;
  }
 }
 .active{
  background-color: aqua;
 }
</style>
<script>
 export default{
  data(){
   return {
    classArr: ["one", "two", "three"],
    num:"",
   }
  },
  methods: {
    result(index){
     this.num = index;
    }
  },
  computed:{
    resultNum(){
     return this.num;
   }
  }
 }
</script>
思路如下:
这段代码使用的是index这个关键字,还使用了computed这个计算属性,当当前的index索引与点击的当前元素的下标相同的时候,便会触发active这个类名。说的很简练,不懂的可以加博主一起探讨
相信看了本文案例你已经掌握了方法,更多精彩请关注php中文网其它相关文章!
推荐阅读:
Atas ialah kandungan terperinci vue2.0选中active后其他选项互斥实现步骤. Untuk maklumat lanjut, sila ikut artikel berkaitan lain di laman web China PHP!
Kenyataan:
Kandungan artikel ini disumbangkan secara sukarela oleh netizen, dan hak cipta adalah milik pengarang asal. Laman web ini tidak memikul tanggungjawab undang-undang yang sepadan. Jika anda menemui sebarang kandungan yang disyaki plagiarisme atau pelanggaran, sila hubungi admin@php.cn
Artikel sebelumnya:vue render开发实例详解Artikel seterusnya:vue组件写法规范
Artikel berkaitan
Lihat lagi- Analisis mendalam bagi komponen kumpulan senarai Bootstrap
- Penjelasan terperinci tentang fungsi JavaScript kari
- Contoh lengkap penjanaan kata laluan JS dan pengesanan kekuatan (dengan muat turun kod sumber demo)
- Angularjs menyepadukan UI WeChat (weui)
- Cara cepat bertukar antara Cina Tradisional dan Cina Ringkas dengan JavaScript dan helah untuk tapak web menyokong pertukaran antara kemahiran_javascript Cina Ringkas dan Tradisional

