Rumah >pembangunan bahagian belakang >tutorial php >wampserver+phpstorm+xdebug环境配置调试php代码
wampserver+phpstorm+xdebug环境配置调试php代码
- 不言asal
- 2018-04-27 13:35:413623semak imbas
这篇文章主要介绍了关于wampserver+phpstorm+xdebug环境配置调试php代码,有着一定的参考价值,现在分享给大家,有需要的朋友可以参考一下
wampserver+phpstorm+xdebug环境配置调试php代码
wampserver安装
phpstorm安装
xdebug安装
phpstorm下调试
wampserver安装
wampserver安装比较简单,只需要下载wampserver.exe,一路next下去即可
phpstorm安装
phpstorm下载地址:https://www.jetbrains.com/phpstorm/
phpstorm破解方法:http://www.oyksoft.com/soft/40722.html?pc=1
在安装完成之后,如果phpstorm还是没有正确破解,看看是不是你的host文件是否有将 0.0.0.0 account.jetbrains.com 添加进去,具体host文件存储位置为:C:\Windows\System32\drivers\etc
xdebug安装
默认情况下,如果你安装的是wampserver,xdebug插件是默认装好的,具体xdebug安装路径可以通过查看php.ini找到,寻找方法是左键点击wampserver程序图标,找到PHP选项,找到php.ini,点击进去,搜索[xdebug],其中zend_extension的值就是你的xdebug存储位置,为了能够在phpstorm中调试php代码,我们需要在php.ini的[xdebug]标签最后面添加下面代码:
zend_extension ="E:/StudySoftware/wampserver/wamp/bin/php/php5.6.25/zend_ext/php_xdebug-2.4.1-5.6-vc11.dll"xdebug.remote_enable = 1xdebug.profiler_enable = off
xdebug.profiler_enable_trigger = Off
xdebug.profiler_output_name = cachegrind.out.%t.%p
xdebug.profiler_output_dir ="E:/StudySoftware/wampserver/wamp/tmp"xdebug.show_local_vars=0xdebug.idekey=PhpStorm
xdebug.remote_enable = On
xdebug.remote_host=localhost
xdebug.remote_port=9000  xdebug.remote_handler=dbgp
配置完成后重启wampserver即可,接着在浏览器中输入localhost,找到phpinfo,点击进去,搜索xdebug,找到下面内容:
谷歌浏览器下安装Xdebug插件
下载地址:http://www.downza.cn/soft/211550.html
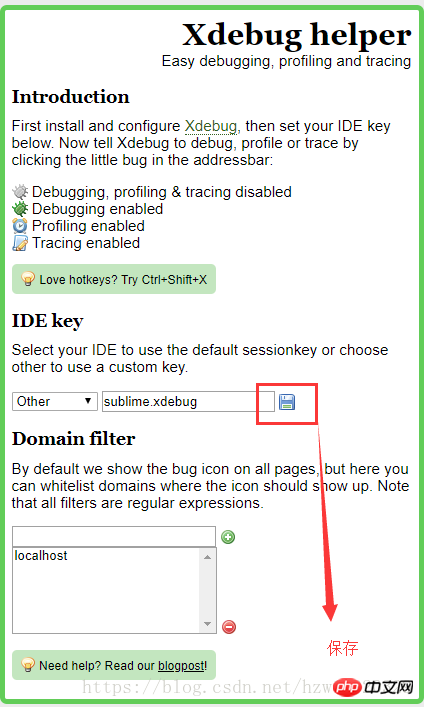
下载完成之后,点击右上角的蜘蛛图标,选择选项,在里面输入如下图所示的内容
phpstorm调试配置
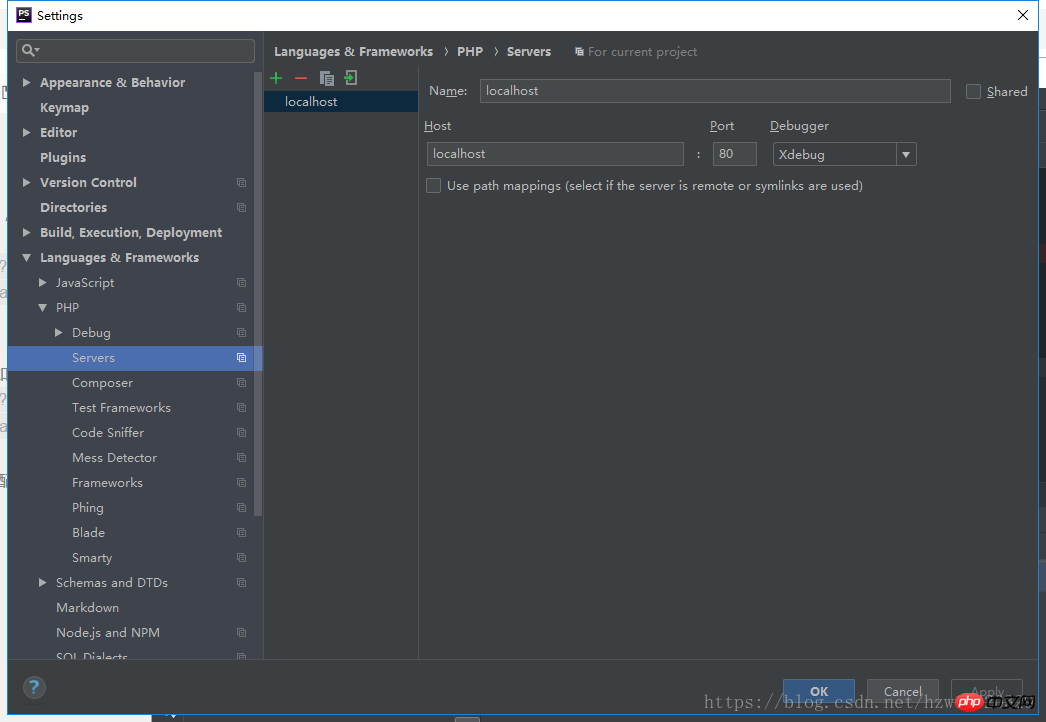
(1):File->Settings->Languages&Frame Works->Php->Servers 配置服务器相关设置,配置内容如下图所示
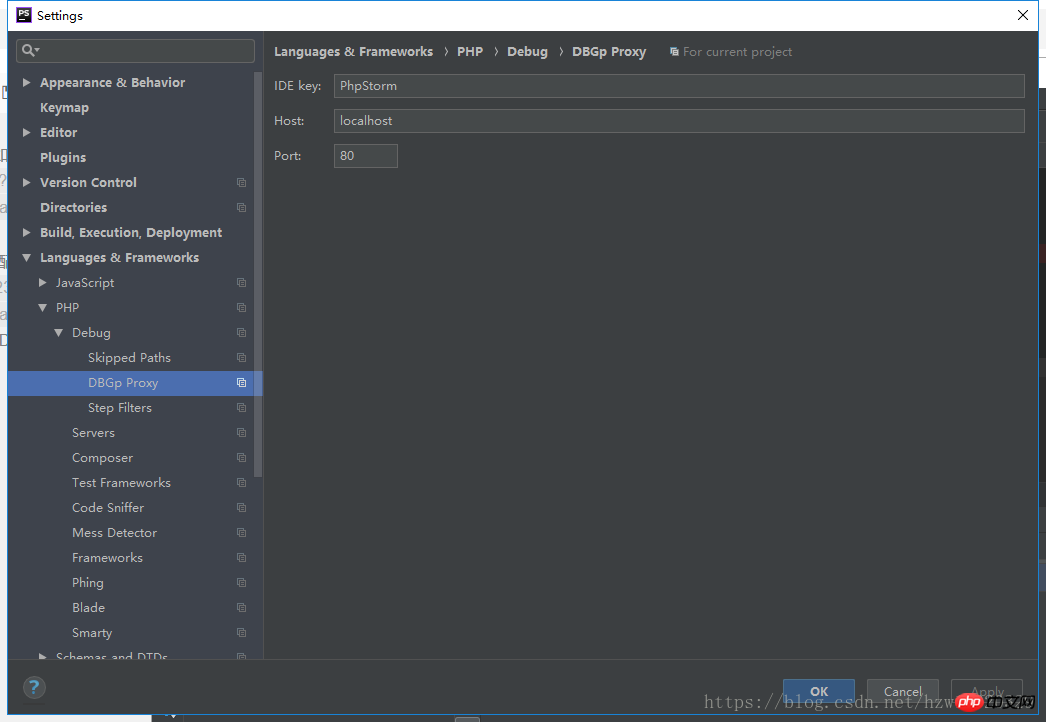
(2):File->Settings->Languages&Frame Works->Php->Debug->DBGp Proxy 配置相关设置,配置内容如下图所示:
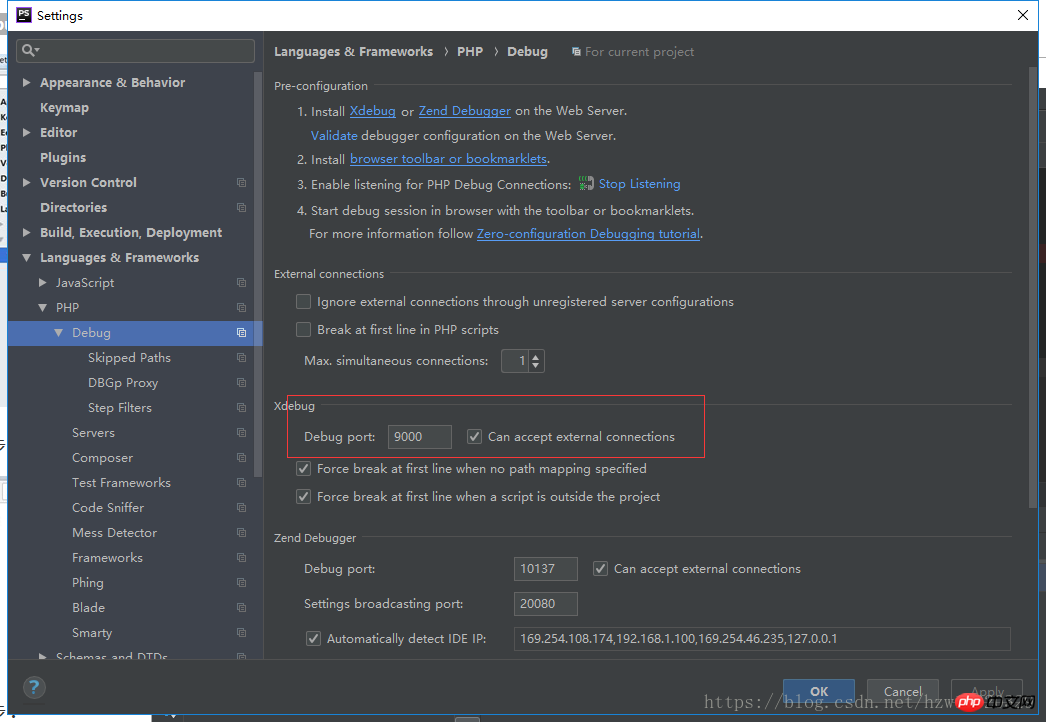
(3):File->Settings->Languages&Frame Works->Php-Debug 找到右边窗口对应的debug设置,把端口改成9000,配置内容如下图所示:
phpstorm进行调试
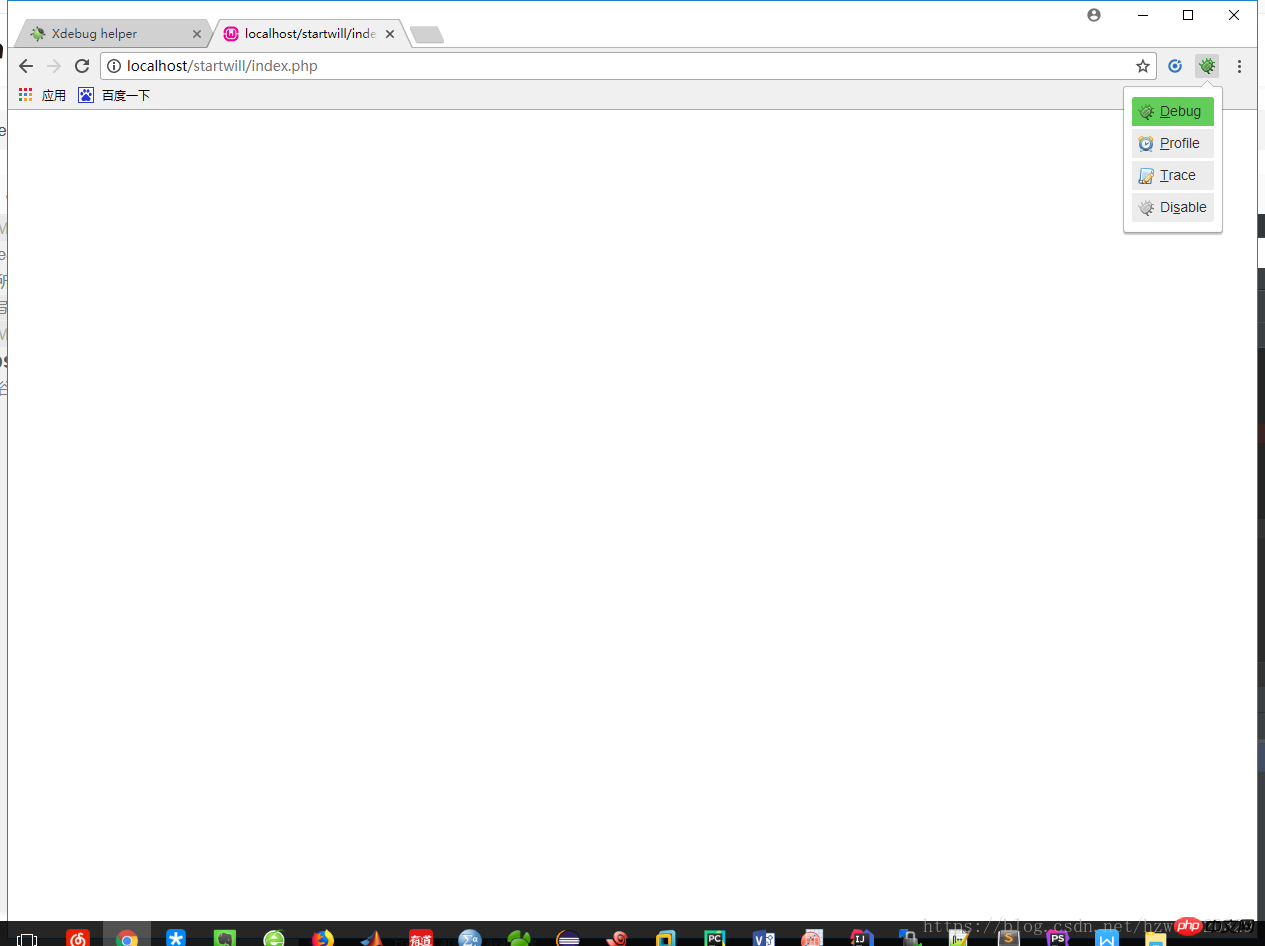
(1):在谷歌浏览器中输入:http://localhost/startwill/index.php,当然这个地址你自己随便变
(2):点击谷歌浏览器中的xdebug插件,选择Debug选项
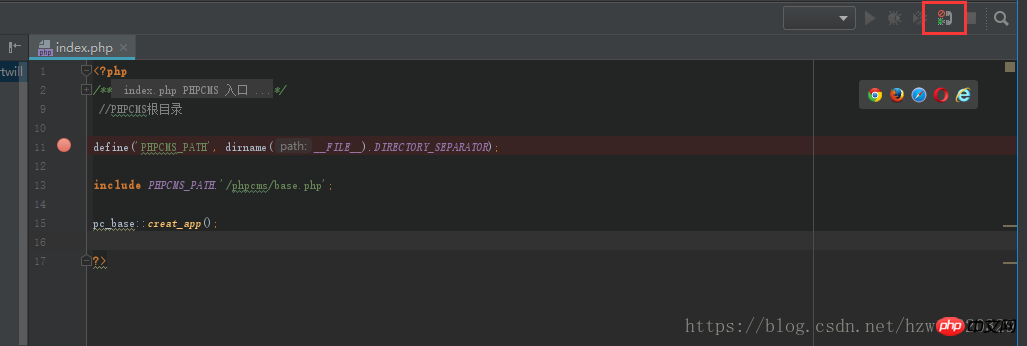
(3):在phpstorm中打开一个我们自己的php文件,在这里我的是index.php文件,设置一个断点,点击右上角的调试按钮:
(4):在浏览器中按下回车键之后,就会执行到我们设置的断点处啦
参考文献
http://developer.51cto.com/art/201704/536857.htm
Atas ialah kandungan terperinci wampserver+phpstorm+xdebug环境配置调试php代码. Untuk maklumat lanjut, sila ikut artikel berkaitan lain di laman web China PHP!
Artikel berkaitan
Lihat lagi- Cara menggunakan cURL untuk melaksanakan permintaan Dapatkan dan Hantar dalam PHP
- Cara menggunakan cURL untuk melaksanakan permintaan Dapatkan dan Hantar dalam PHP
- Cara menggunakan cURL untuk melaksanakan permintaan Dapatkan dan Hantar dalam PHP
- Cara menggunakan cURL untuk melaksanakan permintaan Dapatkan dan Hantar dalam PHP
- Semua simbol ungkapan dalam ungkapan biasa (ringkasan)


