Rumah >hujung hadapan web >tutorial js >Vue.js如何设置路由
Vue.js如何设置路由
- php中世界最好的语言asal
- 2018-03-13 14:36:252428semak imbas
这次给大家带来Vue.js如何设置路由,Vue.js设置路由的注意事项有哪些,下面就是实战案例,一起来看一下。
① 路由map
在main.js中导入vue-router
import VRouter from 'vue-router'
设置全局路由
Vue.use(VRouter)
实例化router
let router = new VRouter({ // 如果mode设为history, 那么地址就可以不使用哈希(# 哈希)了,就可以直接访问. http://localhost:8080/#/apple ==>> http://localhost:8080/apple
  mode: 'history',  routes: [    //  做一个映射表
    {      path: '/apple',      component: Apple
    },
    {      path: '/banana',      component: Banana
    }
  ]
})
/* eslint-disable no-new */new Vue({  el: '#app',
  router,
  template: '578d07aa9e36ca6b43806c9706879c6d',
  components: { App }
})
②路由视图
在app.vue文件中嵌入975b587bf85a482ea10b0a28848e78a4dd6e4ababe59793a4ac75fb9e5c5550e
d477f9ce7bf77f53fbcf36bec1b69b7a ab509c080ec9f7ec77efedb1cdcd4bed  0e39a90a8c3c96d545c4539151ce5752 975b587bf85a482ea10b0a28848e78a4dd6e4ababe59793a4ac75fb9e5c5550e 16b28748ea4df4d9c2150843fecfba6821c97d3a051048b8e55e3c8f199a54b2
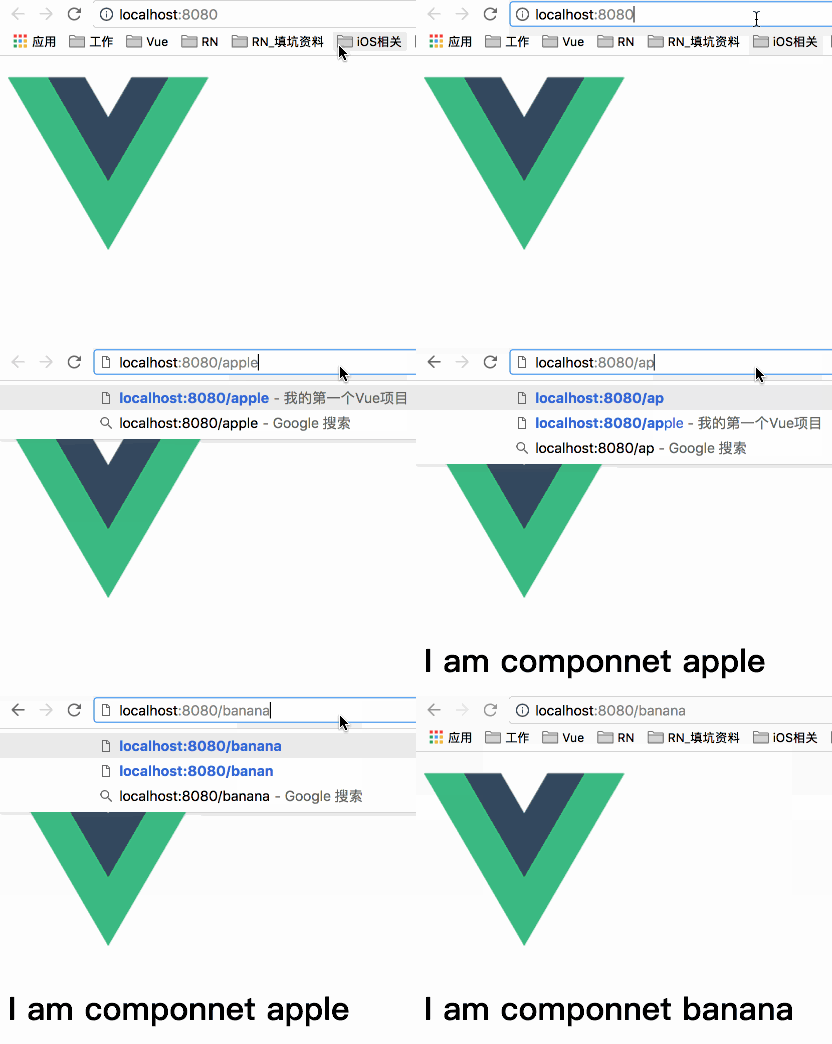
实现效果

③ 路由导航
在app.vue文件中,嵌入router-link标签,该标签可以实现a标签的效果
ed80e2623c680ced48874b1f1a39aa48to appled625018d6d57dc2163f3a71531b24864
具体使用:
<template>
<div id="app">
 <!--
访问apple的时候,将apple的视图塞到这个位置
访问banana的时候,将banana的视图塞到这个位置
-->
<router-view></router-view>
<router-link :to="{path:'apple'}">to apple</router-link>
<router-link :to="{path:'banana'}">to banana</router-link>
</div></template>效果:

相信看了本文案例你已经掌握了方法,更多精彩请关注php中文网其它相关文章!
推荐阅读:
Atas ialah kandungan terperinci Vue.js如何设置路由. Untuk maklumat lanjut, sila ikut artikel berkaitan lain di laman web China PHP!
Kenyataan:
Kandungan artikel ini disumbangkan secara sukarela oleh netizen, dan hak cipta adalah milik pengarang asal. Laman web ini tidak memikul tanggungjawab undang-undang yang sepadan. Jika anda menemui sebarang kandungan yang disyaki plagiarisme atau pelanggaran, sila hubungi admin@php.cn
Artikel sebelumnya:Vue.js的单位件组件Artikel seterusnya:Vue.js的路由参数
Artikel berkaitan
Lihat lagi- Analisis mendalam bagi komponen kumpulan senarai Bootstrap
- Penjelasan terperinci tentang fungsi JavaScript kari
- Contoh lengkap penjanaan kata laluan JS dan pengesanan kekuatan (dengan muat turun kod sumber demo)
- Angularjs menyepadukan UI WeChat (weui)
- Cara cepat bertukar antara Cina Tradisional dan Cina Ringkas dengan JavaScript dan helah untuk tapak web menyokong pertukaran antara kemahiran_javascript Cina Ringkas dan Tradisional

