Rumah >pembangunan bahagian belakang >tutorial php >TP3.1.x修改成功与失败跳转页面的方法介绍
TP3.1.x修改成功与失败跳转页面的方法介绍
- 黄舟asal
- 2017-09-30 09:08:292043semak imbas
这篇文章主要介绍了ThinkPHP3.1.x修改成功与失败跳转页面的方法,涉及thinkPHP底层源文件中相关跳转代码的设置与修改操作技巧,需要的朋友可以参考下
本文实例讲述了ThinkPHP3.1.x修改成功与失败跳转页面的方法。分享给大家供大家参考,具体如下:
在ThinkPHP中,成功与失败的提示页面已经自带。在Action方法中自动调用即可。
比如在Lib\Action有如下的SucErrAction.class.php:
<?php
class SucErrAction extends Action{
  public function index(){
    $this->display();
  }
  public function success1(){
    $this->success("成功提醒!",U("SucErr/index"),3);
  }
  public function error1(){
    $this->error("错误提醒!",U("SucErr/index"),3);
  }
}
?>
在Tpl中有SucErr文件夹,里面有index.html如下:
<!DOCTYPE html PUBLIC "-//W3C//DTD XHTML 1.0 Transitional//EN" "http://www.w3.org/TR/xhtml1/DTD/xhtml1-transitional.dtd"> <html xmlns="http://www.w3.org/1999/xhtml"> <head> <meta http-equiv="Content-Type" content="text/html; charset=utf-8" /> <title>成功与错误页面</title> </head> <body> <button onclick="javascript:window.location.href='__APP__/SucErr/success1'">成功页面</button> <button onclick="javascript:window.location.href='__APP__/SucErr/error1'">错误页面</button> </body> </html>
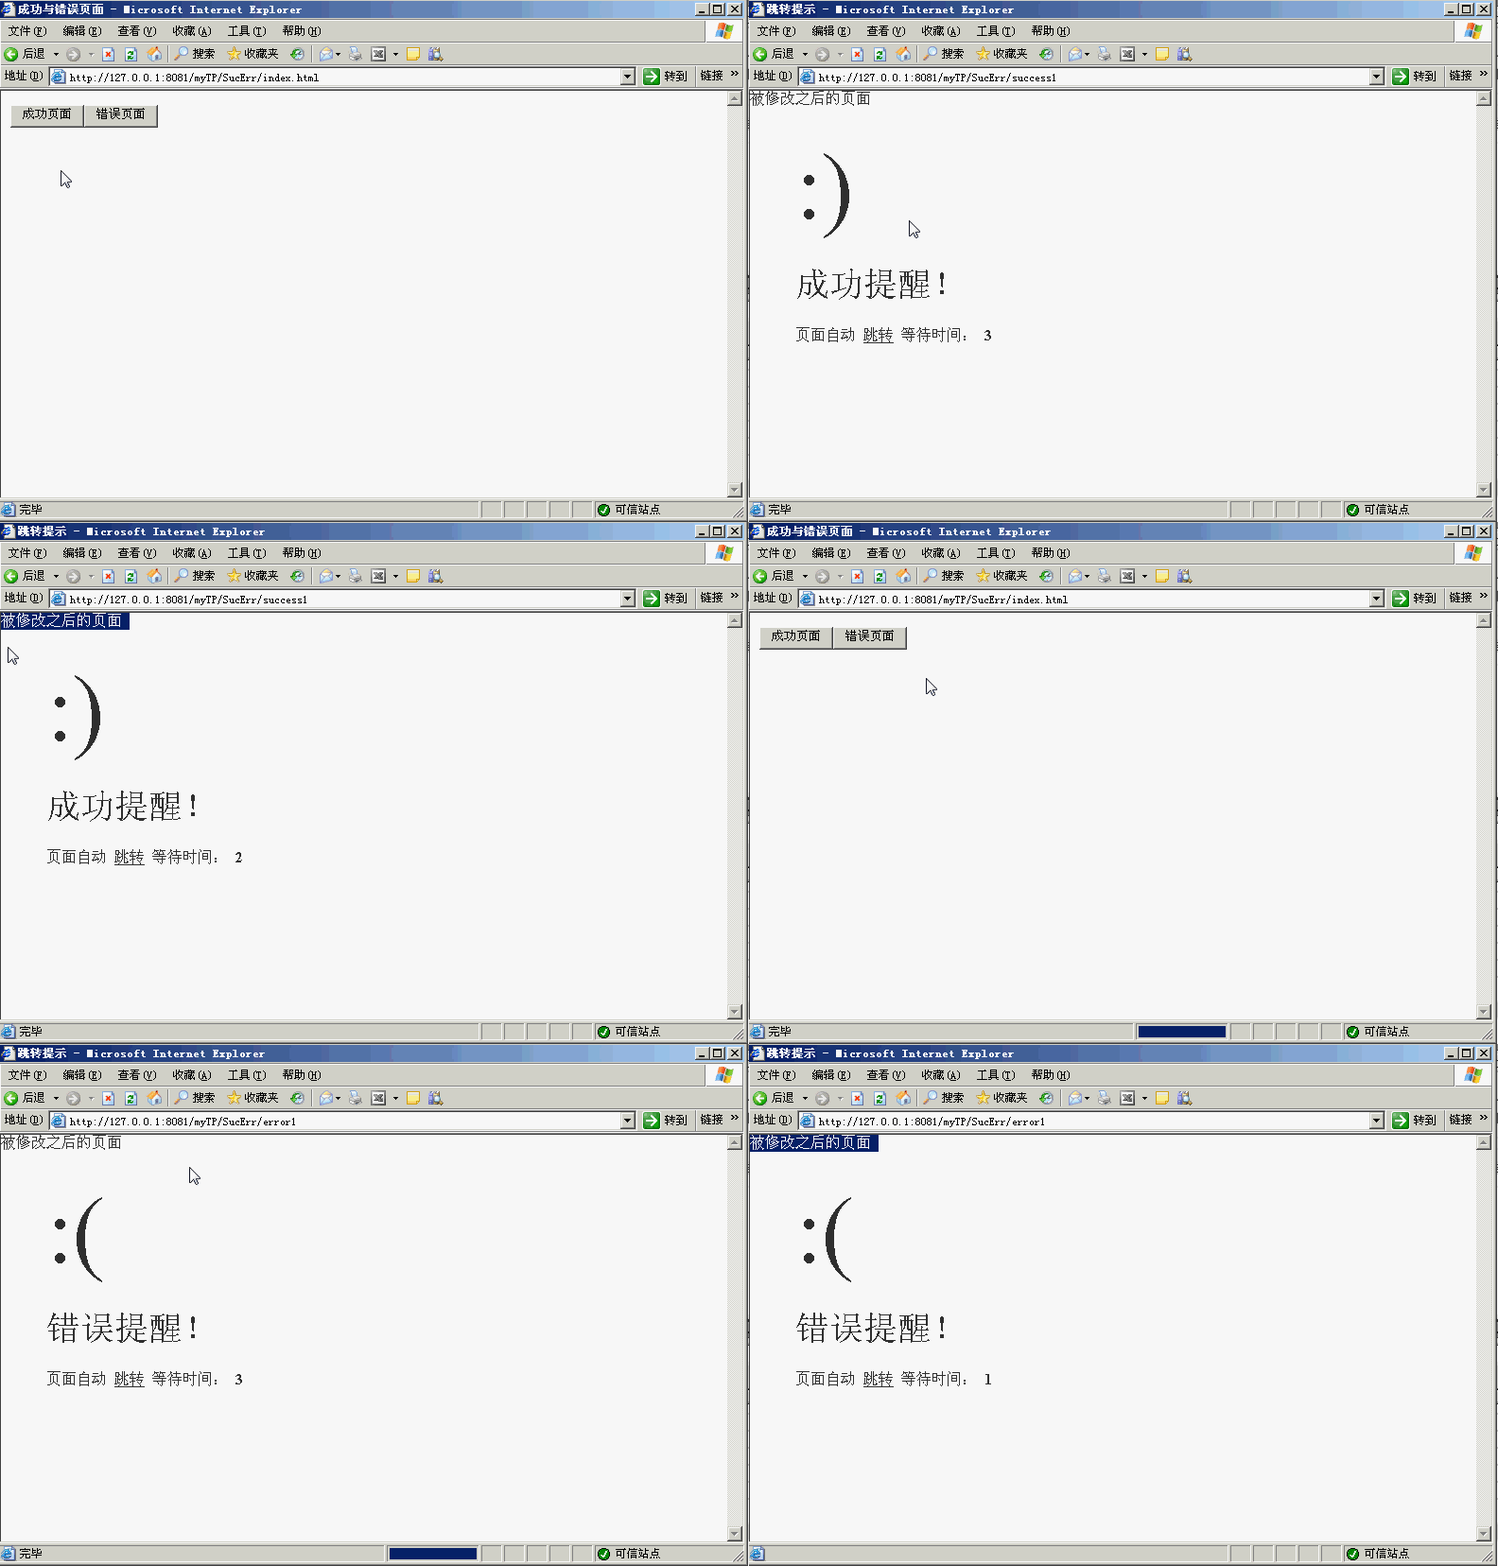
仅摆放两个按钮,用于展示成功与失败的提示页面,提示页面仅维持3秒就会自动跳转。
其中请注意,在SucErrAction.class.php中,不能自己定义success方法与error方法,此乃系统的Action抽象内中固有的方法, 声明success方法与error方法则是继承后重写,会使ThinkPHP运行部正常。
不过,系统自带的成功与失败的提示页面并不能够满足网站的需要,

但是这个页面可以自己修改,比如上图,我就自己在这成功与失败的跳转页面上,添加了一点文字。
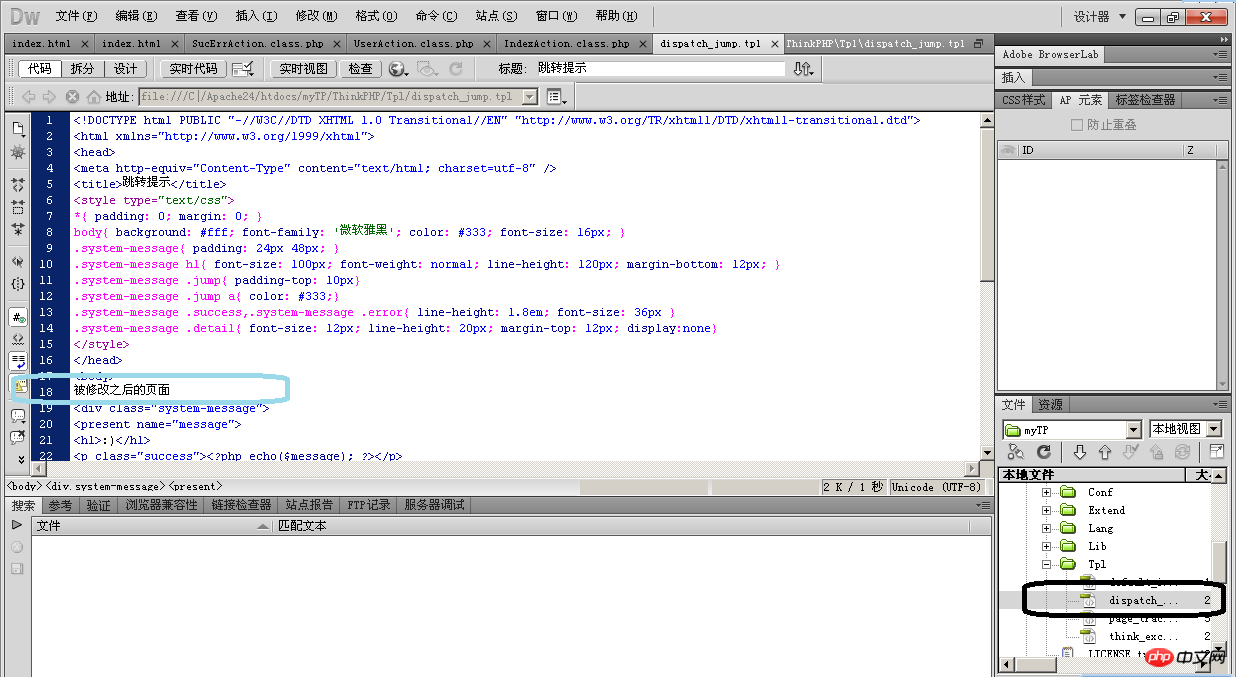
此页面的具体位置在:.\ThinkPHP\Tpl\dispatch_jump.tpl
我就在第18行的位置写上一些字达到上图的效果,此页面大家可以根据自己的需要写任意前端语言,在ThinkPHP方法的$this->success()或者$this->error()都会跳转到这个页面。

Atas ialah kandungan terperinci TP3.1.x修改成功与失败跳转页面的方法介绍. Untuk maklumat lanjut, sila ikut artikel berkaitan lain di laman web China PHP!
Artikel berkaitan
Lihat lagi- Cara menggunakan cURL untuk melaksanakan permintaan Dapatkan dan Hantar dalam PHP
- Cara menggunakan cURL untuk melaksanakan permintaan Dapatkan dan Hantar dalam PHP
- Cara menggunakan cURL untuk melaksanakan permintaan Dapatkan dan Hantar dalam PHP
- Cara menggunakan cURL untuk melaksanakan permintaan Dapatkan dan Hantar dalam PHP
- Semua simbol ungkapan dalam ungkapan biasa (ringkasan)

