Rumah >hujung hadapan web >tutorial js >JS库中的Particles.js在vue上的运用实例详解
JS库中的Particles.js在vue上的运用实例详解
- 巴扎黑asal
- 2017-09-15 09:16:582211semak imbas
这篇文章主要介绍了JS库中的Particles.js在vue上的运用案例分析,需要的朋友可以参考下
知乎的首页后面的粒子动效总觉得很炫酷,搜了一下,发现是用particles.js编写的。刚好目前的项目是利用vue框架的,两个凑在一起学了。
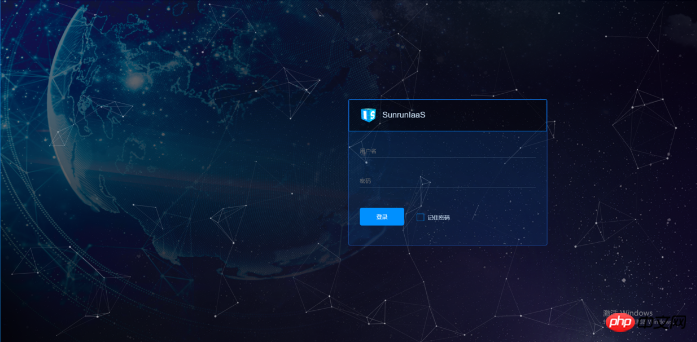
讲道理,这个用得好的话,页面是可以很酷的,譬如我现在写的项目

酷酷的登录页
嘻嘻~
安装particles.js
npm install --save particles.js
配置particles.js
1.data
这个data是用于控制粒子在页面中所呈现的状态。
{
"particles": {
 "number": {
 "value": 60,
 "density": {
  "enable": true,
  "value_area": 800
 }
 },
 "color": {
 "value": "#ffffff"
 },
 "shape": {
 "type": "circle",
 "stroke": {
  "width": 0,
  "color": "#000000"
 },
 "polygon": {
  "nb_sides": 5
 },
 "image": {
  "src": "img/github.svg",
  "width": 100,
  "height": 100
 }
 },
 "opacity": {
 "value": 0.5,
 "random": false,
 "anim": {
  "enable": false,
  "speed": 1,
  "opacity_min": 0.1,
  "sync": false
 }
 },
 "size": {
 "value": 3,
 "random": true,
 "anim": {
  "enable": false,
  "speed": 40,
  "size_min": 0.1,
  "sync": false
 }
 },
 "line_linked": {
 "enable": true,
 "distance": 150,
 "color": "#ffffff",
 "opacity": 0.4,
 "width": 1
 },
 "move": {
 "enable": true,
 "speed": 4,
 "direction": "none",
 "random": false,
 "straight": false,
 "out_mode": "out",
 "bounce": false,
 "attract": {
  "enable": false,
  "rotateX": 100,
  "rotateY": 1200
 }
 }
},
"interactivity": {
 "detect_on": "Window",
 "events": {
 "onhover": {
  "enable": true,
  "mode": "grab"
 },
 "onclick": {
  "enable": true,
  "mode": "push"
 },
 "resize": true
 },
 "modes": {
 "grab": {
  "distance": 140,
  "line_linked": {
  "opacity": 1
  }
 },
 "bubble": {
  "distance": 400,
  "size": 40,
  "duration": 2,
  "opacity": 8,
  "speed": 3
 },
 "repulse": {
  "distance": 200,
  "duration": 0.4
 },
 "push": {
  "particles_nb": 4
 },
 "remove": {
  "particles_nb": 2
 }
 }
},
"retina_detect": true
}
2.template
这个就是动态粒子要展示的位置。
<p id="particles"></p>
3.script
因为涉及到dom树,所以必须在挂载结束后初始化particles.js。第一个参数id就是你在template上取得id名,像我要写的话就是particles。第二个参数是你的data存放的路径,个人建议使用相对路径。
mounted(){
 particlesJS.load('id','path to your particles.data');
}
4.style
#particles{
  position: absolute;
  width: 100%;
  height: 100%;
  background-color: #b61924;
  background-repeat: no-repeat;
  background-size: cover;
  background-position: 50% 50%;
}
讲到这里会发现,还有一个最重要的点没讲出来,恩,就是particles.js 的引入。当你的使用范围比较小时,可以直接在当前vue文件的script中引入,即
//vue文件
import particles from 'particles.js'
又或者你觉得这样不好管理,一定要放在main文件中也可以
//main文件
import particles from 'particles.js'
Vue.use(particles)
最后呈现的效果如下

Atas ialah kandungan terperinci JS库中的Particles.js在vue上的运用实例详解. Untuk maklumat lanjut, sila ikut artikel berkaitan lain di laman web China PHP!
Kenyataan:
Kandungan artikel ini disumbangkan secara sukarela oleh netizen, dan hak cipta adalah milik pengarang asal. Laman web ini tidak memikul tanggungjawab undang-undang yang sepadan. Jika anda menemui sebarang kandungan yang disyaki plagiarisme atau pelanggaran, sila hubungi admin@php.cn
Artikel sebelumnya:JS库之Three.js基础入门Artikel seterusnya:使用Particles.js制作出仿知乎超炫粒子动态背景效果代码介绍
Artikel berkaitan
Lihat lagi- Analisis mendalam bagi komponen kumpulan senarai Bootstrap
- Penjelasan terperinci tentang fungsi JavaScript kari
- Contoh lengkap penjanaan kata laluan JS dan pengesanan kekuatan (dengan muat turun kod sumber demo)
- Angularjs menyepadukan UI WeChat (weui)
- Cara cepat bertukar antara Cina Tradisional dan Cina Ringkas dengan JavaScript dan helah untuk tapak web menyokong pertukaran antara kemahiran_javascript Cina Ringkas dan Tradisional

