Rumah >pembangunan bahagian belakang >Tutorial Python >Python实现车牌定位及分割
Python实现车牌定位及分割
- PHPzasal
- 2018-05-24 09:25:047350semak imbas
具体步骤
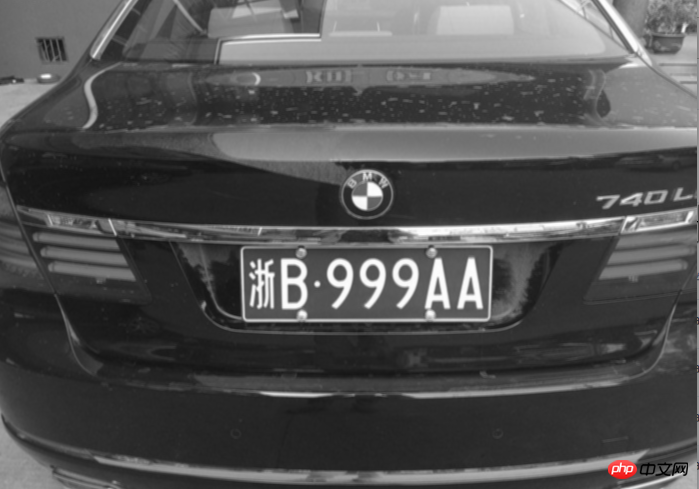
1、将采集到的彩色车牌图像转换成灰度图
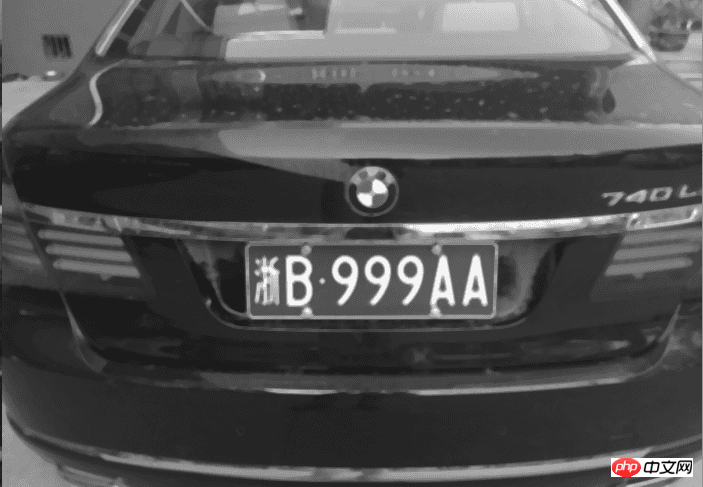
2、灰度化的图像利用高斯平滑处理后,再对其进行中直滤波
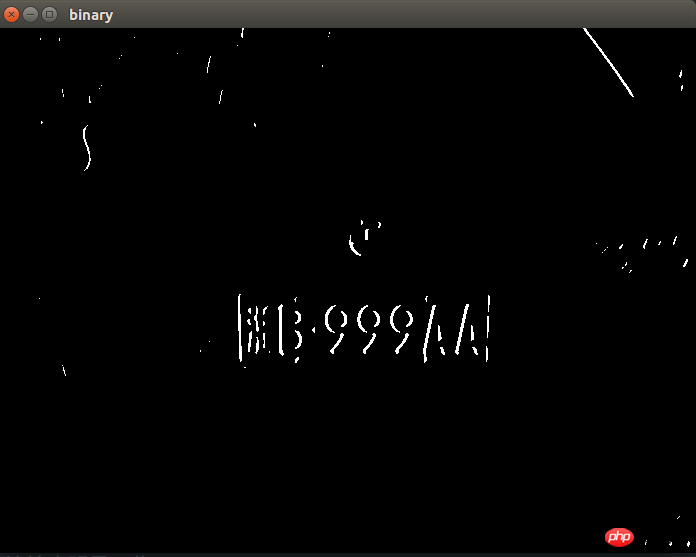
3、使用Sobel算子对图像进行边缘检测
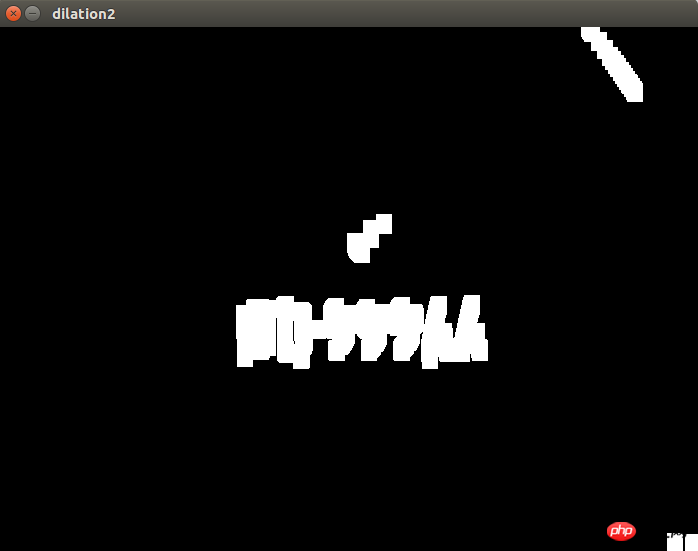
4、对二值化的图像进行腐蚀,膨胀,开运算,闭运算的形态学组合变换
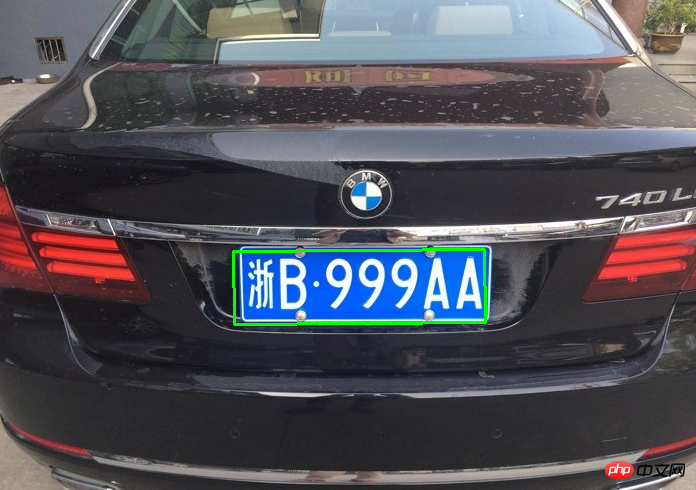
5、对形态学变换后的图像进行轮廓查找,根据车牌的长宽比提取车牌
代码实现
图像灰度化
gray = cv2.cvtColor(img, cv2.COLOR_BGR2GRAY)
高斯平滑,中值滤波处理
gaussian = cv2.GaussianBlur(gray, (3, 3), 0, 0, cv2.BORDER_DEFAULT)
median = cv2.medianBlur(gaussian, 5)
Sobel边缘检测
sobel = cv2.Sobel(median, cv2.CV_8U, 1, 0, ksize = 3)

二值化
ret, binary = cv2.threshold(sobel, 170, 255, cv2.THRESH_BINARY)
对二值化的图像进行腐蚀,膨胀,开运算,闭运算的形态学组合变换
# 膨胀和腐蚀操作的核函数
element1 = cv2.getStructuringElement(cv2.MORPH_RECT, (9, 1))
element2 = cv2.getStructuringElement(cv2.MORPH_RECT, (8, 6))
# 膨胀一次,让轮廓突出
dilation = cv2.dilate(binary, element2, iterations = 1)
# 腐蚀一次,去掉细节
erosion = cv2.erode(dilation, element1, iterations = 1)
# 再次膨胀,让轮廓明显一些
dilation2 = cv2.dilate(erosion, element2,iterations = 3)
对形态学变换后的图像进行轮廓查找,根据车牌的长宽比提取车牌
1、查找车牌区域
def findPlateNumberRegion(img):
    region = []
    # 查找轮廓
    contours,hierarchy = cv2.findContours(img, cv2.RETR_TREE, cv2.CHAIN_APPROX_SIMPLE)

    # 筛选面积小的
    for i in range(len(contours)):
        cnt = contours[i]
        # 计算该轮廓的面积
        area = cv2.contourArea(cnt)

        # 面积小的都筛选掉
        if (area < 2000):
            continue

        # 轮廓近似,作用很小
        epsilon = 0.001 * cv2.arcLength(cnt,True)
        approx = cv2.approxPolyDP(cnt, epsilon, True)

        # 找到最小的矩形,该矩形可能有方向
        rect = cv2.minAreaRect(cnt)
        print "rect is: "
        print rect

        # box是四个点的坐标
        box = cv2.cv.BoxPoints(rect)
        box = np.int0(box)

        # 计算高和宽
        height = abs(box[0][1] - box[2][1])
        width = abs(box[0][0] - box[2][0])

        # 车牌正常情况下长高比在2.7-5之间
        ratio =float(width) / float(height)
        if (ratio > 5 or ratio < 2):
            continue

        region.append(box)

    return region
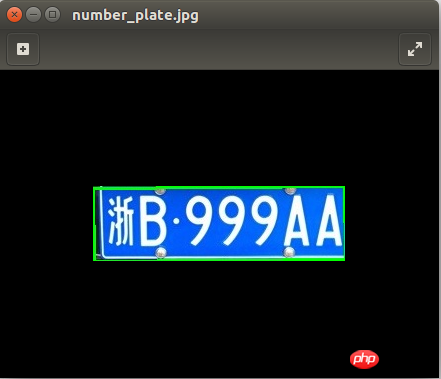
2、用绿线绘出车牌区域和切割车牌
    # 用绿线画出这些找到的轮廓
    for box in region:
        cv2.drawContours(img, [box], 0, (0, 255, 0), 2)
    ys = [box[0, 1], box[1, 1], box[2, 1], box[3, 1]]
    xs = [box[0, 0], box[1, 0], box[2, 0], box[3, 0]]
    ys_sorted_index = np.argsort(ys)
    xs_sorted_index = np.argsort(xs)

    x1 = box[xs_sorted_index[0], 0]
    x2 = box[xs_sorted_index[3], 0]

    y1 = box[ys_sorted_index[0], 1]
    y2 = box[ys_sorted_index[3], 1]

    img_org2 = img.copy()
    img_plate = img_org2[y1:y2, x1:x2]
Atas ialah kandungan terperinci Python实现车牌定位及分割. Untuk maklumat lanjut, sila ikut artikel berkaitan lain di laman web China PHP!
Kenyataan:
Kandungan artikel ini disumbangkan secara sukarela oleh netizen, dan hak cipta adalah milik pengarang asal. Laman web ini tidak memikul tanggungjawab undang-undang yang sepadan. Jika anda menemui sebarang kandungan yang disyaki plagiarisme atau pelanggaran, sila hubungi admin@php.cn
Artikel sebelumnya:Python爬虫模拟登陆教务处并且保存数据到本地Artikel seterusnya:pandas库介绍之DataFrame基本操作

