

 Tutorial sistemLINUXCara Menambah, Memadam, dan Memberi Keistimewaan Sudo kepada Pengguna di Debian 12
Cara Menambah, Memadam, dan Memberi Keistimewaan Sudo kepada Pengguna di Debian 12

In Debian, managing user privileges and administrative access is crucial for maintaining a secure and efficient system. By granting users the ability to execute administrative tasks without relying on the root account, you can enhance security, control access to sensitive operations, and maintain an audit trail of user activity. This detailed guide walks you through the steps to add, delete, and grant sudo privileges to users in Debian Linux.
Whether you're setting up a new Debian system or need to manage user accounts on an existing installation, this step-by-step tutorial is designed to provide clear instructions and explanations that even beginners can follow.
By the end of this guide, you'll have a solid understanding of how to create new user accounts, grant them sudo access, and remove users when necessary.
Before getting into the topic of adding, deleting, and granting sudo privileges to users in Debian, it's essential to understand what sudo is and the advantages it offers.
Table of Contents
1. What is Sudo?
The sudo (Superuser Do) command in Linux and Unix-like systems allows authorized users to execute commands with the privileges of the superuser or another user. It enables users to perform administrative tasks without logging in as the root user permanently.
The primary purpose of sudo is to provide a safer and more controlled approach to system administration. Instead of granting full root access to users, sudo enables privilege separation, limiting the scope of elevated privileges to specific commands or operations.
2. Advantages of Sudo Users
Here are some key aspects regarding sudo and the advantages of having a sudo user:
1. Privilege Separation
By default, Linux systems have a root user account with full administrative privileges. However, logging in as the root user can be risky because any command executed has unrestricted access to the entire system.
Sudo provides a way to separate regular user accounts from privileged tasks, allowing users to perform administrative actions only when needed.
2. Limited Privilege Escalation
Sudo allows specific users or groups to execute specific commands with elevated privileges. This provides a controlled and auditable way to grant temporary administrative access to trusted users.
Users can execute individual commands or a series of commands with sudo by authenticating themselves with their own password, rather than the root password.
3. Auditing and Accountability
Sudo logs all executed commands, providing an audit trail for system administrators. This audit trail helps track who executed which commands and when, enhancing system security and accountability.
The logs generated by sudo can be analyzed to investigate security incidents, troubleshoot issues, and monitor user activity.
4. Fine-Grained Access Control
With sudo, system administrators can define granular access control policies for different users or groups. This allows them to specify precisely which commands or operations each user can perform with elevated privileges.
Access control can be customized based on factors such as user roles, specific systems or services, and even specific command options.
5. Reduced Risk of Accidental Damage
Using sudo helps mitigate the risk of accidental damage caused by executing privileged commands. With sudo, users need to deliberately prefix a command with sudo to run it with elevated privileges, reducing the likelihood of unintentional system modifications or deletions.
It provides an extra layer of safety by prompting users for authentication before executing privileged operations, ensuring they are aware of the consequences of their actions.
6. Collaboration and Delegation
Sudo facilitates collaboration among system administrators by allowing them to delegate specific administrative tasks to other users without sharing the root password.
By assigning sudo privileges to trusted users, the workload can be distributed, and routine administrative tasks can be performed by designated individuals without requiring full root access.
In summary, having a sudo user provides a more secure and controlled approach to system administration. It enhances security, accountability, and flexibility by enabling limited privilege escalation, fine-grained access control, auditing, and delegation of administrative tasks.
3. Add a New User in Debian
To create a new sudo user in Debian, you need to have either an existing sudo user or root access to the system. This requirement ensures that only authorized users can grant sudo privileges to others.
In order to add a new user, follow these steps:
Log in to your Debian system using an existing sudo user account or as the root user. Open a terminal or connect to your Debian system via SSH.
If you have an existing sudo user:
Run the following command to create a new user:
$ sudo adduser senthil
Replace "senthil" with the desired username for the new sudo user.
Enter a strong password for the new user when prompted.
Provide any additional information requested during the user creation process.
If you have root access:
If the currently logged-in user does not have sudo rights, you will need to switch to the root account in order to create new sudo users.
Use any one of the following commands to switch to root user.
$ su -l
Or
$ su -
By using su -l or su -, the root shell is initialized with an environment similar to a normal 'login' shell. This means that the root user's $PATH variable is correctly initialized, ensuring that system directories such as /sbin are included.
Next, run the following command to create a new user:
# adduser senthil
Again, replace "senthil" with your own username.
You will be prompted to set a password for the new user. Enter a strong password and confirm it.
Additional information about the new user, such as their full name, phone number, etc., may be requested. You can enter the information or leave it blank by pressing Enter.
Adding user `senthil' ...
Adding new group `senthil' (1001) ...
Adding new user `senthil' (1001) with group `senthil (1001)' ...
Creating home directory `/home/senthil' ...
Copying files from `/etc/skel' ...
New password:
Retype new password:
passwd: password updated successfully
Changing the user information for senthil
Enter the new value, or press ENTER for the default
	Full Name []:
	Room Number []:
	Work Phone []:
	Home Phone []:
	Other []:
Is the information correct? [Y/n] y
Adding new user `senthil' to supplemental / extra groups `users' ...
Adding user `senthil' to group `users' ...

3.1. Check Sudo Privileges for a Specific User
After creating a new user named "senthil", it's important to note that this user does not have sudo access by default. Without sudo privileges, the user won't be able to perform administrative tasks.
To verify whether a user has sudo access or not, you can use the following command:
# sudo -l -U senthil
Replace "senthil" with the actual username you want to check.
Sample output:
User senthil is not allowed to run sudo on debian12.

As you can see, the user "senthil" has not been granted sudo privileges yet. If the user "senthil" has sudo access, the output will show the allowed commands and their associated restrictions, if any.
In the next steps, we will cover how to grant sudo privileges to the user "senthil" so they can perform administrative tasks.
4. Grant Sudo Privileges to Users in Debian
Add the newly created user to sudo group using the following command:
If you have an existing sudo user:
$ sudo adduser senthil sudo
If you have root access:
# adduser senthil sudo
Sample output:
Adding user `senthil' to group `sudo' ...
Done.

We granted sudo permission to the user "senthil".
You can also the following command to add a user to sudo group.
# sudo usermod -aG sudo senthil
Now verify if the user is added in the sudo group, using command
# sudo -l -U senthil
Sample output:
Matching Defaults entries for senthil on debian12:
    env_reset, mail_badpass,
    secure_path=/usr/local/sbin\:/usr/local/bin\:/usr/sbin\:/usr/bin\:/sbin\:/bin,
    use_pty

User senthil may run the following commands on debian12:
    <strong><mark>(ALL : ALL) ALL</mark></strong>

Here, the line (ALL : ALL) ALL in the above output indicates that the user "senthil" can run any command (ALL) as any user (ALL) with all available privileges.
The output confirms that the user "senthil" has been granted unrestricted sudo privileges on the Debian 12 system, allowing him to run any command as any user with full administrative capabilities.
If you view the contents of the sudoers file;
$ sudo cat /etc/sudoers
You would see some lines like below.
# User privilege specification
root	ALL=(ALL:ALL) ALL

# Members of the admin group may gain root privileges
%admin ALL=(ALL) ALL

# Allow members of group sudo to execute any command
<strong><mark>%sudo	ALL=(ALL:ALL) ALL</mark></strong>

# See sudoers(5) for more information on "@include" directives:

@includedir /etc/sudoers.d
The directive %sudo ALL=(ALL:ALL) ALL in the /etc/sudoers file is a rule that specifies the sudo privileges for members of the "sudo" group. Let's break down what each part of the directive means:
- %sudo: This signifies that the rule applies to all users who are members of the "sudo" group. The % character denotes a group name.
- ALL=(ALL:ALL): This portion defines the scope of the sudo rule. It indicates that the rule applies to any host (ALL) and allows users in the "sudo" group to run commands as any user and any group.
- The first "ALL" represents the hosts or machines on which the sudo rule is applicable. In this case, "ALL" means the rule applies to any host. It allows members of the "sudo" group to execute commands with sudo privileges from any machine.
- The second "ALL" represents the users or accounts as whom the commands can be executed. "ALL" means the members of the "sudo" group can run commands as any user on the system.
- The third "ALL" represents the groups that the sudo commands can be executed as. Again, "ALL" means that the members of the "sudo" group can execute commands as any group on the system.
- ALL: This specifies that the members of the "sudo" group can run any command.
In summary, the directive %sudo ALL=(ALL:ALL) ALL allows any user who is a member of the "sudo" group to execute any command with full administrative privileges. It grants broad sudo access to the users in the "sudo" group, enabling them to perform a wide range of administrative tasks on the system.
Since the user "senthil" is a member of "sudo" group, he can now run any command on any host. To put this in other word, he is one of the administrator.
5. Verify Sudo Privilege of Users
To verify if a user has the ability to perform administrative tasks with sudo, Log out from the current user session. On the login screen, select the new user you created. Enter the password for the new user and log in.
Alternatively, you can quickly switch to the new user using the following command:
# sudo -i -u senthil
This command will instantly switch you to the specified user, in this case, "senthil".
Once you are switched to the user, run any commands with the sudo prefix to perform administrative tasks. For example:
$ sudo apt update

As you witnessed in the above output, the user "senthil" has the ability to run administrative tasks with sudo privilege.
6. Remove Sudo Access from Users
Removing sudo access from a user in Debian systems is a delicate process that requires caution. It's important to ensure that you do not remove the real administrator from the "sudo" group, as there should always be at least one sudo user in the system.
To revoke sudo permissions from a user, follow these steps:
Make sure you are logged out from the user's session ("senthil") and logged in as another user with sudo privileges.
To remove the user "senthil" from the "sudo" group, use the following command:
$ sudo deluser senthil sudo
This command will revoke the user's sudo permissions by removing them from the "sudo" group. Note that this action does not permanently delete the user from the system.
Sample output:
Removing user `senthil' from group `sudo' ...
Done.
Alternatively, you can use the following command to revoke sudo permissions:
$ sudo gpasswd -d senthil sudo
Running this command will have the same effect of removing the user "senthil" from the "sudo" group.
After executing either of these commands, the user "senthil" will no longer have sudo access and will be considered a regular user without administrative privileges.
To verify if the user has indeed been removed from the "sudo" group, you can run the following command:
$ sudo -l -U senthil
This command will display the user's sudo privileges. If the user is no longer listed as having sudo access, it confirms that the sudo permissions have been successfully revoked.
User senthil is not allowed to run sudo on debian12.

The user "senthil" is now removed from sudoer list.
7. Remove Users Permanently
Please exercise caution when permanently deleting users from the system, as this action is not reversible. Double-check that you are removing the correct user, and ensure that you have taken appropriate backups or precautions to prevent any unintended data loss.
To permanently delete users from a Linux system, including their home directory and mail spool, follow these steps:
Ensure that you are logged in as the root user or a user with sudo privileges.
To delete a user, use the following command:
$ sudo deluser senthil
Replace "senthil" with the actual username of the user you want to remove.
This command will remove the specified user from the system, including their user account details. However, their home directory and mail spool will remain intact.
If you want to remove the user's home directory and mail spool along with their account, use the --remove-home option:
$ sudo deluser --remove-home senthil
This command ensures that not only the user account but also their home directory and mail spool are deleted.
Conclusion
Managing user privileges and granting sudo access in Debian systems is an essential aspect of maintaining system security and controlling administrative tasks. By following the step-by-step instructions provided, even beginners can successfully add, grant sudo access, and manage users in Debian systems.
Remember to exercise caution when using sudo, grant privileges only to trusted users, and regularly review sudo logs to monitor user activity and identify any potential security issues.
Related Read:
- Add, Delete And Grant Sudo Privileges To Users In Alpine Linux
- Add, Delete And Grant Sudo Privileges To Users In Arch Linux
- Add, Delete And Grant Sudo Privileges To Users In CentOS
- Add, Delete And Grant Sudo Privileges To Users In Fedora
- Add, Delete And Grant Sudo Privileges To Users In Ubuntu
- How To Allow Or Deny Sudo Access To A Group In Linux
Atas ialah kandungan terperinci Cara Menambah, Memadam, dan Memberi Keistimewaan Sudo kepada Pengguna di Debian 12. Untuk maklumat lanjut, sila ikut artikel berkaitan lain di laman web China PHP!

 Bagaimanakah prestasi berbeza antara Linux dan Windows untuk pelbagai tugas?May 14, 2025 am 12:03 AM
Linux berfungsi dengan baik dalam persekitaran pelayan dan pembangunan, sementara Windows melakukan lebih baik di desktop dan permainan. 1) Sistem fail Linux berfungsi dengan baik apabila berurusan dengan sejumlah besar fail kecil. 2) Linux melaksanakan dengan baik dalam senario rangkaian konkurensi tinggi dan tinggi. 3) Pengurusan memori Linux mempunyai lebih banyak kelebihan dalam persekitaran pelayan. 4) Linux adalah cekap apabila melaksanakan tugas baris dan skrip, sementara Windows melakukan lebih baik pada antara muka grafik dan aplikasi multimedia.
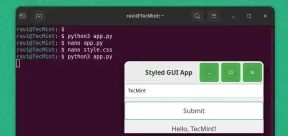 Cara membuat aplikasi GUI di linux menggunakan pygobjectMay 13, 2025 am 11:09 AM
Mewujudkan aplikasi antara muka pengguna grafik (GUI) adalah cara yang hebat untuk membawa idea anda ke kehidupan dan menjadikan program anda lebih mesra pengguna. Pygobject adalah perpustakaan python yang membolehkan pemaju membuat aplikasi GUI di desktop linux menggunakan
 Cara memasang timbunan lampu dengan phpmyadmin di arch linuxMay 13, 2025 am 11:01 AM
Arch Linux menyediakan persekitaran sistem canggih yang fleksibel dan merupakan penyelesaian yang sesuai untuk membangunkan aplikasi web pada sistem bukan kritikal kecil kerana merupakan sumber yang sepenuhnya terbuka dan menyediakan siaran terkini terkini pada kernel
 Cara Memasang Lemp (Nginx, PHP, MariaDB) di Arch LinuxMay 13, 2025 am 10:43 AM
Oleh kerana model pelepasan rollingnya yang merangkumi perisian canggih Arch Linux tidak direka dan dibangunkan untuk dijalankan sebagai pelayan untuk menyediakan perkhidmatan rangkaian yang boleh dipercayai kerana ia memerlukan masa tambahan untuk penyelenggaraan, peningkatan berterusan, dan FI yang masuk akal
![12 Harus Ada Konsol Linux [Terminal] Pengurus Fail](https://img.php.cn/upload/article/001/242/473/174710245395762.png?x-oss-process=image/resize,p_40) 12 Harus Ada Konsol Linux [Terminal] Pengurus FailMay 13, 2025 am 10:14 AM
12 Harus Ada Konsol Linux [Terminal] Pengurus FailMay 13, 2025 am 10:14 AMPengurus fail konsol Linux boleh sangat membantu dalam tugas sehari-hari, apabila menguruskan fail pada mesin tempatan, atau apabila disambungkan ke yang jauh. Perwakilan konsol visual direktori membantu kami dengan cepat melakukan operasi fail/folder dan SAV
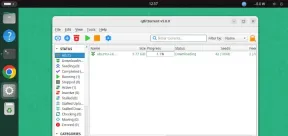 QBitTorrent: Pelanggan BitTorrent sumber terbuka yang kuatMay 13, 2025 am 10:12 AM
QBitTorrent adalah pelanggan bittorrent sumber terbuka yang membolehkan pengguna memuat turun dan berkongsi fail melalui Internet. Versi terbaru, QBitTorrent 5.0, telah dikeluarkan baru -baru ini dan datang dengan ciri -ciri dan penambahbaikan baru. Artikel ini akan
 Persediaan Nginx Hosts, Phpmyadmin, dan SSL di Arch LinuxMay 13, 2025 am 10:03 AM
Artikel ARCH Linux Linux sebelumnya hanya meliputi barangan asas, daripada memasang perkhidmatan rangkaian (NGINX, PHP, MYSQL, dan PHPMYAdmin) dan mengkonfigurasi keselamatan minimum yang diperlukan untuk Server dan PHPMyAdmin MySQL. Topik ini sangat berkaitan dengan forme
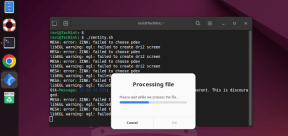 Zenity: Membina Dialog GTK dalam Skrip ShellMay 13, 2025 am 09:38 AM
Zenity adalah alat yang membolehkan anda membuat kotak dialog grafik di Linux menggunakan baris arahan. Ia menggunakan GTK, toolkit untuk mewujudkan antara muka pengguna grafik (GUI), menjadikannya mudah untuk menambah elemen visual ke skrip anda. Zenity boleh menjadi sangat u


Alat AI Hot

Undresser.AI Undress
Apl berkuasa AI untuk mencipta foto bogel yang realistik

AI Clothes Remover
Alat AI dalam talian untuk mengeluarkan pakaian daripada foto.

Undress AI Tool
Gambar buka pakaian secara percuma

Clothoff.io
Penyingkiran pakaian AI

Video Face Swap
Tukar muka dalam mana-mana video dengan mudah menggunakan alat tukar muka AI percuma kami!

Artikel Panas
Alat panas

MinGW - GNU Minimalis untuk Windows
Projek ini dalam proses untuk dipindahkan ke osdn.net/projects/mingw, anda boleh terus mengikuti kami di sana. MinGW: Port Windows asli bagi GNU Compiler Collection (GCC), perpustakaan import yang boleh diedarkan secara bebas dan fail pengepala untuk membina aplikasi Windows asli termasuk sambungan kepada masa jalan MSVC untuk menyokong fungsi C99. Semua perisian MinGW boleh dijalankan pada platform Windows 64-bit.

Pelayar Peperiksaan Selamat
Pelayar Peperiksaan Selamat ialah persekitaran pelayar selamat untuk mengambil peperiksaan dalam talian dengan selamat. Perisian ini menukar mana-mana komputer menjadi stesen kerja yang selamat. Ia mengawal akses kepada mana-mana utiliti dan menghalang pelajar daripada menggunakan sumber yang tidak dibenarkan.

DVWA
Damn Vulnerable Web App (DVWA) ialah aplikasi web PHP/MySQL yang sangat terdedah. Matlamat utamanya adalah untuk menjadi bantuan bagi profesional keselamatan untuk menguji kemahiran dan alatan mereka dalam persekitaran undang-undang, untuk membantu pembangun web lebih memahami proses mengamankan aplikasi web, dan untuk membantu guru/pelajar mengajar/belajar dalam persekitaran bilik darjah Aplikasi web keselamatan. Matlamat DVWA adalah untuk mempraktikkan beberapa kelemahan web yang paling biasa melalui antara muka yang mudah dan mudah, dengan pelbagai tahap kesukaran. Sila ambil perhatian bahawa perisian ini

Dreamweaver Mac版
Alat pembangunan web visual

EditPlus versi Cina retak
Saiz kecil, penyerlahan sintaks, tidak menyokong fungsi gesaan kod

