


Sometimes a chance to show somebody how things are done proves more effective than having to come up with lengthy instructions. This is often true for educators, developers, IT support, YouTubers, online businesses, and teams working from different locations and even different time zones.
Taking a video of your actions as they happen on the screen of your Mac is called screen recording. (You can record your entire screen, a selected portion of the screen, or an app window.)
Ways to record screen with audio |
Steps to follow |
With a specialized third-party app |
Install and open CleanShot X. Choose Record Screen > Press Space bar > Click the microphone icon to Record MacBook Microphone or other source. Install and open iShowU. Set recording preferences and press the red circled dot in the bottom right corner of the app to start recording. |
With Mac’s webcam |
Install and open Capto. Choose the Record option from the toolbar > Select Record Camera > FaceTime HD Camera > Start recording. |
Using Mac’s built-in tools |
Use QuickTime from the menu bar to record the screen. |
With a Mac keyboard shortcut using a microphone |
Press Command + Shift + 5 > Click Options to turn on the audio recording > Record. |

Record your Mac’s screen with Capto
Capture, edit, and share your Mac screen effortlessly with Capto. Record any screen area and add real-time voiceovers.
Try free Security-testedThe best Mac screen recorder option for your Mac
A great comprehensive all-in-one tool for screen recording Mac users can rely on is Capto.
With Capto you get to not only record your screen with real-time voiceover and webcam feed, but also edit your video and audio tracks, add text or speech bubbles, and share instantly from the app:
- Capture a specific app window, a browser, your whole screen, or select an area of any size with any number of windows in it
- Hide desktop while recording
- Take screenshots
- Edit video and images: crop, cut, fade in and fade out for audio
- Add annotations
- Share to Dropbox, YouTube, Facebook, and all possible shared storages, including FTP/SFTP servers

You can also use iShowU to record your screen. This app is particularly handy for creating product walkthroughs and demos and it can record high quality video with a selfie cam overlay. This allows you to create videos with a “talking head” inserted in them.
iShowU can also replace the background in your selfie video to make it look more polished and professional.

How to record your screen on Mac using the Screenshot toolbar
If you’re wondering, “Can I screen record on my Mac with a native macOS utility?” the answer is — yes. Apple has its own built-in screen recording feature called Screenshot that lets you capture video of whatever’s happening on your screen (with real-time audio, should you choose to).
You can use the Screenshot toolbar for taking both screenshots and video recordings of your screen (for video choose from the last two screen icons with a dot in the lower right corner).
To record with Screenshot:
- Press Shift + Command + 5 to open the toolbar
- Choose Record Entire Screen or Record Selected Portion (you’ll be able to drag and resize the frame of the screen area you want to be recorded, if you choose this option)
- Go to Options and choose microphone settings, decide where you’d like to save your recording to, or set a countdown timer
- Click on Record to start the recording
- Click on Stop Recording menu bar icon when you’re done
If your Screenshot toolbar is already set to screen recording, you can use hotkeys for recording your screen: press Shift + Command + 5 to start the recording and Command + Control + Esc to stop the recording.
How to record audio in screen recordings
When you think about how to screen record on MacBook, it’s important to also understand how to include sound in your videos.
As we have already discussed, your native Mac screen recorder allows you to capture audio from your Mac’s built-in microphone, but if you’re looking for more advanced capabilities (like creating and editing voiceovers or learning to record your Skype meetings), you can find out more from our dedicated article on how to record your screen on Mac with sound.
How to screen record on Mac using QuickTime
Another option to record a screen Mac users can try is QuickTime Player. We know this app for playing media files, but it can also be used for recording your screen and sound.
To use QuickTime Player as a Mac screen recorder, simply launch it from Applications and choose New Screen Recording from the File menu. This will open the Screenshot toolbar that lets you configure and start your recording.
The only difference with Screenshot is that with QuickTime Player, once you’re done recording, your file will automatically open inside the app and you can edit it right away.

Read also:
- Crop Video on Mac
- No Clutter Screen Capturing for Mac
- Record Edit Share Videos on Mac
- Take A Scrolling Screenshot
How to screen record for collaboration
Another great tool for asynchronous screen sharing is CleanShot X.It’s a simple screen recording macOS app that comes with a rich toolkit, allowing you to capture your screen without desktop icons, record as MP4 or GIF, trim video, annotate, and keep your recordings saved on CleanShot’s cloud for free — all a few clicks on the menu bar icon away.

How to record a screen with OBS Studio
Another popular contender for Mac screen recorder of choice is OBS Studio.
OBS Studio is a free open-source app used for both streaming and screen recording by many content creators. It’s known for a variety of advanced features, but can also be easily used by beginners.
Understanding how to screen record on Mac with OBS Studio starts with the basics:
- Download (obsproject.com), install, and launch the app
- Set up video: Sources ➙ + icon ➙ Display Capture ➙ name the source ➙ OK
- Set up audio: OBS Studio is set to capture audio from the built-in microphone on your Mac by default — you can add external audio sources or apps for capturing system sound in Sources
- Choose where you want to save your recorded files: Controls ➙ Settings ➙ Output ➙ Recording ➙ Browse ➙ OK
- Choose Start Recording under Controls to begin screen recording Mac
- Press Stop Recording when you're finished

If you’re also looking for an advanced app to help you edit your recordings, check CamerBag Pro. It’s a powerful photo and video editor that allows for professional adjustments and offers pro-quality preset filters to add style to your creations.
How to record your screen on Mac and have an impact?
Being able to clearly get your point across even if you aren’t in the same room with your audience or colleagues is very important. Having a video recording to illustrate it — is priceless. Learning how to screen record on Mac is, without a doubt, a useful skill, and you can master it in no time with Mac’s built-in Screenshot and QuickTime Player or a more advanced OBS Studio screen recording setup.
If you’d like an effective tool that lets you both record and edit your videos from the same app on Mac, opt forCaptoorCleanShot X(if you also like creating GIFs). And, finally, for advance editing and pro quality image adjustments arm yourself withCamerBag Proto present your ideas with style.
Be sure to try Capto, CleanShot X, CameraBag Pro, and iShowU for free with the 7-day trial ofSetapp, a platform of high-performance apps for tasks on Mac and iPhone. Learn how to screen record MacBook and check out more than 250 other options to boost productivity.
FAQ
How to record screen and audio at the same time on Mac
All the above mentioned methods of screen recording Mac users can choose from allow for recording audio from Mac’s built-in mic: you can capture your voice commentary, as well as any sounds playing at the moment (music, app sounds, etc.)
How can I record my screen on Mac with sound but without a mic?
All Macs have an internal microphone built-in, so you don’t have to have an external microphone for capturing sound when screen recording Mac.
Where does screen recording go on a Mac?
The answer differs depending on the app you choose for recording your screen:
Mac’s native Screenshot utility saves recorded files to Desktop (you can choose a different location in Options ➙ Save to)
QuickTime Player automatically opens the video after you hit Stop Recording, and you can then choose where to save your file (File ➙ Save)
OBS Studio lets you locate recordings using the File menu (File ➙ Show Recordings)
-
Apps like CleanShot X save your files to your free in-app cloud account
What is the recording shortcut on Mac?
Use Shift + Command + 5 to start screen recording Mac.Atas ialah kandungan terperinci Cara menyaring rekod pada Mac: Mudah dan cepat. Untuk maklumat lanjut, sila ikut artikel berkaitan lain di laman web China PHP!

 Cara Meringkaskan Laman Web di Safari Untuk MacMay 09, 2025 am 10:47 AM
Ciri Penyederhanaan Web Safari Pelayar Safari: Gunakan kecerdasan Apple untuk dibaca dengan cekap! Salah satu ciri kecerdasan Apple terbina dalam penyemak imbas Safari ialah ciri coretan web. Sama ada kandungan laman web adalah lama atau laman web biasa, Apple Intelligence dapat dengan cepat menghasilkan ringkasan, membantu anda dengan cepat memahami kandungan laman web dan menjimatkan masa. Ciri ini sangat mudah digunakan di Safari untuk Mac. Bagaimana cara menggunakan ciri ssummary web di safari untuk mac? Sekiranya anda menggunakan Apple Silicon Mac dengan macOS Sequoia 15 atau lebih baru
 Cara Memperbaiki Isu Carian Spotlight di MacOS SequoiaMay 09, 2025 am 10:36 AM
Sebilangan besar pengguna Mac telah mendapati bahawa Carian Spotlight tidak berfungsi dengan baik di MacOS Sequoia, sama ada fail yang hilang, aplikasi, dan kadang -kadang tidak berfungsi sama sekali untuk mencari sebarang fail tempatan. Bagi sesetengah pengguna masalah dengan sorotan berlaku selepas t
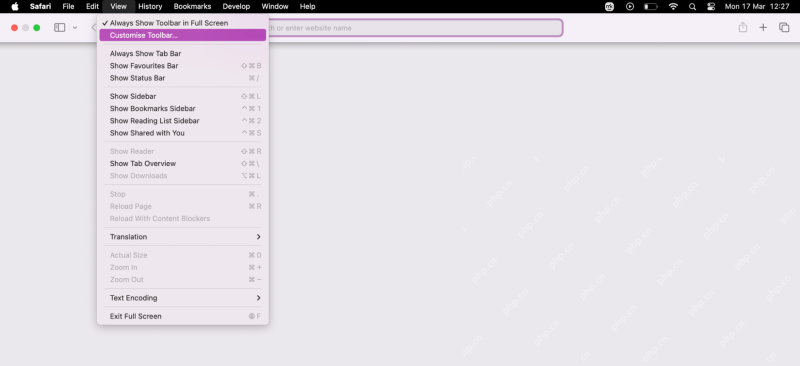 Bagaimana cara menyesuaikan safari pada mac? Bagaimana untuk memperibadikannya di MacBook Air/Pro?May 09, 2025 am 10:35 AM
Peribadikan Pengalaman Safari Anda di MacBook: Panduan Komprehensif Anda boleh menyesuaikan Safari dengan mudah pada MacBook anda untuk meningkatkan pengalaman melayari anda. Panduan ini menyediakan pendekatan langkah demi langkah untuk memperibadikan pelbagai aspek safari, dari t
![Bagaimana untuk membungkam pemberitahuan pada iPhone? [Mesej Bisu & Aplikasi di iOS]](https://img.php.cn/upload/article/001/242/473/174675709271104.jpg?x-oss-process=image/resize,p_40) Bagaimana untuk membungkam pemberitahuan pada iPhone? [Mesej Bisu & Aplikasi di iOS]May 09, 2025 am 10:18 AM
Bagaimana untuk membungkam pemberitahuan pada iPhone? [Mesej Bisu & Aplikasi di iOS]May 09, 2025 am 10:18 AMPemberitahuan Iphone Silence: 6 Cara Mencari Keamanan Anda Perlu rehat dari buzz pemberitahuan iPhone yang berterusan? Panduan ini menawarkan enam kaedah untuk membungkam iPhone anda, dari toggles cepat ke masa yang tenang. Mari menyelam! 1. Mod Fokus: The
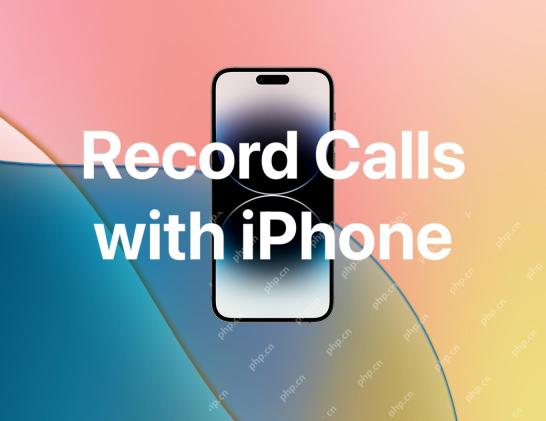 Cara merakam panggilan di iPhoneMay 09, 2025 am 10:15 AM
Fungsi rakaman panggilan iPhone baru yang ditambah dalam iOS 18.1 dan ke atas membuat rakaman tidak pernah berlaku sebelum ini! Hanya ketik butang rakaman pada skrin untuk memulakan rakaman. Butang ini berada pada skrin yang sama seperti pembesar suara, bisu dan menggantung butang, menjadikannya mudah dan cepat. Selepas rakaman bermula, sistem itu secara automatik akan memainkan nada segera untuk memaklumkan kedua -dua pihak bahawa rakaman itu direkodkan, tetapi lebih baik mengesahkannya secara lisan untuk menunjukkan rasa hormat. Mengucapkan selamat tinggal kepada kaedah rakaman yang membosankan yang lalu, seperti menggunakan panggilan tiga pihak untuk dipindahkan ke mel suara atau rakaman dengan komputer Mac. Kandungan panggilan yang dirakam pada iPhone akan disimpan secara automatik dalam aplikasi memo dan disimpan dengan tajuk "Panggil dengan (nama kenalan atau nombor telefon)" supaya anda dapat mendengar kembali, melihat suara ke rekod teks pada bila -bila masa, dan tambah
 RC of MacOS Sequoia 15.2, iOS 18.2, iPados 18.2, dikeluarkan untuk ujianMay 09, 2025 am 09:55 AM
Apple mengeluarkan iOS 18.2, MacOS Sequoia 15.2, dan calon versi iPados 18.2 (RC) untuk semua pengguna yang mengambil bahagian dalam program ujian beta perisian Apple Systems. Versi RC biasanya versi terakhir versi beta sebelum pelepasan awamnya, yang menunjukkan bahawa versi rasmi iOS 18.2, iPados 18.2 dan MacOS Sequoia 15.2 akan dikeluarkan tidak lama lagi. Sebagai tambahan kepada perbaikan pepijat biasa dan peningkatan keselamatan, kemas kini perisian yang akan datang ini memberi tumpuan kepada membawa ciri kecerdasan Apple baru ke peranti yang serasi, termasuk IMAG
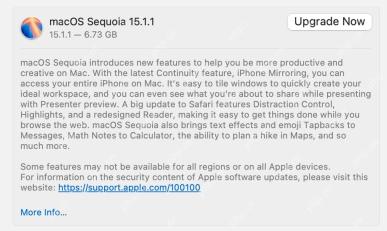 MacOS Sequoia 15.1.1 dengan pembetulan keselamatan tersedia sekarangMay 09, 2025 am 09:40 AM
Apple mengeluarkan kemas kini MacOS Sequoia 15.1.1, kemas kini perisian kecil yang terutamanya mengandungi pembetulan keselamatan MAC yang penting. Kemas kini ini tidak mengandungi sebarang ciri baru, tetapi membetulkan kelemahan keselamatan pelbagai yang sedang dieksploitasi secara aktif, jadi sangat disyorkan bahawa anda memasang kemas kini penting ini pada peranti Apple anda. Di samping itu, Apple telah mengeluarkan iOS 18.1.1 untuk iPhone, iPados 18.1.1, VisionOS 2.1.1, dan iOS 17.7.2 dan iPados 17.7.2, yang semuanya termasuk patch keselamatan yang sama. Cara memuat turun dan memasang Mac
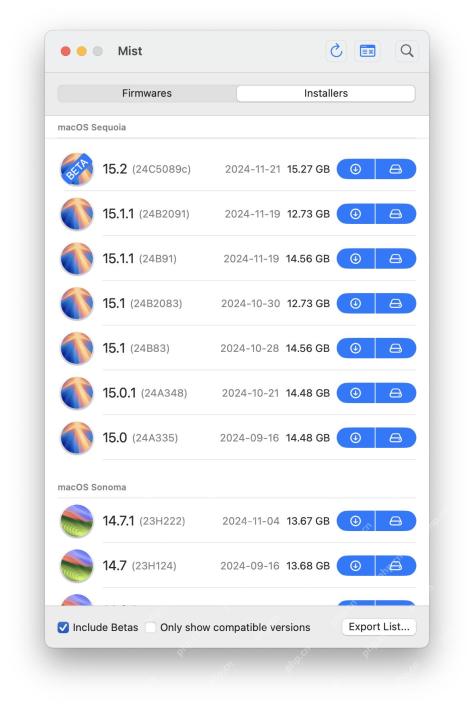 Kabus membuat muat turun pemasang macOS & firmwares mudahMay 09, 2025 am 09:37 AM
Mist: Alat yang berkuasa untuk memuat turun pemasang macOS dan firmware yang mudah Ramai pengguna Mac, kakitangan IT dan pentadbir sistem suka mengikuti program pemasangan MACOS, termasuk perisian sistem Sistem MacOS semasa dan sebelumnya. Di samping itu, banyak pengguna MAC dan profesional IT yang canggih perlu mengakses fail firmware MACOS IPSW pada bila -bila masa untuk memulihkan Apple Silicon Mac, menggunakannya untuk mesin maya, dan juga untuk penempatan, penyelesaian masalah, atau konfigurasi semula dan persediaan MAC anda. Di sinilah Alat Mist Percuma dimainkan, ia menjadikannya sangat mudah untuk memuat turun mana -mana fail firmware macOS IPSW yang tersedia atau mana -mana versi pemasang macOS. Walaupun kami mengekalkannya


Alat AI Hot

Undresser.AI Undress
Apl berkuasa AI untuk mencipta foto bogel yang realistik

AI Clothes Remover
Alat AI dalam talian untuk mengeluarkan pakaian daripada foto.

Undress AI Tool
Gambar buka pakaian secara percuma

Clothoff.io
Penyingkiran pakaian AI

Video Face Swap
Tukar muka dalam mana-mana video dengan mudah menggunakan alat tukar muka AI percuma kami!

Artikel Panas
Alat panas

EditPlus versi Cina retak
Saiz kecil, penyerlahan sintaks, tidak menyokong fungsi gesaan kod

SublimeText3 Linux versi baharu
SublimeText3 Linux versi terkini

mPDF
mPDF ialah perpustakaan PHP yang boleh menjana fail PDF daripada HTML yang dikodkan UTF-8. Pengarang asal, Ian Back, menulis mPDF untuk mengeluarkan fail PDF "dengan cepat" dari tapak webnya dan mengendalikan bahasa yang berbeza. Ia lebih perlahan dan menghasilkan fail yang lebih besar apabila menggunakan fon Unicode daripada skrip asal seperti HTML2FPDF, tetapi menyokong gaya CSS dsb. dan mempunyai banyak peningkatan. Menyokong hampir semua bahasa, termasuk RTL (Arab dan Ibrani) dan CJK (Cina, Jepun dan Korea). Menyokong elemen peringkat blok bersarang (seperti P, DIV),

Pelayar Peperiksaan Selamat
Pelayar Peperiksaan Selamat ialah persekitaran pelayar selamat untuk mengambil peperiksaan dalam talian dengan selamat. Perisian ini menukar mana-mana komputer menjadi stesen kerja yang selamat. Ia mengawal akses kepada mana-mana utiliti dan menghalang pelajar daripada menggunakan sumber yang tidak dibenarkan.

Dreamweaver Mac版
Alat pembangunan web visual

