


How to Label Graph in Excel
Labeling graphs in Excel is essential for making data presentations clear and informative. Here’s a comprehensive guide on how to label graphs in Excel:
What are the steps to add custom labels to a graph in Excel?
To add custom labels to a graph in Excel, follow these steps:
- Select the Graph: Click on the graph you want to add custom labels to. This will display the Chart Tools tabs at the top of the Excel window.
-
Add Data Labels:
- Click on the "Chart Elements" button (the plus icon) next to the graph.
- Check the box for "Data Labels" to add default labels to your graph.
-
Customize Data Labels:
- Right-click on any of the data labels on the graph.
- Select "Format Data Labels" from the context menu.
- In the "Format Data Labels" pane, you can choose to show different elements such as the value, category name, series name, or a custom text.
- To add custom text, check the "Value From Cells" option, and then select the range of cells containing your custom labels. Click "OK".
-
Edit Labels Individually:
- If you need to change a specific label, click on it to select it, and then you can edit the text directly.
By following these steps, you can add detailed and personalized labels to your graph, making your data more accessible and understandable.
Can you explain how to position and format labels on a graph in Excel?
Positioning and formatting labels on a graph in Excel allows you to customize the presentation of your data effectively. Here's how you can do it:
-
Positioning Labels:
- Right-click on the data label you want to position and choose "Format Data Labels".
- In the "Format Data Labels" pane, under "Label Options", you can select from options like "Center", "Inside End", "Outside End", etc., to position the label relative to the data point.
- For more precise control, you can drag the label to the desired position manually.
-
Formatting Labels:
- In the "Format Data Labels" pane, you can also adjust the font style, size, color, and effects.
- Click on the "Text Options" tab to change text fill, outline, and effects like shadow or glow.
- To format labels differently, you might need to select each label individually and apply the desired formatting.
By adjusting the position and format of labels, you can enhance the visual appeal and readability of your graph.
How do you use Excel's built-in tools to label different data series on a graph?
Excel provides several built-in tools to help you label different data series on a graph clearly and effectively. Here's how you can use these tools:
-
Adding Series Labels:
- Click on the graph to activate the Chart Tools.
- Click on the "Chart Elements" button and select "Data Labels".
- Right-click on any data label and select "Format Data Labels".
- In the "Format Data Labels" pane, check the "Series Name" option to display the name of the data series next to the data point.
-
Using Legend:
- The legend is automatically generated when you create a graph with multiple data series.
- You can move the legend to different positions (top, bottom, left, right) by clicking on it, and then dragging it or using the options in the "Chart Elements" menu.
- To label each series in the legend, make sure the series are named appropriately in your data source before creating the graph.
-
Data Table:
- You can also add a data table below the graph to display the values of the data series.
- Click on the "Chart Elements" button and check "Data Table" to show the data values, which can serve as another form of labeling.
By utilizing these built-in tools, you can ensure that different data series on your graph are clearly labeled and easily distinguishable, enhancing the overall effectiveness of your data presentation.
Atas ialah kandungan terperinci Cara Melabel Grafik dalam Excel. Untuk maklumat lanjut, sila ikut artikel berkaitan lain di laman web China PHP!

 Formula Median di Excel - Contoh PraktikalApr 11, 2025 pm 12:08 PM
Tutorial ini menerangkan cara mengira median data berangka dalam Excel menggunakan fungsi median. Median, ukuran utama kecenderungan pusat, mengenal pasti nilai pertengahan dalam dataset, yang menawarkan perwakilan yang lebih mantap dari Tenden Central
 COUNTIF SPREWEET COUNTIF Google dengan contoh formulaApr 11, 2025 pm 12:03 PM
Menguasai sheet google countif: panduan komprehensif Panduan ini meneroka fungsi countif serba boleh di Helaian Google, menunjukkan aplikasinya di luar pengiraan sel mudah. Kami akan merangkumi pelbagai senario, dari perlawanan tepat dan separa ke Han
 Buku Kerja Dikongsi Excel: Cara berkongsi fail Excel untuk beberapa penggunaApr 11, 2025 am 11:58 AM
Tutorial ini menyediakan panduan komprehensif untuk berkongsi buku kerja Excel, meliputi pelbagai kaedah, kawalan akses, dan resolusi konflik. Versi Excel Moden (2010, 2013, 2016, dan kemudian) Memudahkan pengeditan kolaboratif, menghapuskan keperluan untuk m
 Cara Menukar Excel ke JPG - Simpan .xls atau .xlsx Sebagai Fail ImejApr 11, 2025 am 11:31 AM
Tutorial ini meneroka pelbagai kaedah untuk menukar fail .xls ke imej .jpg, merangkumi kedua-dua alat Windows terbina dalam dan penukar dalam talian percuma. Perlu membuat persembahan, berkongsi data spreadsheet dengan selamat, atau merancang dokumen? Menukar yo
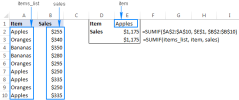 Nama Excel dan Rentang Dinamakan: Cara Menentukan dan Menggunakan dalam FormulaApr 11, 2025 am 11:13 AM
Tutorial ini menjelaskan fungsi nama -nama Excel dan menunjukkan bagaimana untuk menentukan nama untuk sel, julat, pemalar, atau formula. Ia juga meliputi penyuntingan, penapisan, dan memadam nama yang ditetapkan. Nama Excel, sementara sangat berguna, sering melampaui
 Sisihan piawai Excel: Contoh fungsi dan formulaApr 11, 2025 am 11:01 AM
Tutorial ini menjelaskan perbezaan antara sisihan piawai dan kesilapan piawai min, membimbing anda pada fungsi Excel yang optimum untuk pengiraan sisihan piawai. Dalam statistik deskriptif, sisihan min dan piawai adalah intrinsi
 Akar persegi dalam excel: fungsi sqrt dan cara lainApr 11, 2025 am 10:34 AM
Tutorial Excel ini menunjukkan cara mengira akar persegi dan akar n. Mencari akar persegi adalah operasi matematik yang biasa, dan Excel menawarkan beberapa kaedah. Kaedah untuk mengira akar persegi di Excel: Menggunakan fungsi SQRT: The
 Asas Helaian Google: Ketahui cara bekerja dengan hamparan GoogleApr 11, 2025 am 10:23 AM
Buka kunci kekuatan lembaran Google: Panduan Pemula Tutorial ini memperkenalkan asas -asas Google Sheets, alternatif yang kuat dan serba boleh kepada MS Excel. Ketahui cara untuk menguruskan spreadsheet dengan mudah, memanfaatkan ciri -ciri utama, dan bekerjasama


Alat AI Hot

Undresser.AI Undress
Apl berkuasa AI untuk mencipta foto bogel yang realistik

AI Clothes Remover
Alat AI dalam talian untuk mengeluarkan pakaian daripada foto.

Undress AI Tool
Gambar buka pakaian secara percuma

Clothoff.io
Penyingkiran pakaian AI

Video Face Swap
Tukar muka dalam mana-mana video dengan mudah menggunakan alat tukar muka AI percuma kami!

Artikel Panas
Alat panas

Dreamweaver Mac版
Alat pembangunan web visual

SublimeText3 versi Inggeris
Disyorkan: Versi Win, menyokong gesaan kod!

SublimeText3 versi Mac
Perisian penyuntingan kod peringkat Tuhan (SublimeText3)

VSCode Windows 64-bit Muat Turun
Editor IDE percuma dan berkuasa yang dilancarkan oleh Microsoft

Hantar Studio 13.0.1
Persekitaran pembangunan bersepadu PHP yang berkuasa

